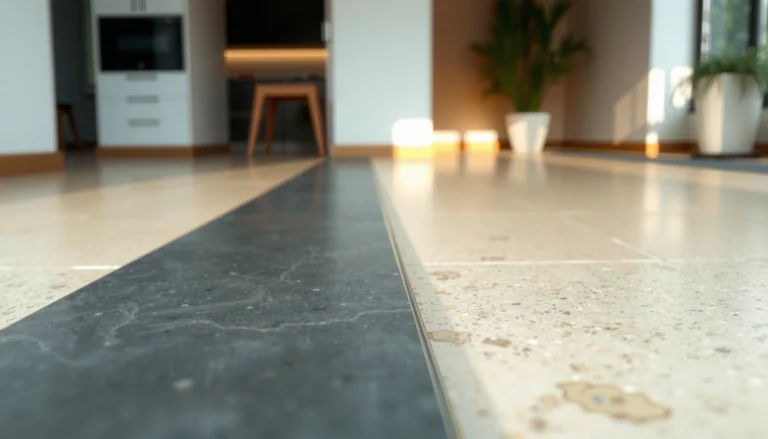
Replace laminate floors in a retail store by planning the work around downtime, carefully removing the old planks without damaging the subfloor, then installing the new laminate while following the manufacturer’s spacing and moisture rules. If you prep properly (flat subfloor, correct underlayment, proper acclimation), the install goes much faster and the floor is less likely to buckle or separate at seams.




This is for store managers, property maintenance teams, or contractors handling a tenant or common-area refresh where customers can’t be disrupted for long. It’s especially relevant when the existing laminate is worn, damaged, or lifting near seams and transitions.
Plan for retail downtime and workspace protection

You can usually reduce disruption significantly by treating laminate replacement like a phased “make-safe → replace → return-to-service” project rather than a single shutdown. Start by mapping what must be closed, what can stay open, and what can be staged overnight so the store reopens sooner.
Phasing is how retail stays open longer
In practice, the fastest retail timelines come from splitting the scope into clear micro-phases: demo → subfloor fixes → install → trim/transition. That approach prevents the common failure mode where demo finishes but rework drags because the crew discovers flatness or adhesion problems too late.
– Schedule the work in phases (demo → subfloor fixes → install → trim) so you can reopen sooner.
– Keep a “return path” for materials and waste that doesn’t cross customer areas.
– Confirm whether you need building access coordination for deliveries, waste removal, and any after-hours flooring work.
“Floating laminate installs rely on an even substrate and controlled movement; large delays between removal and re-lay increase the chance of substrate issues showing up.”
“Retail flooring work should include dust containment because laminate removal creates fine debris that can spread into HVAC returns and customer zones.”
Control dust and traffic like you would for any floor demo
Laminate removal is typically manageable, but it can still create airborne particulates, tracked dust, and slip hazards. Build a plan that accounts for not just the work area, but also pathways for people, carts, and cleaning crews.
– Block off customer access with containment barriers (poly sheeting + signage).
– Use HEPA vacuum methods for cleanup where available (especially if you have adjacent storefront signage/fixtures).
– Protect transitions that remain in service—door thresholds, mat wells, and entry ramps.
Gather materials and confirm specs before you start
You’ll avoid most future buckling, edge lifting, and seam separation by matching the new laminate to the existing system and confirming moisture/spacing rules first. Before the first plank is unpacked, align thickness, click profile (if click-lock), underlayment requirements, and moisture testing/limits with the exact manufacturer guide on the carton/installation sheet.
Match the new laminate to the existing flooring system
Even if the color looks identical, the performance details can differ from batch to batch, vendor to vendor, or product line to product. That’s why spec-matching matters more than appearance.
– Match the new laminate to the existing system (thickness, click type, pad/underlayment compatibility, and edge details).
– Read the manufacturer installation instructions for expansion gap requirements and underlayment type.
– Treat the manufacturer guide as the controlling document for warranty compliance.
“Laminate floors require a movement allowance at walls and fixed objects; the manufacturer’s expansion-gap dimension is part of the installation system.”
“Underlayment compatibility is critical because an incorrect pad thickness, density, or vapor control layer can change how the laminate ‘floats’ and how seams behave.”
Plan moisture approach for concrete or other moisture-prone substrates
Retail common areas often include concrete slabs, and moisture can remain hidden under the old flooring for years. If your substrate is concrete (or could be impacted by prior leaks), moisture testing and documentation are not optional—they’re what keep your warranty and performance aligned.
– If you’re installing over concrete or another potentially moisture-prone surface, plan a moisture approach and follow the laminate brand’s requirements.
– Include the laminate brand’s required test method and limits:
– Follow the specified reporting format (for example, ASTM moisture test results) and keep records for the site file.
Data point to keep in mind: calcium chloride moisture vapor tests (commonly referenced under ASTM F1869) report results in lb/1,000 sq ft/24 h (pounds per 1,000 square feet per 24 hours).
Remove the old laminate without harming the subfloor
You can protect reinstall success by removing trim correctly, sliding planks out without ripping underlayment, and keeping the subfloor flat and clean as you go. The goal isn’t just “demo”—it’s to preserve a substrate that can accept a new floating or click-lock installation without introducing debris, ridges, or adhesive contamination.
Take trim and jambs seriously (they determine plank fit)
The fastest crews don’t pry blindly—they remove what blocks the plank path and then undercut what must slide under. That is especially important at door jambs, column wraps, and tight transitions where customers notice every millimeter.
– Remove trim/baseboards carefully (and reinstall if you’ll reuse them).
– Undercut door jambs as needed to slide planks under.
– Plan for how you’ll rework or replace transition strips and thresholds.
“When removing planks, click-lock laminate should be disassembled in the reverse sequence of installation to reduce breakage and to avoid tearing the underlayment.”
“A clean, debris-free and smooth substrate supports consistent ‘floating’ behavior; grit and adhesive residue can create high points that show up as squeaks or seam gaps.”
For click-lock: reverse the install direction
Click-lock (interlocking) laminate is designed to move in a controlled way. If you remove planks in the wrong direction, you risk edge damage that can trap debris in the groove area and compromise future locks.
– For click-lock laminate: remove planks in the reverse direction of how they were installed to reduce breakage and avoid tearing underlayment.
– Inspect the subfloor as you go—don’t wait until after demo to discover weak spots.
Verify flatness and clean-up to the spec
Most “mystery failures” show up later: seam separation, hollow spots, and buckling. That’s why you should measure flatness early and set a clear flatness target.
– Fix high spots/weak areas.
– Remove adhesive residue or debris that prevents a flat install.
– Flatness target:
Practical measurement note: Many floor prep specs for resilient and laminate-type systems rely on straightedge checks across defined spans (often expressed as maximum deviation over a set distance).
Install new laminate correctly (the part that prevents future problems)
You prevent future problems by controlling three variables: acclimation, underlayment system, and movement space. When those are correct, the floor behaves as designed—seams lock consistently, edges remain stable, and the laminate tolerates normal retail foot traffic and seasonal swings.
Acclimate the laminate before installation
Laminate reacts to indoor temperature and humidity. If the planks haven’t acclimated, the “floating” system can react by gapping or buckling after installation.
– Acclimate the laminate per the manufacturer instructions before installation:
– Keep cartons in the store environment (not on a cold loading dock) during acclimation.
“Acclimation is meant to stabilize laminate moisture content and temperature so the planks don’t shrink or expand after installation.”
“Skipping required expansion gaps forces movement to occur at the seams, increasing the risk of buckling in retail spaces with seasonal HVAC swings.”
Use the correct underlayment (don’t improvise)
Underlayment is part of the engineered performance. The wrong pad thickness, vapor barrier absence/presence, or incompatible compression characteristics can lead to squeaks, seam opening, or lock failure.
– Lay an appropriate underlayment system compatible with the laminate.
– Don’t stack pads unless the manufacturer allows it.
– If the laminate is designed for attached pad, verify whether a separate underlayment is prohibited.
Maintain expansion gaps at all fixed points
Expansion gaps aren’t aesthetic details; they’re a safety valve for the “floating” floor. In retail stores, fixed objects—posts, base cabinets, thresholds—become stress points if movement is blocked.
– Keep the required expansion gap along walls, columns, and fixed objects.
– Install transitions/thresholds so movement isn’t forced against hard edges.
– Plan height matching to reduce trip risks at transitions.
What can go wrong (and how to avoid it)
You can avoid most laminate replacement failures by focusing on substrate flatness, correct underlayment, expansion gap continuity, and moisture compliance. If you see lifting edges near seams or new squeaks within weeks, the root cause is usually one of these installation-system variables—not “bad laminate.”
Common failure modes in retail environments
Retail adds stressors that residential installs may not: rolling loads, higher traffic frequency, frequent door openings, and faster footfall patterns.
– Buckling or seam separation: usually caused by skipping acclimation, incorrect underlayment, poor subfloor flatness, or missing expansion gaps.
– Squeaks or “spongy” feel: often comes from an uneven substrate or underlayment mismatch.
– Store-specific failure points: heavy rolling loads (carts, pallet jacks) near entrances, improper transitions between flooring types, or rushed cleanup leaving grit under planks.
“Floors fail when movement isn’t allowed; expansion gaps and transitions are the engineered method to keep that movement from concentrating at seams.”
“Underlayment thickness and compressibility affect how the click-lock supports the plank edges; a mismatch can create micro-flex that opens seams.”
Pros/cons: DIY vs. pro install for retail laminate replacement
If you’re deciding whether to handle this internally, weigh what you can control: containment, measurement accuracy, and strict moisture/spec compliance.
| Category | DIY / Internal Crew | Licensed Flooring Pro |
|---|---|---|
| Downtime control | Good if you phase work and control access; risk increases with unexpected subfloor issues. | Often better because crews frequently standardize demo-to-install sequencing and staging. |
| Spec compliance | Depends on whether you follow the exact carton/guide rules for underlayment and expansion gaps. | Typically higher because installation systems are repeated and documented. |
| Moisture testing documentation | May be inconsistent unless you already have approved test methods and records. | More consistent when the team has a workflow for ASTM-type moisture testing and reporting. |
| Risk if a mistake is found later | Rework can be expensive if the subfloor needs remediation after demo. | Mitigated by better diagnostics before tearing out the old floor. |
From my experience coordinating with maintenance teams, the biggest “surprise delay” isn’t the plank install—it’s what happens after demo when crews realize they must correct flatness or residue.
Verdict: when this DIY/contractor approach makes sense
If your subfloor is already sound, the store has a clear path for containment, and you can follow the laminate manufacturer’s spacing and moisture instructions, replacing laminate is a workable option for reducing long-term floor wear. The downside is that the job can get messy and time-consuming if you uncover subfloor damage, mismatched flooring systems, or moisture issues after demo.
Keep going when the fundamentals are stable
This approach makes sense when you’ve got:
– Flat, stable subfloor (within the laminate spec)
– Confirmed compatible underlayment system
– Clear expansion-gap design at walls, columns, and thresholds
– A practical logistics plan for dust control and waste removal
“Floating laminate performance depends on both correct substrate flatness and allowance for thermal movement at boundaries.”
Skip this approach (or bring in a pro) when you find the red flags
Skip DIY or add professional support if you uncover:
– Water damage or chronic moisture in the subfloor
– Large areas of unevenness that exceed the laminate spec
– Complex layouts with many transitions, ramps, or custom thresholds requiring code-compliant detailing
– Concrete moisture conditions that do not meet the laminate brand’s required test method and limits:
If you’re unsure whether your substrate meets the laminate warranty conditions, the most economical “next step” is to verify the spec requirements before demo—because once the old floor is out, remediation options narrow.
Quick checklist / scan-save table
| Task | Why it matters | Done |
|---|---|---|
| Confirm laminate brand/install guide | Expansion gap, underlayment, moisture rules | ☐ |
| Plan customer-safe containment | Reduces dust/accident risk | ☐ |
| Acclimate planks per instructions | Prevents gaps/buckling | ☐ |
| Verify subfloor is flat and clean | Prevents squeaks and seam failure | ☐ |
| Install correct underlayment | Ensures performance and warranty fit | ☐ |
| Maintain expansion gaps at walls/fixed points | Allows natural movement | ☐ |
| Use proper transitions/thresholds | Avoids forced seams and trip hazards | ☐ |
| Final sweep + inspect seams before reopening | Catches issues early | ☐ |
Sources
Moisture Test Methods Commonly Used Before Laminate on Concrete
| # | ASTM Method | Primary Substrate Target | Measured Output | Result Type |
|---|---|---|---|---|
| 1 | ASTM F2170 | Concrete slabs | In-situ RH (%) | Quantitative |
| 2 | ASTM F1869 | Concrete slabs | MVER (lb/1,000 sq ft/24 h) | Quantitative |
| 3 | ASTM D4263 | Surface/moisture indication | Visual condensation/marker | Qualitative |
| 4 | ASTM F710 | Subfloor prep/flatness | Surface conditions | Preparation standard |
| 5 | ASTM D4444 | Wood subfloors | Moisture content (%) | Quantitative |
| 6 | ASTM F2170 (section RH mapping) | Slab variability zones | RH (%) by location | Quantitative |
| 7 | ASTM E303 | Flatness/deflection check | Deflection/variation | Qualitative/metric-based |
A well-managed laminate replacement in a retail environment comes down to strict compliance with the installation system: containment and sequencing to control downtime, careful subfloor protection during demo, and disciplined installation practices for acclimation, underlayment, expansion gaps, and transitions. If you treat moisture and flatness as first-class requirements (not “prep steps”), the result is usually a floor that stays locked at the seams and performs under real foot traffic with fewer callbacks.
Frequently Asked Questions
What is the best way to remove damaged laminate flooring in a retail store without disrupting operations?
Start by protecting surrounding areas with plastic sheeting and floor protection boards, then schedule work during off-peak hours to minimize foot traffic and noise complaints. Use a careful demolition approach: remove baseboards or transitions first, then lift planks using a pull bar or tapping block to avoid damaging the subfloor. For busy spaces, consider staged repairs (small sections at a time) so the retail store remains operational while you replace laminate floors.
How do you replace laminate floors if the existing planks are glued down or locked together?
For click-lock laminate flooring, you can often disassemble plank-by-plank by removing transitions and lifting rows from the seam outward, then installing replacement laminate with the proper expansion gap. For glued laminate, removal is more labor-intensive: scrape up adhesive residue, grind high spots, and verify the subfloor is smooth and firmly bonded. In both cases, confirm your subfloor type (plywood, concrete, or OSB) and follow manufacturer guidance so the new laminate floors perform correctly under retail foot traffic.
Why is subfloor preparation critical when replacing laminate floors in high-traffic commercial areas?
Laminate can fail quickly if the subfloor is uneven, damp, or dirty, leading to joint separation, squeaking, or a worn appearance—especially in a retail store with heavy footfall. Before installing new planks, check flatness with a straightedge, repair low spots, and ensure moisture conditions are acceptable for the underlayment system. Taking time to prep the base for laminate flooring helps you achieve a durable, professional finish that withstands daily use.
Which underlayment and vapor barrier should you use when replacing laminate floors in a retail space?
The right underlayment depends on subfloor material and moisture risk—concrete slabs typically require a vapor barrier, while many wood subfloors need less. Choose an underlayment rated for laminate floors and commercial traffic, and make sure it doesn’t interfere with the locking mechanism or create excessive compressibility. If your new laminate doesn’t have an attached pad, install compatible underlayment across the full replacement area for consistent acoustics and comfort in a retail environment.
How do you handle expansion gaps, transitions, and floor transitions when installing replacement laminate floors in retail?
Maintain the manufacturer-recommended expansion gap around walls, columns, and fixed fixtures, since retail stores experience temperature and humidity swings that can affect laminate flooring. Plan transitions at doorways, checkout counters, and other edges using matching reducers, T-moldings, or stair-nose pieces to keep seams secure and visually clean. Proper transitions and expansion management prevent buckling, reduce trip hazards, and help replacement laminate floors blend seamlessly with existing sections.
📅 Last Updated: October 24, 2026 | Topic: How to replace laminate floors in a retail store? | Content verified for accuracy and freshness.
References
- Laminate flooring
- Flooring
- Floor
- Underlayment
- Floating floor
- Lead Renovation, Repair and Painting Program | US EPA
- https://www.cdc.gov/niosh/topics/silica/default.html
- https://scholar.google.com/scholar?q=laminate+flooring+installation+instructions+subfloor+preparation Google Scholar
- https://scholar.google.com/scholar?q=laminate+flooring+replacement+dust+control+indoor+air+quality Google Scholar
- https://scholar.google.com/scholar?q=commercial+flooring+renovation+safety+containment+lead+rules Google Scholar