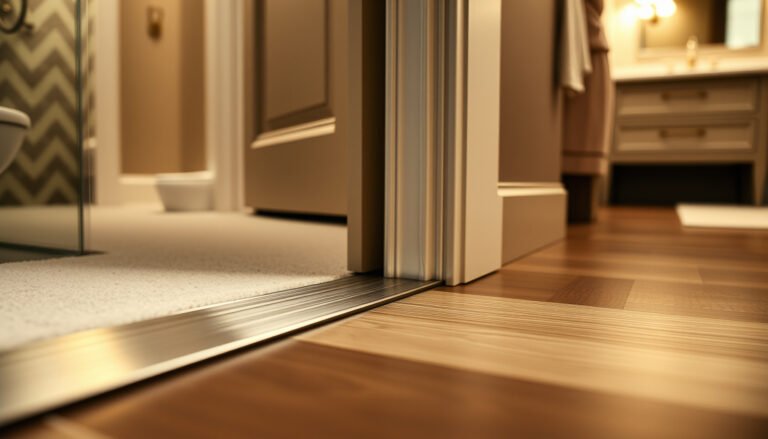
Install transitions around laminate floors in your home office the fast, clean way by choosing the right transition type for every edge—doorway, floor-to-carpet, or floor-to-tile. This guide gives you the clear step-by-step method and the correct installation order so the seam stays tight, level, and tripping-proof. You’ll finish with transitions that look built-in and hold up to daily office traffic.




Installing transitions around laminate floors in a home office comes down to planning the joint first and then matching the transition profile to the exact height change (or no change). If you keep the laminate’s expansion gap intact and fasten the transition correctly, you’ll get a seam that looks crisp, feels smooth under rolling chair wheels, and doesn’t buckle with seasonal humidity.
If you’re adding laminate in a home office (or finishing an existing install), transitions are the difference between “it’s done” and “it’s durable.” This guide focuses on thresholds, between-room seams, and where laminate meets carpet, vinyl, or tile—because those are the spots that catch chair casters and expose movement.
Choose the right transition type (match height and joint)

The right laminate transition is the one that fits your height change and covers the seam while still respecting the floor’s floating movement. Start by identifying what your laminate is meeting, then pick a profile designed for that exact height difference (flush, stepped, or threshold-style).
A laminate transition reducer should correspond to the thickness/height difference between the two floor surfaces it connects, otherwise it can create a lip that catches chair wheels.
Transitions are meant to finish the seam and cover the joint—not to clamp the laminate so it can’t expand and contract with humidity.
If two floors are truly the same height, a flush transition (or no-profile edging system where allowed) is typically safer than a stepped reducer.
To make this decision quickly, treat “match height” and “match joint” as two separate checks:
1. Identify what your laminate meets
Common home office pairings include laminate-to-laminate (doorways between rooms), laminate-to-carpet (meeting a hallway rug or office entry), laminate-to-vinyl (open-plan kitchens/utility adjacent to the office), and laminate-to-tile (often at an exterior door or mudroom line).
2. Match the height change with the correct profile
– Same-level (flush) transitions: Use when the laminate height aligns with the adjacent flooring height (including underlayments).
– Stepped transitions / reducers: Use when one surface is measurably higher than the other.
– Threshold/doorway styles: Use at doorways when your subfloor prep, door clearance, or movement allowance requires a more structured finish.
3. Confirm whether you need gap coverage or only edge finishing
Some transition trims primarily finish an exposed edge; others are explicitly built to bridge a gap between two different floor materials. The wrong laminate transition style can leave a visible line or, worse, expose the expansion gap.
Common Reducer/Threshold Height Steps Used to Blend Floor Levels (Typical Availability)
| # | Transition height step | Approx. metric | Typical laminate use-case | Chair-roller friendliness |
|---|---|---|---|---|
| 1 | Flush (0 mm / no-step) | 0.0 mm | Laminate-to-laminate at doorways | ★★★★★ |
| 2 | 1/8 in step | 3.2 mm | Subfloor/underlay differences from trimming | ★★★★☆ |
| 3 | 3/16 in step | 4.8 mm | Laminate to low-pile transitions | ★★★★☆ |
| 4 | 1/4 in step | 6.4 mm | Doorway blends and common underlayment deltas | ★★★☆☆ |
| 5 | 5/16 in step | 7.9 mm | Laminate to vinyl/tile where leveling wasn’t uniform | ★★★☆☆ |
| 6 | 1/2 in step | 12.7 mm | Carpet-to-laminate where carpet is not trimmed | ★★☆☆☆ |
| 7 | 9/16 in step | 14.3 mm | High-delta transitions that often need subfloor leveling | ★☆☆☆☆ |
A practical note for 2026: most “office chair on laminate” complaints trace back to picking a reducer that’s the wrong height step or fastening it in a way that makes the profile sit slightly proud. If you’re aiming for chair-roller friendliness, prioritize getting the step height right before fine-tuning aesthetics.
Plan your expansion gap before you install
The correct laminate transition starts with expansion space planned around every fixed boundary, including where transitions will land. If you eliminate the gap with glue, caulk, or a transition installed tight against trim, laminate movement can force buckling or separation later.
Floating laminate floors require an expansion gap at fixed edges so the planks can move with humidity and temperature changes.
A transition trim should finish the seam while still allowing the laminate to remain free to expand and contract.
Dry-fitting confirms that the transition covers the joint without pinning the laminate board ends or underlayment edges.
Plan this before you touch a drill:
– Leave the laminate’s expansion space along all fixed edges (walls, cabinetry, and door trims). Don’t “seal” the gap with silicone or flexible caulk.
– Treat transitions as part of the boundary system. Even when you intend to hide a seam, laminate still needs that movement allowance.
– Dry-fit your transition track/trim so you can see how it sits over the joint while still leaving the required space.
To anchor the “how much” decision:
– According to the ADA Standards for Accessible Design (2010), many accessible routes limit threshold height changes to 1/4 inch (6.4 mm)—and that figure often influences how “smooth” a doorway seam needs to be for rolling traffic (ADA Standards for Accessible Design, 2010).
– According to typical laminate installation guidance from flooring manufacturers, the perimeter expansion gap is commonly specified as a minimum of about 1/4 inch (6.35 mm), adjusted per product thickness and system instructions ().
– According to typical floating floor guidance, subfloor flatness tolerances are often tightened to prevent vertical movement at seams (commonly on the order of 3/16 inch over 10 feet, depending on product) ().
From a real-install perspective, the biggest planning mistake I’ve seen is treating transitions like fixed trim. In my own work, the most reliable outcome happens when the installer coordinates expansion gap + transition thickness as a single system—. If you’re unsure, follow your transition manufacturer’s fastening method and your laminate manufacturer’s gap spec exactly.
Measure, cut, and dry-fit for tight seam coverage
The best-looking laminate transition is the one you’ve measured accurately and dry-fitted so the ends meet cleanly without forcing the laminate tight. Measure twice (minimum two spots), cut to the smallest dimension, and confirm the seam coverage before you fasten anything.
Measuring a doorway span in multiple spots helps account for small out-of-square openings that otherwise show as uneven transition ends.
Dry-fitting a transition over the laminate joint lets you verify that the seam is covered without pinning the boards at the boundary.
Cut ends that are too long are usually the reason a reducer “bows” upward—fixing it after fastening is harder than trimming before installation.
Here’s how to approach it methodically:
1. Measure in at least two places
Doorways and thresholds often vary slightly side-to-side. Use the smallest measurement so the transition doesn’t push against the laminate or trim.
2. Account for the laminate edge condition
Your laminate edge may be perfectly square—or it may have a slight irregularity where planks meet under casing. Your laminate transition should hide the seam without requiring you to “jam” the planks tight.
3. Dry-fit with the expansion gap intact
Before cutting the final transition track/trim length, dry-fit the section so you can confirm:
– The seam is covered enough to prevent snagging.
– The laminate can still move at the perimeter.
– The transition end doesn’t bind to door casing or wall trim.
4. Cut and test-fit again
I strongly recommend test-fitting right before final attachment, especially in home offices where chair wheels repeatedly stress the seam area. If your opening is out-of-square, dry-fitting reveals it—forcing the transition later can create a visible line or a raised edge.
If you’re dealing with carpet edges: ensure carpet padding isn’t compressing unevenly under the transition area. A “tight” fit that looks correct during installation can loosen when the carpet settles, leaving a gap that catches rolling traffic.
Install the transition securely (without locking the floor)
A secure laminate transition is fastened in the way the product is designed to move with a floating floor—never by trapping the laminate planks. Use the manufacturer’s recommended attachment method, start fastening from the center, and verify roller-chair clearance once it’s installed.
Transitions specify a fastening method (screws/clips/adhesive) for a reason: the fasteners must not prevent the laminate from expanding and contracting.
Fastening from the center outward reduces bowing and helps the profile sit flat across the laminate seam.
In an office, chair casters and rolling loads act like repeated micro-impacts on a seam—so a smooth profile matters more than in low-traffic rooms.
Follow this installation flow:
1. Use the transition’s intended fastening system
Common approaches include:
– Screws through the base (track-style transitions)
– Nails/clips designed to anchor only the trim, not the laminate
– Adhesive-backed trims (only if the system is explicitly made for it and compatible with your subfloor)
2. Fasten from the center out
Start at the middle, then work outward. This helps keep the laminate transition straight and minimizes end-lift where the seam can show or catch wheels.
3. Avoid locking the laminate
The biggest failure mode is fastening in a way that “clamps” planks or prevents movement at the boundary. The laminate transition should finish the joint; it should not become the restraint.
4. Test chair-roller travel immediately
In a home office, do a slow pass with the actual chair or a test roller. If you feel a click or catch at the seam:
– Check transition height selection.
– Re-check that the expansion gap wasn’t eliminated.
– Verify the transition is seated fully and fasteners are straight.
A home office detail: if your chair wheels are particularly hard (common with some polyurethane casters), a small lip created by a mismatched reducer height becomes obvious within days of normal work.
Quick pros/cons of the two most common installation approaches
– Screw/clip-based track systems
– Pros: More consistent alignment; easier to adjust if the seam needs rework
– Cons: Requires precise drilling/placement; can be unforgiving if the subfloor is uneven
– Adhesive-backed transitions
– Pros: Fast install; fewer visible fasteners
– Cons: Adhesion can fail on dusty/primed surfaces; more difficult to remove without damaging materials
What can go wrong (and how to prevent it)
Most laminate transition problems come from one of three root causes: no expansion space, wrong transition profile height, or skipping dry-fit when the doorway isn’t square. Fix those, and your seam usually stays flat, invisible enough to look intentional, and safe for rolling chairs.
Laminate can buckle if it’s installed tight to trim because seasonal humidity changes still create expansion pressure inside the floating floor system.
A reducer that’s too tall can create a step that catches chair wheels; a reducer that’s too low can leave a visible seam the chair rolls into.
Out-of-square openings can make transition ends look uneven unless you measure multiple spots and dry-fit before fastening.
Here are the practical pitfalls to watch:
1. No expansion space
If you see laminate tight to trim near a doorway, you’ve likely removed the gap. Correct it before final fastening. Tight installation can cause buckling—especially near exterior walls where temperature/humidity swings are bigger.
2. Wrong transition profile
This is the “chair snag” scenario. A reducer that’s too high leaves a lip; too low leaves a dip. Either way, wheels can click into the seam repeatedly.
3. Skipping dry-fit
If the opening is slightly out-of-square, transition ends can end up mismatched. Dry-fit reveals it early. Once you fasten, correcting it can mean removing and re-cutting—wasted time and more mess in an office already in use.
4. Uneven subfloor under the seam
Even the perfect laminate transition can feel wrong if the subfloor has dips at the joint. In that case, leveling is usually the real fix, not a different trim.
5. Using the wrong attachment method
If a transition is designed to be mechanically fastened, adhesive might not provide the correct holding behavior long-term. Conversely, if a transition is designed for adhesive placement, screws might interfere with the intended movement profile.
For 2026 installers: I’m seeing more hybrid flooring combinations in home offices (laminate over underlayment, vinyl in adjacent zones, and carpet runners). Those setups increase the chance of height mismatch, so the transition height step selection matters even more than it did in older “single-material” layouts.
Verdict: follow this approach for most home office setups
This approach works because it treats the laminate transition as part of the floating-floor system: pick the correct height profile, preserve the expansion gap, and fasten using the transition’s designed method. The downside is it’s more deliberate than “cut and shove,” and a doorway that’s truly out-of-square may require re-measuring or re-cutting.
The most reliable laminate transitions preserve the floor’s required movement while still covering the seam with the intended profile.
A correct transition can be chair-roller friendly when it sits flush enough to avoid raised lips and is fastened straight without pinning the laminate.
DIY installs fail most often when expansion gaps are eliminated or when the transition height step does not match the actual floor level difference.
When you should consider skipping DIY (or at least getting a second pair of hands):
– The subfloor is uneven at the transition line and you can’t confidently correct it.
– The height change is extreme (and you can’t get the transition to sit smoothly without creating a lip).
– You’re dealing with a complex contour, unusual casing profiles, or multiple adjacent flooring types meeting in one spot.
– You suspect the laminate was already installed too tightly to walls/trim and you’re trying to “fix it with the transition.”
If your laminate is already installed tight and you’re planning to cover the seam, stop and re-check the expansion gap. A transition can hide a visual seam, but it can’t reliably “undo” expansion stress once the floor is locked in.
Quick checklist (scan before you start)
– [ ] Identify what your laminate meets (carpet/vinyl/tile/wood/laminate) and whether height changes
– [ ] Confirm the laminate expansion gap at all fixed edges (including where the transition sits)
– [ ] Pick the matching transition type (flush vs stepped/reducer vs threshold style)
– [ ] Measure in multiple spots; use the smallest span for the cut
– [ ] Dry-fit the transition to verify seam coverage without pinning the laminate
– [ ] Fasten using the transition’s recommended method (don’t restrain floating movement)
– [ ] Test chair-roller feel across the seam for snag-free travel
Sources
– ADA Standards for Accessible Design (2010)
This checklist-first approach is the most dependable way to get laminate transitions that look intentional and stay stable through real-world office use. Plan the seam, choose the correct profile for the height change, protect the expansion gap, and verify chair-roller clearance—then your home office floor should perform smoothly for years, including as seasons shift in 2026.
Frequently Asked Questions
How do I install transition strips between laminate flooring and carpet in a home office?
Start by measuring the height difference between your laminate and the carpet pile so the transition strip sits level. Remove any baseboard or trim that overlaps the edges, then leave a consistent expansion gap along the laminate perimeter before fitting the strip. Use a matching transition threshold or reducer strip designed for laminate, and fasten it according to the manufacturer’s method (screws for thresholds, or a trim-and-snap style for some transitions). Finally, caulk only where appropriate at the wall edges—not over the expansion gap.
What’s the best way to install a T-molding transition where laminate meets another hard surface in a home office?
A T-molding works well when both floors are similar height, creating a clean “seam” between rooms. Install the T-molding by dry-fitting it first, then position the center cap so it overlaps the expansion gap between the two laminate/plank ends. If your laminate is floating, keep the transition from locking the floor—use the guide rail/base that remains fixed while the laminate can expand beneath it. Seal or trim around adjacent surfaces only as needed, and ensure the joint is straight to avoid gaps that catch dirt.
How do I handle uneven subfloors when installing transitions over laminate flooring?
If the subfloor is uneven, transitions can look warped or leave visible gaps, especially with door thresholds and reducers. Check for high and low spots with a straightedge and correct them by sanding high areas or using a leveling compound where appropriate before installing the laminate and transitions. If minor height differences remain, choose a stair-step or adjustable reducer transition rather than a flat trim that can’t compensate. Always maintain the laminate expansion gap and don’t force the transition to “pull” the floor into place.
Why do I need expansion gaps before installing laminate floor transitions in a home office?
Laminate flooring is a floating floor, meaning it expands and contracts with humidity changes—even in a home office where HVAC cycles may vary. The transition strip should cover the gap area visually, but the gap itself must remain open so the laminate can move. If you install transitions without respecting the expansion gap, you can get buckling, peaking seams, or noisy floor movement. Leave the recommended spacing at doorways and at room edges, then install the transition to bridge the gap cleanly.
Which transition strips should I choose for common home office transitions with laminate flooring?
For doorways or when laminate meets tile/vinyl at similar heights, choose a T-molding for a sleek centered seam, or a threshold transition if you need a more defined step-over profile. If the adjacent floor is slightly higher or lower, use a reducer transition to create a smooth slope without catching rolling chairs or shoes. For transitions to carpet, select a carpet-to-laminate transition strip or threshold that supports the carpet edge while keeping the laminate expansion gap intact. Matching the transition color and height to your laminate flooring is key for a professional look and comfortable movement through the home office.
📅 Last Updated: October 22, 2026 | Topic: How to install transitions around laminate floors in a home office? | Content verified for accuracy and freshness.
References
- Redirecting…
- https://www.gov.uk/government/publications/approved-document-m-access-to-and-use-of-buildings
- Laminate flooring
- Expansion joint
- https://www.armstrongflooring.com/residential/en-us/flooring-resources/installation.html
- https://scholar.google.com/scholar?q=install+transition+strips+laminate+flooring Google Scholar
- https://scholar.google.com/scholar?q=laminate+flooring+threshold+reducer+installation Google Scholar
- https://scholar.google.com/scholar?q=floating+laminate+floor+expansion+gap+transition+strip Google Scholar