
Learn exactly how to measure engineered wood floors for a porch so you can buy the right quantities and avoid costly cuts. This guide walks you through the fastest, most accurate method to calculate total square footage, account for porch irregularities, and plan for waste and layout before you order. By the end, you’ll know the precise measurements to provide—so your installation starts square and stays on spec.




Measure your porch for engineered wood flooring by totaling the exact square footage you’ll actually install, then adding a waste/adjustment allowance (typically 10%–15%) for cuts. If the porch isn’t a perfect rectangle, break it into simpler shapes (rectangles/triangles), measure each part, and total the square footage before ordering—this is the fastest way to avoid under-ordering planks and ending up with mismatched seams.
This is for homeowners, DIYers, or contractors preparing to install engineered wood flooring on a porch—especially when the layout includes stairs, irregular shapes, or transitions to other flooring. The goal is to order the right number of boxes for engineered wood flooring so your plank layout stays consistent from the first row to the last edge.
Measure the porch footprint (square feet)
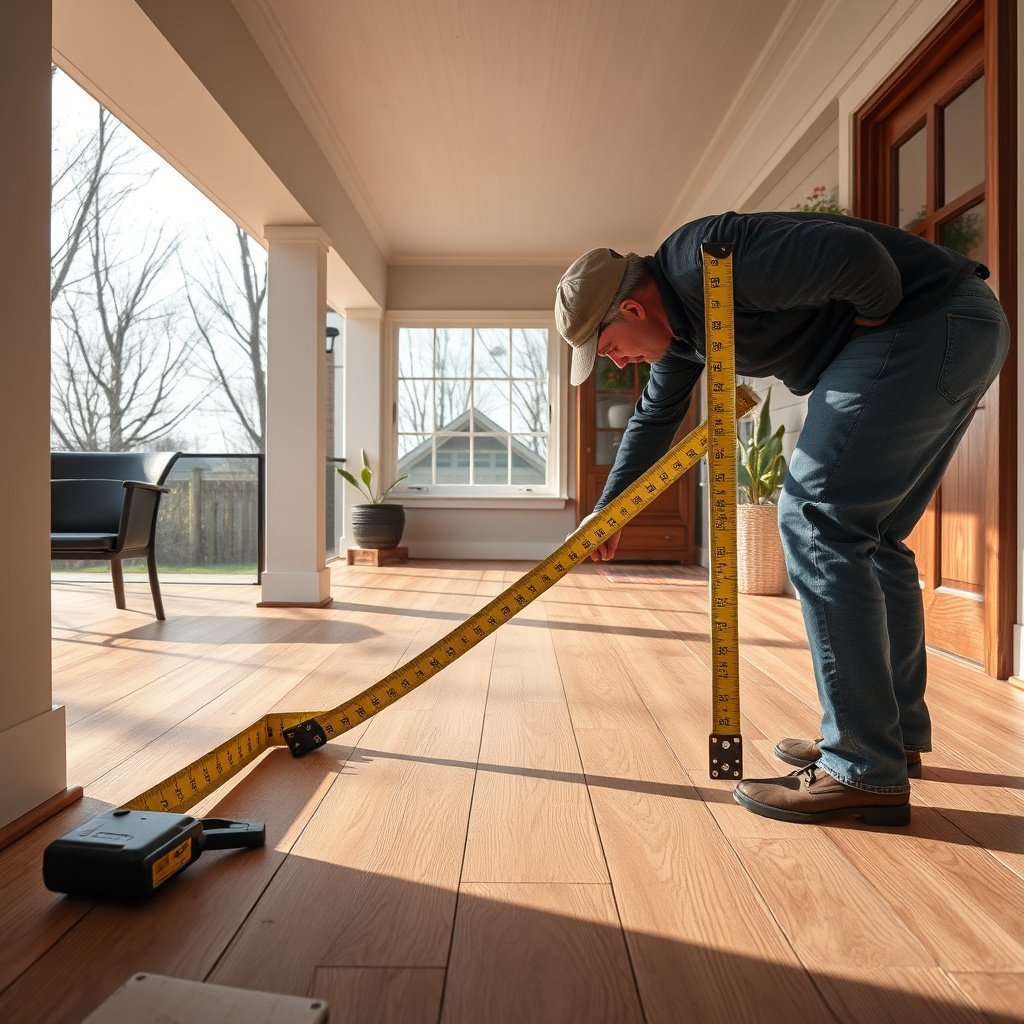
Start by measuring only the porch zones that will receive engineered wood flooring, not the entire deck footprint. Then calculate square footage for each flat section and total the results to get your base ordering area.
– Measure length and width for each flat section of the porch surface (in inches, then convert to feet).
– For irregular shapes, split the porch into simpler sections (e.g., two rectangles) and total the square feet.
– If you have a deck with an overhang, decide whether you’re covering only the walking surface or the full visible area, then measure the exact area to be floored.
When you measure porch engineered wood flooring in inches, convert to feet using 12 inches per foot (1 ft = 12 in), so 1 square foot equals 144 square inches.
Porch flooring ordering starts with installed area: measure only the surface that engineered wood flooring planks will cover, including any landings/steps that receive planks, and excluding areas you’ll leave bare.
For rectangle-based porch layouts, the math is straightforward: area (sq ft) = length (ft) × width (ft). Measure each flat “face” you’ll floor (for example, the main deck bay and a separate landing area if it’s framed differently). On most porches, you’ll get cleaner results by treating the porch as multiple zones rather than trying to force one overall footprint—even if your end result is still a simple sum.
If your porch has irregular geometry (such as an inset, a notch near a post, or an angled wall transition), split it into rectangles and triangles. For triangles, use the right-triangle approach where applicable. According to Euclid’s Elements (c. 300 BCE), the area of a right triangle is (base × height) / 2, which is exactly how you handle many angled porch corner cut-ins during engineered wood flooring takeoffs.
If part of the porch edge is curved (rounded corners), approximate it with multiple short segments (rectangles + triangles) so engineered wood flooring can be ordered from measurable square footage rather than guessing.
Finally, overhangs matter because engineered wood flooring coverage is about what’s installed—not what exists visually. Decide early: are you flooring only the walking plane, or also covering the overhang’s underside/visible area? In almost all ordering situations, you’ll only count the top surface where engineered wood flooring planks will actually lay.
Account for stairs, steps, and angled areas
Treat stairs and landings as separate measurement zones so engineered wood flooring quantifies accurately where the geometry changes. In most porch builds, the stair tread/landing area is where square footage gets miscounted—leading to shortages or last-minute substitutions.
– Treat stair treads/landing areas as separate measurement zones (they often have different geometry than the main deck).
– For angled corners or diagonal transitions, split them into rectangles/triangles so you can calculate square footage accurately.
– Note any expansion gaps you’ll need at edges and around posts so the installed area measurement reflects real coverage.
Stair landings and porch steps should be measured as separate engineered wood flooring zones because their width-to-run geometry rarely matches the main deck area.
For diagonal transitions, breaking engineered wood flooring areas into rectangles and triangles prevents “phantom coverage” that occurs when you measure a bounding rectangle and assume it’s fully installed.
For stairs, the key is to map what you’re actually flooring: typically you cover treads (and sometimes landings), not the vertical risers unless your engineered wood flooring system is specifically designed for that. Measure each tread’s top surface and each landing’s flat surface as its own zone. If your porch has a small landing at the base of the stairs, it’s often easiest to measure it like a rectangle even if it “feels” irregular—then subtract any obstructions.
Angles and diagonal transitions are where people commonly under-order engineered wood flooring. If your porch has a diagonal return (for instance, where it meets a side wall), you can:
1) define the diagonal corner as a triangle, and
2) measure the surrounding rectangles normally.
This produces an installed square footage number that matches how planks will actually land at the edges.
Expansion gaps are also part of “real coverage.” Engineered wood flooring outdoors (or on porches exposed to changing moisture) almost always requires attention to movement and clearance. Use the installation guide for your specific product system for the correct gap size and how it’s handled around posts and edges. If you’re unsure, plan to follow the manufacturer’s instructions rather than “eyeballing” a gap—because your final square footage estimate should align with the area you’ll actually floor.
Convert area to plank quantities
Once you have your total installed square footage for engineered wood flooring, convert it into boxes using the manufacturer’s stated coverage per box. Then add waste/adjustment so you can absorb cuts near posts, transitions, and stair edges.
– Calculate total square footage needed, then multiply by a waste factor to get the ordering quantity (use a conservative waste allowance if your porch has many cuts).
– Check the box coverage stated by the manufacturer (square feet per box), then divide total square feet by box coverage to estimate how many boxes to buy.
– If your planks come in a specific length/width format, confirm the coverage number is based on the same installation orientation you plan to use.
Use the engineered wood flooring manufacturer’s “sq ft per box” figure for ordering; box coverage already accounts for plank format, not just nominal plank dimensions.
Your ordered quantity should include waste for engineered wood flooring cuts—especially around porch stairs, angled corners, and edge trimming near posts and railings.
Here’s the typical workflow for engineered wood flooring porch calculations:
– Step 1: Total installed square footage across all zones (main deck + landings + tread tops you’ll cover).
– Step 2: Multiply by a waste/adjustment factor (commonly in the 10%–15% range, depending on complexity).
– Step 3: Divide by manufacturer coverage per box (sq ft/box).
– Step 4: Round up to the nearest whole box so engineered wood flooring runs don’t stop mid-job.
If your porch has multiple cuts (for example, around rail posts, bench areas, or drain covers), use the higher end of the waste range. If your porch is a single clean rectangle with minimal obstructions, you can usually stay closer to the lower end—still verifying against the manufacturer’s guidance.
Also confirm that your installation orientation matches how coverage is calculated. Some engineered systems specify layout assumptions (for example, plank width vs. how effective coverage is counted in tables). Coverage per box is the number that matters—engineered wood flooring ordering becomes far simpler once you treat it as the source of truth.
Area Calculation Shortlist for Porch Zones (Engineered Wood Flooring)
| # | Porch zone shape | Typical inputs (ft) | Area equation (sq ft) | Measuring simplicity |
|---|---|---|---|---|
| 1 | Rectangle (main bay) | L, W | L×W | ★★★★★ |
| 2 | Right triangle (diagonal corner) | Base, height | (B×H)/2 | ★★★★☆ |
| 3 | Trapezoid (angled wall/railing) | a, b, h | ((a+b)/2)×h | ★★★☆☆ |
| 4 | L-shape (offset by notch) | 2 rectangles (or 1 big − 1 cut) | Area = A_big − A_cut | ★★☆☆☆ |
| 5 | Quarter-circle edge (curved corner) | radius r | (πr²)/4 | ★★☆☆☆ |
| 6 | Octagon/near-octagon (multi-sided deck) | segment decomposition | Sum of sub-areas | ★☆☆☆☆ |
| 7 | Stair landing bay (tread top footprint) | width, depth | W×D (per landing zone) | ★★★☆☆ |
The table above is a practical “math map” for engineered wood flooring takeoffs: use rectangles for straightforward bays, add triangles for diagonal corners, and split complex porch footprints into sums you can measure confidently. This reduces ordering errors because engineered wood flooring boxes are purchased in whole units—there’s no “partial box” to fix a miscount.
Plan layout direction and seam placement
Decide how you’ll run the engineered wood flooring planks before you finalize ordering, because plank direction affects seam visibility and whether you end up with narrow slivers at porch edges. A good layout plan makes your measurement “real” in the field, not just on paper.
– Choose a plank direction that minimizes small sliver cuts near walls, railings, or posts.
– Dry-plan your first row and key borders so seams fall in a neat, consistent pattern across the porch.
– Mark starting points and reference lines on the surface before cutting, so measurement errors don’t compound as you move across sections.
A plank direction that avoids thin edge pieces improves the engineered wood flooring look and reduces costly “do-overs” from incorrect initial row alignment.
Dry-laying the first row and establishing reference lines helps prevent compounding measurement errors across engineered wood flooring zones with steps and transitions.
Even if your square footage is correct, porch installs can fail aesthetically when the seam pattern isn’t planned. For engineered wood flooring, start by choosing a direction that matches how people naturally look at the porch—often aligning with the longest straight run—but also consider obstructions like rail posts. Where possible, keep seams consistent so the porch reads as one continuous floor.
Dry-plan the first row: place planks without locking them fully (per your product’s instructions) to confirm how the edges land near posts and around the stair boundary. This is also where you can validate whether your area split (rectangles/triangles) matches what you see in real space.
Then mark:
– a starting reference line,
– the first row boundary,
– any “stop lines” near stairs/landings,
– and post/obstruction locations.
This approach matters for engineered wood flooring because cutting at the wrong edge and correcting later usually increases waste faster than you expect.
What can go wrong (and how to avoid it)
The most common failures in measuring engineered wood flooring on porches come from bad area accounting and misreading product coverage. If you prevent those two issues, your ordering and installation are far more likely to go smoothly.
– Underestimating waste: complex porch shapes and rail cutouts can quickly eat extra material—especially if you want a balanced look at edges.
– Misreading “coverage per box”: always use the manufacturer’s stated coverage, not an estimate from plank dimensions alone.
– Forgetting obstructions: columns, posts, bench areas, drains, or step edges can reduce usable coverage and force more cuts.
Engineered wood flooring failures during porch installs are commonly driven by coverage errors—especially when installers use plank dimensions instead of the manufacturer’s stated sq ft per box.
Waste planning should account for porch-specific obstacles (posts, rail blocks, step edges), because these increase trimming frequency even when your total measured square footage seems accurate.
Here’s a comparison of typical mistakes and how they translate into real material impact:
| What goes wrong | Likely outcome | How to avoid it |
|---|---|---|
| Measuring a bounding rectangle instead of splitting shapes | You “overcount” area that won’t actually be floored, then run into edge-cut mismatches | Split irregular porch zones into rectangles/triangles before summing sq ft |
| Using a guessed waste factor | Shortages at the last border and inconsistent seam placement | Use the higher end of 10%–15% when cuts cluster near posts/stairs |
| Ignoring coverage-per-box assumptions | Order too few boxes because effective coverage differs from nominal plank math | Use the manufacturer’s sq ft/box, then divide and round up |
| Not planning around obstructions | Extra cuts and irregular plank ends that “break up” the look | Mark posts/drains/benches on your layout before cutting the first plank |
A final trap for engineered wood flooring on porches: transition zones. If you’re meeting another floor type (tile, laminate, existing deck boards), plan seam endings around that boundary. A measurement that’s correct but a seam layout that’s wrong can still leave you with cramped cuts and odd transitions—especially near stair edges.
Verdict / tip
For most porches, the safest approach to order engineered wood flooring is: measure each porch section carefully, total the square feet, add an appropriate waste allowance, then convert to boxes using the engineered wood manufacturer’s coverage-per-box figure. Skip overly complex DIY measuring only if your porch is highly irregular (multiple levels, lots of custom cuts) and you don’t have a second person to double-check measurements or you lack confidence breaking shapes into sections.
Downside to this method: it takes more upfront time than estimating “by feel,” and you may end up with extra boxes if your porch is simpler than you first thought. Still, for engineered wood flooring, the cost of ordering one extra box is usually far less than the cost of halting the project to hunt for a matching lot.
| Quick porch-floor measurement checklist |
|---|
| Measure each flat section (length × width) |
| Split irregular areas into rectangles/triangles |
| Add separate zones for stairs/landings/steps if flooring covers them |
| Total square feet (all zones) |
| Add waste allowance: |
| Use manufacturer coverage per box (sq ft/box) |
| Divide total needed sq ft by box coverage → buy |
Sources
– International Yard and Pound Agreement (1959)
– Euclid, Elements (c. 300 BCE)
A careful, zone-based measurement process is what turns engineered wood flooring on a porch from “guessing” into a reliable ordering and layout plan. Measure installed coverage square feet, split irregular shapes instead of bounding them, include stairs/landings as separate zones, and then purchase based on manufacturer coverage per box with a realistic waste allowance—so your seams look intentional and your project stays on schedule.
Frequently Asked Questions
How do I measure engineered wood floors for a porch accurately?
Start by measuring the porch length and width in inches at multiple points, because porches aren’t always perfectly square. Subtract any permanent obstructions like posts, steps, or built-in benches from your total square footage. Convert your final figure to square feet and add a waste factor (often 10–15%) to account for cuts, seams, and porch irregularities. If the porch has a diagonal or angled section, measure those areas separately and total them.
What’s the best way to calculate square footage for an outdoor engineered wood flooring layout?
Measure each rectangular section of the porch (including areas around doorways or ramps) and multiply length × width to get square footage. Add all separate sections together, then subtract the footprint of anything the flooring won’t cover. After that, apply your waste allowance—porch edges and miter cuts typically require more extra material than interior installs. This gives you the total square footage to compare against box coverage for engineered wood floors.
Which measurements do I need if my porch has stairs, a curved edge, or an angled landing?
For stairs or landings, measure each tread/landing run separately and treat them like distinct flooring zones so cuts fit correctly. For a curved edge, measure the maximum length and approximate width, then use a few “chord” measurements along the curve to estimate area more accurately. Mark a reference line (like the centerline or a straight exterior wall) so your layout and plank direction stay consistent. These steps reduce the risk of running short on outdoor engineered wood boards.
Why should I add extra waste when measuring engineered wood floors for a porch?
Porches often involve more complex cuts than indoor floors—diagonal borders, threshold transitions, and extra spacing along edges can consume material quickly. Because outdoor engineered wood installations may require additional adjustments for leveling and expansion gaps, adding 10–15% waste helps you avoid delays from missing planks. If your porch pattern is diagonal, herringbone, or involves many small sections, consider closer to 15–20% waste. Measuring with waste built in keeps your engineered wood floor project predictable.
How do I measure for expansion gaps and borders when installing engineered wood floors outdoors?
Confirm the manufacturer’s required expansion gap (commonly around 1/4 inch or as specified) and plan that clearance around the perimeter, posts, and door thresholds. Measure from the inside edge of your framing or the final trim line, then subtract space for the gap so the flooring coverage matches real install conditions. If you’ll use a border or fascia board, measure those dimensions separately and account for overlapping trim and transitions. Proper expansion gap measurement is crucial for outdoor engineered wood floors to handle moisture and temperature changes.
📅 Last Updated: October 20, 2026 | Topic: How to measure a engineered wood floors for porch? | Content verified for accuracy and freshness.
References
- Engineered wood
- Wood flooring
- https://www.fpl.fs.usda.gov/search/?q=wood%20deck%20construction%20layout%20measurement
- https://extension.umn.edu/wood-products/building-wood-decks
- NC State Extension Publications | Browse Popular Publications
- https://scholar.google.com/scholar?q=how+to+measure+engineered+wood+flooring+for+porch+installation Google Scholar
- https://scholar.google.com/scholar?q=engineered+wood+flooring+layout+measurement+expansion+gap+installation Google Scholar
- https://scholar.google.com/scholar?q=porch+outdoor+deck+flooring+engineered+wood+moisture+subfloor+measurement Google Scholar