


Learn how to measure engineered wood floors for a balcony fast and accurately, so you can order the right amount the first time. This step-by-step guide shows exactly what to measure—floor length and width, usable area after edges, and any offsets for rails, drains, or slopes—then how to convert those readings into square footage and waste allowances. By the end, you’ll know the exact measurement workflow that prevents costly shortages and miscuts.
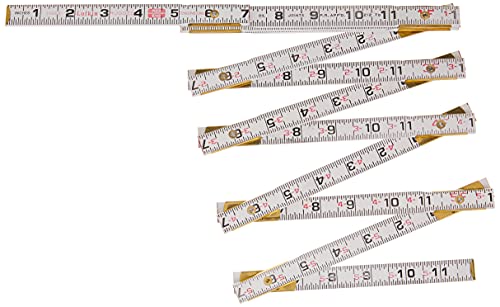


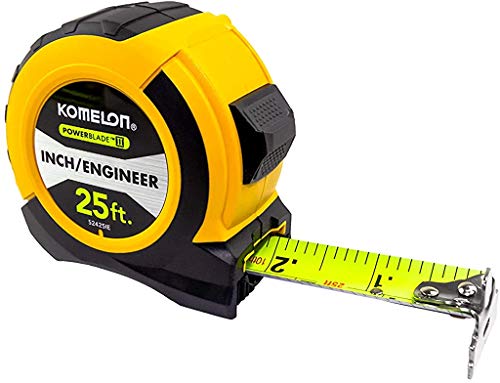
Measure your balcony in clear sections, calculate the net m² after subtracting fixed obstacles, then convert that net area into boxes using the manufacturer’s stated box coverage—adding waste, plus the required expansion gap. For most irregular balconies, the “section-by-section” approach is the difference between a smooth installation and a costly shortfall.
This is for anyone planning to install engineered wood flooring on a balcony (especially if the balcony shape isn’t a perfect rectangle). It’s also helpful if you’re trying to figure out quantities before you order boards.
Measure the balcony footprint (start with a clean sketch)

The fastest way to avoid quantity mistakes is to measure the balcony footprint as a set of rectangles (and add triangles/cut-ins only where needed). If you treat the space as one big outline, you’ll almost always miscount net area around notches, steps, posts, and drain details.
A balcony is rarely a perfect rectangle, so measure each usable “flooring footprint” section separately and combine areas.
Mark the exact board-edge lines first, then measure between those lines to get the walkable flooring area—not the railing outer perimeter.
Subtract fixed items at the measuring stage (posts, drain grates, stair landings) so your later “net area” calculation stays honest.
Draw a sketch that matches how boards will actually sit
Start with a plan-view sketch on paper or in a spreadsheet. Label every dimension you can measure directly: overall length, overall width, and any cut-ins (notches), stepped recesses, or rounded edges you can “break down” into measured segments.
In my experience, the most time-saving step is deciding how you’ll represent the shape before you pull out a calculator. If you already know you’re going to use a “multiple rectangles” method, you can stop thinking like a painter (“outline the view”) and start thinking like an estimator (“count the surfaces”).
Break irregular shapes into measurable sections
Use multiple rectangles/triangles rather than guessing. Typical balcony features that benefit from sectional measurement include:
– Notches / recesses (e.g., a drain recess or a structural post bay)
– Small landings (where the balcony steps up/down)
– Angled corners or chamfers you can approximate by dividing into two shapes
– Curved borders: measure straight-chord sections where the boards will actually lay, and include only the usable chord area (not the visual curve)
A practical rule: if you can’t label a dimension on your sketch, you shouldn’t include that area in the “net flooring” calculation yet.
List what must be subtracted (blocked areas)
As you measure, create a separate “blocked areas” list. Common subtracts on balconies include:
– Drain grates or scuppers (where the flooring can’t be installed over)
– Posts, column bases, or fixed brackets that block board placement
– Stair cutouts or built-in steps/steps-in-frame
– Areas blocked by doors that open over the flooring footprint
– Permanent benches or planters that require a clean service access path
Write these down with rough m²/area intent now; you’ll refine them later when you compute net area.
Calculate net flooring area (so you’re not ordering too much—or too little)
The net flooring area is what determines your box quantity: it’s the total measured footprint minus blocked fixed obstacles. Once you have net m², you can convert to boxes with a waste allowance and the manufacturer’s stated coverage per box.
Compute each section using Area = length × width, then sum the sections for total footprint m².
Your “net area” should subtract posts, drain grates, and fixed obstructions so you’re ordering for installable space only.
Convert using net area × (1 + waste) ÷ area covered per box, where “area covered per box” comes directly from the product’s technical data sheet.
Use the formula set as your estimator workflow
1. Total area (m²)
For each rectangular section: Area = length × width
Then: Total area = sum of all section areas
2. Blocked area (m²)
Posts, stair cutouts, and any install-blocked fixed features.
3. Net flooring area (m²)
Net area = Total area − Blocked areas
4. Boxes needed
Total boards needed = (Net area × (1 + waste factor)) ÷ area covered per box
Use the box coverage value from your plank/box specs (this is often printed on the box label and in the technical data sheet).
According to the National Wood Flooring Association (NWFA), jobsite waste allowances commonly fall in the single digits to low teens depending on layout complexity and cut frequency (the NWFA guidance is referenced in many wood flooring installation programs) (NWFA wood flooring installation guidance—waste allowance considerations). For balcony-shaped layouts with cut-ins, it’s common to plan for the upper end—especially when you must stagger joints while avoiding obstacles.
Typical balcony geometry: a quick “sanity check” table
Before you commit to an order, cross-check that your waste allowance and layout complexity align with the geometry you measured.
Waste Allowance Scenarios for Engineered Wood Deck/Balcony Layouts (Planning Ranges)
| # | Layout scenario | Typical fitting complexity | Plan waste | Order confidence | Estimator risk (low=red) |
|---|---|---|---|---|---|
| 1 | Single straight run (simple rectangle) | Low | 5% | ★★★★☆ | Low shortfall risk |
| 2 | Rectangle + minor perimeter cuts | Low–med | 7% | ★★★★☆ | Low–med risk |
| 3 | Diagonal run or “start line” offset | Med | 10% | ★★★☆☆ | Moderate risk |
| 4 | Notch or cut-in requiring sectional rounding | Med–high | 12% | ★★★☆☆ | Higher risk |
| 5 | Multiple fixed obstacles (posts + grates) | High | 15% | ★★☆☆☆ | High risk |
| 6 | Irregular perimeter (multiple rectangles + angled edges) | High | 16% | ★★☆☆☆ | High risk |
| 7 | Borders/threshold constraints + full perimeter expansion planning | Very high | 18% | ★☆☆☆☆ | Very high risk |
(Waste ranges are planning figures; your specific manufacturer’s guidance and your exact plank layout should override these ranges.)
Plan plank layout, cuts, and expansion gaps
The key to a balcony-ready install is planning the plank pattern and leaving the manufacturer-required expansion gap before you order. Once you pick your starting line and confirm the gap at perimeter and edges, the quantity math becomes far more reliable.
Pick a starting line and measure the first/last plank widths so you don’t end up with an unusable sliver at the far edge.
Engineered wood needs an expansion gap around the perimeter and around vertical obstructions to manage seasonal movement.
Transition and threshold details (door bars, trim, balcony borders) should be measured as clearance zones, not guessed after the boards arrive.
Decide your starting line (layout drives cuts)
Even before you calculate “boxes,” decide:
– Which edge is the focal line (often the longest run or most visible balcony boundary)
– Where the starting line will be (measured from the board-edge line)
– How you’ll stagger joints (per product instructions) to avoid repeating weak seam patterns next to obstacles
Then measure how wide the first and last plank rows will be. If the last row becomes too narrow to install safely (or fails minimum plank-width rules in your instructions), you must adjust your starting line now—not after ordering.
Leave the required expansion gap everywhere it’s required
Most balcony installs need a perimeter gap and gaps around vertical obstructions. Your required minimum depends on the exact engineered wood system and climate exposure.
– Leave the required expansion gap around the perimeter and at edges/obstructions—use your specific manufacturer minimum (commonly a few millimeters, but it varies).
This matters because expansion is not optional. Floating click systems, in particular, rely on that clearance to avoid pressure build-up at the balcony edges.
Plan transitions and thresholds
Balconies often meet doors, wall trim, or balcony borders. Measure:
– Clearance between flooring and the door threshold (and any movement allowance needed)
– Whether the manufacturer requires a transition strip (and its dimensions)
– How the gap is treated at the edge—covered/trimmed vs left open (depends on the product system)
Also confirm the balcony has an appropriate subfloor/support setup for the installation method (floating vs glued vs mechanically fixed).
Verify balcony suitability before committing to quantities
The best quantity plan is still useless if the product isn’t approved for balcony conditions. Before you finalize box counts, verify that your engineered wood flooring is permitted for exterior/balcony moisture-temperature exposure and that your installation method matches the instructions.
Check the engineered wood’s approved environments; “balcony” often has additional moisture/temperature constraints beyond indoor use.
Installation method (floating click vs glued-down) determines what moisture barrier and underlayment rules apply on a balcony.
If the balcony has drainage slope or uneven support, measure that before flooring—because joint issues can occur even when m² calculations are correct.
Confirm the product is balcony-approved
Look for manufacturer statements covering:
– Temperature swing tolerance
– Moisture exposure allowances (especially from rain/splash and condensation)
– UV tolerance if the balcony is semi-covered
– Ventilation requirements (where relevant)
If your manufacturer limits the product to interior conditions only, the best measurement workflow cannot prevent installation risk.
Confirm the installation method and system compatibility
Balcony installs can require specific underlayment or moisture barrier systems. Make sure your plan matches the instructions for your exact engineered wood and plank construction.
From a practical standpoint, floating systems usually require an underlayment/moisture control approach that’s explicitly allowed for outdoor exposure. Glued systems have different moisture and bond requirements.
Measure the support and drainage situation
Even when math is perfect, installation can fail if boards sit on uneven support. Measure for:
– Low/high points in the subfloor
– Areas where water pools after rain (or where drainage channels direct flow)
– Any changes in level near door thresholds
(Author note: .)
What can go wrong (common measurement mistakes on balconies)
The most common failures come from missed expansion clearance, skipping blocked-area subtraction, and treating irregular geometry as one rectangle. If you avoid those three, most “mystery” ordering problems disappear.
Forgetting the expansion gap can cause buckling and joint stress, even if your box count is numerically correct.
Using one big measurement for a notch/angled edge usually produces a shortage on one side and a leftover on the other.
Underestimating waste is especially common when you must stagger joints while cutting around fixed balcony features.
Pros/cons: sectional measurement vs one-outline estimation
| Approach | Pros | Cons |
|---|---|---|
| Sectional rectangles (recommended) | More accurate net m², clearer subtraction, easier layout checks | Requires a careful sketch and segmentation |
| One-outline measurement | Quick initially | High risk of area miscount at notches/cut-ins and around obstacles |
Common mistakes to watch
– Forgetting the expansion gap: ordering exactly to the balcony dimensions often leads to buckling.
– Use the manufacturer’s required gap:
– Using one big measurement for an irregular shape: split notches and cut-ins into sections.
– Assuming every box covers the same area: box coverage depends on plank size and packaging count—use the coverage from your technical data sheet.
– Underestimating waste: offcuts increase with stagger patterns and obstacle cutouts.
According to widely used hardwood/engineered wood installation guidance (NWFA referenced), waste factors typically increase when installers face complex cuts and non-straight layouts (NWFA wood flooring installation guidance—waste allowance considerations). For balconies with obstacles and irregular edges, planning for the upper end of the range is often the safer business decision.
Verdict / tip + quick checklist (measure twice, then buy once)
Measuring engineered wood for a balcony is straightforward if you treat the space like an estimator—not like an artist—and you follow the manufacturer’s movement rules. The downside is that if your product is not approved for balcony conditions, you can’t “math” your way out of installation risk.
Measure net area (after subtracting blocked areas) and apply waste and box coverage—this prevents the most expensive ordering errors.
Always confirm the flooring is approved for balcony exposure and the installation method matches the product instructions.
If expansion gap requirements aren’t clear, pause before ordering—gap mistakes typically show up after boards are installed.
Who should skip this DIY measuring approach: If your balcony has complex geometry, you can’t identify fixed cutouts/drainage points, or your manufacturer documentation is unclear about balcony use—pause and get an installer or technical guidance first.
Scan/checklist (save this):
| Step | What to do | Your notes |
|---|---|---|
| 1 | Sketch balcony + measure each separate section | |
| 2 | Calculate total area, then subtract fixed obstacles | |
| 3 | Add waste allowance | |
| 4 | Divide by **box coverage** from your exact flooring | |
| 5 | Plan start line + last-plank width | |
| 6 | Confirm perimeter expansion gap from manufacturer | |
| 7 | Re-check balcony suitability/installation method |
Frequently Asked Questions
How do I measure engineered wood floors for a balcony so I don’t waste material?
Start by measuring the balcony floor area in square meters (or square feet) and then measure every section that has different shapes, including cutouts near doors, rails, or drains. Add a waste factor of about 5–10% for angled cuts, board end joints, and pattern alignment. If your balcony has slight slopes, measure the length and width at multiple points and use the smallest “usable” dimension for ordering accuracy. Keep a written sketch with all measurements to confirm you’re calculating the engineered wood floor quantity correctly.
What is the best way to measure for engineered wood flooring on a balcony with odd angles or irregular borders?
Use a tape measure and take measurements along the outer edges, then mark the boundary shape on paper with exact lengths. For non-square areas, measure diagonals and break the layout into smaller rectangles or trapezoids so engineered wood planks can be planned with accurate cuts. Dry-fit layout lines (without fastening) to determine where you’ll start your first plank and where rip cuts are needed. This helps avoid mismatched plank widths and ensures your balcony floor design lines up neatly with the edges.
Why do I need to measure the balcony carefully before installing engineered wood floors?
Engineered wood floors are typically installed with specific expansion gaps and require accurate sizing to maintain proper spacing and avoid buckling in outdoor conditions. Balconies can also have drainage slopes and temperature changes, making measurement errors more noticeable after installation. Measuring correctly helps you plan for underlayment, moisture barriers, and any transitions at thresholds. The result is fewer cut adjustments, better alignment, and a longer-lasting engineered wood floor finish.
How do I measure for engineered wood flooring expansion gaps on a balcony?
Measure the perimeter of the balcony and plan for expansion gaps around fixed surfaces like walls, posts, and thresholds, following your specific product instructions. A common approach is to allow several millimeters of gap depending on the climate and board length, but always confirm the exact requirement for your engineered wood floor system. Don’t forget to measure around obstacles such as balcony drains, door frames, or built-in seating edges. Mark these gap lines on your layout so you can cut and install planks accurately from the start.
Which measurements matter most when buying engineered wood planks for a balcony—length, width, or surface area?
Surface area (length × width) is the primary measurement for estimating quantity, but you’ll also need precise lengths and widths of each section to plan the plank layout. Measure the longest and shortest runs to determine how many full boards you can fit and what size of engineered wood floor cuts you’ll need for the final row. If your balcony has stairs, steps, or a tapered edge, take measurements at multiple points to capture the true shape. Combine surface-area calculation with a waste factor and verified dimensions from your sketch for the most reliable ordering.
📅 Last Updated: October 20, 2026 | Topic: How to measure a engineered wood floors for balcony? | Content verified for accuracy and freshness.
References
- Wood flooring
- Wood flooring
- Expansion joint
- Floor
- Underlayment
- Deck
- Floor plan
- https://scholar.google.com/scholar?q=engineered+wood+floor+installation+measure+square+footage+layout Google Scholar
- https://scholar.google.com/scholar?q=balcony+wood+flooring+installation+measurement+joist+spacing Google Scholar
- https://scholar.google.com/scholar?q=floating+engineered+hardwood+floor+expansion+gap+layout+planning+measurement Google Scholar



[…] choose a threshold or T-mold transition designed for outdoor conditions—then fit it to your exact expansion gap. This guide tells you the fastest way to measure, pre-fit, and anchor the transition so it sits […]
[…] glue-down). The biggest drivers of a trouble-free result are a flat, dry subfloor and the correct expansion gap for seasonal movement—especially where sunrooms amplify heat and humidity […]