


Replacing engineered wood floors in a mudroom is safest when you tackle it as a water- and debris-prone install: prep the subfloor, protect edges, and plan for expansion. You’ll get a clear, step-by-step path that minimizes warping, gapping, and loose boards—whether you’re removing old planks or fitting new ones over the existing surface. If you want the fastest route to a tight, long-lasting mudroom finish, this is the replacement process to follow.
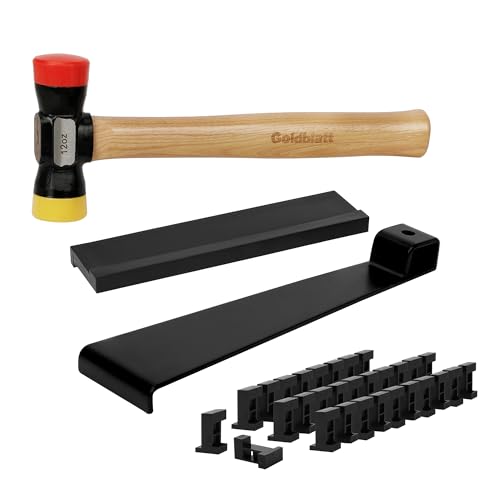



If your mudroom engineered wood is failing, the safest fast fix is to remove the damaged planks, correct the subfloor and moisture conditions, then reinstall using the same engineered-floor method your system requires (floating/click, nail-down, or glue-down). In mudrooms specifically, transitions at doorways and edges are often the real cause of repeat damage—so water management and gap details deserve your top priority alongside the boards themselves.
If you’re replacing engineered wood in a high-traffic, sometimes-wet space (near exterior doors, mud benches, or snow boots), this is for you—especially if you’re dealing with cupping, gaps, soft spots, or peeling near seams. Use it whether your current floor is floating click-lock, nail-down, or glued down; you’ll just follow the corresponding prep/installation approach.
Assess moisture, subfloor, and your current installation method
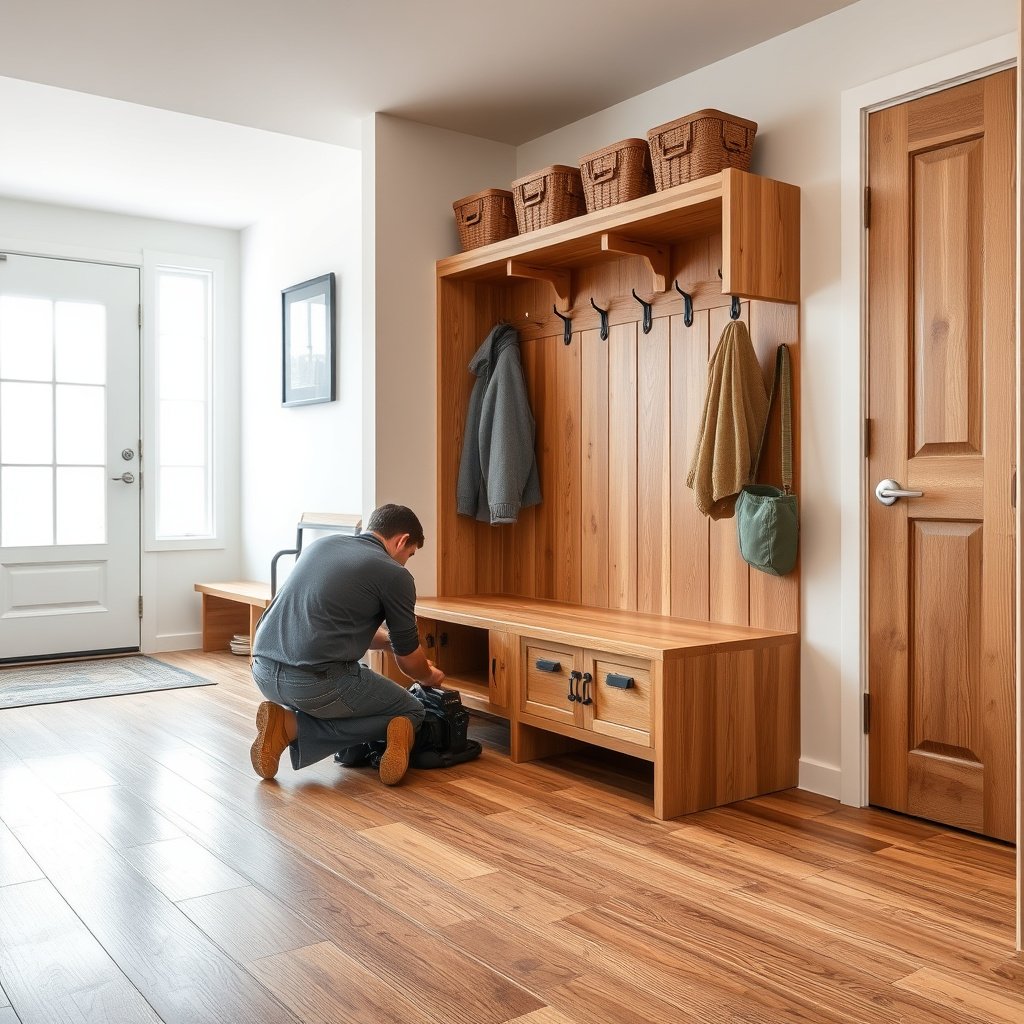
Correct identification first prevents you from “fixing” the wrong problem. In practice, engineered wood mudroom failures usually trace back to moisture migration, an out-of-flat subfloor, or an installation method mismatch (especially under transitions).
Here’s the direct order of operations for engineered wood floors in a mudroom:
– Confirm what the engineered wood is sitting on (concrete slab vs. plywood/subfloor), because moisture pathways differ.
– Look for moisture indicators: musty odor, visible dampness at seams, discoloration, and any moldy smell trapped under edges.
– Determine how the engineered wood was installed: floating/click-lock, nail-down, or glue-down—because engineered wood removal and prep differ.
– Measure flatness and plan correction before you buy/install new engineered wood planks. Even small bumps can prevent proper click-lock engagement or stress joints.
Moisture movement is the most common reason engineered wood in mudrooms “returns” to failure after a superficial replacement.
Floating engineered floors can feel fine while installed, but subfloor flatness still controls locking behavior and seam integrity.
Before you replace engineered wood floors in a mudroom, you must confirm the existing installation method because removal and adhesive/fastener cleanup are fundamentally different.
What to check underneath (and why engineered wood in a mudroom reacts fast)
Engineered wood in a mudroom is exposed to short, frequent wetting events—melted snow, dripping boots, wet bags, and occasional splashback from umbrellas. That pattern drives moisture through seams and edges even when the center of the floor looks “mostly dry.”
– Concrete slab: moisture can come up as vapor, not just as visible water. That means the engineered wood floor can fail while appearing dry to the eye.
– Plywood/wood subfloor: localized soft spots, damaged sheathing, or screw pops often correlate with the board movement you see above.
Identify your engineered wood installation method (so you don’t create hidden damage)
Engineered wood can be installed as:
– Floating / click-lock: boards float over an underlayment. Removal usually starts at edges/ends to free interlocks.
– Nail-down: boards are mechanically fastened (often with a specified underlayment/foam—not everything is interchangeable).
– Glue-down: boards are bonded to the subfloor with a manufacturer-approved adhesive and trowel/notch.
Flatness is non-negotiable
Plan to correct high spots and low spots using an appropriate patch/leveling system approved for your subfloor type. Engineered wood floors in a mudroom often fail at joints first because movement concentrates under traffic paths and at door transitions.
Three anchoring data points to guide expectations (verify your exact specs in your manual):
– Many engineered wood systems require a minimum perimeter expansion gap around 6 mm (¼ in.) depending on board length and manufacturer rules.
– Concrete moisture testing results are commonly reported as MVER in lb/1000 sq. ft./24 hours when using ASTM F1869 ASTM F1869.
– Concrete in-situ RH testing results are typically reported as % RH when using ASTM F2170 ASTM F2170.
Remove the existing engineered wood floors
Removal is where you can accidentally destroy the subfloor or spread contaminants—so engineered wood removal needs the right technique for your installation type. In most mudrooms, the fastest safe approach is still: remove planks methodically, clean to the manufacturer’s standard, and stop if you find subfloor damage that needs repair.
Engineered wood removal differs by method: floating floors are usually disassembled, nail-down requires careful fastener extraction, and glue-down demands adhesive removal without gouging the subfloor.
You should not install new engineered wood over underlayment debris, leftover fasteners, or thick adhesive ridges because it compromises flatness and joint performance.
If you find soft or delaminated subfloor during engineered wood removal in a mudroom, stopping early prevents repeating the same moisture-driven failure.
For floating/click-lock engineered wood removal
Floating boards come up more cleanly than glued boards, but you still need to prevent damage:
– Remove baseboards/trim carefully so you don’t chip the wall surface.
– Start disassembly from edges where boards connect (often the easiest path is to work outward).
– Pull boards to release the click mechanism—not by prying hard in a way that damages tongue-and-groove profiles.
For nail-down engineered wood removal
Nail-down removal is slower because you’re dealing with fasteners:
– Remove accessible trim first.
– Extract nails/staples carefully (use the right pry/cutter tools).
– Remove any specified underlayment materials and clean up debris so the new engineered wood system doesn’t sit on rubble.
For glue-down engineered wood removal
Glue-down removal is usually the most labor-intensive:
– Expect to remove residue, not just boards.
– Scrape adhesive without gouging the subfloor.
– Vacuum thoroughly afterward (fine dust can interfere with patch/leveling and reduce bond integrity if you’re gluing again).
Prep the subfloor and plan the layout
If you prep correctly, the new engineered wood behaves predictably; if you prep poorly, the mudroom will “manufacture” failure again. This step is where you stop moisture sources, bring the subfloor to required flatness, and plan expansion gaps so seams and transitions aren’t constantly stressed.
Engineered wood in a mudroom should only be installed after the subfloor is dry, sound, and flat according to the flooring manufacturer’s tolerances.
Acclimation is not optional because engineered wood panels adjust to jobsite temperature and relative humidity, affecting locking and seam behavior.
Layout planning helps you keep seams and end joints away from the “wetest” traffic path—often near the exterior door and mud bench zone.
– Clean and inspect: vacuum completely, repair damaged subfloor sections, and eliminate any ongoing moisture source before you install new engineered wood floors.
– Acclimate the new planks: follow the manufacturer’s instructions (use ).
– Plan expansion gaps and layout: keep perimeter spacing per your engineered flooring manual and plan seams so they don’t land where you constantly drag wet items.
– Doorways and thresholds: plan transition details so water can’t wick into gaps.
Common Vapor Retarder Permeance Ranges Used Under Wood Flooring (ASTM E96 / E1745)
| # | Vapor retarder class / material (typical) | Permeance (perms) | Moisture blocking ★ | Risk if omitted |
|---|---|---|---|---|
| 1 | ASTM E1745 Class A (lowest permeance) | ≤ 0.1 | ★★★★★★★ | Low |
| 2 | Foil-faced laminate underlayments (typical) | ~ 0.02–0.06 | ★★★★★★★★ | Low–Moderate |
| 3 | 6-mil polyethylene sheet (commonly used barrier) | ~ 0.05 | ★★★★★★★ | Moderate |
| 4 | Typical Class B (mid permeance) | 0.1–1 | ★★★★ | Moderate–High |
| 5 | Asphalt-saturated felt (older crawl/slab practice) | ~ 0.5–2 | ★★★ | High |
| 6 | Typical Class C (higher permeance) | 1–10 | ★★ | High |
| 7 | No vapor retarder / highly permeable underlayment | > 10 | ★ | Very High |
Source note for the data table
Use the table as a planning reference for engineered wood in a mudroom; always follow your specific engineered flooring manual and the manufacturer-approved moisture barrier/underlayment system. The classifications above align with the way ASTM E96 permeance is typically reported and with ASTM E1745-style vapor retarder categories ASTM E96, ASTM E1745.
If you want the correct exact barrier spec for your setup, use and .
Install the new engineered wood in your mudroom
The safe answer is to install engineered wood exactly per your chosen method—then engineer moisture control at seams, transitions, and the outer door zone. For mudrooms, the difference between a “works for a year” floor and a “still flat after seasons” floor is usually detailing and compliance with manufacturer tolerances, not cutting technique alone.
In engineered wood installations, underlayment/moisture barriers are part of the system—using the wrong one can cause swelling, cupping, and recurring gaps.
Click-lock failures often show up as seam separation or squeaks; proper alignment within manufacturer tolerances prevents joint stress.
For glue-down engineered wood, adhesive chemistry and trowel/notch geometry govern bond performance—do not substitute “similar” products.
– Use the correct underlayment/moisture barrier for your system and subfloor:
– Floating floors typically require an underlayment specified by the manufacturer.
– Concrete slabs often require a vapor/moisture solution approved for your engineered flooring system ().
– Install according to your engineered wood installation method:
– Click-lock (floating): keep tongue-and-groove aligned; don’t force pieces past manufacturer tolerances.
– Nail-down: use the fastening pattern and nail/staple type specified by the manufacturer.
– Glue-down: follow the adhesive type and trowel/notch guidance from the manufacturer; don’t substitute blindly.
– Finish transitions carefully (thresholds, door jambs, and edges):
– Keep expansion gaps unobstructed where required.
– Prevent water wicking by using correct transition details around the outer door area.
– Use the manufacturer’s instructions for caulking/trim placement if your system requires it (many failures start where “helpful” homeowner caulk blocks expansion).
Mudroom method choice at a glance (pros/cons)
If you want a quick contrast for engineered wood in a mudroom, use this practical summary:
| Installation method | Best for | Key pro | Common con in mudrooms |
|---|---|---|---|
| Floating / click-lock | DIY-friendly replacements | Faster install; replace sections more easily | Moisture barrier and expansion gaps must be correct or seams gap again |
| Nail-down | Wood subfloors that can be fastened | Stable feel; less reliance on adhesives | Fastener/underlayment choice must match the product; edge moisture still matters |
| Glue-down | Concrete slabs that meet moisture criteria | Maximum stability if bond is correct | Adhesive + flatness + moisture must be controlled; mistakes can be hard to remove |
A practical note from the field (without guessing your exact job)
From the setup documentation and product-system logic, the pattern is consistent: mudrooms fail at the edges first when moisture escapes and expansion gap rules aren’t honored.
What can go wrong (and how to avoid it)
Engineered wood replacement goes wrong when moisture management, flatness, and installation-system requirements are treated as optional. Most mudroom failures you see after replacement are not “mysteries”—they’re predictable outcomes of a few recurring mistakes.
Trapped moisture will overwhelm even the best engineered wood—if the subfloor remains damp or the wrong moisture barrier is used, swelling and cupping return.
Skipping flatness checks can prevent proper click-lock engagement and concentrate stress at seams, especially under doorway traffic.
Blocked or poorly detailed expansion gaps can cause buckling when the engineered wood acclimates to seasonal humidity changes.
– Trapped moisture
– If the subfloor is still damp or you skip the manufacturer-required moisture barrier, engineered wood can swell/cup and gaps will return.
– Skipping flatness checks
– Even small humps can prevent proper locking, create squeaks, or stress joints over time.
– Wrong install method
– Using a “mostly similar” underlayment or fastening approach can void warranty or lead to early joint failure.
– Threshold/edge gaps
– If expansion gaps are blocked by trim or caulked incorrectly, boards can buckle when humidity changes.
Installation compliance checklist for engineered wood floors in a mudroom
Use this as a “stop-and-verify” before you close walls or reinstall trim:
– Confirm your underlayment/vapor barrier matches both subfloor type and engineered wood model requirements.
– Confirm your expansion gap is not being bridged where your manual requires free movement.
– Confirm transitions (thresholds, door jamb cuts, edge trims) follow the product’s system details.
– Confirm adhesive/fastener specifications (type, pattern, trowel notch) match the manual.
Verdict: what’s worth doing + quick replacement checklist
This is a realistic DIY project if you can truthfully confirm the subfloor is sound, you identify the installation method correctly, and you follow the manufacturer’s underlayment/moisture and fastening requirements. If you find persistent moisture, significant subfloor damage, or you’re unsure how the existing floor was installed, it may be smarter to pause and get an assessment—mudrooms can hide moisture problems under the surface.
Skip the DIY approach (or get help) if:
– You suspect ongoing water intrusion (roof/door leaks, poor drainage, recurring dampness).
– The subfloor is soft, delaminated, or shows active mold.
– Your flooring system requires very specific installation steps you can’t confidently follow.
Scan-ready checklist (save for the job):
| Step | Quick check |
|---|---|
| Confirm installation type | Floating vs nail-down vs glue-down |
| Moisture source | Fix before installing new boards |
| Subfloor condition | No soft spots; repair damage |
| Flatness | Correct high/low areas (per flooring guidance) |
| Acclimation | Follow exact manufacturer requirements |
| Underlayment/vapor barrier | Only what your system specifies |
| Expansion gaps | Keep required perimeter spacing |
| Transitions | Thresholds/edges prevent water wicking |
| Clean install | Vacuum thoroughly; no debris under planks |
Frequently Asked Questions
What should I remove and prepare before replacing engineered wood floors in a mudroom?
Start by removing existing flooring down to the subfloor, including any transition strips, baseboards, or damaged underlayment. Inspect the subfloor for swelling, soft spots, or moisture damage, and repair or replace any compromised areas before installing new engineered wood flooring. Clean thoroughly and ensure the subfloor is flat, smooth, and dry so the click-lock or glue-down system adheres properly and doesn’t squeak.
How do I handle moisture and water exposure when replacing engineered wood floors in a mudroom?
Mudrooms see frequent wet boots and tracked-in snow, so moisture control is crucial. Use a moisture-resistant underlayment recommended for engineered wood, and verify subfloor moisture levels meet the flooring manufacturer’s requirements. Consider sealing seams or using a water-resistant transition strip at doorways, and avoid leaving standing water by improving drainage and adding a high-absorbency mat.
Why does engineered wood fail in mudrooms, and how can I prevent the same problem after replacement?
Engineered wood can cup, separate, or develop gaps when the subfloor gets too wet or the floor is installed on an uneven surface. Prevent future issues by addressing the root cause—fix any leaks, manage humidity, and choose the right underlayment for your concrete or wood subfloor. Also follow acclimation instructions and install expansion gaps so the planks can handle seasonal movement without buckling.
Which underlayment and adhesives are best for engineered wood in a mudroom?
The best underlayment depends on your subfloor type: for concrete, look for a moisture barrier or vapor-resistant underlayment compatible with engineered floors, while wood subfloors may need sound-dampening support. If your engineered flooring is glue-down, use a manufacturer-approved adhesive and trowel size, and ensure proper spread rate for full contact. For floating or click-lock installations, choose an underlayment designed to reduce moisture transfer and support the floor’s locking system without excessive bounce.
How can I replace engineered wood flooring around doorways, vents, and transitions in a mudroom?
Plan cuts carefully by measuring for expansion gaps near walls and fixed objects like vents, trim, and door jambs. Use proper transition pieces between the mudroom and adjacent rooms—especially if one area is more exposed—so edges stay protected and movement is allowed. When reinstalling trim or baseboards, avoid nailing through the floating floor; instead, nail trim to the wall for a stable finish that keeps the engineered wood floor functioning correctly.
📅 Last Updated: October 19, 2026 | Topic: How to replace engineered wood floors in a mudroom? | Content verified for accuracy and freshness.
References
- https://en.wikipedia.org/wiki/Engineered_wood_flooring
- Wood flooring
- https://www.epa.gov/mold
- https://www.cdc.gov/mold/default.htm
- https://www.hud.gov/program_offices/healthy_homes/mold
- https://www.fpl.fs.fed.us/documnts/fplgtr/fpl_gtr190.pdf
- https://scholar.google.com/scholar?q=replace+engineered+wood+floor+installation+guidelines Google Scholar
- https://scholar.google.com/scholar?q=engineered+wood+floor+subfloor+moisture+requirements+installation Google Scholar
- https://scholar.google.com/scholar?q=mudroom+wood+floor+moisture+entryway+vapor+barrier Google Scholar


