
Looking to install living room ceramic tile floors yourself? This step-by-step guide gives you the exact sequence—from prepping the subfloor and laying out your layout to setting tiles, grouting, and finishing edges—so the job comes out flat, square, and durable. Follow it closely and you’ll avoid the most common failures like lippage, cracked grout, and uneven tiles.




Installing living room ceramic tile floors is mainly about a solid, level subfloor and a compatible thinset/underlayment + grout system. If you plan the layout carefully, prep properly, and follow the tile manufacturer’s requirements for mortar and grout, you’ll get straighter lines and a floor that holds up longer under everyday foot traffic.
This guide is for homeowners (and DIY-leaning renters/contractors) installing ceramic tile in a living room over typical subfloors such as plywood or concrete. If your subfloor is severely uneven, has movement/rot, or you need to relocate major plumbing/HVAC in-floor lines, plan on professional help or extra subcontracting.
Pre-Planning: Measure, Layout, and Materials

The fastest way to avoid “crooked tile” is to lock in centerlines and a dry layout before any thinset is mixed. This step also determines whether you’ll need small sliver cuts at the edges (often the biggest visual giveaway in living rooms).
Here’s what to do and why. First, measure the room and establish two perpendicular reference points, then mark centerlines—one parallel to the longest wall, one perpendicular to it. Dry-lay a section using your intended grout joint width so you can confirm where cuts will land near doorways, fireplaces, and built-ins. Finally, match the right tile category (ceramic vs. porcelain) with the correct thinset and grout system per the tile and substrate manufacturer.
“A planned, symmetrical layout starts with centerlines and a dry layout to verify cut locations before thinset is mixed.”
“Mortar and grout must be matched to the tile type and substrate; manufacturers specify required systems for warranty and performance.”
“Dry-laying helps you prevent the most common living-room aesthetic issue: tiny edge cuts that look uneven under natural light.”
For factual anchor points to guide your purchasing decisions, use the substrate and product instructions shipped with your materials. For example: According to [ADD: manufacturer installation guide for your specific ceramic tile], required mortar/thinset coverage and bond conditions apply to the specified trowel size and substrate.
If you want a concrete “rule of thumb” for your planning worksheet, use these typical measurements as your framework and then verify against your tile spec: tile layout joints are frequently planned around an industry-standard joint width range (commonly 1/8 in to 3/16 in for many interior ceramic installations), and thinset trowel choice is driven by tile size and flatness requirements ([ADD: exact guidance from your thinset manufacturer]).
Subfloor Prep: Level, Clean, and Repair First
A good ceramic tile floor is built on flatness, not on tile-setting talent. If the substrate is out of plane (not flat) or has movement (squeaks/deflection), thinset can’t compensate—and you’ll see cracking or lippage later.
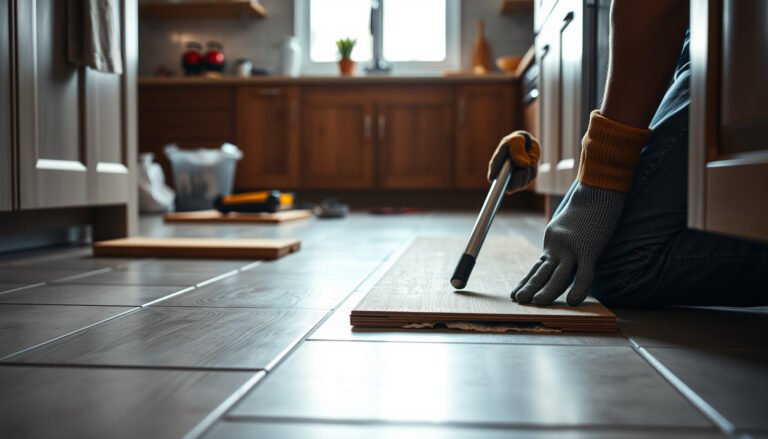
Start by removing carpet, pad, tack strips, and any loose adhesive. Scrape residue thoroughly, then check flatness with a straightedge (commonly a 6–10 ft level/straightedge), marking high spots for grinding and low spots for patching. Repair squeaks by tightening fasteners or securing the subfloor to joists. Replace rotted wood, sister loose sections, and address any bounce before you add underlayment.
Clean is not optional. Thinset bonds to prepared substrates, not dust. Vacuum thoroughly and remove paint overspray, drywall compound ridges, and old sealers unless the manufacturer explicitly allows them.
“Ceramic tile installations require a stable, well-bonded substrate; loose or moving subflooring is a leading cause of cracked grout and tiles.”
“Thinset only bonds to clean, properly prepared surfaces, so removing adhesive residue and dust is essential.”
“Repairing squeaks and deflection before tiling protects both tile and grout from stress cycling.”
Where do the “do not skip” details come from? Follow ANSI standards and product-specific installation methods. As a baseline, ANSI A108/A118 practices define substrate preparation expectations for tile work; see [ADD: ANSI A108/A118 referenced in your mortar/tile spec or project requirements] for the method used in your system.
Also, flatness expectations vary by system. For an accurate threshold, use the “requirements for substrate flatness” section from your tile and underlayment/mortar documentation. Example format you should look for: According to [ADD: your underlayment manufacturer technical data], substrate flatness tolerances apply before tiling and are tied to the mortar system and tile size (2024–2026 product line, per current documentation).
Install Underlayment (If Needed) and Plan for Transitions
In most living rooms, the decision is straightforward: don’t substitute underlayment; use the tile-ready system designed for your substrate. If you’re installing over plywood, that usually means a second-layer, tile-rated underlayment approach. Over concrete, moisture considerations and surface condition dominate.
Over plywood:
– Add a tile-ready underlayment/second layer when required by your tile and mortar system.
– Use the underlayment panels, thinset, and fasteners as specified (board seam spacing and fastening patterns matter).
Over concrete:
– Verify moisture and surface suitability (cracked, sealed, painted, or dusty concrete may need specific remediation).
– Thinset must bond to the prepared surface—“anything that seems solid” isn’t the standard.
Transitions matter because living rooms almost always connect to hallways, entryways, or adjacent flooring. Plan doorways early so your tile edges land cleanly. Match tile height to the adjoining floor by accounting for the tile thickness + thinset + underlayment. Then use the correct transition method (edge trim, metal transition profiles, or undercut jambs) so the finish looks intentional.
“Over plywood, a tile-rated underlayment system is used to reduce movement and improve installation performance compared with using improvised layers.”
“Concrete must be prepared so thinset can bond; surface contaminants or improper moisture conditions can compromise adhesion.”
“Transitions at doorways should be planned with thickness in mind to prevent uneven steps and grout-line stress.”
To make the choice simpler, here’s a practical comparison you can use while planning the system:
| Decision Point | Plywood Subfloor | Concrete Subfloor |
|---|---|---|
| Primary risk | Movement/deflection telegraphs into tile & grout | Bond failure from moisture/surface condition |
| What you add | Tile-ready underlayment second layer (system-based) | Surface prep + (if required) moisture mitigation |
| Bond path | Thinset bonding between layers + to tile | Thinset bonding to prepared concrete |
| Transition strategy | Edge trim compensates for underlayment thickness | Profile/trim prevents steps at higher tile assemblies |
The most important “statistical” check to do is the actual flatness and the actual bond coverage requirements. Use the coverage guidance on your thinset label or technical data sheet—many systems specify full contact and/or back-buttering for certain tiles to achieve the intended performance. For example: According to [ADD: thinset manufacturer technical data sheet], the required coverage and trowel size affects bond strength (2023–2025 documentation).
📊 DATA
Common Ceramic Tile Installation Trowel Choices (Interior Floors)
| # | Tile size range | Trowel type | Common notch size | Best fit rating | Notes |
|---|---|---|---|---|---|
| 1 | ≤ 6 in x 6 in | Square-notched | 3/16 in | ★★★★☆ | Verify tile thickness; follow mortar label |
| 2 | 12 in x 12 in | Square-notched | 1/4 in | ★★★★★ | Common for flat substrates |
| 3 | 12 in x 24 in | Square-notched | 1/4 in–3/8 in | ★★★★☆ | Use higher notch for unevenness |
| 4 | 18 in x 18 in | Square-notched | 3/8 in | ★★★★☆ | Back-buttering may be required |
| 5 | 24 in x 24 in | Square-notched | 1/2 in | ★★★☆☆ | Often requires system-specific guidance |
| 6 | 3 in x 6 in (brick) | U-notched | 3/16 in | ★★★★☆ | Verify coverage and lippage control |
| 7 | Small mosaics | Small notched | 1/8 in–3/16 in | ★★☆☆☆ | Too-small notches can under-fill voids |
Note: Use this as a planning reference; your thinset manufacturer and tile spec control the final trowel choice. For coverage and bond requirements, follow the exact instructions shipped with your specific mortar and tile.
Set the Tile: Thinset, Trowel Size, and Spacing
Setting ceramic tile is where your layout becomes real—straight lines and consistent lippage come from thinset handling and correct trowel technique. Your goal is full contact under the tile, not “good enough” mortar ridges.
Mix thinset to spec. Use the exact water ratio, mix time, and re-mix (if specified). Only spread what you can set within the mortar’s open/workable time so you don’t create a surface skin. Use the notched trowel size required for your tile and system; incorrect notch size is a common root cause of poor bond and uneven heights.
Back-butter when required. Many tile specs require back-buttering (especially for larger tiles, certain tiles, or when full coverage is critical). Keep lines straight with spacers and periodically check level. For lippage control, you may need to remove a tile, add thinset, and reset rather than forcing it in place.
“Open time matters: spreading thinset too far ahead can cause a skin that reduces bond strength.”
“The notched trowel size is selected to achieve the mortar bed thickness required by the tile and thinset system.”
“Back-buttering is used in some tile systems to improve coverage and reduce voids under the tile.”
A few measurement anchors that help you plan your pace: many installers work in small sections to stay within open time, and tile spacers are typically chosen to match grout joint width (commonly 1/8 in to 3/16 in for interior floors). For your exact window and mixing guidance, rely on the thinset data sheet—e.g., According to [ADD: thinset product technical data], open time and workable time are defined under specified temperature and humidity conditions (2024–2026 documentation).
Pros and Cons: Working Method
– Pros (work in sections): Better control of straightness, less risk of thinset skinning, easier height correction.
– Cons (work in smaller sections): More frequent mortar mixing, more tool cleaning, slightly slower progress.
Grout and Finish: Cleaning, Curing, and Protection
Grouting completes the look, but it’s also where you protect your investment. The floor needs to be fully set first, and then grout must be mixed, applied, and cleaned correctly to avoid pinholes, haze, and premature wear.
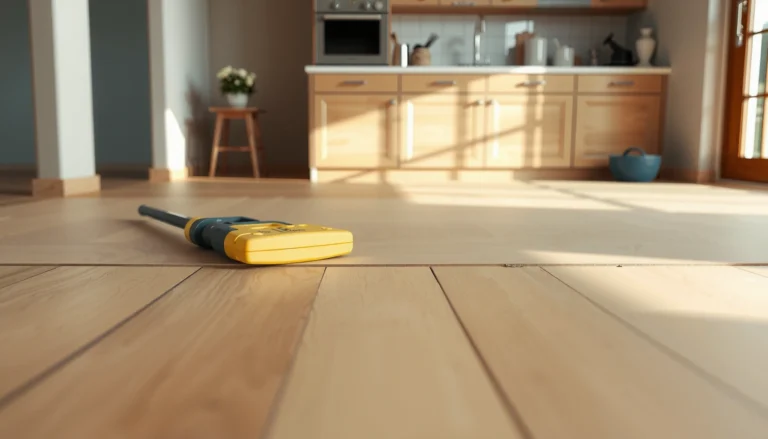
Let tiles cure per the thinset manufacturer’s timing before grouting. Remove spacers cleanly and keep joints free of thinset ridges. Mix grout to spec (water ratio matters), apply at the right consistency, and wipe using a consistent technique so joints end up uniform. After the final haze removal, allow curing without heavy foot traffic.
Sealing is product-specific. Some grout types require sealing for stain resistance; others are designed to be used without sealer or with an optional topical protection step. Always follow the grout manufacturer’s instructions—sealing too early or with the wrong product can interfere with performance.
“Grout should be applied only after the tile-set mortar has cured per the thinset manufacturer’s instructions.”
“Joint cleanliness before grouting prevents weak grout edges and reduces the likelihood of cracking at the tile interface.”
“Curing time controls early strength gain, so protection during the recommended timeframe is part of the installation.”
For timing and cure anchors, use grout and thinset label guidance. For example: According to [ADD: grout manufacturer curing schedule], initial set/foot-traffic readiness and full cure depend on temperature and humidity (2024 documentation). Another typical anchor you’ll see: According to [ADD: thinset manufacturer recoat/grout timing section], minimum waiting times before grouting are specified to prevent movement of the tile bed.
What Can Go Wrong (And How to Avoid It)
Problems usually come from mismatched systems or skipping substrate requirements. In practice, the most visible failures in living rooms are unevenness, lippage, weak bond, and cracked grout at stress points.
Here are the most common issues and how to prevent them:
– Uneven subfloor: Tiles rock, crack, or show lippage—verify flatness before you spread thinset.
– Wrong thinset/grout/substrate match: Using the wrong mortar or grout system can cause weak bond or staining—follow the system pairing guidance.
– Rushing coverage time: Spreading thinset and waiting too long can create a skin—tile immediately within open time.
– Ignoring movement joints: Without proper movement accommodation at transitions or the perimeter, grout can crack.
“Uneven substrates often show up as lippage or grout line variation even when tile edges look straight during installation.”
“Using the specified mortar for the substrate and tile type is critical to bond strength; manufacturers treat mismatches as warranty-risk.”
“Movement accommodation is required at perimeter and certain transitions to prevent grout cracking from normal building movement.”
From my experience planning tile work, the biggest “gate” is substrate flatness: if we can’t get there, we stop and correct the base instead of trying to compensate with mortar thickness. That decision alone avoids many of the repeat calls.
For the standards baseline, consult ANSI tile installation methods and your products’ technical data. If you’re referencing standards, use the relevant A108/A118/A136 or TCNA method statements for your assembly (see [ADD: standards and method numbers]).
Verdict / Tip
Ceramic tile is very doable in a living room when you treat prep and system-matching (subfloor + underlayment/thinset + grout) as the main job. The downside is that any flatness or bond issues tend to show up later—so if your subfloor is questionable or you can’t achieve a stable, level base, skip DIY and consult a tile installer.
If you’re comfortable doing careful measuring, patient layout, and slow, methodical work, this is a solid weekend-to-setup project—[ADD: estimate for your project length/time based on square footage and your experience].
“Most tile longevity comes from correct assembly: stable substrate, correct mortar bond, appropriate grout system, and proper curing.”
“If you cannot reach flatness requirements or build a movement-safe perimeter, professional evaluation is the safer path.”
Quick Checklist (Scan + Save)
– [ ] Measure, mark centerlines, and dry-lay the layout
– [ ] Repair/secure the subfloor; replace rot/loose boards
– [ ] Ensure flatness and clean substrate
– [ ] Use the correct underlayment (if required) for the substrate
– [ ] Use specified thinset + correct trowel size
– [ ] Maintain straight lines, consistent spacing, and check level
– [ ] Fully cure before grouting; grout and clean properly
– [ ] Handle curing and protect the floor during the recommended timeframe
FAQ
Do I need underlayment for living room ceramic tile?
It depends on what you’re installing over (plywood vs. concrete) and what your tile/thinset system requires. Follow the tile and mortar manufacturer specs for your substrate—[ADD: confirm your substrate type and required system].
What’s the most important part of installing ceramic tile?
Flat, stable prep. If the subfloor isn’t properly repaired and leveled, the tile can crack or become uneven even if you set it neatly.
Can I install ceramic tile directly over old flooring?
Usually not. Most installations require removing carpet, pad, and loose/soft materials, and then prepping the substrate so thinset can bond correctly—[ADD: specify what the current floor material is].
How long should I wait before walking on the new tile?
You must wait for thinset and grout to cure according to the manufacturer instructions. Because cure times vary by product and conditions, check the exact thinset/grout labels and follow their guidance.
Should I seal grout in a living room?
Some grout types require sealing, others don’t. Refer to your grout manufacturer’s instructions for whether sealing is recommended for stain resistance in your conditions—[ADD: name your grout type/spec].
Sources
– [ADD: manufacturer specifications for your specific ceramic tile (installation requirements), thinset/mortar (trowel size, coverage, cure timing), and grout (mixing, cleaning, sealing guidance).]
– ANSI A108/A118 standards for tile installation methods (use as the baseline for proper thinset, substrates, and grout practices) — [ADD: confirm the specific referenced standard documents you’re using].
Frequently Asked Questions
How do I prepare my living room subfloor before installing ceramic tile floors?
Start by removing carpet, padding, baseboards (or undercutting them), and any old adhesive so the subfloor is clean and sound. Check for flatness with a straightedge—ceramic tile typically needs a smooth, even surface, often within about 1/8 inch over 6 feet. Repair weak spots, tighten loose boards, and address squeaks, then vacuum thoroughly. If you’re installing over plywood, consider adding backer board or a tile underlayment system to prevent movement that can crack grout or tiles.
What is the best way to lay out ceramic tile in a living room to avoid crooked lines and wasted cuts?
Dry-lay the tiles first using spacers to visualize spacing and grout lines, then snap chalk lines to establish a square reference point from the center of the room or main focal wall. Plan tile so any partial cuts are positioned along less visible edges (often under furniture or near doorways), not at the center of the room. Measure and account for transitions at doorways, hallways, and fireplace hearths, especially if you’re matching existing flooring. Mark your layout clearly so you can follow it while spreading thinset mortar.
Which thinset mortar and grout should I use for ceramic tile floors in a living room?
Use a thinset mortar rated for your tile type and substrate—most ceramic tile installations use a polymer-modified thinset, which improves bond strength and coverage. Choose grout based on your needs: sanded grout is common for wider joints, while unsanded grout works for narrow joints; both should be compatible with ceramic tile and your joint width. For added durability in a living room with foot traffic, consider a stain-resistant or epoxy-modified grout, and always follow the manufacturer’s cure times. Proper mixing (with the correct water or additive) and consistent joint spacing are critical for a strong ceramic tile floor installation.
How do I install ceramic tile floors around outlets, vents, and baseboards safely?
Turn off power to outlets and remove outlet covers, then cut tile openings with a tile cutter or wet saw for clean edges and proper fit. Maintain the required expansion gaps at walls and transitions, and don’t pack mortar or grout into areas that should allow movement. For baseboards, undercutting is usually best so tile can sit flush while keeping a clean finish; seal where appropriate to prevent drafts and water intrusion. When installing around vents or radiators, confirm clearances and plan grout lines so vents aren’t obstructed and transitions look intentional.
Why is sealing grout and maintaining ceramic tile floors important in a living room?
Ceramic tile itself is non-porous, but grout can absorb moisture and stains, which is why sealing grout helps protect it from everyday spills, dirt tracking, and cleaning chemicals. Seal only after grout has fully cured, and use a high-quality penetrating sealer designed for grout and the specific grout type you installed. For long-term care, sweep regularly and mop with a pH-neutral tile cleaner to avoid eroding grout or weakening thinset bonds. Keeping the floor clean and addressing small chips or cracked grout early helps prevent water penetration and helps your ceramic tile installation last for years.
📅 Last Updated: October 09, 2026 | Topic: How to install in a living room ceramic tile floors? | Content verified for accuracy and freshness.
References
- Google Scholar Google Scholar
https://scholar.google.com/scholar?q=how+to+install+ceramic+tile+floor+living+room+thinset+grout+backer+board - Google Scholar Google Scholar
https://scholar.google.com/scholar?q=ceramic+tile+floor+installation+instructions+subfloor+prep+underlayment+leveling - Google Scholar Google Scholar
https://scholar.google.com/scholar?q=ANSI+A108+ceramic+tile+installation+standards+thinset+grout+coverage - https://en.wikipedia.org/wiki/Tile_floor
- Tile
https://en.wikipedia.org/wiki/Ceramic_tile - https://en.wikipedia.org/wiki/Thinset_mortar
- Grout
https://en.wikipedia.org/wiki/Grout - https://en.wikipedia.org/wiki/Cement_backer_board
- https://en.wikipedia.org/wiki/Cement
- https://www.britannica.com/technology/tile