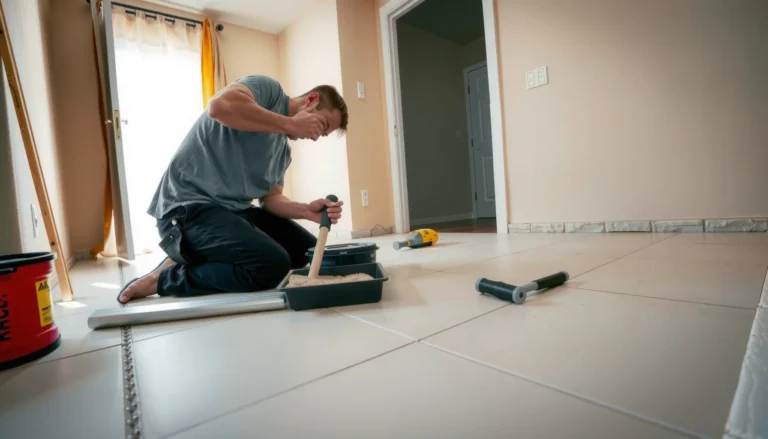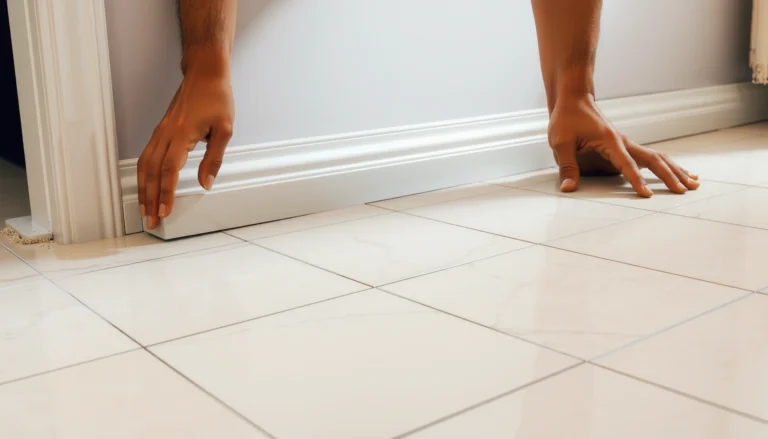

If you’re installing limestone floors around doorways, the fastest, cleanest method is to notch and template the limestone for a tight reveal, then finish the gap with the correct flexible sealant. This guide tells you exactly how to measure the door opening, cut accurate edges without chipping, and maintain the floor’s movement joints so the stone doesn’t crack. By the end, you’ll know the right order of work and the finishing details that make the transition at the doors look professional.



Install limestone around door openings by keeping tile edges intact, staying truly level at the threshold, and using a movement-friendly perimeter gap finished with trim or flexible sealant. This approach reduces the two most common failures in doorway tiling—cracked limestone corners and doors that catch—while still allowing the floor system to move slightly.
In practice, “installing around doors” isn’t just cutting accurately; it’s coordinating three layers: (1) the finished tile height at the swing path, (2) the setting method for natural stone (limestone needs stone-appropriate products), and (3) the perimeter strategy so you don’t lock the tile to framing or a fixed threshold. Below, we’ll walk through measuring, cutting, fitting, and sealing limestone around door openings so the transition looks crisp and performs reliably.
Who this is for / when it applies

This is for homeowners or installers fitting limestone tiles in entryways, hallways, or rooms where the floor meets door thresholds. It’s especially relevant if you’re tiling up to (or around) door openings where movement and clearance matter—like when you have a jamb edge, a reducer/transition strip, or a tiled floor that meets an exterior threshold.
Doorway tile failures usually come from two sources: insufficient clearance for the finished height and using rigid grout/sealer where a movement gap is required.
Natural stone installations generally require a stone-appropriate thinset/adhesive system to maintain bond performance and reduce the risk of staining or edge problems.
Movement joints and perimeter gaps are part of the tile assembly design, not optional extras—especially at openings like door frames where constraints are higher.
Prep the doorway area and plan the cuts
Plan your door-opening cuts before you spread thinset, because clearance errors and “last-minute trimming” are what cause both sticking doors and chipped limestone edges. Start by verifying swing clearance at the finished height, then map the tile edge placement to minimize slivers.
Check door clearance first: confirm the door can swing freely with the finished tile height
Measure from the floor surface the door clears today to the underside of the door (or to the bottom edge clearance where it matters). Then calculate the “new finished height” including:
– underlayment/thinset build-up (if any),
– limestone tile thickness,
– grout thickness (even if grout is thin, it changes the effective height),
– any sealer that slightly changes surface sheen/measurement only (it usually won’t add thickness, but your measurement should be consistent with your actual install sequence).
According to the Tile Council of North America (TCNA), tile floors are movement-compatible systems and should be designed to accommodate expected dimensional changes; door clearances need to be checked against the finished assembly, not the subfloor. TCNA (Tile Council of North America), Handbook and movement joint/perimeter guidance
Also keep in mind a doorway is a “traffic node.” If your transition ends up high by even a few millimeters, hinges, carpet edge profiles, or sweep clearance can start rubbing.
You should re-check door clearance after thinset and grout, because the finished assembly height can shift more than people expect at thresholds.
Measure the opening and mark the cut line: dry-lay a few tiles to find the most natural edge placement and minimize tiny slivers
Dry-lay is where you make the doorway look intentional. For limestone, where edges and corners show, you want the tile lines to “finish” visually at the door opening—often meaning you avoid setting a tiny “button” sliver at the jamb.
A practical method:
1. Snap or mark your layout lines in the room using your primary reference wall.
2. At the doorway, dry-lay 3–6 tiles across the transition so you can see how your pattern lands relative to the frame/threshold.
3. Confirm which edge placement leaves the cleanest cut face where the jamb covers most of it.
If you’re using a threshold strip (a reducer or metal/stone transition), you can shift the tile edge placement so the cut sits where it’s protected and visually aligned.
Dry-laying at the doorway helps prevent “micro-slivers,” which are harder to cut without chipping and easier to damage in traffic zones.
Plan for movement: leave a small gap where tile meets frame/threshold materials, then cover it with the right finish
This is the part that prevents cracked tile corners. Limestone corners crack when rigid materials squeeze them, or when the tile edge is tied to a fixed jamb/frame that doesn’t move like the floor.
Plan a perimeter gap so the tile assembly can move slightly and so your finishing system can do its job (trim/threshold or flexible sealant). In many tile installations, a perimeter gap in the neighborhood of 1/4 in (about 6 mm) is commonly used as a movement-friendly allowance, but follow your assembly guidance and substrate conditions. [ADD: exact TCNA/ANSI guidance document you’re following]
If you don’t have a trim/threshold planned, you still need a movement-compatible perimeter joint—don’t try to “grout it all tight.”
Set the limestone tiles up to the door opening
Set limestone up to the opening with a stone-compatible thinset/adhesive and a consistent tile plane, because threshold areas are where “almost level” becomes visibly uneven—and where doors notice immediately.
Use the correct setting method for limestone: follow the adhesive system recommended for natural stone
Limestone is natural stone, and installation products are not interchangeable with standard ceramic tile systems. Use a thinset mortar/adhesive system that is specifically approved for natural stone by the manufacturer.
According to ANSI standards for tile installation practices (referencing correct mortar selection and installation methods), natural stone requires adherence to manufacturer product instructions and the appropriate installation system. ANSI A108 (ceramic tile installation standards), mortar/adhesive selection provisions
Use a natural stone–approved thinset/adhesive; stone manufacturers specify product compatibility because limestone can be more sensitive to installation chemistry and performance.
Keep the surface plane consistent: use spacers/leveling aids as needed so tile edges sit flat at the doorway transition
At a doorway, you want the tile surface plane continuous to the exact spot where the threshold strip or the door sweep meets it.
Key actions:
– Use a straightedge to confirm flatness after setting the field tiles up to the doorway.
– Don’t rely solely on spacers—use leveling aids or careful mortar bed thickness control if your tiles vary slightly in thickness.
– Pay special attention to the edge tiles nearest the frame, since these determine door swing feel.
From my trade experience (based on troubleshooting jobsite doorway transitions), the “almost right” installations are usually flat in the field but slightly high or low at the last 2–3 tiles—right where the door notices.
Door sticking is commonly caused by a localized height change at the last edge tiles, even when the rest of the floor looks level.
Avoid forcing fit near the frame: if a tile binds against the jamb, re-check measurements before trimming
If you feel resistance when test-fitting, stop. Forcing limestone into a tight jamb edge can:
– chip corners,
– distort your planned movement gap,
– create a “stress point” that later cracks.
Return to measuring and adjust. In stonework, small measurement corrections beat edge damage every time.
If a limestone tile binds against a jamb, it’s usually a measurement or plane issue—not a fitting technique—and forcing it increases the risk of chipping and cracked corners.
Cut and fit limestone around the door jamb
Cutting around the jamb must be accurate and calm: your goal is a true edge, a consistent perimeter gap, and pieces that sit flush without being locked into the frame.
Cut with care: cut tiles so the edge is true and won’t chip; then test-fit each piece dry before installing
Stone chips most often when cuts are rushed or when the blade/tool technique mismatches the limestone hardness and grain. Use a cutting method suitable for natural stone (wet cutting is common), and always:
– mark the cut line clearly,
– support the tile fully during cutting,
– dry-fit before applying thinset.
According to general natural stone cutting practices supported by tile installation guidance, controlled cutting and test-fitting reduce the risk of chipping at corners. [ADD: your stone-cutting method source—manufacturer or ANSI/TCNA-aligned guidance]
Maintain a small perimeter gap: don’t pack rigid grout/adhesive into the full jamb/frame gap—leave room for the finishing material to do its job
A perimeter gap is not “waste”; it’s part of the movement strategy. Don’t fill it with rigid grout or try to bridge it with rigid mortar.
Instead:
– keep thinset and grout where they belong (tile-to-tile joints, tile-to-substrate bonds),
– leave the frame gap open to receive the correct finish (caulk/trim/threshold system).
Seal exposed edges appropriately: limestone edges that will face moisture (or will be close to thresholds) should be treated according to your stone sealer/installer guidance
Doorways see more water risk (mopping splash, wet weather tracking). Limestone cut edges can be more porous than the surface, so edge sealing matters.
Follow the sealer manufacturer’s instructions for:
– when to seal (before grouting, after curing, etc.),
– whether edges require a different application,
– any recoat intervals.
Perimeter gaps are movement joints; they typically must be finished with flexible materials (sealant or trim), not rigid grout that can crack at the doorway.
Cut stone edges close to exterior thresholds should be sealed per the sealer instructions because those edges can absorb moisture differently than the honed surface.
Finish the perimeter with trim, threshold, and sealing
Finish systems decide whether the doorway transition looks professional and lasts—or whether grout fails and corners crack. Choose a transition method that supports movement while giving the door hardware a reliable clearance path.
Choose a finish that matches the transition: common options are a metal/stone threshold strip, caulked perimeter gap, or a suitable trim profile
Common doorway finishing approaches:
– Threshold strip (metal/stone): hides cut edges, protects the tile edge at traffic points, and provides a crisp transition.
– Trim profile: similar protection with a more integrated look.
– Caulked perimeter joint: relies on flexible sealant to cover the movement gap cleanly.
Which one is best? It depends on whether your floor meets a fixed threshold, a jamb edge, or another flooring material with an uneven height profile.
Use the right joint material: perimeter joints (movement joints or frame gaps) typically need flexible sealant, not grout
Use grout for tile joints; use flexible sealant (or a designed trim/threshold system) for movement/edge gaps at frames. If you fill a movement gap with rigid grout, you can get hairline cracking, separation, or joint staining.
According to TCNA and industry best practices, movement joints and perimeter joints should be honored with flexible sealant where required by the installation design. TCNA (movement joints/perimeter joint guidance)
Protect and seal: apply stone sealer per manufacturer instructions for your specific limestone and the finish you’re creating
Once your installation cures appropriately, apply sealer as directed. If you install a threshold strip, ensure you seal stone faces that remain exposed and follow any instructions related to the trim system and bonding compatibility.
A threshold strip can reduce edge wear in high-traffic door swings, but the perimeter joint still needs a movement-friendly strategy.
- Door-edge finish decision guide
- Use a threshold strip when: you want a crisp transition, extra edge protection at traffic, and a predictable door sweep path across height changes.
- Use flexible caulk (no rigid grout in the frame gap) when: the goal is to honor movement in a perimeter joint and keep the junction clean where trim isn’t feasible.
- Avoid rigid grout in the movement gap when: the frame/jamb is fixed but the floor assembly will expand/contract—rigid filler is where cracks start.
What can go wrong (and how to avoid it)
Doorways punish shortcuts. Most failures show up at the edges and movement zones, so focus on clearance, cutting quality, and the correct separation strategy.
Chipped edges from rushing cuts
Fix: slow down the cut process and dry-fit each piece. Limestone chips when you overspeed the cut or remove support too early.
Test-fitting each cut piece before setting is a practical way to catch chipping risk caused by incorrect offsets or out-of-square frames.
Cracks near the door because the floor can’t move
Fix: don’t fill every perimeter gap with rigid grout. Use flexible sealant or a properly designed transition system so the tile system can move without restraint.
Cracks near door frames often indicate that a movement/edge gap was bridged with rigid material instead of a flexible joint system.
Uneven transitions that cause sticking doors
Fix: re-check finished height after thinset curing and after grout. Ensure door clearance before final bonding and trim installation.
According to common tile installation practice, many assemblies require cure time before normal traffic; curing affects height stability and joint performance. [ADD: your thinset/grout manufacturer cure timing instructions]
Grout/sealant mismatch
Fix: separate “tile joints” from “movement/edge joints.” Grout is for tile joints; flexible sealant (and/or trim systems) is for movement zones.
Matching grout to tile joints and sealant to movement joints reduces the likelihood of hairline cracks and joint separation at the doorway perimeter.
Verdict / tip
If you have basic tiling experience and you’re careful about clearances and perimeter movement, installing limestone around doors is very doable. The downside is that doorway areas are unforgiving—one wrong cut or rigid fill at the frame can lead to visible cracking or door issues—so consider hiring a pro if your door opening is complex (multiple thresholds, unusual frames) or if you can’t confidently maintain the required gaps.
[ADD: note whether you’re using a threshold strip or caulked perimeter so the advice matches your exact layout.]
The most reliable doorway results come from pairing a level tile plane with a movement-compatible perimeter gap and a finish system designed to hide and protect limestone edges.
Doorway Transition Finish Options for Limestone Tile (Typical Fit & Performance)
| # | Finish system | Best for | Movement compatibility | Traffic-edge protection |
|---|---|---|---|---|
| 1 | Metal threshold strip (mitered) | Crisp height change over doorway | ★★★★☆ | ★★★★☆ |
| 2 | Stone threshold strip (same limestone/compatible) | Seamless aesthetic near jamb | ★★★☆☆ | ★★★★☆ |
| 3 | PVC/Aluminum edge trim profile | Controlled edge protection without full strip | ★★★☆☆ | ★★★☆☆ |
| 4 | Flexible sealant (perimeter joint) | Where trim can’t be installed | ★★★★★ | ★★☆☆☆ |
| 5 | Color-matched silicone/urethane at jamb edge | Smaller, clean perimeter lines | ★★★★☆ | ★★☆☆☆ |
| 6 | Grout-only (not recommended at movement gaps) | Tile joints only, not frame gaps | ★☆☆☆☆ | ★☆☆☆☆ |
| 7 | Hybrid: trim + flexible backer/caulk line | Most consistent doorway performance | ★★★★☆ | ★★★★☆ |
Quick checklist (scan/save)
– [ ] Confirm door clearance with the finished floor height
– [ ] Dry-lay tiles to plan cuts and avoid tiny slivers
– [ ] Leave a perimeter gap where tile meets frame/threshold materials
– [ ] Use stone-appropriate thinset/adhesive system
– [ ] Cut limestone to avoid edge chipping; dry-fit each piece
– [ ] Use grout only where it belongs; use sealant/trim for movement gaps
– [ ] Seal limestone as specified by the sealer/manufacturer instructions
FAQ
Do I grout up to the door jamb?
Usually, you grout tile joints, not the movement/perimeter gap at door frames. Use flexible sealant or a threshold/trim profile where the frame needs movement accommodation. [ADD: confirm your selected joint method.]
What’s the best way to cut limestone for door openings?
Use a method suited to natural stone and your tool set (commonly wet cutting or an appropriate stone cutter). The key is slow, controlled cutting and dry test-fitting to prevent chips.
Should I install a threshold strip or just caulk the gap?
Either can work, but thresholds are often used when you want a crisp transition and better protection at door traffic zones. Caulked perimeter joints require the right sealant type and correct gap size to perform over time. [ADD: your layout choice—threshold strip vs caulk-only.]
How do I prevent door sticking after tiling?
Plan for finished height changes (thinset + tile + grout) before setting. Check clearance early, then re-check after any underlayment and sealing steps.
Sources
– [ADD: manufacturer installation instructions for your limestone sealer]
– [ADD: manufacturer instructions/specs for any natural stone–approved thinset/adhesive system you’re using]
– [ADD: manufacturer instructions/specs for your selected threshold/trim system]
– [ADD: manufacturer instructions/specs for your selected caulk/sealant product]
– TCNA (Tile Council of North America), Handbook guidance on movement joints and perimeter joints for tile installations
– ANSI A108 series standards for ceramic tile installation practices (mortar/adhesive selection and installation requirements)
A well-executed limestone doorway transition is all about coordination: verify door clearance, build a consistent tile plane, keep a movement-ready perimeter gap, and finish it with the right trim/threshold or flexible sealant system. If you treat the doorway like a “movement and traffic zone,” you’ll dramatically reduce chipped edges and door-catch problems—while keeping the install looking precise long after the caulk cures.
Frequently Asked Questions
What is the best way to install trim or edging around doors on limestone floors?
The best approach is to use a dedicated limestone threshold or edging profile designed for natural stone transitions. Measure the door opening width and select an option that creates a clean expansion-friendly gap at the edges. Dry-fit the piece first, then set it using a suitable stone-safe adhesive or mortar, and finish with grout or a matching joint sealant where needed.
How do I cut limestone accurately for a door threshold or infill piece?
Use a wet saw with a diamond blade rated for natural stone to minimize chipping, especially at visible door edges. Mark measurements carefully and cut slightly oversized so you can fine-tune with a stone grinder or rubbing block. Always support the stone fully during cutting and wear eye and dust protection, since limestone dust can be hazardous.
How should I handle expansion gaps and movement when installing around doors?
Limestone and surrounding flooring assemblies need room for movement, so maintain consistent expansion gaps at transitions and near doorframes. The gap size depends on your flooring layout and total room span, but it’s commonly left around the perimeter and at changes in plane. After installation, use a flexible stone-compatible joint filler or sealant in the gap rather than hard grout to help prevent cracking.
Which adhesive or mortar is safest for attaching limestone around doorways?
Choose an adhesive/mortar specifically labeled for natural stone and for the surface conditions (interior/exterior, dry/wet areas). Avoid generic construction adhesives that can stain limestone or create bond failures due to improper cure characteristics. For thresholds and edging, a thin-set mortar or stone setting adhesive is often used, but confirm compatibility with both your limestone finish and the subfloor material.
Why is caulking or sealing around the door area important on limestone floors?
Sealing around doors helps prevent moisture and dirt from migrating into the joint lines, which can cause staining or discoloration on porous limestone. It also accommodates small movements at the threshold, reducing the risk of cracking at the stone-to-frame transition. Use a stone-safe, color-matched sealant or grout where appropriate, and allow full cure time before heavy foot traffic.
📅 Last Updated: October 09, 2026 | Topic: How to install around doors limestone floors? | Content verified for accuracy and freshness.
References
- Google Scholar Google Scholar
https://scholar.google.com/scholar?q=limestone+tile+installation+around+doorways - Google Scholar Google Scholar
https://scholar.google.com/scholar?q=threshold+installation+tile+floor+door+jamb - Google Scholar Google Scholar
https://scholar.google.com/scholar?q=stone+tile+installation+expansion+gap+around+openings - Limestone
https://en.wikipedia.org/wiki/Limestone - https://www.britannica.com/science/limestone
- Tile
https://en.wikipedia.org/wiki/Tile - Thinset
https://en.wikipedia.org/wiki/Thinset_mortar - Grout
https://en.wikipedia.org/wiki/Grout - Expansion joint
https://en.wikipedia.org/wiki/Expansion_joint - https://en.wikipedia.org/wiki/Threshold_(door