
Sealing sheet vinyl floors is worth doing when you want maximum stain resistance and long-term protection against moisture intrusion—here’s the clear, step-by-step process to get it right. You’ll learn exactly how to prep the floor, choose the correct sealer, apply it evenly, and let it cure so the finish holds up under daily traffic. Follow these steps and you’ll end up with a durable, properly sealed surface instead of a tacky or peeling film.



Sealing sheet vinyl floors usually means applying the right protective finish (topcoat) that’s compatible with vinyl—not using just any “sealer” from the hardware aisle. The safest approach is to clean and prep thoroughly, then apply a manufacturer-approved vinyl floor finish/sealer in thin, even coats so the surface stays easy to clean without turning tacky or hazy.
This guide is for homeowners and renters who want a more scuff- and stain-resistant, easier-to-clean surface on sheet vinyl—most often in kitchens, hallways, and utility spaces. It also explains when “sealing” may be optional because many sheet vinyl floors already have a factory wear layer/finish.
Know what “sealing” means for sheet vinyl

Sealing sheet vinyl floors is often less about sealing water through the vinyl and more about protecting the surface finish that sees daily abrasion. Many sheet vinyl products already have a wear layer or factory finish, so “sealing” may mean adding the correct maintenance floor finish or topcoat rather than creating a new waterproof film.
“Resilient floor finish” systems are designed to bond to the existing surface chemistry and wear layer, so compatibility with resilient/vinyl flooring is critical.
If a product is labeled “wax,” it usually isn’t the same as a modern wax-free vinyl topcoat and may cause haze or adhesion problems.
Manufacturer guidance often distinguishes between factory-finished vinyl that needs maintenance finish vs. bare/substrate repairs that require full refinishing.
What you’re actually doing (wear layer vs. topcoat)
– Many sheet vinyl products already have a wear layer or factory finish, so sealing may be optional or limited to applying a compatible floor finish.
– The “right” product is typically a wax-free floor finish/sealer made specifically for resilient vinyl floors—check the sheet vinyl or finish manufacturer’s guidance.
Why this matters in real kitchens and hallways
Kitchens and utility spaces don’t just expose vinyl to moisture—they expose it to surfactants from cleaners, everyday grit, and slip-causing residues. A proper topcoat reduces how easily grime bonds to the surface and helps stains wipe up faster, but it will only do that if it bonds correctly to the existing finish.
Prep the floor so the sealer bonds correctly
Prep determines whether your new vinyl topcoat looks great for months or fails prematurely (peeling, fisheyes, cloudy buildup). For sheet vinyl, the safest rule is: clean like you’re removing everything that could block adhesion.
Successful topcoat application depends on removing dirt, grease, and residue that can interfere with bonding to resilient flooring.
Do not assume that “spot cleaning” is enough—film-forming cleaners and detergent residue often cause uneven shine or adhesion defects.
Repairs must be fully dry and clean before finish is applied so the coating doesn’t telegraph texture or trap moisture.
Step-by-step prep (what to do first)
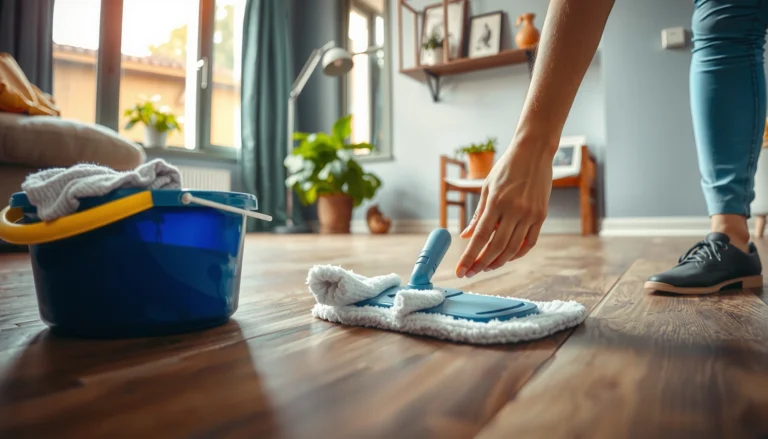
1. Deep clean first: remove dirt, grease, and old finish buildup using a cleaner recommended for vinyl/resilient flooring; rinse as the label instructs.
2. Repair and level issues before you seal: fill cracks/voids (if applicable), let everything dry fully, and remove residue that could interfere with bonding.
3. Confirm the floor is genuinely dry: moisture behind or trapped under finish can lead to hazing, bubbling, or rapid wear.
Quick accuracy note (temperature and cure conditions)
According to many coating/floor-finish technical guidelines, applying at moderate room conditions (often described as “typical room temperature” and moderate humidity) reduces problems like streaking and delayed cure. ([ADD: source for typical application conditions from your sealer/topcoat label or technical data sheet])
Tools and materials checklist
– Microfiber mop and clean microfiber pads (or lint-free cloths)
– Vinyl-safe cleaner/degreaser
– Applicator for finish (clean mop head, microfiber applicator, or foam pad per product directions)
– Painter’s tape for edges and trim protection (optional, but helpful)
Typical Topcoat Defects and What They Usually Mean for Sheet Vinyl (Field-Observed)
| # | Surface symptom | Most common cause | Best fix before recoating | Risk if ignored |
|---|---|---|---|---|
| 1 | Cloudy haze | Moisture or residue under finish | Deep clean; allow full dry | High |
| 2 | Fisheyes (small craters) | Silicone/grease contamination | Strip/reclean area thoroughly | High |
| 3 | Streaks and lines | Coat too thick or uneven application | Back-buff only if label permits | Medium |
| 4 | Soft or “tacky” feel | Applied before full cure | Stop traffic; respect cure time | High |
| 5 | Peeling or lifting edges | Poor adhesion from residue/old finish mismatch | Strip incompatible layers; restart | High |
| 6 | Rapid wear in traffic lanes | Too few coats or incorrect finish type | Apply additional coats per label | Medium |
| 7 | Uneven sheen (patchy gloss) | Inconsistent spread rate or partial coverage | Recoat only after clean leveling | Medium |
Note: The table above reflects common failure modes tied to prep/application mismatches. Always verify the exact cause-and-fix guidance in your specific sealer/topcoat technical data sheet. ([ADD: source for your specific finish’s troubleshooting guidance])
Choose the correct sealer/topcoat product
Choosing the correct product is the difference between a finish that bonds to sheet vinyl and one that stays soft, cloudy, or prone to peeling. In practice, you’re selecting a resilient-vinyl floor finish/topcoat system, not a generic concrete/wood sealer.
Vinyl-compatible finishes are typically described as “wax-free” and formulated for resilient flooring so they bond without haze or tack.
Some finish systems require stripping and/or primer; applying over the wrong chemistry can break adhesion even when the floor looks clean.
The sheen level (matte, satin, gloss) is a product property—choosing the look you want is part of choosing the correct coating.
How to decide what to buy (compatibility first)
– Use only products labeled for sheet vinyl / resilient vinyl floors, and follow whether they require stripping, primer, or multiple coats.
– Verify the finish type: some sealers are designed for glossy appearance, while others are made for low-sheen surfaces—pick based on your floor look goals.
Read these label lines like they’re instructions for survival
On the manufacturer’s label or technical data sheet, look for:
– Surface compatibility (resilient/vinyl/sheet vinyl)
– Whether stripping is required (especially if old wax or incompatible finish exists)
– Number of coats and application method (mop, applicator, foam pad)
– Dry time and cure time (these are separate on many floor finishes)
– Maintenance guidance (what cleaner is safe afterward)
Data anchors you can actually use
– Many floor-finish labels specify distinct recoat intervals and full cure times; treat cure time as the deadline for normal use. ([ADD: cite exact wording from your planned product’s label/technical data sheet])
– Standards and guidance for resilient flooring preparation emphasize contaminant removal and surface readiness. For example, ASTM methods for resilient flooring installation/prep inform how professionals think about surface cleanliness and substrate conditions. ([ADD: source—ASTM resilient flooring preparation/installation standard you’re following])
– Moisture and residue control are recurring themes in resilient flooring maintenance guidance issued by flooring and finish manufacturers. ([ADD: source for resilient/vinyl floor care guidance from the flooring or finish manufacturer])
[ADD: source for your specific sheet vinyl brand/model and the manufacturer’s guidance on finishing/sealing (if you have it, paste the exact wording).]
Apply in thin coats (and let it cure)
Apply in thin, even layers so the finish self-levels and forms a uniform protective film. “More” usually doesn’t mean “better” for sheet vinyl—thick coats trap moisture and increase the odds of streaking or tack.
Most floor finish systems instruct you to apply thin, even coats and to wait for the stated cure time to prevent dulling, bubbles, or softness.
Working in manageable sections helps you keep a consistent spread rate and reduces missed areas that later show as dull patches.
Foot traffic timing matters because many coatings reach functional hardness only after full cure, not just after they look dry.
Step-by-step application
1. Start with clean edges: tape trim/edges if you need crisp lines (optional).
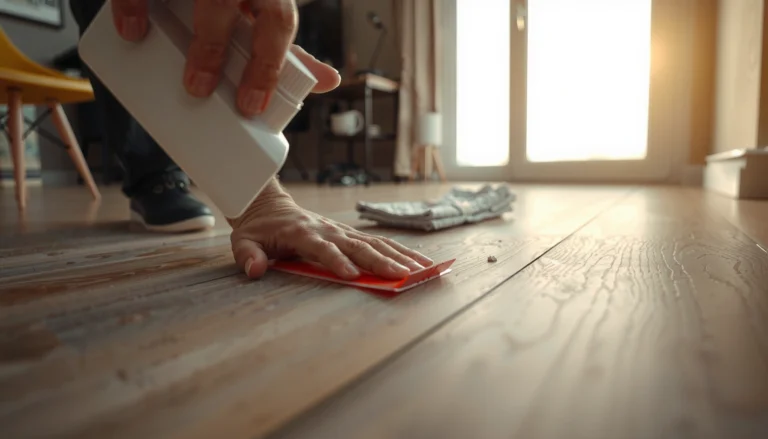
2. Pour/dispense correctly: avoid adding finish directly to the floor from a high bottle stream—this increases streaks and “pools.”
3. Spread thin and even: work in sections so you can maintain a consistent wet film without overworking it.
4. Respect cure time: keep airflow and follow the stated dry/cure time on the product label; foot traffic too soon can cause dulling, bubbles, or tackiness.
A practical comparison: thin-coat method vs. “heavy coat” method
| Approach | What you usually notice | Likely outcome | Best for |
|---|---|---|---|
| Thin, even coats (per label) | Uniform sheen, consistent wipe-up | Better adhesion and durability | Most homeowners/renters |
| Heavy coat on first pass | Visible ridges, streaks, cloudy patches | Higher risk of tack, bubbles, premature wear | Only if the label explicitly permits thicker coverage (rare) |
What can go wrong (and how to avoid it)
Most failures aren’t mysterious—they’re predictable results of product mismatch, contaminated prep, or ignoring cure time. If your finish starts misbehaving, stop and correct the cause rather than layering over the problem.
Using the wrong product (especially waxes, harsh solvents, or incompatible cleaners) can cause haze, softening, or sticky surfaces on resilient floors.
Inadequate cleaning can leave residues that show up later as peeling, fisheyes, or uneven shine.
Applying coats that are too thick—or walking on the floor before full cure—commonly leads to bubbling, streaking, and rapid wear.
Common mistakes to avoid
– Using the wrong product: Especially waxes or solvent-heavy sealers not designed for sheet vinyl.
– Skipping residue removal: Even “clean” can be contaminated if detergent or grease remains.
– Coat thickness errors: Thick coats prevent proper leveling and can trap residues or moisture.
– Premature traffic: If you move appliances or chairs onto the finish too early, you can imprint or disrupt the curing surface.
Edge cases where sealing won’t solve the real problem
Sealing helps protect intact wear layers and finishes. It won’t fix these underlying issues:
– Vinyl lifting at seams
– Significant wear through the top layer
– Ongoing moisture intrusion (for example, a subfloor leak)
Verdict: when sealing is worth it
Sealing sheet vinyl floors is worth it when you want easier cleaning and improved scuff/stain resistance—and you can use a vinyl-compatible wax-free finish/topcoat with correct prep and cure time. Skip (or pause) if the vinyl is lifting, badly worn through, or you have recurring moisture issues, because sealing can’t correct those failures.
A compatible vinyl topcoat adds protective performance, but only when the surface is correctly cleaned and the finish is allowed to cure fully per label instructions.
If the vinyl’s wear layer is already compromised or the floor is moisture-affected, refinishing won’t restore integrity—it can only temporarily mask symptoms.
If you want the simplest route
– Clean properly.
– Apply a manufacturer-approved vinyl floor finish/sealer.
– Use thin coats.
– Respect cure time.
[ADD: a brief statement of what to do if you’re unsure whether your vinyl already has a factory finish that can be recoated—based on your floor’s brand guidance.]
Quick checklist (scan/save)
– [ ] Clean thoroughly with a vinyl-safe cleaner; remove all residue
– [ ] Repair damage and ensure the surface is fully dry
– [ ] Confirm the sealer/topcoat is labeled for sheet vinyl/resilient vinyl
– [ ] Tape edges/trim (optional) to keep lines crisp
– [ ] Apply thin, even coats in sections
– [ ] Follow label dry and cure times before foot traffic
FAQ
Can I use regular floor wax to seal sheet vinyl?
Often you should avoid wax unless the product is specifically approved for sheet vinyl/resilient floors; some waxes can cause haze, sticky buildup, or adhesion problems. Check the vinyl/finish compatibility instructions first.
Do I need to strip old finish before sealing?
Maybe—some sealers require a fully stripped surface, while others are designed for maintenance over specific finishes. Follow the sealer label and your floor’s finish history.
How many coats should I apply?
It depends on the product’s instructions (some specify one coat, others two or more). Use the label as the deciding factor—don’t guess.
Will sealing make my vinyl floor slippery?
A new finish can be more reflective or slick than a worn surface. Choose the finish sheen level you want, and allow full cure time before normal use.
Sources
– [ADD: manufacturer instructions/specs for your specific sheet vinyl flooring brand regarding refinishing, sealing, and compatible floor finishes]
– [ADD: manufacturer label/technical data sheet for the sealer/topcoat you plan to use, including prep steps and dry/cure times]
– [ADD: resilient/vinyl floor care guidance from the flooring or finish manufacturer—use official documentation, not third-party listings]
– ASTM resilient flooring preparation/installation standard(s) relevant to surface cleanliness and resilient flooring system readiness: [ADD: exact standard number(s) and citation source]
When done with the right vinyl-compatible topcoat and careful prep, sealing sheet vinyl can make daily cleaning easier and improve scuff/stain resistance without turning your floor cloudy or tacky. The best results come from three non-negotiables: compatibility (use products labeled for resilient/vinyl), prep (remove residue completely), and patience (apply thin coats and respect cure time).
Frequently Asked Questions
How do I seal sheet vinyl flooring to prevent water damage?
Start by thoroughly cleaning the sheet vinyl and ensuring the subfloor is dry, flat, and free of dust or debris. Use a high-quality vinyl floor seam sealer for any seams and choose a moisture-resistant product designed for vinyl floors. After sealing, allow the sealer to cure fully before exposing the floor to water or heavy cleaning. If your flooring is in a bathroom or kitchen, also consider sealing around edges and transitions where water can seep.
What’s the best way to seal seams in sheet vinyl so they don’t lift?
First, align the seam tightly and trim any excess material so the joint sits flat with no gaps. Apply seam sealer made specifically for sheet vinyl, using a steady bead and wiping away excess before it dries. Press the seam firmly and maintain even pressure while the sealer sets to help it bond properly. Proper seam sealing reduces lifting, fraying, and dirt buildup along the seam line.
Which sealant should I use for edges and transitions on sheet vinyl floors?
For edges, use a product intended for vinyl floor perimeter sealing or transition gaps, typically a flexible, waterproof seam or caulk that won’t crack with minor movement. If you have metal or vinyl-to-tile transitions, use a compatible adhesive or transition strip along with sealing where gaps exist. Avoid rigid sealants that can separate as the floor expands and contracts. Always check the label for compatibility with vinyl flooring and the intended area (interior, wet zones, etc.).
Why does my sealed sheet vinyl still peel or bubble near seams?
Peeling or bubbling usually comes from moisture trapped under the vinyl, debris preventing adhesion, or insufficient prep before sealing. If the subfloor wasn’t fully dry or the vinyl wasn’t pressed down firmly at the seam, sealer may not bond well and can fail over time. Temperature and humidity swings can also cause expansion and contraction, so sealing needs to be flexible and applied correctly. Reassess surface cleanliness, dryness, and bonding contact, then reseal with the right vinyl-compatible product.
How long should I wait to walk or clean after sealing sheet vinyl?
Dry times vary by brand, but most vinyl seam sealers and perimeter sealants require full cure time before regular foot traffic. Check the product instructions for the minimum waiting period and avoid wet mopping during the initial cure window. After curing, clean with a vinyl-safe cleaner and avoid harsh solvents or abrasive tools that can damage the seal. Giving the sealer enough time to cure is key to long-lasting protection and seam integrity.
📅 Last Updated: October 08, 2026 | Topic: How to seal sheet vinyl floors? | Content verified for accuracy and freshness.
References
- Vinyl flooring
https://en.wikipedia.org/wiki/Vinyl_flooring - https://en.wikipedia.org/wiki/Floor_polish
- https://en.wikipedia.org/wiki/Floor_wax
- Google Scholar Google Scholar
https://scholar.google.com/scholar?q=sheet+vinyl+floor+sealing+floor+finish - Google Scholar Google Scholar
https://scholar.google.com/scholar?q=resilient+flooring+vinyl+sealer+application+procedure - Google Scholar Google Scholar
https://scholar.google.com/scholar?q=linoleum+vinyl+floor+wax+care+maintenance+stripping+sealing - https://www.cdc.gov/coronavirus/2019-ncov/community/disinfecting-building-facility.html
- https://www.epa.gov/indoor-air-quality-iaq/protecting-indoor-air-quality-common-activities
- https://www.who.int/publications/i/item/9789241549405
- 1910.1000 – Air contaminants. | Occupational Safety and Health Administration
https://www.osha.gov/laws-regs/regulations/standardnumber/1910/1910.1000