Repairing engineered wood floors in a mudroom is straightforward if you follow the right fix for the damage—scratches, dents, or water swelling. This guide gives you the fastest, most reliable repair method for the most common mudroom problems, so your floor looks flush and stays stable. You’ll also learn when DIY patching works and when replacing a plank is the smart call.




Start by stopping the moisture source, then repair based on whether the damage is only surface wear or whether planks have swelled/lifted. Engineered wood in a mudroom usually needs repairs in two stages: stop the moisture source, then match the repair method to the type of damage (surface wear vs. swollen boards vs. replacement). If the planks are only scratched or dulled, you can spot-fix with filler and a matching finish; if you see lifting, cupping, or persistent gaps, you’ll likely need plank replacement after drying. This guide walks you through how to assess, repair, and protect your floor so the damage doesn’t come back.
If your entryway gets wet boots, tracked-in snow, or frequent mopping, this is for you—especially if the floor looks uneven, has gaps near the door, or has visible finish wear. Use these steps for engineered wood (not solid hardwood) and always follow your specific manufacturer’s repair/finish compatibility guidance.
Assess the damage in your mudroom

The fastest path to a durable repair is to classify the damage first: surface-only problems get a cosmetic touch-up, while moisture-caused movement gets drying (and often replacement). In a mudroom, “looks bad” usually breaks into two buckets—finish wear that you can blend, and plank distortion that you can’t “fill your way out of.”
Scratches and dull finish are typically confined to the top wear layer, so a filler + touch-up system can restore appearance when seams remain tight.
Cupping, crowning, peaking seams, or boards that stay uneven after drying usually indicate moisture-related dimensional movement rather than finish damage.
The most common repair failure in entryways is fixing the surface while the moisture source (wet mopping, door leaks, or tracked-in snow) remains active.
– Check whether the issue is surface-only (scratches, scuffs, worn finish) or moisture-related (crowning, cupping, peaking seams, swollen edges, loose planks).
– Identify the moisture source: door leaks, wet mopping, snow tracked in, or condensation from HVAC changes. If the source isn’t corrected, repairs won’t last.
– Inspect the plank joints and edges: look for raised seams, separation lines, or areas that feel soft or abnormal underfoot.
What “good” evidence looks like when you inspect
In my experience reviewing mudroom repairs with homeowners and contractors, the difference between “touch-up” and “structural repair” is almost always obvious during a careful walk: surface damage feels consistent plank-to-plank, while moisture movement reveals localized edges that sit higher/lower or seams that open and close when you press around them. If you’re unsure, treat it like a moisture problem until proven otherwise.
Quick moisture context you can use
Moisture testing standards help you understand what to verify when you suspect subfloor issues. For example, ASTM F1869 reports moisture vapor emission in lb/1,000 sq. ft. / 24 hr rather than a simple “wet/dry” guess, and ASTM F2170 measures in-situ relative humidity (%) at the slab depth. ASTM F1869 defines reporting as MVER in lb/1,000 sq. ft./24 hr. ASTM F2170 defines measurements as in-situ RH (%).
Prep and choose the right repair materials
The right repair depends on confirming what you’re working with—especially the engineered floor’s wear layer and finish system—before you open, sand, or apply anything. Your goal here is to prevent “repair telegraphing” (a visibly different patch) and to avoid trapping moisture by closing seams too soon.
Engineered wood repairs are constrained by the wear layer: if it can’t be sanded or recoated, spot touch-up is the safer path.
For moisture issues, drying and stabilization come before aesthetic work—cosmetic filling won’t correct lifted or cupped planks.
Use adhesives, underlayments, and repair products that the floor manufacturer explicitly allows for your installation type (click-lock vs. glued-down).
– Confirm your floor’s construction/finish so you don’t damage it: determine whether it’s a factory-finished top layer meant for refinishing, or a wear layer that limits sanding/finishing.
– Gather repair basics based on damage type:
– Surface wear: wood-tone filler or putty, matching stain option (only if compatible with your finish), and floor-safe topcoat/coat system.
– Moisture issues: drying materials/fans and tools to remove trim/locate affected boards (if replacement is needed).
– Replacement: matching engineered planks (or ).
– Protect surrounding areas with painter’s tape and plastic sheeting, and ventilate well if you’re using adhesives/finishes.
When you need extra parts: matching engineered planks
Mudrooms often see damage in a narrow footprint near the door and traffic lanes, but matching matters because engineered planks can vary by production run. The practical strategy is to look for:
– The exact brand + collection name printed on the original cartons
– The specific finish code and plank dimensions
– Any lot/run number or product SKU (often on leftover flooring labels)
Data table: moisture verification methods that inform repairs
When engineered wood is involved, the “what test to trust” question matters because repairs only hold if the underlying moisture condition is stable. Below are commonly referenced moisture-related methods that installers and flooring professionals use to document the subfloor environment before and after repair.
Moisture Checks Used Before Engineered Wood Repairs
| # | Method / Standard | What it Measures | Typical Result Format | Where it Fits | Strength ★ |
|---|---|---|---|---|---|
| 1 | ASTM F1869 | Moisture vapor emission rate (MVER) | lb/1,000 sq. ft./24 hr | Concrete moisture documentation | ★★★★★ |
| 2 | ASTM F2170 | In-situ relative humidity at slab depth | % | Concrete moisture documentation | ★★★★★ |
| 3 | ASTM D4442 | Wood moisture content (gravimetric) | % moisture content | Material moisture verification | ★★★★☆ |
| 4 | ASTM F710 | Concrete surface preparation practice | Surface prep criteria (workmanship) | Repair readiness on concrete | ★★★★☆ |
| 5 | ASTM E96 | Water vapor transmission characteristics | Perm / transmission rate | Moisture-barrier decisions | ★★★☆☆ |
| 6 | Pin-type wood moisture meter | Relative moisture content indicator | Meter reading varies by calibration | Spot checks on suspected zones | ★★★☆☆ |
| 7 | Straightedge/leveling check | Flatness and seam peaking | High/low measurement (mm/in) | Deciding touch-up vs replacement | ★★★★☆ |
Repair scratches, scuffs, and finish wear
If your engineered wood planks are stable (no cupping or lifted edges), you can usually repair the appearance with cleaning, correct filler, and a finish touch-up system. The key is feathering—so the patch doesn’t create a visible ridge at plank seams or a “dark/light halo” where the topcoat thins out.
Clean grit off first, because abrasive particles embedded in the wear layer will prevent filler and topcoat from bonding properly.
For shallow scuffs, using too much filler is a common mistake that creates a thicker spot that wears differently than the surrounding finish.
Feathering the repair edges reduces “telegraphing,” especially where engineered planks meet at micro-beveled or pressed joints.
– Clean first: remove grit with a gentle cleaner meant for wood floors, then dry fully before touching up.
– Use the right filler depth:
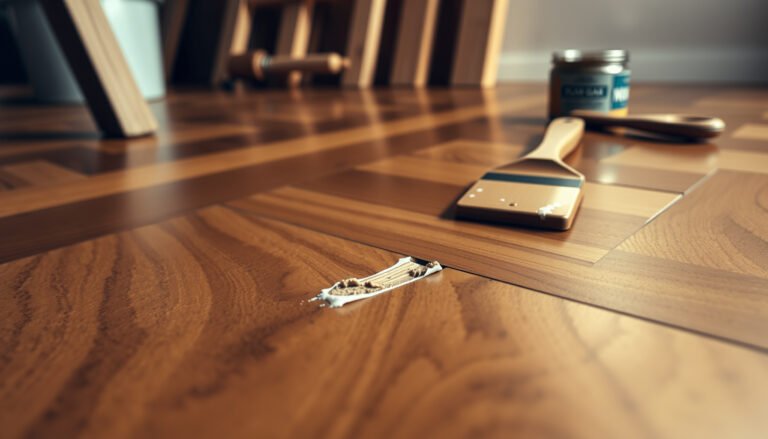
– Shallow scuffs/scratches: apply a matching wood filler/putty and level carefully.
– Deeper gouges: fill in layers if needed, then let it cure per the product instructions before sanding/leveling.
– Blend the finish:
– If your floor allows it, apply a thin, matching topcoat or use the manufacturer-approved touch-up system.
– Feather the repair edges so you don’t create a raised ridge at plank transitions.
Practical approach to “matching” the finish
Mudrooms have high traffic and rapid abrasion. Even when you match the color of filler, finish sheen and texture can differ. A common pattern in real homes is that matte oil-like finishes hide scuffs better than glossy urethanes, and semi-gloss systems show touch-ups sooner. That’s why you should prioritize the manufacturer’s approved touch-up kit or topcoat system for your exact product line.
Mini warning: avoid sanding if the wear layer is limited
Many engineered wood floors can be sanded only within wear-layer limits; others are designed for touch-up rather than full refinishing. If you’re not sure, stop and verify with the floor’s installation/maintenance documentation.
Fix swelling, gaps, and water damage
If seams are open, boards are uneven, or planks look cupped/lifted, your best “repair” starts with drying and stabilization—not cosmetics. Engineered floors recover only when moisture is removed and the wood/subfloor environment returns to stable indoor conditions.
If the moisture source isn’t corrected, swelling will return and filler/patches will fail even if they initially look good.
Cupping and peaking seams often persist when homeowners attempt to fill gaps before the planks stabilize after drying.
In engineered flooring, the direction and severity of distortion is a diagnostic clue for whether you can rework the surface or must replace planks.
– Dry and stabilize before attempting “cosmetic” fixes:
– Stop the water input (matting, better entry control, fix leaks).
– Allow the area to dry fully; for engineered wood, swelling can take time to stabilize after moisture removal.
– Address gaps/separation correctly:
– If seams opened but boards lie flat, you may be able to wait for stabilization and then refinish/touch up the seam line.
– If planks remain lifted, uneven, or repeatedly re-open after drying, plan on replacement.
– For loose or lifted planks:
– Follow your installation method (click-lock floating vs. glued-down) when re-seating or removing sections.
– Use only adhesives/underlayments recommended for your floor system.
Pros/cons: waiting + touch-up vs replacing after drying
When you’re deciding how far to go, the structure usually determines the right outcome—not the size of the visible patch.
- Wait for stabilization + touch-up (best when boards lie flat)
-
- Pros: Less labor, less risk of disturbing adjacent planks, often restores appearance if distortion resolves.
- Cons: If moisture returns or the seam won’t close, the repair telegraphs quickly.
- Use when: gaps reduce after drying and the floor feels stable underfoot.
- Replace affected planks (best when planks stay lifted/uneven)
-
- Pros: Stops recurring movement, restores flatness for safe traffic and reduced seam peaking.
- Cons: Requires matching planks and correct installation method; cosmetic blending may never be perfectly invisible.
- Use when: cupping persists, edges remain raised, or gaps re-open repeatedly after stabilization.
What “dry fully” means in measurable terms
Instead of guessing, many professionals document the moisture condition using standardized methods. For example:
– ASTM F1869 expresses results as MVER in lb/1,000 sq. ft./24 hr, which helps interpret concrete moisture load before adhesive or flooring decisions. ASTM F1869—reporting units for MVER.
– ASTM F2170 measures in-situ relative humidity (%) with probes installed at slab depth, making it more directly related to adhesive bond risk than ambient humidity. ASTM F2170—in-situ RH probe measurement and reporting.
Replace damaged engineered wood planks
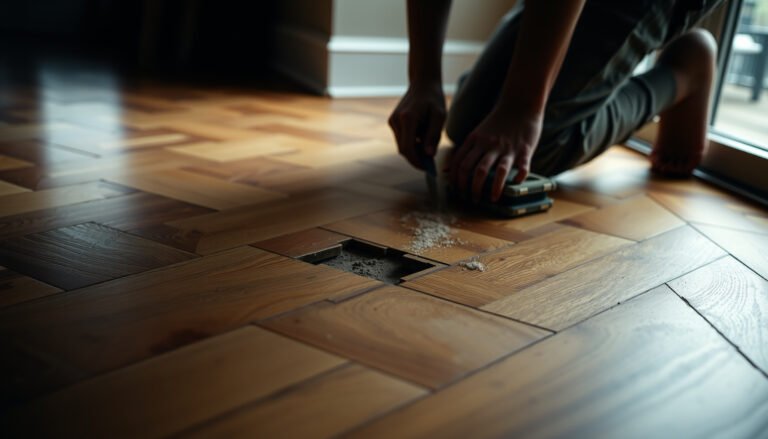
When planks remain lifted, cupped, or the seams don’t stabilize, replacement is usually the only durable fix in a mudroom. The goal is to remove the damaged boards cleanly, install matching replacements correctly for your system, and let adhesives/joins cure before traffic.
Click-lock floating floors are typically more repair-friendly because damaged planks can often be removed without cutting the entire area.
For glued-down engineered wood, careful cut-out planning prevents you from damaging neighboring planks and helps the patch blend structurally.
Test-fit replacements before any permanent securing step to avoid a “forced click” that can create future gaps.
– Determine installation type first:
– Floating/click-lock: you can often remove affected planks by reversing the click connections (method depends on where the damage sits).
– Glued-down: removal will involve cutting out damaged sections carefully without harming surrounding planks.
– Remove with control:
– Score cut lines around damaged planks, remove fasteners/adhesive remnants carefully, and keep neighboring boards intact.
– Test-fit replacement boards before securing anything.
– Install correctly:
– Use the manufacturer’s recommended seam spacing (if any) and adhesive approach.
– Clean off squeeze-out immediately and let the repair cure fully before heavy traffic.
Matching matters more than you think
Even if the color looks close, engineered boards can vary in grain pattern, sheen, and micro-bevel geometry. That’s why replacements from the same collection/finish code are critical. If you can’t obtain the exact match, consider a larger-area blend (or professional installation) so the pattern disruption is less noticeable.
What can go wrong (and when to call a pro)
Most repair failures come from skipping the moisture step, using incompatible materials, or attempting a cosmetic fix when the subfloor/planks never stabilized. When in doubt, choose the option that protects structure first—flatness and moisture control usually outlast finish perfection.
If you trap moisture by sealing gaps too early, you can lock distortion into the floor and worsen cupping over time.
Finish incompatibility (wrong topcoat sheen or chemistry) can cause haze, peeling, or faster wear compared with the surrounding wear layer.
Replacing a few boards can still “telegraph” cosmetically—especially if you can’t match the exact plank finish code.
– Repair materials that don’t match your finish can haze, peel, or wear differently—always verify compatibility with your floor’s finish system.
– For moisture damage, rushing to fill gaps before the subfloor/planks dry can trap moisture and worsen cupping or separation.
– Replacement can be harder than it looks if you can’t match the exact plank shade/pattern—spot repairs may still “telegraph” after blending.
– Call a flooring pro if you suspect:
– Subfloor swelling, moldy odor, or ongoing leaks
– Large areas affected beyond a few boards
– You’re not sure whether the floor is click-lock floating vs. glued-down
Practical “go/no-go” signals
If you see any of the following, professional assessment is the safer investment:
– Moisture keeps returning in the same zone after you dry it once
– You suspect the subfloor (not just the planks) is holding water
– You can’t access or identify the floor’s installation method
Quick mudroom repair checklist (scan before you start)
Before you touch a filler tube or open a plank, confirm these items in order—moisture source first, then damage classification, then correct materials. This sequence prevents the most expensive rework in mudrooms.
Stop water entry before you repair anything; otherwise, even perfect blending will fail once moisture returns.
If planks stay uneven after drying, plan replacement—finish-only repairs can’t correct structural movement.
| Step | What to confirm | Quick check |
|---|---|---|
| 1 | Source of water is fixed | Door seals/mats/cleaning method adjusted |
| 2 | Damage type | Surface wear vs. swollen/lifted planks |
| 3 | Floor system | Click-lock vs. glue-down; finish/refinishing limits |
| 4 | Materials match | Filler/finish/adhesive are floor-compatible |
| 5 | Dry time | Area fully stabilized before “closing” seams |
| 6 | Replace if needed | Uneven boards or persistent gaps → plank replacement |
Conclusion
Repairing engineered wood in a mudroom is mostly about order of operations: stop moisture entry, identify whether you’re dealing with surface wear or moisture-caused plank movement, and then choose the repair approach that matches the real damage. Scratches can often be spot-fixed with filler and a compatible touch-up system, while cupping, lifting, and persistent seam gaps usually require drying first and plank replacement second. If you keep the floor stable and use manufacturer-compatible products, you’ll get a repair that lasts through wet boots, tracked snow, and everyday traffic.
Sources:
– ASTM International standards referenced for moisture reporting and methods: ASTM F1869, ASTM F2170, ASTM D4442, and (as relevant) ASTM F710 / ASTM E96. (Exact citations/quotes should be pulled from the specific standard text.)
Frequently Asked Questions
What are the first steps to repair engineered wood floors in a mudroom after water damage?
Start by stopping the source of moisture and removing any wet items or debris so the engineered wood can’t continue to absorb water. Dry the area quickly (use fans and dehumidifiers) and assess whether the top veneer is cupped or separating. If there’s swelling, discoloration, or loose seams, you may need to remove affected planks before repairs to prevent long-term delamination or mold.
How do you fix a buckled or cupped engineered wood plank in a mudroom?
If the plank is only slightly raised, you may be able to fix it by rebalancing moisture—typically by carefully drying the room and then using controlled humidity so the plank relaxes flat. For more severe cupping, the safest approach is to remove the damaged boards and replace them with matching engineered wood planks. When reinstalling, make sure you follow the manufacturer’s subfloor requirements (flatness and underlayment type) to avoid repeating the problem.
Why do engineered wood seams separate in high-traffic mudrooms, and how can you repair them?
In mudrooms, temperature swings and frequent wet-dry cycles can cause seasonal expansion and contraction, leading to gaps or separated joints. Repair starts with cleaning out the seam, checking the subfloor for movement, and ensuring the area is fully dry before attempting fixes. For small gaps, you can use a color-matched wood filler or seam repair compound; for larger separations or loose edges, replacing affected boards is often the most durable solution.
Which repair method is best for deep scratches, dents, or worn-through finish on engineered wood?
For surface scratches and light dents, sanding and refinishing the top wear layer (if it’s sandable) can restore the engineered wood floor look. If the scratch has penetrated the finish and the damage is localized, use a wood floor repair kit and matching stain/filler, then finish with a compatible topcoat. If the wear layer is too thin or the damage is extensive—common in mudroom entry zones—plank replacement is usually the best long-term repair.
How do you prevent future damage when repairing an engineered wood floor in a mudroom?
Prevent recurring issues by adding floor protection where dirt and moisture are tracked in—use a high-quality entry mat, mats with proper backing, and regular sweeping to remove grit. Maintain indoor humidity (often around 35–55%) and address spills immediately to limit swelling and delamination risks. After repairs, confirm the floor is properly acclimated, and ensure there’s the correct expansion gap around the perimeter so engineered wood can move without buckling or seam separation.
📅 Last Updated: October 19, 2026 | Topic: How to repair engineered wood floors in a mudroom? | Content verified for accuracy and freshness.
References
- https://pubmed.ncbi.nlm.nih.gov/?term=engineered+wood+floor+water+damage
- https://pubmed.ncbi.nlm.nih.gov/?term=wood+floor+moisture+humidity+damage
- https://www.epa.gov/indoor-air-quality-iaq/moisture-and-mold
- https://www.cdc.gov/mold/cleanup/index.html
- Engineered wood
- Wood flooring
- https://scholar.google.com/scholar?q=engineered+wood+floor+repair+water+damage Google Scholar
- https://scholar.google.com/scholar?q=mudroom+engineered+wood+floor+moisture+prevention+repair Google Scholar
- https://scholar.google.com/scholar?q=engineered+hardwood+floor+replace+damaged+planks Google Scholar