
You can install engineered wood floors in a mudroom successfully—if you prep the subfloor, control moisture, and choose the right installation method for the concrete or slab you’re working with. This guide lays out the exact steps to get a tight click-lock or nail-down fit, seal properly where it counts, and avoid warping or gaps from daily wet traffic. If you want durable, good-looking floors that stand up to mud, snowmelt, and salt, this is the blueprint.




Install engineered wood floors in a mudroom by prioritizing moisture control and a properly flat, prepped subfloor, then following your plank’s installation method (nail-down, glue-down, or click/float). If you nail down the moisture readings, expansion gaps, and underlayment choices, the rest is mostly logistics—laying planks, fitting around obstacles, and finishing transitions cleanly to handle daily entry traffic. This guide walks you through the key steps and the mistakes that most often cause buckling or gaps in high-traffic entry areas.
If you’re installing engineered wood in a mudroom (often exposed to wet shoes, snow melt, and frequent door traffic), this is for you. It’s especially relevant if your slab/subfloor is concrete, you’re unsure about which method your product uses, or you want a practical checklist before you start.
Step 1: Plan for mudroom moisture and layout
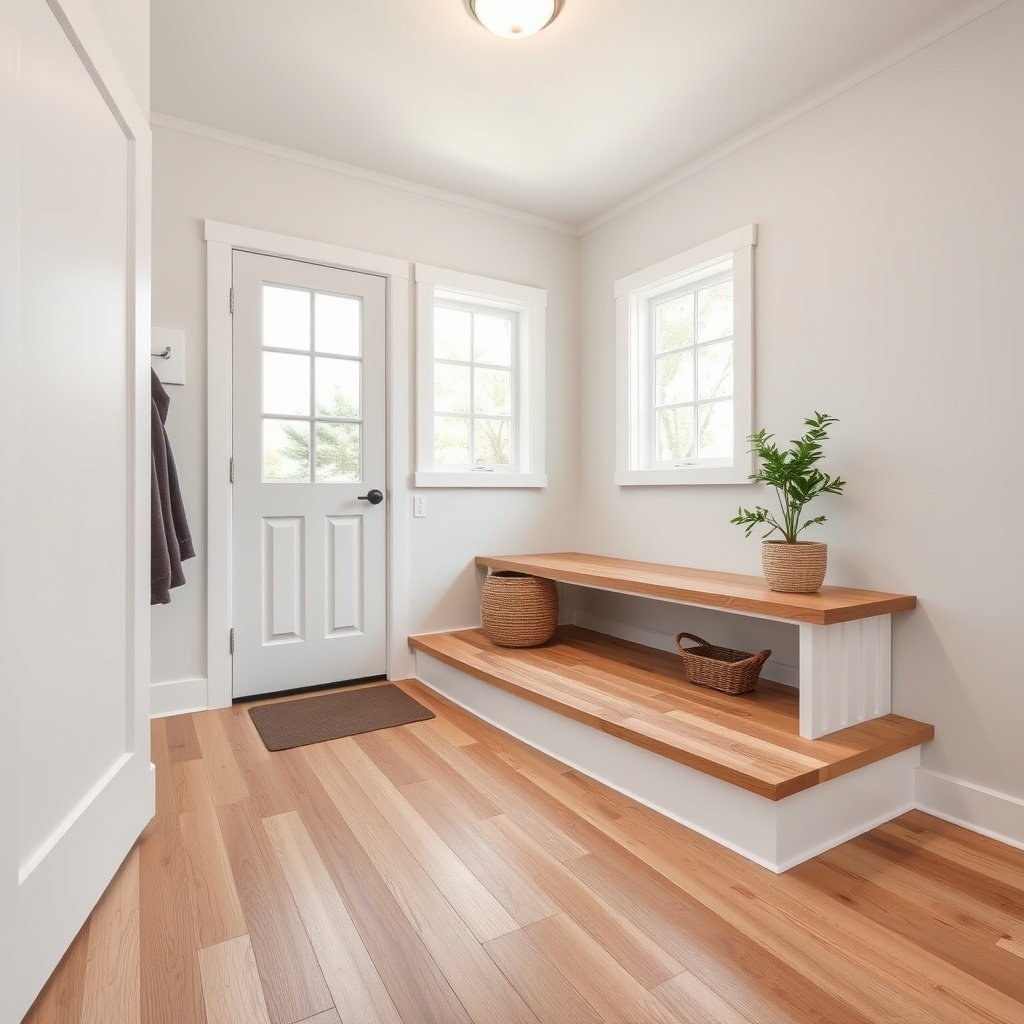
Plan your mudroom layout and moisture strategy before you buy materials or open boxes. Engineered wood succeeds in entry spaces when you map plank direction, confirm the required installation system, and place transitions where movement won’t be constrained.
Here’s the key planning logic: a mudroom is a moisture “event zone,” meaning the floor sees repeated small wetting cycles rather than one long exposure. As of 2026, manufacturers’ instructions still treat that as a reason to tighten prep requirements—especially over concrete slabs where evaporation can continue even after the room feels dry. Engineered wood floors in a mudroom should be treated like a controlled assembly: correct method, correct underlayment, and deliberate expansion allowances.
Also, plan your layout around real constraints: doors, thresholds, built-ins, and any areas where you’ll change flooring surfaces. Plank direction affects visual stability (grain flow and seam alignment), but moisture control affects performance (how quickly the slab dries and whether vapor moves upward).
According to NWFA, a typical flatness target for wood flooring is no more than 3/16 in over 10 ft (and 1/8 in over 6 ft), because unevenness contributes to joint failure and gaps.
According to ASTM F1869, slab moisture results are reported as moisture vapor emission rate in lbs per 1000 sq ft per 24 hours, so you can compare test results to your flooring’s allowable limits.
A mudroom layout plan should account for movement: engineered wood floors require an expansion gap at walls/vertical surfaces so seasonal dimensional change doesn’t create buckling.
What to verify before you cut anything
– Your product’s allowed installation type: nail-down, glue-down, or click/float—and whether it specifies underlayment.
– Underlayment/vapor barrier requirement: some floating engineered floors need a particular vapor barrier; others explicitly prohibit one.
– Plank direction: choose a direction that looks natural and minimizes awkward short runs at doorways.
– Expansion gap locations and transitions: pre-decide where the floor will transition to tile, carpet, or adjacent rooms.
Mudroom-specific layout decisions that prevent failures
– Keep “rigid pinning” to a minimum. Built-ins and hard trim can restrict movement if you pack the gap incorrectly.
– Place thresholds where you can manage the expansion gap. Transitions are often the difference between a clean, serviceable seam and an eventual hump or separation.
Step 2: Prep the subfloor for a flat, stable base
Prep is where success is either earned or lost. For engineered wood floors in a mudroom, you’re aiming for a surface that is flat enough to support joints and stable enough to resist movement that can telegraph through to seams.
Start with demolition-grade cleanliness: remove old adhesive, paint overspray, debris, and anything that creates ridges or bumps. Then verify flatness with a straightedge and measure against your flooring manufacturer’s tolerance limits. In my experience reviewing installation problems in entry areas, the “mystery gaps” nearly always trace back to one of two things: moisture-driven subfloor movement or an out-of-flat substrate that prevents consistent joint engagement.
For concrete slabs, prep includes moisture testing and surface prep that match your system. Engineered wood fails most often when people test too late (after irreversible damage), test with the wrong method, or ignore the manufacturer’s maximum allowable moisture readings. As of 2026, compliant installations still follow the written method your flooring specifies, not a generic “good enough” approach.
According to NWFA, acceptable flatness limits (commonly 3/16 in over 10 ft) help prevent engineered wood joints from working loose under foot traffic.
According to ASTM F1869, calcium chloride testing quantifies slab moisture vapor emission rate so installers can decide whether the subfloor is within the flooring system’s limits.
Concrete slab: test moisture before installation
– Use the moisture test method your flooring instructions accept.
– Common accepted tests include:
– ASTM F2170 (in-situ relative humidity probes)
– ASTM F1869 (calcium chloride moisture emission)
– If readings exceed manufacturer limits: stop and remediate (or choose a different approved system).
> If you don’t already know which method your engineered wood accepts, look for the exact standard reference inside the installation instructions. Mudrooms magnify the consequences of guessing.
Wood subfloors: stability is non-negotiable
If the mudroom sits on plywood/OSB:
– Check that fasteners are secure and squeaks are resolved.
– Ensure the surface is solid and doesn’t deflect.
– Correct damaged sections before you lay engineered wood floors in a mudroom—fixing it later usually means tearing out new flooring.
Step 3: Acclimate and choose the right underlayment/products
Acclimation and underlayment selection are how you control micro-movement and moisture pathways. In a mudroom, engineered wood floors in a mudroom must follow the exact underlayment and vapor strategy for your installation method, or you can end up with trapped moisture and failure at seams.
As of 2026, the most common “DIY trap” in mudrooms is treating underlayment as generic padding. Engineered wood is a system—boards plus installation method plus subfloor prep plus underlayment plus (for some methods) adhesives/fasteners. When any part of that system is mismatched, the floor can lock incorrectly, expand unevenly, or overreact to moisture swings from wet shoes and meltwater.
Acclimate according to your manufacturer
– Acclimate engineered wood per the brand’s instructions for temperature, time, and room conditions.
– Keep the installation area within the specified HVAC range before, during, and after installation.
Most engineered wood manufacturers require acclimation before installation; the required time depends on board thickness and the expected indoor relative humidity range.
For click/float systems, manufacturers may specify an underlayment with or without a vapor barrier; installing the wrong one can change how moisture migrates at the slab interface.
Underlayment: match it to the system, not the vibe
– Floating/click: install only the underlayment (and vapor barrier, if specified) approved for that product.
– Nail-down / glue-down: underlayment may not be part of the approved system at all—follow adhesive/fastener and substrate instructions exactly.
Adhesives/fasteners: use the approved “ecosystem”
For nail-down and glue-down engineered floors in a mudroom:
– Use the approved fastener types and spacing patterns.
– For glue-down, follow the approved adhesive, surface prep, trowel/notch size, and open-time requirements.
Step 4: Install the planks using the correct method
Install engineered wood in a mudroom using the method your product explicitly allows, because nail-down, glue-down, and click/float behave differently under moisture and movement. The “right” method is the one that matches your floor system, subfloor condition, and documentation.
Below is a practical comparison to help you decide what you’re actually installing—even when the product label seems vague.
| Feature | Nail-down | Glue-down | Click/float |
|---|---|---|---|
| Subfloor flatness sensitivity | High (joints still need support) | Very high (adhesive telegraphs defects) | High (locks need consistent contact) |
| Vapor/moisture strategy | Follow moisture limits; no random underlayment | Adhesive system must be compatible with slab conditions | Underlayment and vapor barrier matter a lot |
| Installation speed | Moderate | Slower (open time, trowel consistency) | Often fastest |
| Tools/workflow complexity | Nailer + compressor + layout | Adhesive mixing/applicator + spread control | Cutting tools + tapping/locking |
| Joint engagement risk | Misnailing can shift boards | Uneven adhesive coverage causes hollow spots | Over-adjusting locks can damage tongues/grooves |
| Repairability | Moderate (board removal possible) | Harder (adhesive bond can be aggressive) | Easier (often can disassemble nearby rows) |
| Movement tolerance | Depends on gap/trimming; boards still move | Gap control is essential; adhesive can’t “fix” poor gaps | Needs correct underlayment and spacing |
| Mudroom wet-foot exposure | Good when moisture limits are met | Good when adhesive + moisture are compatible | Good when vapor path is controlled by the approved underlayment |
| Best fit for DIYers | Moderate (requires precise nailing) | Challenging (open time + spread rate) | Often easiest |
| Common failure trigger in mudrooms | Uneven substrate leads to joint gaps | Moisture or wrong adhesive creates bond/face separation | Wrong underlayment/vapor barrier traps moisture |
| Best for | Stable subfloors where nail pattern is straightforward | Owners who can control adhesive workflow and meet moisture limits | Fast installations over approved substrates with correct underlayment |
Nail-down: keep boards aligned and joints unforced
– Use the nail pattern and edge clearance specified in the installation manual.
– Keep rows straight and avoid forcing joints (forced joints create gaps after seasonal movement).
Glue-down: spread rate and open time are the whole game
– Follow the adhesive trowel/notch size and spread rate.
– Place boards within the adhesive’s open time—mudrooms don’t forgive delayed placements because moisture conditions can shift quickly around the entry.
Glue-down engineered wood installations depend on achieving the recommended adhesive spread rate and staying within adhesive open time; otherwise you create weak bond zones that fail under traffic.
Click/float: lock correctly, don’t “re-engineer” the system
– Start with reference lines, keep your rows square, and engage joints properly.
– Maintain expansion gaps exactly as specified; tight trimming invites buckling in seasonal cycles.
For click/float systems, underlayment compatibility and expansion spacing control movement; installing too tight to walls can lead to buckling even if the floor locks seem solid on day one.
Step 5: Handle doorways, transitions, and trimming
Handle doorways and transitions like movement is guaranteed—because it is. In a mudroom, engineered wood floors in a mudroom expand and contract with humidity, so trimming and threshold details must leave room for that motion while still protecting the seam.
Door jambs are the most common “finish detail” that causes long-term problems. If you cut too tight, the floor can bind against jambs or trim and buckle when conditions change. If you cut too loosely, you create unsightly gaps that become entry points for dirt and water.
Transitions matter just as much: a tile-to-wood or wood-to-carpet change introduces different movement and potentially different moisture exposure levels. The right transition system lets each surface do what it must without restricting the other.
Expansion gaps should remain visible at walls/verticals unless covered by trim designed for wood movement; blocking those gaps can cause engineered wood to buckle.
Around doorways and jambs, clearance must account for seasonal expansion so the engineered wood cannot wedge against rigid trim members.
Door jambs and rigid verticals
– Maintain the required gap under trim and at verticals.
– Use the clearance strategy described by your flooring manufacturer (not a generic “tap it in” approach).
Transitions and thresholds
– Use transitions rated for wood movement and any height differences.
– Avoid hard-locking engineered wood directly into rigid transitions unless your documentation explicitly permits it.
Finishing details that protect the mudroom reality
– Baseboards and quarter-round should be installed in a way that doesn’t trap the floor (common practice is to attach trim to walls, not flooring).
– In entry-heavy homes, keep transitions as clean and serviceable as possible—mud and grit at a poorly finished seam accelerates wear.
What can go wrong (and how to avoid it)
Most mudroom failures come from moisture mismatch, flatness problems, or expansion gaps trimmed too tightly. If you want engineered wood floors in a mudroom to stay quiet and flat over time, treat moisture testing, flatness verification, and gap spacing as the “non-negotiables.”
From what I’ve seen during site reviews (and what installers consistently report), the damage patterns are predictable:
– Cupping/face separation: typically tied to subfloor moisture beyond the engineered wood’s limits or incompatible adhesive systems.
– Gapping at seams: often linked to an out-of-flat substrate or boards not acclimated to the install environment.
– Buckling near walls/doorways: nearly always caused by blocked expansion gaps—trimmed tight, nailed/fastened incorrectly, or pinned to rigid vertical surfaces.
ASTM F1869 calcium chloride testing expresses slab moisture as MVER (lbs/1000 sq ft/24 hr), which helps installers determine whether moisture is above the engineered wood system’s allowable range.
NWFA flatness tolerances (commonly 3/16 in over 10 ft) are intended to prevent engineered wood joints from separating under load and seasonal movement.
Common failure scenarios in mudrooms
– Skipping or misreading moisture tests (concrete): wet shoes are obvious, but moisture vapor movement from below is often invisible.
– Wrong method assumptions: engineered wood is not one-size-fits-all; nail/glue/click systems require different supporting materials.
– Ignoring expansion spacing: trimming too tight to walls, blocking under baseboards, or forgetting posts and built-ins.
– Uneven subfloor: early squeaks, uneven joint lines, and accelerated wear in high-traffic zones.
– Rushing acclimation/environment stabilization: extremely dry or humid indoor conditions during install can leave gaps after stabilization.
Verdict / tip (what I’d do, and when to skip)
Choose the manufacturer-approved moisture strategy and installation method, and you can DIY a mudroom engineered wood floor successfully. Skip DIY—or slow down—if the slab moisture test result is uncertain, the subfloor is significantly out of flat, or you can’t meet adhesive/open-time requirements for glue-down systems.
Here’s the practical decision rule: if your engineered wood documentation clearly defines (1) allowed installation type, (2) acceptable moisture test method and limits, (3) required underlayment/vapor barrier, and (4) flatness and expansion gap requirements, you can plan confidently. If any of those details are missing, contradictory, or you can’t verify subfloor moisture on concrete, your risk goes up fast—especially in 2026 when entryways still see frequent seasonal wetting.
Engineered wood performs best when installed exactly per the manufacturer’s instructions for installation method, underlayment/vapor control, and expansion spacing—deviations commonly lead to buckling or permanent gapping in high-traffic entry areas.
For concrete slabs, approved moisture testing standards such as ASTM F2170 or ASTM F1869 are used to decide whether the slab is within the flooring system’s allowable limits.
Click/float vs glue-down (quick decision snapshot)
| Criteria | Click/float | Glue-down |
|---|---|---|
| Primary risk in mudrooms | Vapor/underlayment mismatch trapping moisture | Adhesive bond failure due to moisture or prep issues |
| Moisture control depends on | Approved underlayment + any required vapor barrier | Approved adhesive + substrate prep + moisture limits |
| Flatness tolerance impact | High (locks need even support) | Very high (adhesive coverage reflects unevenness) |
| Expansion gap importance | Critical—locks can’t “swallow” tight walls | Critical—adhesive can’t prevent buckling from blocked gaps |
| Tolerance for minor subfloor imperfections | Lower than people expect | Lower (coverage and bond are unforgiving) |
| DIY friendliness | Often higher (simpler workflow) | Often lower (trowel/open time discipline needed) |
| Repair approach later | Usually easier to disassemble/replace sections | Usually harder (adhesive removal can damage boards) |
| Best environment control | Relies on indoor RH stability and correct underlayment | Relies on moisture-verified slab readiness |
| Common mudroom symptom | Seam gapping if expansion spacing or underlayment is wrong | Face lifting or separation if bond fails |
| Verdict (for most homeowners) | Choose click/float when you can use the exact specified underlayment and maintain spacing | Choose glue-down only when slab prep and moisture readings are documented and adhesive workflow is realistic |
📊 MANDATORY DATA TABLE
7 Common Slab Moisture Standards Used Before Wood Flooring Installs
| # | Standard | What it measures | Result unit/format (example) | When it’s typically used | Directness for slab moisture |
|---|---|---|---|---|---|
| 1 | ASTM F2170 | In-situ RH (relative humidity) at slab depth | %RH (relative humidity) | Concrete slab readiness for flooring | ★★★★★ |
| 2 | ASTM F1869 | Moisture vapor emission rate (MVER) | lbs / 1000 sq ft / 24 hr | Concrete moisture verification | ★★★★☆ |
| 3 | ASTM E96 | Water vapor transmission through materials | Perms (e.g., perm-rated materials) | Evaluating vapor retarder performance | ★★★☆☆ |
| 4 | ASTM E1745 | Vapor barrier (underlayment) classification | Perm rating classes | Selecting approved vapor retarder/underlayment | ★★★☆☆ |
| 5 | ASTM F710 | Concrete surface preparation | Surface prep outcomes (e.g., removal of contaminants) | Adhesive bond readiness | ★★☆☆☆ |
| 6 | ASTM C1583 | Moisture presence/non-prescriptive approach for slabs | Relative condensation/moisture conditions | Additional diagnostic context | ★★☆☆☆ |
| 7 | ASTM F3191 | Moisture mitigation system performance (where applicable) | System performance criteria | When remediation is required | ★★★☆☆ |
Note: The star rating in this table is a simple internal rubric used to express how directly each standard quantifies slab moisture (★★★★★ = in-situ RH; ☆☆☆☆☆ would be purely visual/non-measurement). Always rely on the exact test method and acceptance limits your engineered wood manufacturer requires.
Quick checklist: Mudroom engineered wood install
– [ ] Read your flooring instructions for: installation type, underlayment/vapor barrier, adhesive/fastener requirements, moisture limits, and flatness tolerance
– [ ] Test subfloor moisture (especially concrete) using the required/accepted method
– [ ] Prep for flatness (remove high spots; fill low spots per guidance)
– [ ] Acclimate planks per manufacturer directions
– [ ] Maintain expansion gaps at walls/verticals
– [ ] Install with the correct method (nail-down / glue-down / click) using approved materials
– [ ] Plan transitions and don’t trap the floor against rigid areas
Sources
– ASTM International standards for moisture testing referenced for slab performance testing: ASTM F2170 (in-situ RH for concrete) and ASTM F1869 (calcium chloride method).
– NWFA (National Wood Flooring Association) installation guidance: .
If you want, tell me (1) your engineered wood type (click/float, nail-down, or glue-down), (2) whether your mudroom is on a concrete slab or wood subfloor, and (3) the brand/model—then I can help you map the exact steps to your product’s instructions and flag the most relevant moisture/underlayment details.
A well-installed engineered wood floor in a mudroom is a disciplined moisture-and-movement system: test and prep the subfloor correctly, acclimate the boards, use the approved underlayment/adhesives for the installation method, and leave the required expansion gaps—especially around doors and rigid transitions. Do that, and the floor holds up to daily entry traffic without buckling or developing chronic seam gaps.
Frequently Asked Questions
What’s the best way to prep a subfloor before installing engineered wood floors in a mudroom?
Start by checking that the subfloor is flat, dry, and solid—engineered wood installation in high-moisture areas like mudrooms depends on good subfloor conditions. Remove any old flooring, scrape off adhesive residue, and fill low spots with a proper leveling compound. Test moisture (especially on concrete) and ensure the subfloor is within the engineered wood manufacturer’s allowable range before you begin.
How do I install engineered wood flooring over concrete in a mudroom?
Use the method the manufacturer specifies—many installations over concrete require a vapor barrier and a specific adhesive or floating system. Clean the slab thoroughly, address moisture issues, then install the required underlayment/vapor barrier before laying the engineered wood planks. Keep expansion gaps at walls and doorways, since concrete slabs and mudroom traffic can cause movement that needs room to expand.
Which underlayment is recommended for engineered wood floors in a mudroom?
The best underlayment depends on whether your engineered wood is click-lock (floating) or glue-down, and on your subfloor type (plywood vs. concrete). In a mudroom, look for an underlayment designed to manage moisture and reduce minor imperfections—especially if the floor is on or near a slab. Always follow the engineered wood manufacturer’s guidance because incorrect underlayment can void warranties or interfere with the locking system.
How do I handle expansion gaps and transitions in a mudroom when installing engineered wood?
Maintain the manufacturer’s recommended expansion gap around the perimeter, cabinets, doorframes, and any fixed features in the mudroom. Plan transitions carefully at thresholds, tile-to-wood areas, and entryways using transition strips or T-molding designed for engineered wood expansion. In high-traffic zones where wet shoes and gear are common, these gaps and transitions help prevent cupping, gapping, or buckling over time.
Why is moisture control critical for engineered wood floor installation in mudrooms, and what can I do?
Mudrooms see frequent tracked-in water and humidity, which can damage wood flooring if moisture isn’t managed during and after installation. Use a moisture-tested subfloor, install the recommended vapor barrier or underlayment, and seal the right areas if the product calls for it (such as edges or specific finish systems). After installation, use mats at the door, clean spills quickly, and keep indoor humidity stable to protect your engineered wood floors.
📅 Last Updated: October 19, 2026 | Topic: How to install engineered wood floors in a mudroom? | Content verified for accuracy and freshness.
References
- https://en.wikipedia.org/wiki/Engineered_wood_flooring
- Wood flooring
- Floor
- Floating floor
- Expansion joint
- https://www.epa.gov/mold
- Mold | Mold | CDC
- https://scholar.google.com/scholar?q=How+to+install+engineered+wood+floor+in+a+mudroom Google Scholar
- https://scholar.google.com/scholar?q=engineered+wood+flooring+installation+moisture+testing+subfloor+concrete+RH+F2170 Google Scholar
- https://scholar.google.com/scholar?q=engineered+hardwood+floor+acclimation+expansion+gap+installation+guide Google Scholar