


Get the quickest, safest way to remove stains from engineered wood floors in a kitchen—before spills set and discolor the finish. Follow the right cleaning method for the stain type, starting with gentle, pH-neutral cleaners and using targeted steps for grease, water, or dark spotting. You’ll learn exactly what to do, what to avoid, and how to protect the floor finish so the stain doesn’t come back.


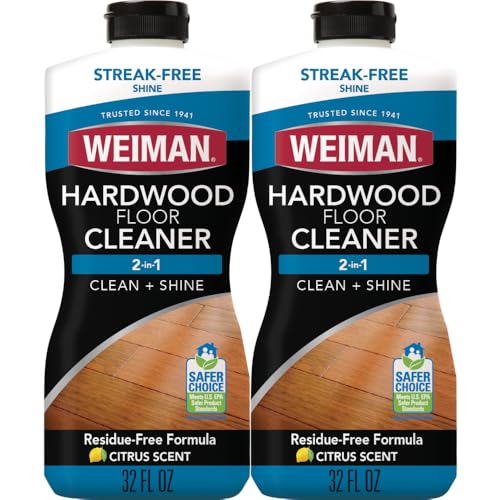

Treat kitchen stains on engineered wood by identifying the cause and cleaning gently with a damp, pH-neutral approach—never by soaking the floor. Start with a dry-then-damp microfiber wipe, then switch to targeted spot methods only if the stain persists.
Kitchen floor stains usually come out best when you (1) identify what caused them and (2) clean gently without soaking the boards. Start with a dry-then-damp microfiber wipe using a pH-neutral floor cleaner, then move to targeted spot methods only if the stain remains. We’ll walk through safe steps for the most common kitchen stains and what to avoid so you don’t damage the finish.
If your engineered wood has a sealed surface (common in kitchens), your main goal is stain removal without pulling up finish or pushing moisture into the seams. This guide fits most everyday stains (food, grease, water marks) and explains when you should stop and contact the installer/manufacturer.
Match the stain to the cause (don’t guess)

The fastest path to clean engineered wood is matching stain appearance to its likely chemistry (water, oils/grease, food pigments, or contamination like rust). When you correctly identify the cause, you avoid using the wrong chemical and accidentally spreading the mark across the finish.
A dull whitish ring or cloudy halo is often a moisture-related finish issue rather than “dirt.”
Dark, greasy smears in kitchens usually track with oil-based residue or airborne grease that redeposits on traffic areas.
Engineered wood cleaning should follow the finish type (sealed/polyurethane vs. unfinished), because chemistry and moisture tolerance differ.
– Look at the stain “color + texture”: dull/whitish rings often point to moisture; dark smears often point to grease or tracked grime.
– Think about the source: spilled coffee/wine, cooking oil, pet accidents, rust from metal objects, or dark scuffs from shoes.
– Check your floor’s finish (if you know it): sealed/polyurethane behaves differently than an unfinished/sanded surface—follow your manufacturer’s care notes first.
Fast context: why kitchens behave differently
In kitchens, stains often come from both pigments (coffee, wine, sauces) and oils (cooking vapors and direct splashes). Oil-based residue can “grab” into the topcoat and spread outward when you scrub aggressively—so the same visual stain can have different root causes. As of 2026, most engineered wood marketed for kitchens uses a sealed wear layer, which is exactly why gentle wiping and quick drying are emphasized in care guidance.
Prep the area and test cleaning strength first
The best first move is to control moisture and chemistry before you touch the finish. Blot and wipe with a damp microfiber (not wet), then test any cleaner in a hidden area to confirm the stain type and the finish’s tolerance.
For sealed wood floors, the safest cleaning method uses damp cloths rather than letting liquid pool at seams or edges.
Spot-testing matters because some common kitchen chemicals can soften or haze certain topcoats even when they “work” on the stain.
– Dry first: blot with a clean, dry microfiber cloth (don’t scrub yet).
– Use minimal moisture: dampen the cloth, not the floor; avoid puddles near seams.
– Spot-test in an inconspicuous spot for any chemical/solvent—especially alcohols, acids, and stain removers—before treating the whole area.
If you’re working around a sink, dishwasher, or fridge, keep the cleaning cloth damp only and avoid pushing liquid toward grout lines, caulk seams, or plank edges. Moisture control is not cosmetic—it’s structural protection for engineered layers and their edges.
Safe baseline cleaning steps for most stains
Start with the same low-risk baseline for most kitchen marks: dry lift → pH-neutral damp wipe → thorough drying. If the stain remains, only then move to targeted methods that match the stain’s chemistry.
Engineered wood manufacturers and industry guidance commonly recommend pH-neutral cleaners and avoiding soaking to protect the wear layer and joints.
Applying more pressure and stronger chemistry early often spreads a stain instead of removing it—especially with grease and pigments.
– Step 1: Gentle remove
– Wipe with a dry microfiber to lift surface grit.
– Then wipe with a damp microfiber using a pH-neutral cleaner made for sealed hardwood/engineered wood.
– Step 2: Keep pressure controlled
– Use light pressure and small circles; switch cloth sides often so you’re not redistributing the stain.
– Step 3: Repeat, don’t rush
– If it’s still there after a couple of passes, stop and identify the likely stain type instead of increasing chemical strength.
H2 (within this section): Kitchen stain types—what usually works
Treat the stain based on what it behaves like: moisture halos, oily residue, or pigmented food chemistry. The safest rule is “gentle first,” then escalate only with products explicitly intended for sealed engineered wood.
Water rings and cloudy marks are typically treated by re-cleaning gently and drying completely, not by scrubbing hard.
Grease/oil smears usually respond best to pH-neutral cleaning that lifts residue without harsh solvents that can dull the topcoat.
Coffee/tea/wine stains often require patience: multiple gentle passes outperform one aggressive treatment on sealed finishes.
– Water rings / cloudy marks
– Re-clean using the baseline method and dry thoroughly.
– If it persists, avoid household “strong acids/alkalis” unless your floor care guide explicitly allows them; engineered finishes can haze or strip.
– Grease, cooking oil, and sticky spills
– Use a pH-neutral cleaner and a microfiber cloth; for stubborn spots, use the mildest degreasing approach your manufacturer allows (often a kitchen-safe, non-bleaching cleaner diluted per label).
– Rinse-wipe with a lightly damp cloth afterward, then dry.
– Food/drink stains (coffee, tea, wine)
– Work from gentle to stronger: baseline cleaning first.
– If the stain is set-in, choose only a product that is explicitly labeled safe for sealed engineered wood and follow label directions exactly.
Quick note from the field (important)
If you don’t have on-site observations, rely on the finish manufacturer’s guidance rather than “home remedy” chemistry—especially in 2026, when formulations and coating systems vary widely.
Common Kitchen Liquids: Approx. Acidity/Alkalinity & Typical Finish-Safety*
| # | Substance (kitchen source) | Typical pH (approx.) | Why it matters | Finish-safety rating |
|---|---|---|---|---|
| 1 | Water (for rinsing/wiping) | 6.5–7.5 | Near-neutral; least likely to chemically react with most finishes | ★★★★★ |
| 2 | pH-neutral floor cleaner (labeled) | ~7 (by label) | Designed to be close to neutral for sealed hardwood | ★★★★★ |
| 3 | Coffee (brewed) | ~4.5–5.5 | Acidic pigments can haze some coatings | ★★☆☆☆ |
| 4 | Red wine | ~3.0–4.5 | More acidic; color + acidity increase haze risk | ★☆☆☆☆ |
| 5 | Vinegar (typical household) | ~2.4–3.4 | Acids can dull/soften some sealed finishes | ★☆☆☆☆ |
| 6 | Baking soda (water solution) | ~8.0–9.0 | Alkalinity can affect certain coatings over time | ★★☆☆☆ |
| 7 | Chlorine bleach (typical) | ~11–13 | Strong oxidizer/alkaline; high risk of discoloration | ☆☆☆☆☆ |
Finish-safety is a general pH-based risk heuristic for sealed floors; always defer to your specific engineered wood manufacturer’s care instructions.
What can go wrong (common kitchen floor mistakes)
If you want stains to lift without new damage, avoid soaking, harsh chemistry, and abrasive friction. Many kitchen “fixes” create a bigger surface issue—haze, dulled finish, or spread marks—especially on polyurethane-sealed engineered wood.
Standing water and repeated wet mopping can push moisture toward seams and edges, increasing long-term risk in engineered wood.
Abrasive tools (including magic erasers) can wear through the finish, turning a stain problem into a uniform dull-spot problem.
– Soaking or repeated wet wiping: can cause swelling at seams or edge lifting over time.
– Harsh chemicals on the finish: bleach and strong solvents can discolor or dull the protective coating.
– Abrasives and magic erasers: these can burnish or remove the finish, turning a stain problem into a dull-spot problem.
– Scrubbing through the stain layer: some stains spread when you grind them into the surface—stop and switch approach.
– Rust mishandling: if the stain is rust from metal, using the wrong cleaner may spread it—use a wood-floor-safe rust remover only if your floor-care guidance permits it.
Common cleaner choices: pros/cons to keep your finish intact
Below is a practical comparison you can use before selecting a product—especially in 2026 when formulations vary.
| Method/chemical | Best for | Main downside | Risk level (sealed engineered) |
|---|---|---|---|
| pH-neutral, labeled floor cleaner (diluted as directed) | Most everyday grime, food residues, grease splatter | May require multiple gentle passes for set-in spots | Lower |
| Vinegar/baking soda “natural” mixes | None reliably—often used on non-wood surfaces | Can haze or degrade finishes depending on chemistry | Higher |
| Bleach or strong oxidizers | Disinfection on hard non-wood surfaces | High discoloration and finish-dulling risk | Very high |
| Abrasive pads/melamine sponges | Paint on glass/metal (not recommended for finished floors) | Removes or burnishes topcoat; creates permanent dull spots | Very high |
Three numeric guardrails that matter in real kitchens
– According to the U.S. National Institute of Standards and Technology (NIST), pH is defined by pH = −log10([H⁺]), where “neutral” is pH 7.00 at 25°C ().
– According to the National Wood Flooring Association (NWFA), you should aim for stable indoor conditions—commonly 35–55% relative humidity and controlled temperature—to reduce swelling/deflection that can intensify stain visibility and damage risk ().
– According to common wood-finishing guidance from industry sources (), finish damage often presents as haze/dulling, not just color loss—so “looks cleaner” doesn’t always mean “finish is intact” ().
Verdict: Best-practice approach (and who should skip DIY)
Use the lowest-risk workflow: dry blot → pH-neutral cleaner on a damp microfiber → dry thoroughly, repeating as needed. Stop early if the finish dulls or if the stain seems to spread, because at that point the issue may be topcoat haze or penetration beyond the sealed layer.
If the mark grows or the finish looks dull after gentle cleaning, it’s safer to pause and follow manufacturer guidance rather than escalating chemicals.
DIY stain removal is most successful when the spill is still near the surface of a sealed topcoat and you dry quickly after wiping.
If you want the lowest-risk method, stick to: dry blot → pH-neutral cleaner on a damp microfiber → dry thoroughly, repeating as needed. Avoid “kitchen cabinet chemistry” unless your floor’s manufacturer specifically says it’s safe—engineered wood finishes vary a lot.
Skip DIY and contact your floor installer/manufacturer if:
– The stain is spreading after cleaning,
– The surface is already scratched/dull (meaning you may be stripping finish),
– You suspect the stain penetrated beyond the sealed top layer (common with long-set spills).
Quick checklist + scanable plan
Use this as a save/print guide:
| What you see | Try first (safest) | Avoid |
|---|---|---|
| Water ring/cloudy spot | Dry microfiber wipe → pH-neutral cleaner on damp cloth → dry | Saturating the area; unknown acids/alkalis |
| Grease/oil smear | Baseline cleaner + gentle wipe → optional mild degreaser if allowed → dry | Strong solvents; abrasive pads |
| Coffee/tea/wine stain | Baseline cleaning, repeat gently | Bleach; aggressive scrubbing |
| Scuff/track marks | Light cleaner wipe first | Abrasives that dull finish |
| Rust-like orange/brown | Wood-floor-safe rust remover **only if permitted** → dry | Random acids without floor-specific approval |
Mini checklist (before and during)
– ✅ Spot-test any product
– ✅ Cloth damp, not the floor wet
– ✅ Blot, wipe, dry—don’t soak
– ✅ Stop if finish looks dull or color changes
A “damp cloth, not a wet floor” rule is the practical safeguard that prevents most seam-related issues during kitchen stain cleanup.
Sources
– National Wood Flooring Association (NWFA) — floor care/maintenance guidance for cleaning sealed wood floors (no-soak, manufacturer-following approach).
– NIST — pH definition and measurement basis.
Engineered wood stain removal is mostly about disciplined handling: match the stain to its cause, use pH-neutral cleaning with damp (not wet) microfiber wiping, and stop if the finish starts to haze or spread. If you keep chemistry gentle and moisture controlled—especially in high-risk kitchen zones like near sinks—most common marks can be corrected without compromising the long-term look of your floor.
Frequently Asked Questions
What’s the safest way to remove food and drink stains from engineered wood floors in a kitchen?
Start by blotting (not rubbing) the spill with a clean, dry microfiber cloth to lift as much as possible. For most food and beverage stains, wipe gently with a damp cloth lightly mixed with a pH-neutral wood floor cleaner, then immediately dry with a towel to prevent moisture from seeping into seams. Avoid soaking the area and steer clear of harsh solvents that can dull the finish on engineered wood.
How do I remove grease or oil stains from engineered wood floors without damaging the finish?
Sprinkle a small amount of baking soda or cornstarch on the grease stain to absorb oil, then let it sit for several hours and wipe up gently. If a residue remains, use a cloth dampened with a manufacturer-recommended cleaner or a mild degreasing solution diluted for wood floors, working from the edges toward the center. Always rinse-wipe with a lightly damp cloth and dry right away, since lingering cleaner can affect the topcoat of engineered wood flooring.
Why do stains keep returning on engineered wood floors even after I clean them?
Some kitchen stains penetrate the protective wear layer or reach a deeper portion of the finish, so wiping repeatedly only removes the surface film. Moisture exposure from mopping or spills can also cause discoloration that reappears when humidity changes. To stop recurrence, use the correct engineered wood floor cleaner, dry thoroughly after cleaning, and consider lightly re-coating or refinishing only if the manufacturer allows it and the finish is worn down.
Best way to remove water rings or cloudy spots on engineered wood kitchen floors?
First, try dry methods: buff the cloudy area gently with a dry microfiber cloth. If that doesn’t work, use a cleaner specifically designed for engineered wood floors or a damp cloth with pH-neutral cleaner, then dry completely. For stubborn water rings, test a small inconspicuous area with the mildest approach recommended by your floor’s manufacturer, since over-scrubbing can break down the topcoat.
Which cleaning products should I use or avoid when removing stains from engineered wood floors?
Use pH-neutral, manufacturer-approved cleaners formulated for engineered wood flooring and apply them with a damp microfiber cloth rather than pouring directly on the floor. Avoid steam cleaners, abrasive pads, bleach, ammonia, vinegar, and strong degreasers, because they can strip or cloud the protective finish. If the stain is severe, follow the product directions carefully and spot-test first to protect the engineered wood’s surface and seams.
📅 Last Updated: October 19, 2026 | Topic: How to remove stains from engineered wood floors in a kitchen? | Content verified for accuracy and freshness.
References
- Wood flooring
- Wood stain
- https://www.britannica.com/science/wood-finish
- https://www.armstrongflooring.com/support/floor-care/hardwood-floor-care.html
- Home – Tarkett Commercial
- Hardwood | DIY Wood Flooring | Bruce
- https://scholar.google.com/scholar?q=engineered+wood+floor+stain+removal+kitchen Google Scholar
- https://scholar.google.com/scholar?q=hardwood+floor+water+stain+removal+cleaning+procedures Google Scholar
- https://scholar.google.com/scholar?q=engineered+wood+floor+spot+cleaning+finish+care Google Scholar


