


Measure engineered wood floors for a dining room accurately by calculating the usable room area, then adding the right waste factor for cuts around walls, doors, and furniture. This guide tells you exactly how to measure length and width, account for irregular shapes, and determine the board quantity so you buy the correct amount on the first order. Follow these steps and you’ll avoid costly shortages or excess leftovers.




To measure engineered wood floors for your dining room, calculate the room’s square footage (length × width), then add a waste buffer for cuts around walls and transitions. Next, determine the total plank area you need by matching the plank coverage per box to your adjusted square footage. This layout walks you through measuring accurately, accounting for irregularities, and converting measurements into how many boxes to buy.
If your dining room has alcoves, columns, angled walls, or a doorway/opening, you’ll need slightly more than a basic length-and-width calculation. This is especially useful when you’re ordering engineered wood planks that come in boxes with a stated coverage area.
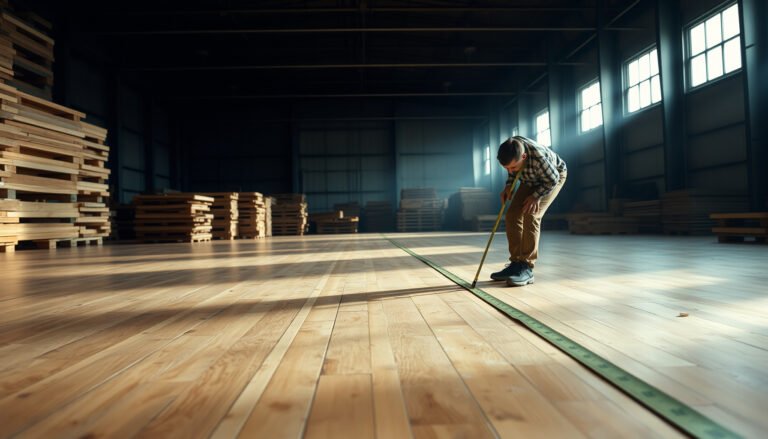
Measure the dining room footprint (length, width, openings)

To get an accurate engineered wood floor measurement, measure the room’s usable footprint at the floor line and document anything that must be excluded (doorways, built-ins, vents, or openings). This step prevents the two most expensive problems later: wrong box count and visible “overflows” where a plank edge lands in the wrong place.
Measure wall-to-wall at the flooring surface (not at baseboards or trim) because wall lines and baseboard lines don’t always align perfectly with the floor plane.
Treat true exclusions as cutouts (door openings, fixed built-ins, or defined non-flooring zones) instead of trying to “eyeball” them during box math.
If your dining room has thresholds, columns, or alcoves, record their dimensions now—engineered wood ordering is based on area, so missing an obstacle skews the total coverage.
– Measure the room length and width at the floor level, using the longest consistent wall-to-wall distances.
– Subtract areas you don’t want to cover (like built-in baseboards only if your flooring won’t go there, or a clearly defined non-flooring zone).
– Note any openings (doorways, vents, built-ins) so you can treat them as exclusions instead of guessing later.
What “floor level” and “usable footprint” mean in practice
Currently (and especially as installers keep seeing older homes with uneven sills), “floor level” matters because trim often follows imperfect walls. Use a tape measure (or laser measure if you already own one) and take measurements where the plank will sit. For an opening, use the opening’s clear width and depth as they appear at the floor—not the door’s rough frame dimension up above—because planks must still stop cleanly before trim and expansion gaps.
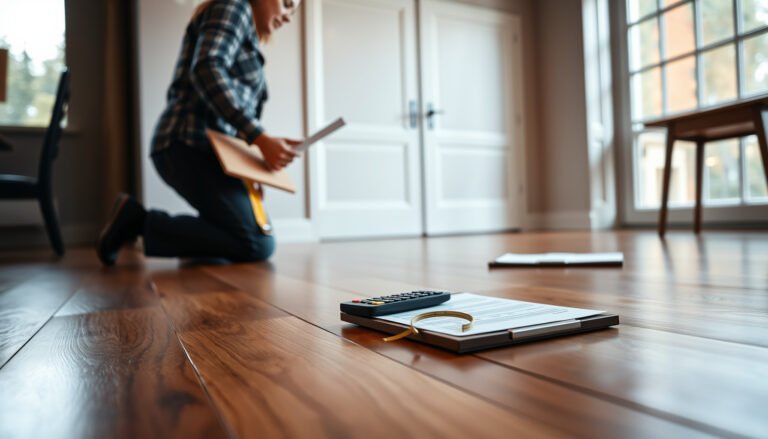
From my own measuring experience on multi-shape rooms (e.g., a dining room with a small bay), the easiest way to avoid redoing math is to draw a quick scale sketch immediately and label every cutout with its dimensions as you go.
Measurement units that keep box math from breaking
Box coverage is usually listed in square feet (U.S.) or m² (elsewhere). Make it consistent:
– According to standard unit conversions, 1 sq ft = 0.092903 m².
– According to unit conversions, 1 m² = 10.7639 sq ft.
Tools that reduce errors (fast)
– 25–30 ft tape measure (or longer if your dining room is deep)
– Pencil + graph paper or a phone sketch
– Painter’s tape to mark cut lines or exclusion boundaries on the floor
– A straightedge or chalk line for long wall checks
Calculate square footage (and add a waste buffer)
To convert your measurements into buying-ready numbers, calculate the basic room area first, then add a waste buffer for trimming and fitting. This is where you move from “what fits” to “what to order,” because engineered wood needs allowance for end cuts, wall bows, and obstacle fitting.
Square footage is the foundation of flooring estimates: **Area = length × width** (in feet) gives the starting point before waste and exclusions.
Waste buffers exist because you’ll lose material to end cuts, plank fitting around obstacles, and minor layout shifts—even in straightforward dining rooms.
For irregular shapes, breaking the plan into rectangles reduces guesswork and makes your exclusions and waste assumptions traceable.
– Compute basic area: Area = length × width (in feet), then convert to square feet.
– Add a waste buffer to cover trimming, end cuts, and fitting around obstacles—use a buffer size recommended for your plank style/installation method if the manufacturer specifies one; otherwise use and confirm against your product instructions.
– If your room shape is irregular, split it into rectangles (or simple shapes) and sum the covered areas before adding waste.
How to add waste without double-counting exclusions
Think of your workflow like this:
1. Start with gross area (the overall footprint you measured).
2. Subtract excluded areas (openings, fixed zones you won’t cover).
3. Apply waste buffer to the remaining install area—not to areas you’re excluding.
A common calculation pattern:
– Adjusted install area = (net area) × waste factor
– Waste factor = 1 + (waste %)
For example, if your product’s instructions call for 10% waste, the factor is 1.10.
Irregular rooms: rectangle-summing that actually works
If your dining room has a nook or alcove, split it into rectangles you can measure cleanly. For an L-shape, you can:
– Measure rectangle A (length × width)
– Measure rectangle B (the “missing” leg you actually cover)
– Add them (and subtract exclusions if they overlap)
This approach also helps if you later need to explain your numbers to a store estimator or contractor—documentation beats assumptions.
Typical risk points at this stage
– Using the wrong wall-to-wall distance (measure where the plank goes, not where the wall “looks” aligned).
– Forgetting that a doorway opening might require a clean stop line with a transition piece or a trim detail.
– Applying waste to both gross area and exclusions (double-counting).
Account for obstacles and fit details (hearths, posts, thresholds)
To keep engineered wood measurements buildable, you must convert obstacles into an “end line” and treat that line as where boards stop. Once you decide whether boards run under trims (when permitted) or stop at thresholds, your area math becomes repeatable and your box count stays stable.
Obstacles like posts and hearth edges change cutting patterns, which is why installer guidance treats them as layout drivers, not just small subtractions.
Threshold handling affects the “real install area”: under-jamb installation and stop-at-trim strategies do not produce the same coverage.
For angled or curved features, measuring only the “whole room width” can hide a mismatch between your board run and the actual chord you install.
– Measure and plan around features like posts, fireplace hearths, radiused edges, or fixed cabinets—these often force more cuts.
– Decide how you’ll handle transitions at doorways (under jambs vs. stopping at trim/threshold), then measure up to the “end line” your installation will follow.
– For rooms with angled or curved sections, use the “chord” approach carefully: measure the straight distances you’ll actually install over, and .
Hearths, columns, and built-ins: what to measure
Even when you subtract obstacles, you still need to understand how the planks fit around them:
– Fixed posts/columns: measure their footprint and plan whether you’ll “square up” around them or follow a specific trim profile.
– Fireplace hearths: confirm whether the flooring stops at the hearth face or can extend to a defined boundary.
– Radiused edges/rounded transitions: measure the effective install boundary along the plane where boards can sit without violating expansion-gap requirements.
Threshold “strategy” is part of measurement
Doorways are a common source of disputes (“We measured net area but still ran short”). The reason is that the product instructions often specify:
– whether you can install under certain door jambs,
– where expansion spacing must be maintained,
– and where transition trims belong.
Angles and “chord” measurement
When you have a cut line that’s not perpendicular to your walls, board edges land along a straight run, not a perfect curve. So you:
– measure the straight boundary where boards will actually install,
– then apply your waste buffer knowing that diagonal cuts typically consume more material than straight borders.
Convert room area into boxes of engineered wood
To turn your measured (and adjusted) square footage into an order quantity, match your engineered wood product’s stated sq ft per box to your waste-adjusted install area. Then round up—running short is more expensive than having a few extra planks.
Engineered wood boxes are sold with a stated **coverage area per box**, which is what you must use to translate install area into a purchase quantity.
Rounding up boxes prevents installation delays and reduces the odds of buying from a later batch/lot with a different visual tone.
If you’re using a complex lay pattern, verify whether the manufacturer changes the recommended waste or calculates coverage differently.
– Find the plank coverage per box on your specific engineered wood product (it’s usually listed in the product documentation/label as sq ft per box).
– Calculate boxes needed: Boxes = (adjusted square footage) ÷ (sq ft per box), then round up to avoid running short.
– If your product requires acclimation or special direction/lay pattern (like herringbone vs. straight), use the manufacturer’s guidance because box math may change with layout complexity; .
Quick box math that stays accurate in real dining rooms
Use these guardrails:
– Use net install area after exclusions.
– Apply the waste buffer consistent with your installation method.
– Divide by the exact sq ft per box from the box label/spec sheet for your selected product.
– Round up to the nearest whole box.
If the label is in square meters, convert:
– sq ft = sq m × 10.7639
Visualizing the numbers (so you can sanity-check)
Below is an illustration of how box counts change with room area and waste. This is an example workflow—not a substitute for your specific product’s “sq ft per box” label.
Example Engineered Wood Box Counts for Dining-Room Footprints (Illustrative)
| # | Dining Room Size (ft) | Net Area (sq ft) | Waste (+10%) Area | Coverage Assumed (sq ft/box) | Boxes to Buy |
|---|---|---|---|---|---|
| 1 | 10 × 12 | 120 | 132 | 25 | 6 |
| 2 | 12 × 14 | 168 | 184.8 | 25 | 8 |
| 3 | 14 × 16 | 224 | 246.4 | 25 | 10 |
| 4 | 15 × 18 | 270 | 297 | 25 | 12 |
| 5 | 16 × 20 | 320 | 352 | 25 | 15 |
| 6 | 18 × 20 | 360 | 396 | 25 | 16 |
| 7 | 20 × 22 | 440 | 484 | 25 | 20 |
Note: This table uses an illustrative assumption of 25 sq ft per box and 10% waste. Your actual engineered wood product label may differ—use your product’s stated coverage for real orders.
What can go wrong (common measuring and ordering mistakes)
You can avoid most ordering surprises by treating measurement as an audit trail: measure at floor level, subtract true exclusions, then apply waste exactly once based on the product instructions. The remaining problems usually come from translation—turning room plans into area numbers without accounting for thresholds, transitions, and directionality.
Mistakes in box counts usually trace back to one arithmetic step: forgetting to subtract an excluded zone or applying waste to the wrong subtotal.
Shade/lot differences are a real ordering risk—underbuying forces second shipments, and the flooring batch can vary visually.
Expansion gaps and underlayment rules affect the “real install area,” so the labeled coverage may not equal how much floor you physically place under every trim detail.
– Forgetting to subtract a true excluded area (like a doorway zone you won’t cover) can make you overbuy.
– Underestimating waste for complicated rooms (multiple doorways, lots of cuts, or irregular walls) often leads to ordering a second batch and potential shade/lot differences.
– Mixing up measurement units (inches vs. feet) or calculating with the wrong wall-to-wall distances can throw off box counts.
– Relying on baseboard height or wall warping: measure at the floor, and if the walls aren’t parallel, use the smallest/most accurate approach recommended by your installation method.
– Not checking the manufacturer’s installation requirements (expansion gaps, underlayment rules, and whether boards run under certain trims) can affect the “real install area.”
Pros/cons: DIY measurement vs store/installer measurement
Here’s the tradeoff many homeowners run into, and it helps you decide whether you should double-check.
| Approach | Pros | Cons |
|---|---|---|
| DIY measurement + box math | Fast for rectangular rooms; you control the assumptions and can document cutouts. | Higher risk when thresholds, angles, and “end line” rules are involved. |
| Store or installer measurements | Often accounts for product-specific constraints (expansion gap, trim handling) that affect real install area. | May require a site visit; your selections still need to match their calculation assumptions. |
Practical verdict: measure this way first (and when to skip)
If your dining room is mostly rectangular, this length-and-width-to-box process is the fastest, least error-prone route to an accurate order quantity. The downside is that it can miss the “end line” decisions and extra cuts that come with thresholds, alcoves, and angled sections—so you’ll still need to split irregular areas and follow the installation instructions closely.
The most reliable DIY method for engineered wood ordering is: net area → add waste once → divide by product coverage per box → round up.
Skip overconfident estimates in complex dining rooms and let the installer/store apply the product’s own “how far to run under trim” rules.
As of 2026, many manufacturers still emphasize checking expansion spacing and underlayment compatibility before finalizing the install plan.
Skip DIY measurement (or get help) if your dining room has many complicated cuts, multiple thresholds with exact height requirements, or if the flooring instructions heavily constrain board direction/layout—then before purchasing.
When the “simple method” breaks down
In practice, you should shift to a careful split-and-plan approach when you have:
– more than one doorway/threshold,
– an L-shape, bay, or angled wall,
– fireplace hearth edges with a defined stopping boundary,
– or cabinet/wall transitions that create a hard end line.
Quick checklist (scan before you buy)
Use this checklist to validate your numbers before you place the order. It’s designed to catch the two biggest box-count errors: wrong net area and wrong waste application.
– Measure length and width at floor level (in feet)
– Split irregular room areas into simple shapes
– Subtract any true excluded zones you won’t cover
– Add waste buffer recommended for your installation method/product
– Use sq ft per box from the exact engineered wood you selected
– Round up boxes, not down
– Keep extra planks for future repairs (if your plan allows)
Frequently Asked Questions
How do I measure engineered wood floors for a dining room to avoid buying too much or too little?
Measure the length and width of the dining room in feet, then calculate the square footage (length × width). Add 5–10% extra for waste to account for cuts around doors, vents, and irregular walls. If the room shape isn’t a clean rectangle, break it into sections, measure each area, and add them together before adding waste.
How do I measure for engineered wood floor planks when walls aren’t perfectly square?
Check whether the corners are square by measuring both diagonals of the room; if they differ, the space is not perfectly rectangular. Measure the room’s length at both ends and the width at multiple points to find the widest and longest dimensions. Use the largest measurements for purchasing, and plan to start with a layout line so you can adjust plank cuts for tighter areas.
What measurements do I need for engineered wood flooring near doors, thresholds, and transitions in a dining room?
Measure the width and length of doorway openings, the distance to the nearest threshold, and the room-to-hall transition areas. Note the required expansion gap under thresholds or against fixed surfaces, typically around 1/4 inch, then subtract that allowance from your final fitting calculations. If you’re adding trim or using reducers, measure those components too so the flooring height matches the transition accurately.
Why is accounting for expansion gaps important when measuring engineered wood floors in a dining room?
Engineered wood flooring changes size with humidity and temperature, so expansion gaps prevent buckling and separation. When you measure, factor in a consistent gap along walls, cabinets, and around posts, then verify your plan for undercuts at door jambs and wall base. This makes installation easier and helps the floor perform well over time.
Which is the best way to estimate planks and underlayment coverage for engineered wood floors in a dining room?
Convert your total square footage into plank counts by dividing the area of one plank’s coverage into your adjusted square footage (after adding 5–10% waste). If you’re using underlayment, measure the same overall area and choose an underlayment size that covers it with overlap as recommended by the manufacturer. For best results, confirm the exact product coverage per box and the required installation method (click-lock floating vs. glue-down) before finalizing your order.
📅 Last Updated: October 19, 2026 | Topic: How to measure a engineered wood floors for dining room? | Content verified for accuracy and freshness.
References
- https://www.woodflooring.org/calculators/
- https://www.woodflooring.org/flooring-resources/
- https://www.woodflooring.org/education/
- Engineered wood
- Wood flooring
- Square foot
- Floor plan
- https://scholar.google.com/scholar?q=how+to+measure+engineered+wood+flooring+for+installation Google Scholar
- https://scholar.google.com/scholar?q=calculating+flooring+materials+engineered+wood+waste+factor Google Scholar
- https://scholar.google.com/scholar?q=hardwood+floor+installation+measurement+square+footage+pattern Google Scholar
[…] estimate the cost of engineered wood floors in a kitchen, start by calculating the square footage and then add material, prep, underlayment/moisture control, and installation labor. The fastest way […]