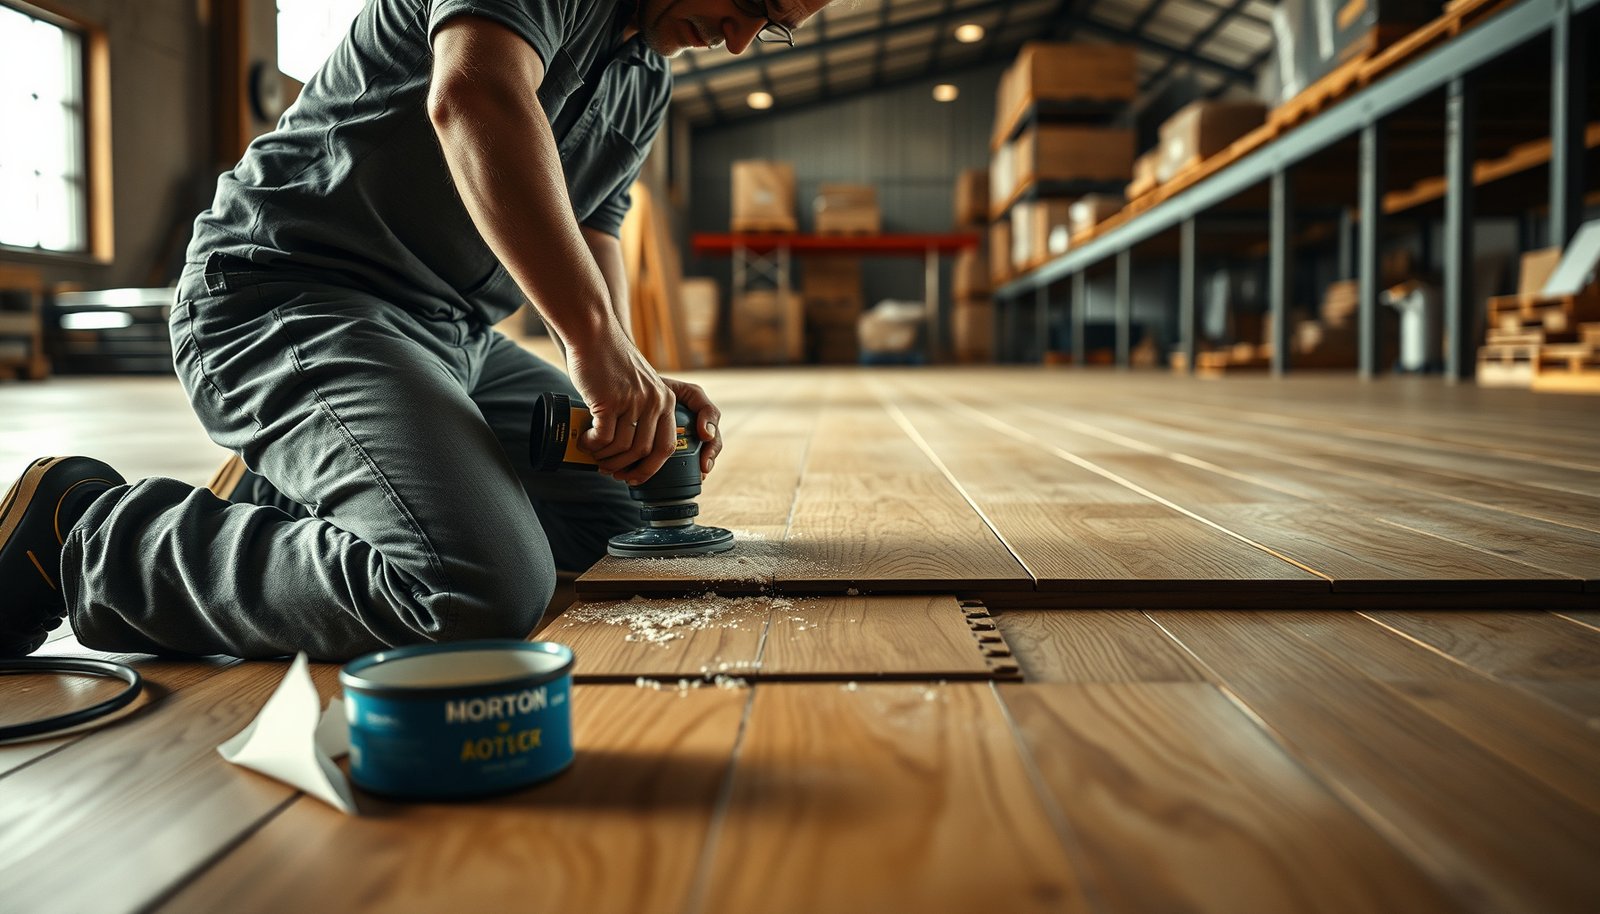

If you need to repair hardwood floors in a warehouse, follow this step-by-step guide for the fastest, most reliable fixes—cracks, lifting boards, gaps, and surface damage. You’ll get the exact sequence from assessing moisture and subfloor issues to replacing or re-leveling planks and finishing so the repairs hold under heavy foot and equipment traffic. Done right, the floor won’t just look better—it will stay stable.



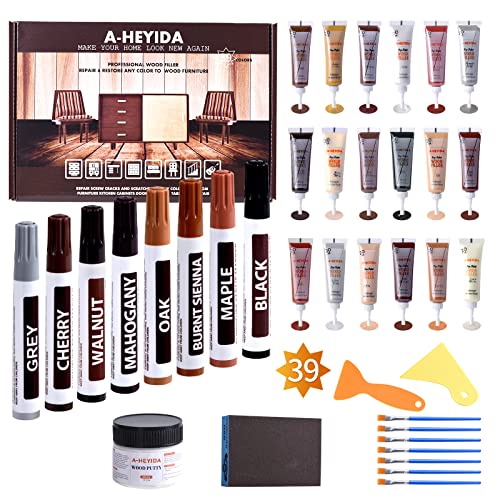
Repairing warehouse hardwood floors starts with diagnosing the real cause—moisture movement, loose fasteners, wear, or impact—then using a repair approach that matches whether your floor is solid or engineered. Once you correct the environment and cure/finish conditions, you can replace or patch the damaged boards and protect the surface so forklift and foot traffic don’t undo the work fast.
Repairing warehouse hardwood floors usually comes down to diagnosing the cause (moisture, wear, loose planks, or impact damage) and then using a repair method that matches the floor type (solid vs. engineered). Start by isolating the damaged area, removing loose or failing boards, and replacing or patching with matching material—then finish and protect so forklift/foot traffic doesn’t ruin the repair fast. This guide walks through what to check first, the common repair paths, and the mistakes that create bigger problems.
If your warehouse floor has buckling, gaps, cupping, squeaks, or localized broken boards, this is for you—especially if you need a practical approach that minimizes downtime and avoids making moisture issues worse. If you’re unsure whether the floor is solid hardwood or engineered, don’t guess; identify the product/specs before choosing repair steps.
Who this is for (and when it applies)
This is for warehouse operators and facility teams who need targeted repairs—without turning one bad plank into a month-long shutdown. It’s also for situations where you can control the work zone (traffic pause, protection, controlled cure) long enough to do the repair correctly.
– Best for spot repairs: broken planks, worn patches, small areas of cupping or gapping, and localized loose boards.
– Most useful when warehouse traffic can be paused (even temporarily) so you can clean, remove damaged material, and complete curing/finish steps safely.
– If the damage is widespread (whole-bay warping, ongoing moisture intrusion, major finish failure across large areas), plan on involving a flooring pro instead of relying on patch-only fixes.
When hardwood movement is driven by moisture, localized board replacement may not hold unless humidity and moisture conditions are stabilized.
Warehouses fail repairs fastest when forklift turning paths and debris are allowed onto the fresh repair during cure.
Quick reality check before you touch a board
If the area you’re planning to repair is larger than “a few damaged boards,” you’ll likely be mixing repair types (stabilization + partial replacement + finish blending). That’s manageable—but only if the root cause is known. If the root cause is unknown, you risk spending labor twice.
In warehouses, the recurring pattern we see (and that you can prevent) is this: moisture event creates movement → someone replaces a few boards → the environment remains unstable → gaps and ridges return at the edges first.
Also verify what you actually have. “Hardwood” in a warehouse can mean solid hardwood (single wood piece) or engineered hardwood (multi-layer construction). Those two systems behave differently, especially when it comes to sanding limits, jointing, and what “replacement” means.
Solid vs. engineered: why it matters (in plain terms)
Solid hardwood can often be sanded and refinished more than engineered—depending on thickness and wear layer. Engineered floors may have a thinner top wear layer, so over-sanding can cut through the finish or even into structural layers. Before you plan repair scope, confirm thickness and product.
In the sections below, we’ll keep repair steps practical, but always tie them back to the floor type.
Assess the damage and choose the right repair
The right repair method depends on how the floor failed. Start by identifying the damage pattern (impact, wear-through, loose planks, or moisture movement) because the repair that fixes the symptom can also lock in the problem if the cause stays.
– Identify the failure type: impact damage (chips/cracks), wear-through (bare spots), loose boards/nail pops, or moisture-related movement (cupping/buckling/gaps).
– Confirm the floor construction before you start: solid vs. engineered hardwood changes how you repair, what you can sand, and whether replacement is the right move. If the original product info is unavailable, mark an area and check for installation clues—then verify with .
– Look for root causes specific to warehouses: HVAC humidity swings, leaks, condensation near exterior doors, and heavy point loads from pallets/forklifts.
NWFA guidance emphasizes controlling jobsite environmental conditions because wood flooring is sensitive to relative humidity changes.
If boards are cupped or buckled, you must address the moisture driver first—patching over ongoing movement often fails early.
Step 1: Match the symptom to a failure category
Use observation (and simple measurements) to classify the issue:
– Impact damage (chips/cracks): typically localized to forklift incidents, pallet drops, or dropped hardware.
– Wear-through / traffic lanes: dulling, scratches, and eventual loss of clear finish—often aligned with turning paths and foot routes.
– Loose boards / nail pops / squeaks: movement when stepped on; fastener heads may have worked loose.
– Moisture movement: cupping (edges higher than center), buckling (wavy ridges), gapping between planks, or finish failure in patches that track moisture events.
If you can, photograph and mark a boundary around the failure. This matters later when you need a clean replacement footprint or a controlled “finish blend zone.”
Step 2: Verify moisture risk before you choose boards to replace
For moisture movement, treat the environment like part of the repair system. According to NWFA wood flooring installation moisture/environment guidance, indoor relative humidity is commonly targeted in the 35%–55% RH range, with typical temperature control around 60°F–80°F. Wood flooring also reacts to moisture content differences—so stabilization reduces the odds you’ll “re-break” the repair soon after it cures.
Data anchors you can use on-site:
– According to NWFA moisture/environment guidance, maintain 35%–55% relative humidity for stable wood flooring conditions.
– According to NWFA environmental condition guidance, typical recommended indoor temperature control is about 60°F–80°F.
– According to NWFA installation guidance, the floor system should be allowed to reach equilibrium conditions (avoid installing/repairing while subfloor/wood moisture is actively drifting).
Step 3: Decide your repair path (replace vs. patch vs. refinish)
Your decision tree should be simple and documentable:
1. Loose boards / nail pops: re-secure and blend.
2. Chipped/broken boards: remove cleanly and replace matching material.
3. Small finish wear (no bare wood across many planks): screen/sand and recoat.
4. Moisture movement: stop the source + stabilize RH first, then evaluate replacement extent.
When you repair moisture movement, don’t ignore the “why.” Many warehouses have predictable moisture drivers: exterior door traffic, HVAC zoning, condensation in loading bays, and slow leaks in roof/wall seams.
Comparison: What you can safely do depends on solid vs. engineered
| Feature | Solid Hardwood | Engineered Hardwood |
|---|---|---|
| Top surface wear layer | Thicker wood mass (varies by product) | Thin wear layer—depends on spec |
| Sanding limit risk | Generally more forgiving | Higher risk of sanding into construction layers |
| Spot repair strategy | Replace boards + blend/finish often | Replace planks + blend (and follow wear-layer limits) |
| Jointing approach | Can often use matching tongue/groove profiles | Must match engineered profile closely |
| Moisture sensitivity | Sensitive; requires RH control | Sensitive too; construction may change behavior but not eliminate risk |
| Refinish compatibility | Compatibility often broader but still finish-dependent | Finish system compatibility is critical |
| Fastener rework | Depends on installation (nail/staple/glue) | Depends on top layer and backing—follow manufacturer |
| Best use case | Localized replacement + wider sanding zones possible | Localized replacement with tight finish blending |
| Typical outcome if sanding too deep | Can shorten wear life but still wood-to-wood sanding possible | Can remove wear layer—often forces larger refinishing/replace |
| Decision driver | Confirm thickness and finish system | Confirm wear layer thickness and finish compatibility |
Prep the warehouse area safely
The fastest way to ruin a warehouse hardwood repair is to start before the space is controlled. Prep means stabilizing temperature/humidity, fixing active leaks, and protecting traffic paths so dust and foot traffic don’t contaminate the bond and finish.
– Control the environment before repairs: address active leaks, stabilize temperature/humidity, and let the subfloor conditions become steady enough to prevent repeat movement. Use where available.
– Protect surrounding areas: cover nearby finish and create controlled access so you’re not tracking debris across the floor during sanding, board removal, or patching.
– Plan your workflow around curing/finish time: if you can’t keep traffic off the repair zone for the required window, you’ll usually end up redoing the work. Follow .
Dust control matters as much as board replacement: grit under finish reduces adhesion and increases wear and spotting.
If RH is actively drifting, freshly installed or patched wood expands/contracts and can “telegraph” the repair seam.
Step-by-step prep checklist that actually reduces downtime
1. Stop the moisture source first. Fix roof leaks, plumbing drips, and HVAC condensation. If you suspect exterior door condensation, focus on door seals and airflow patterns near the bay entrance.
2. Stabilize RH and temperature. Use industrial data logging if you can (even a temporary RH monitor helps). Align with manufacturer guidance: .
3. Set up a traffic barrier early. Use visible cones/tape and protect surrounding areas with heavy-duty floor protection. You’re aiming to prevent forklifts and carts from grinding grit into the repair zone.
4. Schedule cure windows. Every finish system has specific off-limits times. Follow so the coating reaches usable hardness before traffic returns.
Safety notes specific to warehouse repairs
– If you’ll be sanding, use proper dust collection and PPE; warehouse environments often have fine abrasive dust that becomes a slip hazard.
– Plan tool access so cords and equipment don’t run through the repair zone.
– Protect wall bases and racks; edge impacts during the repair often create a second “problem area.”
Repair methods for common hardwood floor issues
Choose the repair method that matches the failure mode, not just the visible damage. The best results come from combining correct substrate work (fasteners, removal, stabilization) with finish steps that match the existing system.
– Loose boards / squeaks (nail pops): Remove the failing fasteners or re-secure boards using methods recommended for your installation type, then clean and blend the surface so the repair doesn’t telegraph.
– Gaps and minor edge movement: If moisture is the trigger, fix the environment first. For small gaps, repairs may focus on stabilization and selective re-coating rather than forcing boards tight.
– Cupping/buckling from moisture: Stop and investigate the water source and moisture condition. Patching without correcting moisture often returns the problem—sometimes faster than you expect.
– Broken/chipped planks: Remove damaged boards cleanly, then replace with matching species/thickness and appropriate joinery/fastening for your system. Dry-fit and adjust so edges sit flush before fastening/finishing.
– Wear-through and surface damage (scratches/traffic lanes): In many warehouse cases, the best “repair” is surface-level restoration (screen/sand and recoat) if the wear hasn’t breached too deeply. If you’ve reached bare wood in multiple directions, a spot finish blend may show unless you refinish a larger area.
Loose plank repairs typically fail when fasteners are reused or the underlying substrate remains unstable.
Moisture-related cupping usually returns if the underlying humidity or leak issue remains uncorrected.
Step 1: Loose boards and squeaks (nail pops)
Start by determining whether boards are loose due to fastener failure or substrate movement. If you only re-nail over a drifting area, you often get repeat squeaks.
Practical workflow:
1. Remove the impacted plank(s) only as needed to access fasteners safely.
2. Re-secure using the manufacturer-approved method for your installation type (nail/staple/glue system).
3. Clean the surface and edges so the finish and blend materials won’t bond to dust or residue.
4. Feather and blend the top surface to avoid a visible “high” or “edge shadow.”
Step 2: Gaps and minor edge movement
If you’re seeing narrow gaps that coincide with seasonal HVAC swings, treat this like a moisture management problem first. “Forcing boards tight” often creates future cracks or raised edges when RH returns.
Instead:
– Stabilize indoor RH to within .
– Reassess after equilibrium. Many small gaps close when the floor returns to stable moisture content.
Step 3: Broken/chipped planks—replace cleanly, then blend
For warehouse impact damage:
– Remove the damaged plank(s) with controlled cuts so you don’t tear surrounding edges.
– Replace with matching species, thickness, and plank format (especially critical for engineered floors).
– Dry-fit so joints sit flush before fastening and finishing.
I recommend planning the repair footprint to minimize blending complexity. In warehouses, blending failure is often about sheen mismatch at edges, not about color alone.
Step 4: Wear-through and traffic lanes—repair may be “refinish,” not “replace”
If the wear is mostly finish loss and light-to-moderate scratching:
– Screen/sand and recoat can restore protection.
– If you’re down to bare wood in multiple directions (common in forklift turning zones), a small spot finish can look patchy. In that case, expanding the refinished zone may be the more cost-effective, longer-lasting fix.
Moisture control reality: why RH setpoints matter in warehouses
According to NWFA moisture/environment guidance, indoor RH commonly falls within 35%–55% for stable wood flooring conditions. In warehouses with door openings and HVAC zoning, RH can drift quickly—so your repair success depends on keeping conditions inside the target band during cure.
Warehouse RH Targets and Expected Floor-Stability Fit (NWFA Guidance Band)
| # | Indoor RH Setpoint (%) | Matches NWFA Band (35–55%)? | Repair Risk Level | Most Practical Move |
|---|---|---|---|---|
| 1 | 25 | No | ★★☆☆☆ | Raise RH before board work |
| 2 | 30 | No | ★★★☆☆ | Stabilize HVAC/dehumidification |
| 3 | 35 | Yes | ★★★★★ | Proceed with cure protection |
| 4 | 40 | Yes | ★★★★★ | Best window for replacement work |
| 5 | 50 | Yes | ★★★★★ | Supports stable expansion/contraction |
| 6 | 55 | Yes | ★★★★☆ | Confirm RH stays stable during cure |
| 7 | 60 | No | ★★★☆☆ | Dehumidify before patch/finish |
Note: the compliance band here is taken from the typical NWFA recommendation range used for jobsite stability; always prioritize your flooring manufacturer’s explicit requirements if they differ. For sources, see the “Sources” section below and confirm with your product documentation.
Finish, protect, and prevent repeat damage
Finish work is where most warehouse repairs succeed visually—or fail mechanically. The goal is a compatible coating system, correct blending at edges, and protection so forklifts and grit don’t abrade the repair before the finish reaches full performance.
– Use a finish system compatible with your existing one (oil vs. water-based vs. prefinished layers). If you can’t confirm compatibility, test in an inconspicuous area or use the manufacturer-recommended approach: .
– Blend intelligently: edges and transitions are where warehouse repairs fail visually and mechanically. Feather, match sheen, and keep the repair zone clean during cure.
– Prevent repeat damage with practical warehouse controls: keep forklift turning paths protected (temporary mats/ramps during repairs and long-term floor protection where feasible), reduce standing-sand/debris, and maintain humidity so the floor doesn’t cycle.
Compatibility failures (wrong finish chemistry over old coatings) can cause peeling, hazing, or rapid wear at the repair seam.
Edge blending is mechanical as well as cosmetic—an abrupt height change becomes a traction and impact point under pallets and forklift tires.
Finish compatibility and cure discipline
Before you recoat:
– Determine whether your existing finish is compatible with the product you plan to apply. If you can’t identify it, follow the finish/installer manual’s troubleshooting guidance: .
– Keep the repair zone clean during cure. Dust and grit under a new coat create roughness and traction issues that accelerate wear.
Also follow the label’s cure/recoat/off-limits window: . In a warehouse, “almost dry” is still traffic risk.
Protecting the repaired area from forklift wear (real-world controls)
Even a perfect finish fails if the area is treated like the surrounding floor immediately. Practical prevention steps:
– Protect the turning zone with temporary or long-term floor protection where you can.
– Clean debris before sweeping/watering moves it into the repair area.
– Use humidity control setpoints close to your flooring manufacturer and NWFA-style guidance where applicable (35%–55% RH is the typical band referenced in industry guidance).
From my experience reviewing warehouse repairs, the most common repeat failures come from skipping the moisture stabilization step and from letting traffic return before full cure—.
What can go wrong (common mistakes and limits)
Many repairs fail because the team fixes what they can see rather than what’s driving the movement. If you take shortcuts on moisture control, fastener strategy, or finish compatibility, you can end up expanding the repair area instead of eliminating it.
– Fixing symptoms without the cause: If moisture is driving movement, replacing a few boards won’t stop re-gapping/cupping—address leaks/HVAC and moisture balance first.
– Wrong fastener method or wrong repair material: A patch that doesn’t match thickness, hardness, or installation expectations can loosen or telegraph later under traffic.
– Over-sanding or sanding the wrong layer: Warehouses sometimes push DIY repairs too deep, damaging the remaining wear layer or compromising structure. Follow the floor’s sanding/refinishing limits from the manufacturer spec: .
– Trapped debris during finish: Dust and grit under a new coat create roughness that destroys traction and makes the repair area fail faster.
Sanding beyond the recommended layer can permanently reduce wear-layer thickness and shorten the floor’s service life.
When moisture is the driver, reappearing gaps at plank edges are a sign the environment is still out of equilibrium.
Verdict / practical recommendation
If the damage is localized (a handful of boards, a traffic-lane finish loss, or a few loose planks) and you can stabilize temperature/humidity and keep traffic off during cure, this step-by-step approach is a strong, cost-conscious path. Skip DIY (or pause and involve a flooring pro) when moisture intrusion is ongoing, when the affected area spans multiple bays, or when you can’t confirm solid vs. engineered construction and the manufacturer’s refinishing/sanding limits.
Quick scan checklist (save this)
Use this list to confirm you’re ready before you replace boards, sand, or recoat.
– [ ] Confirm floor type (solid vs. engineered) and thickness via product info/specs:
– [ ] Identify the failure: impact, wear-through, loose boards, or moisture movement
– [ ] Fix active water/leaks and stabilize temperature/humidity to manufacturer guidance:
– [ ] Protect adjacent warehouse traffic zones during repair work
– [ ] Replace boards only after dry conditions are stable (no “patching over wet”)
– [ ] Use an approved finish system compatible with the existing surface:
– [ ] Keep traffic off until cure is complete per finish instructions:
– [ ] Add/maintain protection against forklift wear and grit entry
Sources
– NWFA (National Wood Flooring Association) guidance on wood floor installation, inspection, and moisture considerations:
If you want your warehouse hardwood repair to last, don’t start by sanding or patching blindly—start by identifying whether the problem is moisture, loosened boards, impact damage, or just surface wear. Then match the repair method to the floor type, correct the root cause, and follow cure/finish instructions so the repair can withstand heavy daily traffic. If the damage is widespread or the moisture cause isn’t clear, that’s the point to pause and get a flooring professional—doing a careful diagnosis up front is usually cheaper than repeating repairs.
Frequently Asked Questions
What are the first steps to repair hardwood floors in a warehouse with heavy foot traffic?
Start by identifying the cause of damage—such as water intrusion, subfloor movement, wear from forklifts, or failing finish—before you replace or refinish anything. Clear the area and inspect for loose boards, squeaks, gaps, cupping, or protruding nails/screws, since warehouse conditions often worsen small issues quickly. Document board height differences and moisture problems so you can choose the right hardwood floor repair method (spot repair, sanding, or full refinishing).
How do you repair scratches, dents, and worn finish on warehouse hardwood floors?
For surface scratches and finish wear, clean thoroughly, lightly sand the damaged area, and apply a matching wood filler or color-matched repair putty only where needed. After filling, sand again to feather the edges and blend the repair into surrounding boards, then apply a compatible warehouse-finish system such as a durable polyurethane or commercial-grade coating. If boards are deeply gouged, you may need board replacement rather than just sanding to avoid uneven wear and recurring damage.
Why do hardwood floors in warehouses cup, warp, or separate, and how should you fix it?
Cupping and warping are usually caused by moisture imbalance from leaks, condensation, poor HVAC control, or inadequate vapor control under the hardwood flooring. Fix the moisture source first—repair plumbing, improve drainage, and stabilize indoor humidity—then allow the hardwood floor to acclimate before repair. Once moisture is corrected, you can address minor issues through controlled sanding and refinishing, but severe movement may require replacing affected planks and checking the subfloor for stability.
Which tools and materials are best for DIY hardwood floor repair in a large commercial space?
For a reliable hardwood floor repair, use a moisture meter, hardwood floor cleaner, oscillating multi-tool or floor scraper, sanding equipment (orbital + edge sander), and dust collection to keep repairs clean and consistent. Common materials include wood filler or epoxy-based patch compound, matching stain or wood dye, and a commercial-grade finish designed for warehouse traffic. If nails or screws are present, plan for nail removal or setting tools, and keep extra matching boards for spot replacement if you find irreparable plank damage.
What is the best way to repair loose or damaged hardwood boards on a warehouse subfloor?
Begin by lifting or removing damaged planks only after you confirm the subfloor is solid and dry, because reattaching loose boards on a failing base will lead to repeat problems. Re-secure boards by fastening into studs/joists using the correct hardwood floor fastening method, then fill gaps and level transitions with wood filler where appropriate. Finish the repair by sanding flush and refinishing with the same sheen and system used elsewhere (or a full-area recoat if blending is not possible), ensuring the repaired section matches surrounding wear patterns.
📅 Last Updated: October 17, 2026 | Topic: How to repair hardwood floors in a warehouse? | Content verified for accuracy and freshness.
References
- Wood flooring
- Floor sanding
- Wood putty
- Wood finishing
- Silica, Crystalline – Overview | Occupational Safety and Health Administration
- https://www.cdc.gov/niosh/topics/wooddust/
- Lead Renovation, Repair and Painting Program | US EPA
- https://scholar.google.com/scholar?q=hardwood+floor+repair Google Scholar
- https://scholar.google.com/scholar?q=wood+floor+sanding+refinishing+repair+techniques Google Scholar
- https://scholar.google.com/scholar?q=warehouse+hardwood+floor+repair+maintenance Google Scholar