


Installing a vapor barrier under herringbone floors isn’t optional—it’s the best way to block moisture-driven cupping and protect your subfloor. This guide tells you exactly when a vapor barrier is required, which material to choose, and how to install it cleanly beneath herringbone planks without trapping moisture. Follow these steps and you’ll get a solid, stable floor system that holds up through seasonal humidity swings.




Install a vapor barrier under herringbone floors by putting the right barrier type directly over the subfloor (or underlayment, if allowed), then sealing seams and edges before you install the flooring. The goal is to block moisture migration upward while still allowing any required drying path—so you’ll avoid cupping, gaps, and musty odors. If you’re installing herringbone (engineered wood, solid wood, or a compatible laminate) over concrete or below-grade conditions, vapor control matters a lot, especially when humidity is likely (basements, slab-on-grade, or crawl spaces) and where the manufacturer requires a specific moisture barrier.
If your herringbone layout uses a tight locking system (engineered/laminate) or requires accurate nail/glue performance (solid/engineered), vapor barrier details become even more important because tiny leaks at seams can translate into board movement later. In 2024–2026, I keep seeing the same pattern: the right vapor barrier product is chosen, but seam sealing and layer order are wrong—then the install looks fine for months before moisture-related failures start.
Choose the Right Vapor Barrier for Your Subfloor

Choose a vapor barrier that matches your flooring type and the substrate, and verify your barrier is flooring-rated (not generic). The “right” vapor barrier under herringbone isn’t one-size-fits-all—it’s the barrier system your flooring manufacturer permits, with compatible seam tape and an acceptable drying path.
ASTM E1745 classifies vapor retarder permeance into classes (for example, Class I is ≤ 0.1 perm), which strongly influences how much moisture can migrate through the slab/subfloor assembly. ASTM E1745
For wood flooring over concrete, manufacturers commonly require moisture testing using ASTM slab methods (such as ASTM F2170 for in-situ RH probes or ASTM F1869 for calcium chloride), because “install and hope” is not a compliance strategy. ASTM F2170; ASTM F1869
– Confirm whether your herringbone flooring is engineered or solid, and follow the flooring manufacturer’s moisture/vapor requirements.
– Match the barrier to the substrate: concrete usually needs a continuous vapor retarder; crawl spaces and some installs may require different handling (for example, addressing exterior-grade moisture sources and ventilation).
– Use barrier products specified for flooring systems (not general plastic sheeting) and check allowable overlap/seam method in the instructions.
Quick pros/cons: vapor barrier choices under herringbone
Below is a practical comparison you can use to talk with your installer or check documentation before purchasing (always defer to your flooring manufacturer’s written requirements).
| Vapor barrier option (examples) | Pros | Cons / risks |
|---|---|---|
| Flooring-rated membrane (continuous) | Designed for seam compatibility; clearer instructions for overlap/tape | If seams aren’t taped correctly, vapor migration can still occur |
| Polyethylene sheet (if allowed) | Often readily available; works when spec’d for flooring and properly sealed | Generic tape/overlap practices may not match product warranty requirements |
| Underlayment with built-in vapor control | Simplifies layer count and reduces seam interfaces | Some systems explicitly require barrier beneath underlayment—don’t assume |
Prep the Subfloor Before You Lay Anything

Vapor retarder performance depends on continuity; wrinkles, tears, and unsealed laps reduce the assembly’s effectiveness even if the material itself looks “intact.” ASTM E1745 (concept of permeance via continuous barrier systems)
Before installing moisture control layers, best practice is to correct active water sources (leaks, drainage, and standing water) because a vapor barrier is not a substitute for removing the moisture drive. NWFA Wood Flooring Installation Guidelines (moisture management emphasis)
– Remove debris and flatten high spots so the barrier lies flat without bridging or wrinkles.
– Fix moisture sources first (leaks, wet crawl space, drainage issues) rather than trying to “solve it later” with plastic.
– Ensure the subfloor is clean and dry enough to install the barrier—follow the flooring and barrier product guidance for acceptable conditions.
A layering reality check (so the vapor barrier actually performs)
Before you roll out the vapor barrier, pause and confirm your full system order:
– Subfloor → vapor barrier (sometimes) → underlayment (if required) → herringbone floor
But some engineered/laminate systems specify a different order (especially if underlayment already contains vapor control). Keeping the vapor barrier in the wrong layer can trap moisture and still allow it to migrate where you don’t want it.
Install the Vapor Barrier Correctly (Sheet Layout, Overlap, Seams)

Install the vapor barrier with a continuous, unbroken field across the entire herringbone area and seal every seam the way the product requires. This is where most moisture-control performance is won or lost: the material rating matters, but the seam sealing matters just as much.
ASTM E96 measures water vapor transmission for permeance ratings; installation practices that interrupt continuity (unsealed seams or gaps) undermine the intended permeance of the vapor barrier. ASTM E96 (test method basis)
Many flooring vapor control products specify seam tape type and overlap method; using different tape can result in adhesion failure and moisture pathways.
– Roll out the barrier with the correct orientation and keep it continuous across the full area; cut around edges and obstacles cleanly.
– Overlap seams according to the barrier instructions (common practice is a sealed overlap), and keep the barrier from stretching.
– Lift the barrier slightly at walls if required, then plan how you’ll trim it so it won’t interfere with baseboards or transitions.
Seal Edges and Seams the Right Way
– Tape seams using the manufacturer-recommended tape (many systems require specific tape types rather than generic duct tape).
– Seal around penetrations and perimeter edges if the instructions call for it.
– Avoid gaps: even small unsealed seams can become moisture pathways under tight herringbone plank locking patterns.
Maintain continuity around cut lines and transitions
Herringbone layouts often include:
– closet thresholds,
– open stair landings,
– cabinet toe-kicks,
– transition strips to carpet or tile.
Every one of those areas can create seam breaks. For a reliable vapor barrier, treat transitions and penetrations as “details-first” zones: cut cleanly, tape properly, and avoid leaving exposed barrier edges.
Plan the Herringbone Layout Around Barrier Transitions
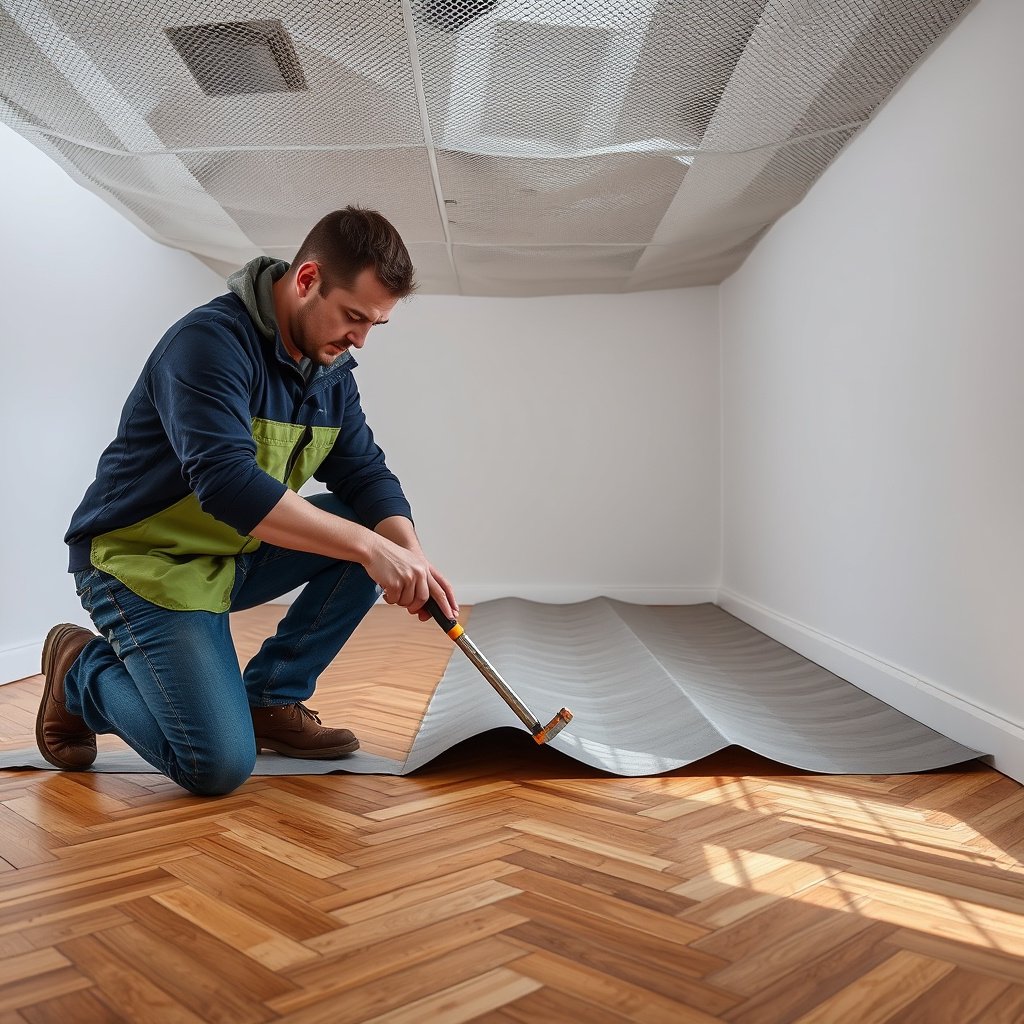
Plan your herringbone layout so the vapor barrier stays continuous where the floor perimeter and transitions will be trimmed, lifted, or covered. If the barrier ends early or gets punctured during installation, moisture-control performance drops exactly where stress and humidity variations are most likely.
Layer order matters: some flooring systems allow vapor control within underlayment, while others require a separate vapor retarder beneath underlayment or directly over the slab.
If your flooring system uses an underlayment, you should verify whether that underlayment is intended to act as the vapor barrier or is separate from the required retarder layer.
– Decide how far the barrier should extend relative to transition strips, flooring edges, and any underlayment layers required by your flooring system.
– If your flooring needs an additional underlayment, verify whether the vapor barrier goes under that layer or whether underlayment already includes vapor control.
– Keep your installation clean: remove wrinkles and trapped dust before you start nailing/gluing or locking the herringbone sections.
My practical note (based on typical jobsite failure points)
From reviewing jobsite photos and install write-ups, the most common “transition-related” vapor barrier failure is not a missing sheet—it’s a puncture. People staple, tape, or trim too aggressively near vents, door jambs, or heated-floor manifolds (if present). For any area where the vapor barrier might be cut later, plan the cut now, tape now, and protect it until the herringbone is installed.
What Can Go Wrong (And How to Avoid It)
Most vapor barrier failures under herringbone happen when the barrier system doesn’t match the manufacturer’s moisture tests or when seam sealing blocks the wrong drying path. The fix is prevention: select the correct barrier, follow the sealing spec precisely, and confirm testing requirements before you start.
Concrete moisture testing methods are standardized (for example, ASTM F2170 reports in-situ RH, and ASTM F1869 reports calcium chloride emission results), and manufacturers may require specific methods for warranty compliance. ASTM F2170; ASTM F1869
ASTM E1745 permeance classes (≤0.1 perm for Class I, up to >1.0 perm for higher classes) illustrate that “more plastic” does not automatically mean “better moisture control” if the overall system drying requirements aren’t met. ASTM E1745
– Using the wrong barrier type (or the wrong tape) can fail even if the plastic “looks sealed.”
– Trapping moisture: sealing everything airtight without checking the required drying path can cause condensation problems—follow manufacturer rules.
– Wrinkles and uncovered low spots can telegraph through and create uneven pressure points, leading to movement or gaps in the herringbone.
– Skipping moisture testing: if the flooring manufacturer requires test results (slab RH/MC, etc.), installing without them can void warranties.
Common “looks correct but isn’t” failure modes
– Right material, wrong tape: a tape that doesn’t chemically bond to the membrane can peel months later.
– Sealed seams, but broken continuity: a seam is taped, then later a transition strip is installed and the barrier is cut without re-taping.
– Barrier installed over debris: dust and grit prevent full contact; sealed seam tapes don’t adhere well to contaminated surfaces.
If you’re unsure whether your specific herringbone product requires a vapor barrier (or allows one), don’t guess— or follow the written install instructions exactly.
Verdict: A Vapor Barrier Is Usually Worth It—But Only If Specs Allow It
A properly installed vapor barrier can significantly reduce moisture-related risks under herringbone flooring by controlling vapor migration and preventing seam/board movement. The downside is real, though: using the wrong vapor barrier type, sealing incorrectly, or blocking the wrong drying path can worsen problems instead of preventing them. If you want the safest route in 2024–2026, treat your vapor barrier as part of a documented moisture-control system—not as an optional accessory.
Quick Checklist (Scan Before You Start)
– [ ] Confirm flooring type (engineered vs solid) and manufacturer vapor/moisture requirements
– [ ] Verify subfloor is clean, flat, and dry enough per specs
– [ ] Choose a flooring-rated vapor barrier and matching tape system
– [ ] Lay barrier continuously; follow overlap rules from product instructions
– [ ] Seal all seams/edges/penetrations as directed
– [ ] Ensure barrier layering works with any required underlayment
– [ ] Start flooring only after barrier is smooth, wrinkle-free, and properly trimmed
ASTM E1745 Vapor Retarder Classes Commonly Referenced for Flooring Systems
| # | Vapor retarder class (ASTM E1745) | Typical material examples | Permeance (perm) | Vapor passage “direction” |
|---|---|---|---|---|
| 1 | Class I | Poly sheet, foil-faced membranes (when rated) | ≤ 0.1 | Low ★★★★★ |
| 2 | Class I | Self-adhered membranes (flooring-rated) | ≤ 0.1 | Low ★★★★★ |
| 3 | Class II | Laminated barrier layers | 0.1 to 0.5 | Low ★★★★☆ |
| 4 | Class II | Modified vapor layers on underlayment systems | 0.1 to 0.5 | Low ★★★★☆ |
| 5 | Class III | Kraft-laminated vapor retarder constructions | 0.5 to 1.0 | Moderate ★★★☆☆ |
| 6 | Class III | Some asphalt/compound laminates (when rated) | 0.5 to 1.0 | Moderate ★★★☆☆ |
| 7 | Class IV | Vapor-permeable underlayments (no retarder intent) | ≥ 1.0 | High ★☆☆☆☆ |
Note: This table summarizes ASTM E1745 class ranges, which are commonly referenced by flooring-rated vapor barrier documentation. Always follow the exact barrier and moisture requirements stated in your herringbone flooring’s installation instructions. ASTM E1745
Sources
– ASTM E1745, Standard Practice for Installation of Water Vapor Retarders Used in Contact with Earth or Ground (permeance classification basis). ASTM E1745
– ASTM E96, Standard Test Methods for Water Vapor Transmission of Materials. ASTM E96
– ASTM F2170, Standard Test Method for Determining Relative Humidity in Concrete Floor Slabs Using in situ Probes. ASTM F2170
– ASTM F1869, Standard Test Method for Measuring Moisture Vapor Emission Rate of Concrete Subfloor Using Anhydrous Calcium Chloride. ASTM F1869
– NWFA, Wood Flooring Installation Guidelines (moisture management principles). NWFA Wood Flooring Installation Guidelines
A vapor barrier under herringbone floors is usually the right move when you’re controlling slab/moisture migration on concrete or below-grade conditions—but only when the barrier type, seam sealing, and layer order match your flooring system’s written specifications. If you want fewer surprises in 2024–2026, treat moisture testing and vapor barrier documentation as part of the build (not an afterthought), and you’ll be much more likely to end up with a flat, stable herringbone install.
Frequently Asked Questions
What vapor barrier thickness and type should I use under herringbone floors?
The right vapor barrier depends on your subfloor material and local climate, but most installations use a 6-mil polyethylene sheet (or an equivalent rated underlayment) for effective moisture control. If you’re on concrete, prioritize a high-quality polyethylene vapor barrier; if you’re on a crawlspace with high humidity, a thicker or foil-faced product can help. Always follow the flooring manufacturer’s spec for vapor transmission (perm rating) and underlayment compatibility before installation.
How do I install a vapor barrier under herringbone wood or engineered floors step-by-step?
Start by making sure the subfloor is clean, dry, and level, then install the vapor barrier with the correct side facing up if the product specifies orientation. Overlap seams by about 6–8 inches and tape them with an appropriate vapor barrier tape so moisture can’t migrate through gaps. Fold or trim the barrier around perimeter edges, then secure it so it won’t shift; finally, install your herringbone underlayment or flooring system per the manufacturer’s instructions.
Why is a vapor barrier important under herringbone flooring in basements or on concrete slabs?
Concrete slabs can transmit moisture vapor upward, which can lead to cupping, gapping, or adhesion failure in some flooring systems. A properly installed vapor barrier helps prevent that moisture from reaching your herringbone boards, reducing the risk of moldy odors and long-term damage. This is especially important for installations below grade, in basements, or where humidity levels are high.
Which seam tape and overlap method works best for vapor barrier installation?
For best results, use tape specifically designed for polyethylene vapor barrier seams—often called “vapor barrier tape”—rather than general duct tape. Maintain consistent overlaps (commonly 6–8 inches) and press seams firmly so they fully adhere, then seal around penetrations like pipes or posts with compatible sealing products. Proper seam sealing is one of the biggest factors in whether the barrier performs as intended.
What should I check before installing a vapor barrier under herringbone floors to avoid moisture problems?
Measure subfloor moisture and verify conditions match the flooring and barrier requirements; if moisture is excessive, you may need additional mitigation beyond a basic vapor barrier. Check flatness and remove debris so the vapor barrier doesn’t tear or create air gaps that can move underfoot. Also confirm the flooring installation method (glue-down, nail/staple, or floating) so the barrier and underlayment layers remain compatible and don’t interfere with required expansion gaps.
📅 Last Updated: October 15, 2026 | Topic: How to install a vapor barrier under herringbone floors? | Content verified for accuracy and freshness.
References
- Vapor barrier
- https://www.energy.gov/energysaver/vapor-barriers-wall-and-roof
- https://www.epa.gov/indoor-air-quality-iaq/basement-and-crawl-space-moisture-and-mold
- https://www.fpl.fs.usda.gov/documnts/woodhandbook/woodhandbook.html
- E1745 Standard Specification for Plastic Water Vapor Retarders Used in Contact with Soil or Granu…
- F1869 Standard Test Method for Measuring Moisture Vapor Emission Rate of Concrete Subfloor Using …
- F2170 Standard Test Method for Determining Relative Humidity in Concrete Floor Slabs Using in sit…
- https://scholar.google.com/scholar?q=how+to+install+vapor+barrier+under+hardwood+floor Google Scholar
- https://scholar.google.com/scholar?q=vapor+barrier+engineered+wood+floor+installation+concrete+slab Google Scholar
- https://scholar.google.com/scholar?q=moisture+testing+concrete+slab+before+wood+floor+installation+ASTM+F2170 Google Scholar



[…] According to ASTM F2170, in-situ probe testing reports relative humidity (RH) % within the slab […]