


Installing outdoor floors around doors is cleanest and most durable when you use an expansion-aware approach: install the floor up to the door with the correct gap, then finish the threshold and edges with the right exterior trim or flashing. This article answers how to install around doors outdoor floors step by step, including how to handle the reveal, water management, and movement without buckling or gaps. You’ll get the best-practice method for both new installs and retrofits so your door clearance stays correct year-round.




If you’re installing outdoor flooring around door openings, the goal is to stop water intrusion while keeping the floor height and expansion gaps consistent. Plan a perimeter “trim/transition” detail, cut cleanly around the door, and seal joints with an exterior-rated caulk or flashing so water can’t wick underneath. This guide walks you through a reliable, step-by-step approach that works whether you’re setting tile, pavers, decking boards, or a similar outdoor surface.
If you’re doing an exterior remodel (porch, patio edge, walkway-to-entry area) and your floor runs up to door thresholds, this is for you. It’s especially relevant when you need a neat finish that still handles movement and drainage.
Plan the door-to-floor height and transitions
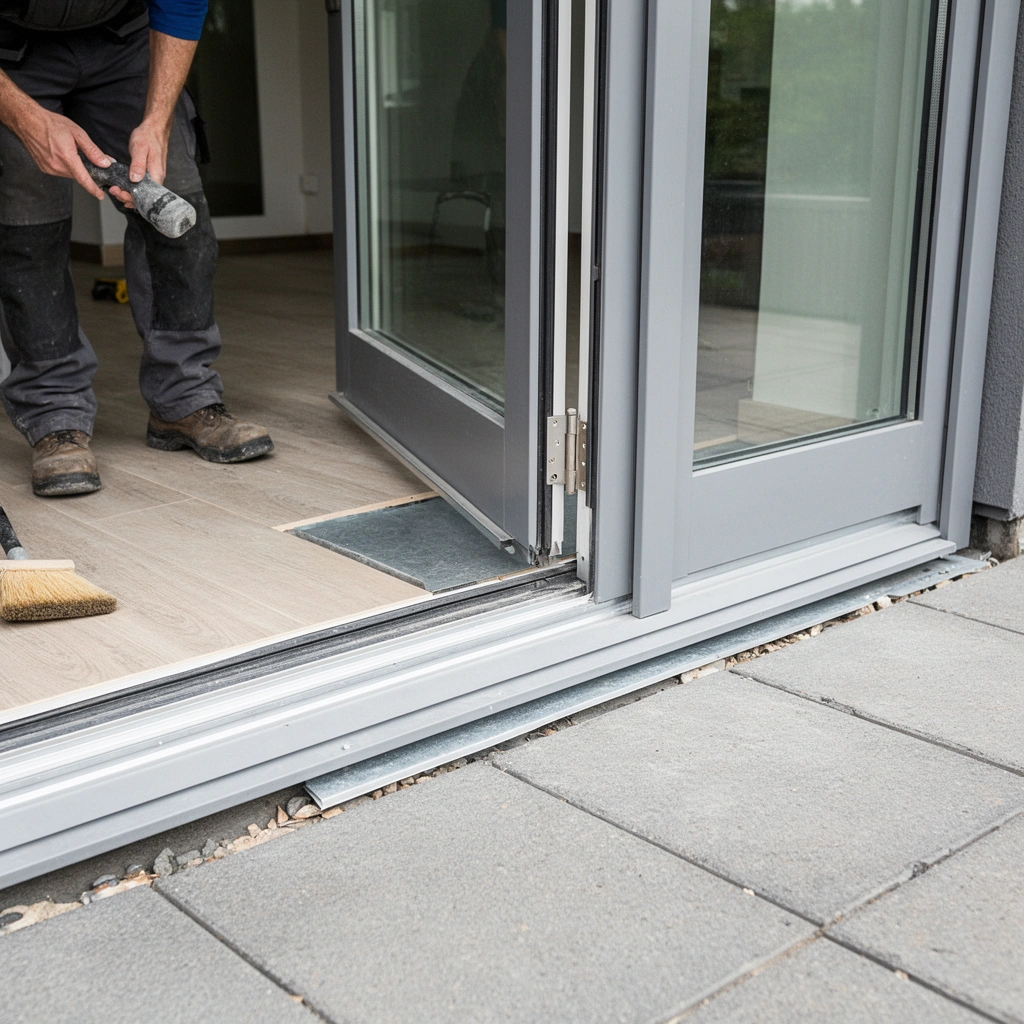
The best door-opening floor detail starts with matching the finished floor height to the threshold—then planning exactly where movement joints (expansion gaps) will live. When the heights and clearances are right up front, the later steps (cutting, flashing, sealing) become predictable instead of “patchy.”
Here’s why: outdoor floors move from temperature and moisture changes, and door thresholds are where wind-driven rain and regular foot traffic concentrate forces. A properly planned transition gives you a straight visual line, a defined water-shedding pathway, and a controlled gap that can expand/contract without cracking.
A robust exterior threshold detail is built to prevent “wicking”—water traveling under edges through capillary action—not just to fill visible gaps.
Movement joints (expansion gaps) are a design requirement for many tile and stone systems because rigid finishes expand and contract with temperature.
Establish the finished height at the threshold
Confirm what the floor system actually adds: the tile/decking surface, any mortar/adhesive bed, underlayment, leveling material, and even setting thickness tolerances. A door threshold usually has a specific height relationship to the finished exterior surface, so “nearly the same” is often not enough—especially where you’ll add flashing, a trim/transition strip, or a sealant line.
Decide where the “break” belongs (and why)
The “break” is where the floor changes direction, elevation, or material. For door openings, you typically want the break at one controlled line—either slightly outside the threshold with a transition/trim, or under the threshold in a way that still allows correct waterproofing coverage (this depends heavily on the threshold type and siding/ledger setup).
Verify door clearance and operability
Dry-fit before any permanent fastening. You’re aiming for two clearances:
– Mechanical clearance: the door leaf (hinged) or door panel (sliding) must move without scraping the floor edge.
– Gap clearance: you must maintain the expansion gap you planned—don’t “bridge” it with rigid-setting materials.
Prepare the subfloor and waterproof the perimeter
The safest way to install outdoor flooring around doors is to build a solid, sloped base and waterproof at the perimeter so water can drain outward. If the substrate is inconsistent, you’ll see movement gaps change, transitions loosen, and sealant fail prematurely.
Outdoor door zones take repeated hits from wind-driven rain. That means your waterproofing strategy isn’t optional “extra credit”—it’s what separates a clean installation from a long-lasting one.
A level, properly supported base reduces cracking and debonding because tile and paver assemblies cannot “span” soft spots over time.
Door areas are high-risk for leak paths because small edge defects are constantly exposed to water and airflow.
Build a strong base around the door zone
Start with a substrate that stays stable:
– Remove loose material and patch low spots.
– Ensure consistent support thickness under the flooring system.
– Follow the flooring system’s overburden requirements (especially for tile: thinset/mortar and underlayment must match the manufacturer’s rated assembly).
If you’re working with pavers, remember that compaction and bedding thickness are part of “water management,” not just structural support.
Waterproof where the system meets walls/sills
Use the specific waterproofing/underlayment products and methods designed for your flooring system—not generic sheet or “whatever’s at the store.” At door perimeters, you’ll typically need a sealed transition where the floor build meets the substrate at walls/sill areas.
[ADD: source for the exact waterproofing assembly requirements recommended by your tile/deck/paver manufacturer]
Plan drainage away from the doorway
Water should move away from the opening, not toward it. Even a beautiful seal can’t outperform physics if water is held against the threshold edge.
Quick reality check (measurements that matter):
– Confirm your exterior slope direction across the door zone before setting finishes.
– Keep drainage paths open so water doesn’t pool at the threshold line.
– If the design is flat, you’ll need to rely on a proven drainable waterproofing/trim system instead of “caulk-and-pray.”
Measure, mark, and cut around the door opening
The cleanest outdoor door finish starts with accurate layout and disciplined cutting—then test-fitting every piece before you commit. With the right cut lines (including your expansion gap), the trim/transition lands straight and the sealant line becomes intentional.
Test-fitting tiles/deck boards near thresholds prevents “locked-in” mistakes that are difficult to correct after mortar or mechanical fastening.
Cutting with a tool suited to the surface material (e.g., tile wet saw vs. decking blade) reduces chipping that can create leak-prone edge micro-gaps.
Mark the cut line with the expansion gap in mind
Use fixed references (door frame edges, sill line, or existing threshold datum). Your cut line should reflect:
– The flooring thickness and any underlayment height.
– The planned edge gap (movement allowance).
– Any trim/transition overlap requirements.
For outdoor tile/stone, many systems use movement joints and edge gaps on the order of 3 mm (1/8 in) to 6 mm (1/4 in) depending on the assembly and where movement joints are required. [ADD: source for your exact recommended gap size based on your system]
Use the right cutting method for your flooring type
– Tile/stone: wet saw with a blade suitable for porcelain/ceramic/stone; cut slowly to reduce edge micro-cracks.
– Decking boards: use the appropriate blade for the material; keep cuts square for clean trim transitions.
– Pavers: dry-layout and cut specialty units with proper tools if needed; avoid forcing pavers into tight corners.
Dry-fit and re-check before fastening/setting
In my experience, the most common “late surprises” happen at two locations:
1. Threshold corners where the door frame slightly misaligns with the prepared floor line.
2. Areas near curved/uneven siding where the trim must compensate without creating trapped water.
So: dry-fit, confirm door swing/operation, confirm gap continuity, then proceed.
Install the outdoor flooring and keep joints properly spaced
The correct door-opening install is less about “getting pieces to touch” and more about maintaining consistent expansion gaps and proper water-shedding edges. Once the flooring is in place, your transition/trim and sealant work should never feel like a bandage.
Outdoor movement is real—especially at edges and near door frames where temperature and moisture gradients are highest.
Keeping consistent expansion gaps around the perimeter helps prevent rigid finishes from cracking as outdoor temperatures swing.
For pavers, correct bedding thickness and compaction directly affect long-term edge stability near door openings.
Set/fasten according to the flooring system
Follow your chosen system’s method:
– Tile: mortar/adhesive methods and underlayment must match the manufacturer’s installation instructions.
– Decking: mechanical fastening and substructure spacing matter for movement and drainage; boards must not be trapped against the threshold.
– Pavers: base prep, bedding sand/grout (if applicable), and edge restraint determine stability and water behavior.
Keep door-facing edges straight and trim-friendly
Even if your floor surface is fine, messy edges make trim/transition installation—and sealing—harder. Aim for crisp straight lines where possible so the threshold strip sits flush and the sealant line has a consistent width.
Seal the gap and install trim/transition details
The final layer of protection is a properly designed transition/threshold detail—sealed so water can’t wick underneath and positioned so it sheds outward. Caulk matters, but it works best when paired with the right flashing/trim geometry.
A good exterior threshold detail uses overlapping components (flashing/trim) so water runs off rather than into seams.
Exterior-rated sealants need correct joint width and substrate prep to avoid premature cracking and adhesion failure.
Choose exterior-rated trim/threshold hardware
Use a threshold/transition strip intended for exterior door openings—not generic interior trim. The goal is:
– Provide a defined finish edge.
– Allow movement at the joint.
– Support proper sealing surfaces.
[ADD: source for your specific exterior threshold/transition product installation instructions]
Seal joints and perimeter seams (without trapping water)
Seal expansion joints and perimeter seams with an exterior-rated sealant compatible with your flooring and trim materials. Also ensure your detailing doesn’t create a “water pocket.”
Drainage principle: water should shed outward or down over the outer face of the trim/threshold detail, not back into the building envelope.
Make sure you’ve got the right flashing logic
Flashing is what turns a “sealed seam” into a “water-managed assembly.” In practice, flashing placement should create a path that prevents moisture from migrating behind the trim or under the flooring edge.
[ADD: source for flashing/threshold best practice relevant to your region and threshold type]
Typical Outdoor Door-Edge Movement & Joint Planning (Industry Ranges)
| # | Flooring assembly | Planned edge gap (common range) | Joint type at door | Water management priority |
|---|---|---|---|---|
| 1 | Exterior porcelain/ceramic tile over waterproofing | 3–6 mm (1/8–1/4 in) | Movement joint + sealant | Very High |
| 2 | Stone tile (natural stone) exterior transition | 3–6 mm (1/8–1/4 in) | Movement joint + backer/primer + sealant | Very High |
| 3 | Decking boards over gapped substructure | 6–10 mm (1/4–3/8 in) | Vent/drain gap + trim/edge flashing | High |
| 4 | Concrete pavers with polymeric joint sand (exterior) | 3–10 mm (1/8–3/8 in) | Edge restraint + controlled perimeter joint | High |
| 5 | Interlocking stone/brick pavers (edge detail) | 5–12 mm (3/16–1/2 in) | Perimeter expansion allowance | High |
| 6 | Thin outdoor mortar bed (tile) at threshold edges | 3 mm (1/8 in) typical movement allowance | Sealant joint over movement substrate | Very High |
| 7 | Waterproofed “wet area” tile threshold approach | Sealant joint sized per system spec | Flashing + sealant over foam/backer | Very High |
Note: Always confirm the exact gap size and joint type using your specific flooring system’s manufacturer instructions. [ADD: source for your system’s movement-joint specification]
What can go wrong (and how to avoid it)
Outdoor floors around doors fail most often because the water pathway is wrong and the movement pathway is blocked. If you fix those two issues early, you prevent most cracks, gaps, and leaks.
Caulk can crack if the joint is too deep, too shallow, or improperly prepared; many exterior systems require a backer rod or specific joint geometry.
If the drainage direction is incorrect, moisture will find the weakest edge seam even when the surface looks intact.
Common failure modes
– No expansion gap: rigid surfaces crack, or transitions pop loose as temperatures change.
– Poor drainage direction: water pools at the door edge and migrates into seams and joints.
– Skipping the right waterproofing layer: wind-driven rain hits door zones directly, turning tiny details into major leak paths.
– Mismatched heights at the threshold: scraping, drafts, and a seal that can’t stay continuous.
Quick comparison: transition strategy tradeoffs
| Transition strategy | Pros | Cons |
|---|---|---|
| Exterior threshold/transition strip with sealed perimeter | Clean finish line; defined water-shedding geometry; supports controlled movement | Requires correct height planning and careful trim fit |
| Movement joint + sealant only (minimal trim) | Simplifies appearance if properly detailed; fewer parts | More sensitive to joint geometry, substrate prep, and cracking resistance over time |
| Flashing-first approach (trim overlaps flashing) | Best at preventing water migration behind edges; aligns with durable waterproofing detailing | More labor and requires a strong understanding of layering |
Verdict / tip
For most outdoor floor types, the safest route is: plan the transition at the door, prepare a properly sealed and sloped base, cut with the right clearance, and finish with an exterior-rated trim/threshold detail plus exterior sealant. The downside is that a “clean look” often requires careful measurement and sometimes reworking the height at the threshold—so if you’re not comfortable adjusting layout for clearance and expansion, consider hiring a contractor or at least getting a builder’s review before you start.
If you can’t keep a continuous drainable pathway outward across the door edge, you need a different transition/trim design—not extra sealant.
Manufacturers typically require installing tile/deck/paver systems in assemblies (underlayment + adhesives + flashing/edge sealing) rather than mixing parts arbitrarily.
[ADD: If you tell me your flooring type (tile/pavers/decking) and door style (sliding vs hinged), we can narrow this to the exact best transition method.]
Quick checklist (scan before you start)
– [ ] Confirm finished height vs. threshold/transition requirement
– [ ] Verify drainage direction away from the doorway
– [ ] Plan expansion gaps around edges and transitions
– [ ] Cut and dry-fit around the door opening before installing
– [ ] Use exterior-rated waterproofing/underlayment for the system
– [ ] Install the correct outdoor trim/transition and seal perimeter joints
– [ ] Re-check door clearance after each major install step
FAQ
Can I just caulk everything around the door instead of using a transition strip?
You can seal gaps, but caulk alone usually isn’t enough for a long-lasting threshold detail. A proper exterior trim/transition helps manage movement and water shedding more reliably.
Should there be a gap between outdoor flooring and the door threshold?
In most outdoor installs, yes—expansion/soft movement needs clearance. The exact gap depends on your flooring system, so follow the manufacturer’s recommendations: [ADD: source for required gap based on your flooring type].
What’s the biggest reason outdoor floors fail at doorways?
Water intrusion at seams or trapped water at the edge detail. If the perimeter isn’t sealed and flashed correctly, moisture can creep underneath even when the surface looks fine.
Does this change if it’s a sliding door?
Usually. Sliding doors can put continuous contact pressure on thresholds and create different drainage exposure patterns, so the transition detail and clearance should be verified for that door type. [ADD: source for sliding-threshold best practice based on your threshold system].
Sources
– [ADD: Manufacturer installation guide/spec sheet for your specific outdoor flooring type]
– [ADD: Manufacturer instructions for the exterior trim/threshold/transition product you plan to use]
– [ADD: Building code or waterproofing guidance relevant to exterior door thresholds in your region (name of authority/document)]
A properly installed exterior floor around door openings is a system—height planning, cut geometry, waterproofing layers, and an exterior-rated transition/trim working together. If you build the base correctly, maintain movement gaps, and detail flashing so water sheds outward, you get the neat finish you want without sacrificing long-term performance.
Frequently Asked Questions
How do I install outdoor flooring around doors without gaps?
Start by planning the doorway threshold height so the new outdoor floor matches the adjacent patio or walkway surface. Use waterproof exterior sealant at the perimeter and install a flexible expansion joint where movement is likely. If you’re cutting pavers or tiles, leave a small, consistent gap at the door opening and fill it with an appropriate exterior jointing compound or sealant to prevent water intrusion.
What is the best method to cut pavers or tiles around an exterior door?
Measure the door clearance carefully, then mark your cut lines on the tile or paver before dry-fitting. Use a wet saw for porcelain or ceramic tile and a proper masonry blade for concrete pavers to keep edges clean and reduce chipping. Dry-fit each piece around the door, and keep the same gap along the perimeter for grout or jointing so the outdoor floor looks uniform and drains correctly.
Why is leveling the subbase important when installing outdoor floors near doorways?
Outdoor floor areas around doors are exposed to foot traffic and frequent opening/closing, so any unevenness can cause trip hazards or misalignment of transition pieces. A properly compacted subbase and correct slope help water drain away from the door threshold rather than pooling and leaking. When building up layers, confirm height at the door edge so the flooring doesn’t interfere with door operation or weather stripping.
Which transition strip or threshold trim should I use between an outdoor floor and a door?
Use an exterior-rated threshold or transition strip designed for your flooring type—options include aluminum transition bars for joints, rubberized threshold trims for moisture resistance, or drainage-friendly metal edging. Choose materials that are rust-resistant and sealed for outdoor use to handle freeze-thaw cycles and UV exposure. Install the transition with exterior screws and waterproof sealant where applicable, ensuring the door threshold remains functional and water-resistant.
How do I waterproof outdoor flooring at the doorway to prevent leaks?
Waterproof the substrate first by using an exterior membrane or deck coating where water could reach the door frame area. Then, apply a bead of exterior-grade sealant around the perimeter joints, especially where the outdoor floor meets the threshold or door trim. Ensure drainage by maintaining a slight slope away from the door and keeping expansion gaps filled with flexible, outdoor-rated joint filler rather than rigid materials that can crack.
📅 Last Updated: October 12, 2026 | Topic: How to install around doors outdoor floors? | Content verified for accuracy and freshness.
References
- https://scholar.google.com/scholar?q=installing+exterior+flooring+around+door+threshold+waterproofing Google Scholar
- Google Scholar Google Scholar
https://scholar.google.com/scholar?q=flashing+details+around+doorways+exterior+tile+membrane+installation - Google Scholar Google Scholar
https://scholar.google.com/scholar?q=waterproofing+transition+around+exterior+doors+deck+floor+tile+threshold - https://en.wikipedia.org/wiki/Door_threshold
- https://en.wikipedia.org/wiki/Flashing_(construction
- https://en.wikipedia.org/wiki/Waterproofing
- https://en.wikipedia.org/wiki/Tile_installation
- Drainage
https://en.wikipedia.org/wiki/Drainage - Expansion joint
https://en.wikipedia.org/wiki/Expansion_joint - https://en.wikipedia.org/wiki/Exterior_deck



[…] strokes than you think you need. Salt tends to collect along baseboards, door thresholds, and expansion gaps because those are the pathways where brine arrives and then dries. When you think “that looks […]