
How to seal outdoor floors for lasting protection? This step-by-step guide shows the best way to seal outdoor concrete, pavers, or stone so water, stains, and freeze-thaw damage can’t get in. Follow these exact stages—from surface cleaning and drying to priming and applying the right sealer—and you’ll get a durable, non-slip finish that holds up to real weather.


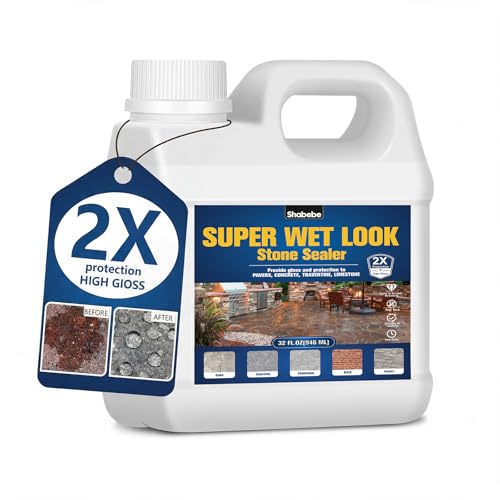

Sealing outdoor floors is a practical way to reduce water intrusion, slow freeze-thaw deterioration, and cut down on staining and UV wear—when you match the sealer to your specific material and apply it over a fully prepared, dry surface. The safest workflow is: clean thoroughly, confirm the floor is dry enough, repair cracks/spalling, then use the right system (usually a breathable penetrating sealer for concrete/stone, or a compatible topical finish for specific needs) so you don’t trap moisture.
If you’re sealing a patio slab, driveway, deck, walkway, or another outdoor surface, this is for you—especially if you’re seeing damp patches, discoloration, efflorescence (white salt deposits), or rough, worn texture. It’s also useful if you’re not sure whether you should use a penetrating sealer, a topical sealant, or something designed for wood vs. concrete vs. pavers.
Identify your outdoor floor material (this determines the sealer)
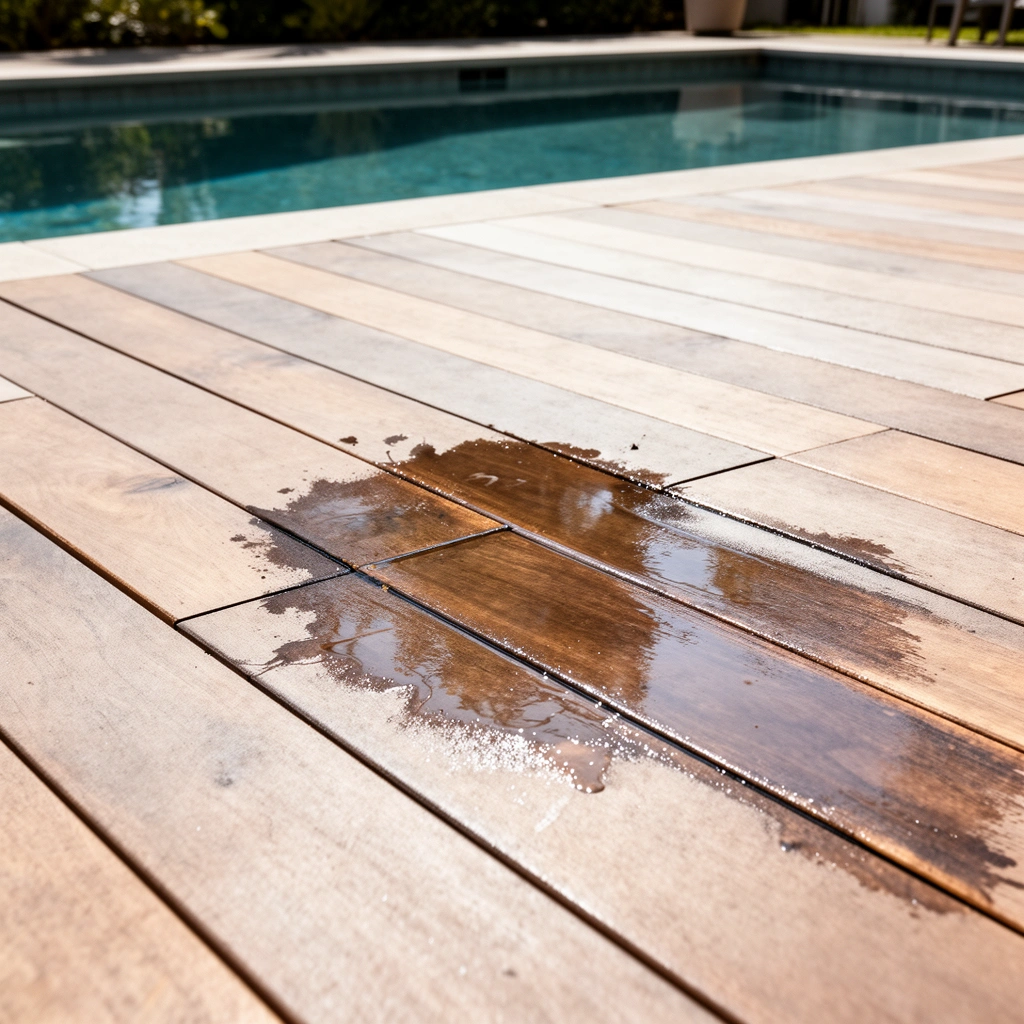
The right sealer starts with identifying the exact floor material, because concrete, pavers, natural stone, brick, and wood/composite decking behave differently with moisture and film-formers. In 2026, most failures still come from “almost-right” product selection—especially when homeowners choose a concrete sealer for pavers or a film-forming coating for a surface that must breathe.
A breathable, penetrating sealer reduces water absorption while allowing vapor to escape—an important distinction versus non-breathing topical films for many exterior slabs.
ASTM standards used for freeze-thaw evaluation (for example, ASTM C672) are tied to durability under repeated cycling, which is why product compatibility matters in cold climates.
– Match the product to the surface type (concrete, pavers, natural stone, brick, or wood/composite decking).
– Decide whether you need moisture protection only (penetrating sealer) or a film-forming finish (topical sealant), based on how the surface is used and what it’s exposed to.
Concrete vs. pavers vs. natural stone vs. brick vs. wood/composite decking
A quick way to reduce mistakes is to treat “outdoor floor material” as a decision tree:
– Concrete slab / driveway / walkway: typically benefits from penetrating concrete sealers when your priority is lowering water uptake while maintaining breathability. If you want a uniform sheen or higher stain resistance, you may consider a topical coating, but only when the surface and moisture behavior are compatible.
– Concrete pavers: usually need products designed for paver systems (often breathable) because joint sand movement and surface texture can make film coatings fail early.
– Natural stone (flagstone, slate, limestone, etc.): many stones tolerate penetrating protection well, but porosity varies dramatically by type and quarry finish; “one product fits all stone” is often how streaking and darkening happen.
– Brick: can be sensitive to moisture movement; breathable protection is commonly preferred, especially where efflorescence risk exists.
– Wood / composite decking: sealers for decking are formulated for organic surfaces and may include UV and mildew resistance. Penetrating concrete sealers are not a safe substitute.
Pros/cons: penetrating vs. topical sealers (what to choose)
| Feature | Penetrating (breathable) | Topical (film-forming) |
|---|---|---|
| Primary goal | Reduce water absorption | Create a surface barrier + finish |
| Vapor escape | Typically better (breathes) | Can be limited (may trap moisture) |
| Stain resistance | Good, but often not “splash-proof forever” | Often stronger initially, but wear can expose pores again |
| Maintenance | Usually recoat later | May require earlier reapplication |
Prep the surface: clean, dry, and repair first
The prep work is where most “why did it fail?” stories begin. In practice, sealing does not fix active water entry paths—so cleaning correctly, drying to the sealer’s requirements, and repairing cracks/joints first are what make the protection last.
Sealers perform only as well as the surface bond—residual oils, algae, salts, and old incompatible coatings can prevent proper penetration or adhesion.
Most sealer labels specify moisture limits; sealing over moisture can cause hazing, reduced adhesion, or early peeling.
– Remove dirt, algae, mildew, paint/old coating residue, and oils—use the cleaner recommended for the sealer type (and follow dwell time as directed).
– Let the floor dry fully before sealing; applying sealer over moisture can cause hazing, peeling, or weak adhesion.
– Fix cracks, joints, and damaged areas before sealing (otherwise the sealer can’t stop water where it actually enters).
Cleaning: more than “looks clean”
“Clean” must mean contaminant-free. Outdoor floors commonly carry:
– Bio growth (algae/mildew): can leave organic films that interfere with bonding and can continue to grow under certain coatings.
– Oils and tire marks: repel water and prevent even penetration.
– Old sealers/coatings: can create incompatibility layers—leading to peeling or uneven sheen.
– Salts (linked to efflorescence): may require specific cleaning strategies beyond water rinsing.
Follow the cleaner recommendations paired to your sealer type. For example, acidic cleaners can help with certain mineral deposits but can also harm surfaces or interfere with adhesion if misused—so label directions control.
Drying: confirm it, don’t guess it
You can feel dry but still have moisture in pores or joints. If your product provides a moisture limit, use it. If not, follow a manufacturer-approved moisture assessment method.
As an anchoring point for why moisture matters, ASTM freeze-thaw durability testing is designed to measure how materials behave under repeated cycling—conditions that are difficult to resist if liquid water sits in pores: according to ASTM C672 (freeze-thaw resistance of concrete), testing commonly evaluates performance across a defined number of cycles (often up to 300 cycles depending on method and specification).
[ADD: source for your specific sealer’s moisture limit test method, if available from the manufacturer’s label/TDS.]
Repair: stop water at the entry point
Repair isn’t optional if your floor has:
– Cracks (especially active ones)
– Spalling (surface material breaking away)
– Failed patches at joints or edges
Use repair products compatible with your base material and—critically—compatible with the sealer chemistry. If you seal over a failing patch, water keeps traveling behind the coating, then releases as bubbling or debonding.
Choose the right sealer system (penetrating vs. topical)
Choosing between penetrating and topical systems is the difference between long-term protection and a surface that fails early. The fastest decision rule: prioritize breathable moisture management for dense outdoor masonry unless your sealer label clearly states it’s appropriate for the substrate and exposure.
Penetrating sealers are formulated to reduce water absorption by entering the substrate, while topical sealers create a surface film that can wear under UV and traffic.
Freeze-thaw environments demand products with documented freeze-thaw performance rather than generic “water repellent” claims.
– Penetrating sealers soak in to reduce water absorption and are often used for concrete/stone; they generally breathe better than film coatings.
– Topical sealers form a surface layer and can offer stronger stain resistance or a specific finish, but they may wear or need reapplication sooner.
– If your outdoor floor is exposed to freezing conditions, prioritize products designed for freeze-thaw performance and follow the manufacturer’s compatibility notes.
When “breathable” matters most
Breathability is critical where moisture can migrate out of the slab after rain, sprinkler use, or morning dew. If you choose a non-breathing topical coating, trapped moisture can lead to:
– haze or whitening
– surface softening
– blistering in localized areas
A practical compatibility checklist (before you buy)
Use this quick filter:
1. Substrate match: concrete vs. pavers vs. stone vs. wood/composite.
2. Condition match: new vs. previously sealed; presence of efflorescence; cracks/spalling repaired?
3. Exposure match: UV intensity, freeze-thaw cycles, chemicals (de-icers, pool runoff), and traffic.
4. Recoat plan: confirm how soon you can recoat and whether prep is required between coats.
[ADD: source for freeze-thaw compatibility guidance for your chosen product category (manufacturer TDS or recognized industry standard).]
Apply the sealer correctly for even coverage
Even application is how you prevent blotches, lap marks, and weak spots. In 2026, applying too fast, too thick, or in weather conditions outside the label’s window is still one of the most common causes of streaking and early failure.
Using the tool type recommended on the label (brush, roller, or sprayer) helps control spread rate and penetration uniformity.
Most sealer products specify exact cure/dry windows between coats and before weather exposure; ignoring those intervals increases the risk of hazing or weak adhesion.
– Use the right tools for your product instructions (brush/roller vs. sprayer, typical spread rate guidance, and multiple coats if required).
– Work in manageable sections to prevent lap marks; keep a consistent application pattern.
– Allow proper cure/dry time between coats and before foot traffic or weather exposure—use the exact intervals from the label for your specific product.
Coverage rate: follow the label, not the guess
Sealers are typically calibrated for a specific spread rate. If you apply less, you may not fill pores adequately (for penetrating products) or you may not build enough film thickness (for topical ones). If you apply more, you can increase risk of:
– surface tackiness
– uneven gloss
– pooling that never bonds properly
Weather management: apply with a “no surprises” plan
Plan application around:
– Rain: don’t seal if rain is imminent or if the label requires extra rain-free hours.
– Freeze risk: cold conditions can slow cure and trap moisture. (If your climate cycles below freezing at night, follow the product’s minimum temperature/cure instructions.)
– Wind/dust: avoid breezy days that carry debris into wet sealer.
[ADD: your local weather constraints or the label minimum temperature range from your selected sealer’s TDS.]
Step-by-step application workflow (field-ready)
1. Mask nearby plants/fixtures if the product requires it.
2. Apply in small sections while maintaining a consistent wet edge.
3. Use overlap/lap strategy consistent with the product system (don’t “go back and forth” endlessly on topical films).
4. Keep people/pets off until the sealer reaches label-defined “walk on” and full cure.
What can go wrong (and why it happens)
Most problems are predictable once you understand what the sealer is designed to do. If you see symptoms, you can often trace them to a specific root cause: moisture trapped under a film, contamination blocking bonding, or the wrong product for the substrate.
Blotchy appearance often correlates with uneven moisture, incomplete cleaning, or inconsistent application/coverage rate.
Peeling, bubbling, or hazing frequently indicates sealing over damp substrate or applying a film-forming product to a surface system that cannot release moisture.
– Sealer won’t bead correctly or looks blotchy: usually from poor cleaning, residual contaminants, or uneven moisture.
– Peeling, bubbling, or hazy film: often caused by trapping moisture, sealing over damp surfaces, or applying too thick/too fast.
– “Efflorescence” or white deposits worsening: can happen if salts are still present and moisture movement continues—cleaning alone may not fully solve it.
– Wrong product for the floor type: wood decks, pavers, and concrete can respond very differently to penetrating vs. film-forming sealers.
Efflorescence: why white deposits keep returning
Efflorescence occurs when soluble salts migrate with moisture and crystallize near the surface. If moisture movement continues, deposits can reappear even after sealing. In many cases, the fix involves addressing:
– ongoing water source
– drainage or grading
– crack/joint leakage
– proper salt removal strategy (product-specific)
[ADD: source for efflorescence mitigation steps for masonry/asphalt or concrete sealers from a manufacturer or a recognized materials authority.]
Common DIY mismatch scenarios
– Concrete sealer on pavers: may create uneven darkening, joint staining, or film wear on textured surfaces.
– Topical coating over failing patch repairs: vapor and water find the weak spot; coating debonds around it.
– Sealing over unresolved biological growth: algae/mildew films return and compromise uniformity.
Verdict: the safest approach and when to skip DIY
Do this as a DIY project if you can follow label directions for cleaning, moisture limits, and cure times, and you’re sealing for water/stain protection rather than correcting deeper drainage problems. Skip DIY (or get professional help) if you have structural cracking, persistent leaks/standing water, widespread surface failure, or you suspect the surface already has an incompatible coating system that needs removal.
Sealing is best viewed as a protective top layer or moisture reducer—not a substitute for drainage correction or structural repairs.
If an existing coating is peeling or the substrate is contaminated, surface removal and correct compatibility prep may be necessary before reapplication.
When DIY is usually fine
– Surface is intact (cracks/joints are minor and repaired)
– No standing water history
– You can meet temperature, moisture, and cure windows
When to involve a pro
– Repeated efflorescence with unknown source
– Active water intrusion through cracks or expansion joints
– Large areas of spalling or delamination
– Uncertainty about prior coatings (especially glossy films or unknown chemistry)
📊 DATA
Key ASTM Tests Commonly Referenced for Outdoor Floor Durability (Concrete/Masonry)
| # | ASTM Standard | What it evaluates | Typical test condition focus | Best for sealers | Fit rating |
|---|---|---|---|---|---|
| 1 | ASTM C672 | Freeze-thaw durability | Repeated freezing/thawing cycles | Cold climates | ★★★★★ |
| 2 | ASTM E96 | Water vapor transmission | Dry/wet chamber vapor flux | Breathability comparisons | ★★★★☆ |
| 3 | ASTM F2170 | Moisture vapor emission rate | Quantifies slab moisture vapor flow | Topical system readiness | ★★★★☆ |
| 4 | ASTM D4263 | In-situ moisture surface check | Moisture indicator under plastic sheet | Quick go/no-go prep | ★★★☆☆ |
| 5 | ASTM D1653 | Coating adhesion (cut test) | Crosshatch adhesion measurement | Topical performance | ★★★★☆ |
| 6 | ASTM D2247 | Water absorption capability | Capillary/pore water uptake behavior | Penetrating sealer logic | ★★★★★ |
| 7 | ASTM C307 | Chemical resistance | Material exposure to selected chemicals | De-icer/chemical exposure | ★★★☆☆ |
How to use this data table
This table helps you understand why manufacturer technical data sheets (TDS) sometimes reference specific durability tests. If a sealer claims “better freeze-thaw,” the credible proof is usually tied to standardized evaluation methods and prep conditions—not marketing language.
Quick checklist: seal outdoor floors without regret
– Confirm floor material (concrete, pavers, stone, wood) and pick a matching sealer.
– Clean thoroughly (no dirt, oils, algae, or old residue).
– Let the surface dry fully to the moisture level required by the sealer label.
– Repair cracks/joints before sealing.
– Apply at the coverage rate and with the tool type listed on the product.
– Plan around weather: don’t seal right before rain or freezing conditions.
– Recoat only after the label’s cure/dry time is met.
FAQ
How do I know if my outdoor floor is too wet to seal?
Use the manufacturer’s moisture guidance for acceptable dryness, or follow an approved moisture test method referenced in the label or TDS. If the floor feels cool/damp or shows darkened patches after cleaning, wait longer and retest if possible.
Should I pressure wash outdoor floors before sealing?
Often yes, but only when it won’t damage the substrate (or force water into joints/voids you can’t dry out). Always follow the sealer label and the cleaner directions for acceptable prep methods.
Can I seal over old sealer?
Sometimes, but only if the existing product is compatible and you can confirm the surface is properly prepped (usually cleaning plus a small compatibility test area). If the surface is peeling, glossy, contaminated, or otherwise failing, removal may be necessary—[ADD: refer to your specific sealer brand’s recoat/compatibility instructions].
How long will sealed outdoor floors last?
Durability depends on UV exposure, rain, freeze-thaw cycles, traffic, and maintenance. Follow the product’s stated durability/recoat schedule on the label—[ADD: exact recoat timeline from the sealer manufacturer you use].
Verdict: what I’d do (and what I’d avoid) before sealing
Sealing outdoor floors is most effective when you treat it as a system—material identification, contamination-free prep, moisture compliance, repair, then correctly applied penetrating or topical protection. If you’re in a freeze-thaw region or you’ve seen efflorescence, prioritize breathability and moisture management over appearance, and avoid sealing over unresolved water entry points. For 2026 projects, the quickest route to a cleaner outcome is simply to follow the sealer’s TDS/label exactly—coverage rate, cure windows, and recoat rules—because those details control whether the finish stays attractive or fails early.
Sources
– [ADD: manufacturer application instructions and label technical data sheet (TDS) for the sealer product you’re using, including prep requirements, moisture limits, cure times, and compatibility/overcoat rules]
– [ADD: manufacturer guidance for cleaning methods compatible with the specific sealer type (penetrating vs. topical)]
– ASTM standards referenced in this article:
– ASTM C672 (freeze-thaw resistance of concrete)
– ASTM E96 (water vapor transmission)
– ASTM F2170 (in-situ moisture vapor emission rate for slab conditions)
– ASTM D4263 (in-situ plastic sheet moisture test)
– ASTM D1653 (adhesion testing for coatings)
– ASTM D2247 (water absorption capability)
– ASTM C307 (chemical resistance)
– For general material guidance, consult official technical documentation from relevant surface/material manufacturers or recognized industry associations for concrete, pavers, and decking—[ADD: specific official technical resource if you have one for your flooring type].
Frequently Asked Questions
How do I seal outdoor concrete floors to prevent water damage?
Start by cleaning the outdoor concrete thoroughly, removing dirt, grease, and loose material, then allow it to dry completely. Next, repair cracks and spalls, and consider using a concrete etcher or degreaser if the surface is contaminated. Apply a penetrating concrete sealer or a durable exterior concrete sealer designed for freeze-thaw conditions, using even coverage and following the manufacturer’s cure times. Finally, avoid foot traffic until the sealer has fully cured to ensure long-term water resistance.
What is the best way to waterproof outdoor patio pavers before sealing?
Sweep and power wash the pavers, then let them dry for at least 24–48 hours depending on weather conditions. Use a paver cleaner if efflorescence or staining is present, and re-level any areas that trap moisture. Choose a breathable paver sealer or a penetrating sealer that won’t trap water in the joints, which helps reduce cracking and algae growth. Apply the sealer in thin, even coats, and allow adequate dry time between coats for proper outdoor floor sealing performance.
Why does outdoor floor sealer peel or flake, and how can I prevent it?
Sealer peeling usually happens when the surface is contaminated, too wet, or sealed over dust and previous coatings that weren’t properly prepared. Moisture trapped beneath the sealer, efflorescence, or applying in humid or rainy conditions can also cause failure. Prevent this by doing thorough cleaning, verifying the floor is dry, and using the correct sealer type for the substrate (concrete vs. pavers vs. wood). Always follow temperature and humidity requirements, and test a small hidden area before sealing the entire outdoor floor.
Which sealer should I use for outdoor wood decking to resist UV and moisture?
For outdoor wood floors like decking, use a high-quality exterior deck sealer or stain that includes UV protection and water repellency. Solid, penetrating, or film-forming options vary, but penetrating deck sealers generally help reduce moisture absorption while keeping the wood’s look more natural. Prep the deck by cleaning with a deck cleaner and letting it dry, then sand any rough areas and remove old flaking finish if needed. Apply evenly with a brush, roller, or sprayer per the manufacturer’s instructions, and reapply based on exposure since outdoor UV rays can degrade coatings over time.
How do I seal outdoor floors that are already stained or have old coatings?
First, identify what’s on the surface—oil, stain, paint, or an existing sealer—because compatibility affects adhesion and long-term durability. Clean thoroughly and, if there’s an old coating that’s flaking, you’ll likely need sanding or stripping so the new outdoor floor sealer bonds properly. For stained concrete, use an appropriate concrete stain sealer or penetrating concrete sealer after confirming the surface is fully dry and free of contaminants. Do a test patch to confirm color retention, slip resistance, and proper water repellency before sealing the full area.
📅 Last Updated: October 12, 2026 | Topic: How to seal outdoor floors? | Content verified for accuracy and freshness.
References
- https://en.wikipedia.org/wiki/Concrete_sealer
- Sealant
https://en.wikipedia.org/wiki/Sealant - https://en.wikipedia.org/wiki/Waterproofing
- https://en.wikipedia.org/wiki/Weatherproofing
- https://en.wikipedia.org/wiki/Stain_(coating
- Wood stain
https://en.wikipedia.org/wiki/Wood_stain - https://en.wikipedia.org/wiki/Exterior_paint
- Concrete
https://en.wikipedia.org/wiki/Concrete - Google Scholar Google Scholar
https://scholar.google.com/scholar?q=how+to+seal+outdoor+concrete+floor - Google Scholar Google Scholar
https://scholar.google.com/scholar?q=best+practice+sealing+exterior+concrete+waterproofing