Estimating the cost of stained concrete floors is easiest when you price it by the surface size, prep level, and stain finish you want—those three factors drive almost every quote. This practical guide shows you exactly how to calculate total installed cost, including grinders/repairs, acid or water-based staining, sealing, and any floor coating cleanup. You’ll leave with a clear budgeting method and the ability to compare bids confidently without getting surprised by hidden prep costs.



Estimating stained concrete floor cost comes down to square footage math plus what the slab needs for prep, then—only after that—pricing the stain/sealer system and installation labor. Use a step-by-step takeoff so you can spot when “stain-only” quotes are missing the real money drivers like grinding, repairs, and moisture mitigation.
If you’re a homeowner, property manager, or contractor planning a renovation and you want to avoid surprises, this is for you—especially when the slab needs repairs or when you’re comparing “stain and seal” to more decorative systems.
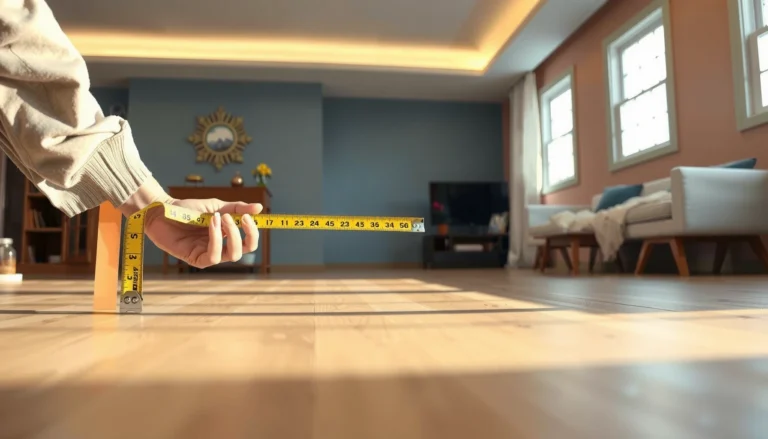
Step 1: Measure square footage and map the project scope

Square footage is the starting point, but your estimate becomes accurate only when you correctly define stained area versus protected area. Begin by measuring the total slab footprint, then subtract zones that won’t receive stain (or that require different treatment), such as closets, built-ins, and bathroom walls.
“Stained concrete cost” estimates should be based on the actual stained square footage (not the room’s full footprint) because masking and material consumption scale with stained area.
According to common concrete coating estimating practice, converting a room sketch into a stained-area takeoff is the first step before pricing stain, neutralizer, and sealer.
What to calculate (and why it affects cost)
1. Stained area (sq ft): Sum only the concrete surfaces receiving stain. For example, a kitchen may be 300 sq ft, but if you only stain 250 sq ft (island, toe-kicks, or built-ins excluded), your materials and labor should price 250 sq ft.
2. Non-stained zones / protected zones: Masking and edge protection still cost money—especially around baseboards, toe-kicks, shower perimeters, and pre-existing finishes.
3. Complexity items that change labor hours:
– Transitions (wood-to-concrete, stained-to-untreated, existing tile cut lines)
– Stairs and landings (often billed separately)
– Edges/trim around posts, columns, and radiator covers
– Full depth vs. partial decorative area (a small entry landing can be more expensive per sq ft because minimum mobilization applies)
Waste and coverage assumptions (don’t guess blindly)
Coverage can vary widely with porosity, profile, and prior coatings. Your estimator should carry a coverage factor (often expressed as an “allowance”) applied to stain and sealer yield so the quote reflects real job conditions.
A practical approach:
– Use manufacturer coverage guidance for your exact stain/sealer system.
– Add a reasonable application allowance if the slab is uneven, heavily absorbent, or contains repairs.
> [ADD: manufacturer coverage guidance for stain/sealer products, ideally with product name and target sq ft per gallon.]
Step 2: Estimate surface prep (often the biggest cost driver)
Surface preparation is where stained concrete projects most often exceed “$X per sq ft stain” marketing quotes. If you want a reliable budget, estimate prep as a separate line item—cleaning, grinding/shot blasting, patching/leveling, crack repair, and any needed stain-blocking or moisture mitigation.Surface preparation is the primary determinant of stained concrete outcome and total cost because most coating failures start with inadequate cleaning, profile, or moisture control.
According to ASTM surface-preparation principles used by coatings contractors, achieving the correct concrete surface profile and removing contaminants are prerequisites before applying decorative stains and sealers.
Common prep categories to price separately
1) Cleaning / contaminant removal
– Removal of paint, drywall compound, adhesive residue, curing compounds, and grease.
– Degreasing and detergent cleaning (and sometimes mechanical abrasion) are typical scope items.
2) Grinding or shot blasting
– Used to open pores, remove laitance, flatten high spots, and create a consistent profile for stain absorption.
– This is often the largest equipment-driven labor component.
3) Crack repair and patching
– Narrow hairline cracks may be treated differently than actively moving cracks.
– Patch materials vary (feather-finish patch vs. full-depth repairs), which affects labor time and cure scheduling.
4) Leveling
– Any “waves,” ridges, or spalled areas can change grinding scope and increase material use of patch/leveling compounds.
– Leveling may add days because of cure/rehab cycles.
5) Stain blocking
– If previous stains, sealers, or chemical contaminants cause blotchiness, the contractor may use stain-blocking primers or sealers to achieve predictable color.
6) Moisture-related steps
– If moisture vapor transmission or hydrostatic pressure is present, a moisture-mitigation primer/vapor-control system may be required before sealer.
– This is frequently the difference between a short-lived “pretty floor” and a durable finish.
> [ADD: moisture mitigation primers or vapor-control systems required by your chosen stain/sealer manufacturer and the conditions that trigger them.]
Variables that change prep scope fast
Expect the prep line item to swing if you discover:
– Existing paint or sealer that hasn’t been documented
– Uneven profile (trowel marks, patch ridges, “hard spots”)
– Efflorescence (white salt deposits from moisture movement)
– Deep cracks and spalls that require structural-level repair
The best way to avoid scope misses is to treat prep as the “inspection-based” part of estimating, not a flat assumption.
Step 3: Price materials for stain and sealing system
Material cost is usually the most straightforward part of the estimate—but only if you match the stain system to the concrete condition and the sealer to the intended wear. Break the materials into stain, required intermediates (like neutralizer for acid systems), and final sealer.
For acid-based stains, neutralizer/rinse products are often required and should be costed in the materials list—not treated as an optional add-on.
According to manufacturer technical data, coverage for stain and sealer can vary by concrete porosity and surface profile, so the exact product’s sq ft per gallon should drive budgeting.
How to structure your material takeoff
1. Stain
– Acid-based stain (common for reactive color change)
– Water-based stain (often more predictable on some substrates)
2. Color intensifiers (if your look requires them)
3. Rinse/neutralization (for acid systems)
4. Final sealer
– Penetrating sealer vs. film-forming system (your contractor should recommend based on use case)
5. Application supplies
– Plastic, tape/masking materials, rollers/pads, sprayers (if included in scope), mixing/cleanup chemicals
Mandatory product coverage math (use TDS, not generic rates)
Use the exact coverage rates from the chosen product’s SDS/technical data sheets. Below is a practical reference for how contractors often frame coverage in the field; you still must replace these with your exact product specs during real estimating.
Typical Coverage & Cost Drivers for Stain + Sealer Systems (per gallon, field-averaged ranges)
| # | Material line item | Typical coverage (sq ft/gal) | Main reason coverage varies | Estimator priority |
|---|---|---|---|---|
| 1 | Acid concrete stain | 120–200 | Concrete porosity & surface profile | ★★★★★ |
| 2 | Water-based concrete stain | 180–350 | Absorption rate & application method | ★★★★☆ |
| 3 | Neutralizer / rinse (acid systems) | 200–400 | Rinse technique & repeat applications | ★★★★☆ |
| 4 | Penetrating sealer (1–2 coats) | 150–250 | Concrete porosity & coat count | ★★★★★ |
| 5 | Film-forming sealer (poly/urethane blends) | 120–200 | Dry-film target & recoat timing | ★★★★☆ |
| 6 | Moisture mitigation primer / vapor control | 200–300 | Porosity & required DFT | ★★★★★ |
| 7 | Concrete prep cleaner / etch (as applicable) | 300–500 | Dilution rate & dwell time | ★★★☆☆ |
Quick sanity-check math you can apply
– Multiply stain coverage (sq ft/gal) by your stained area.
– Convert gallons to containers (round up to the nearest available size).
– Repeat for each layer (stain, sealer coat 1, sealer coat 2).
> [ADD: exact coverage rates from your chosen products’ SDS/technical data sheets.]
Step 4: Estimate labor time for application and finishing
Labor is typically the second major cost driver after prep. A good estimate breaks labor into prep labor, stain application, and sealer application with realistic scheduling for cure/recoat windows.
Stained concrete labor estimates should separate application work from cure/recoat time because crews often lose productive hours waiting on dry and recoat windows.
In bid comparisons, confirm whether edge work, masking, equipment mobilization, and cleanup are included—these items can be bundled differently across contractors.
What to break out line-by-line
– Prep labor: cleaning, masking, grinding/shot blasting coordination, patching assists
– Staining labor: layout, protection, application method (spray vs. roller/pour), detail work at edges
– Rinse/neutralize (acid systems): timing, water management, and proper runoff handling
– Sealer labor: coat application, spreading rate consistency, and curing protection
– Cleanup and demobilization: plastic removal, waste disposal, final protection
Recoat and cure reality check
Even if your process is “two coats,” the installer can’t always treat them as back-to-back. Recoat windows, humidity impacts, and surface dryness can extend schedule and increase crew hours.
> [ADD: recoat timing and cure/foot-traffic limits from your sealer system’s technical data.]
Step 5: Account for design complexity and add-ons
Design complexity changes both material consumption and labor time. Multi-tone layouts, custom borders, mottling effects, and tight architectural details can push cost up quickly—even when square footage stays the same.
The more color transitions, borders, and masking lines your design includes, the more labor time you should allocate for testing, layout, and careful edge control.
Most reputable stained concrete contractors run a test area because slab porosity and pre-existing conditions strongly affect final color depth.
Add-ons to price (don’t “hope” they’re free)
– Test patch allowance: set aside time and materials for a representative slab section.
– Custom color blends / multi-color schemes: can require separate product batches and additional masking.
– Protective measures: furniture move-back, staging, plastic flooring protection, and adjacent surface coverage.
– Scheduling constraints: occupied homes, limited work windows, and restricted dust-control measures.
> [ADD: allowance for test area time/materials.]
What can go wrong (common estimation mistakes)
Avoiding bad surprises is mostly about resisting three failure modes: under-scoping prep, using incorrect coverage assumptions, and treating stain as if it’s also the protection system.
Underestimating prep is the #1 reason stained concrete quotes fail in the field because surface profile, contamination removal, and patching directly affect both cost and final appearance.
Color comes from the stain chemistry, but durability comes from the sealer system and the correct match between stain and sealer.
Common mistakes to watch for
– Underestimating prep
– Existing paint/sealer, efflorescence, or deep cracks can require grinding plus specialty primers and extra patch cycles.
– Using wrong coverage assumptions
– Porosity and surface texture change yield; use product TDS numbers and apply a realistic allowance.
– Confusing stain vs. sealer
– Stain creates color; sealer is what protects against wear, chemicals, and cleaning cycles.
– Ignoring moisture and failure conditions
– If moisture issues aren’t mitigated, you risk peeling, discoloration, or early coating failure.
Pros/cons snapshot: “Stain & seal” vs. higher-performance systems
| Option | Pros | Cons / estimating watch-outs |
|---|---|---|
| Stain + sealer (decorative) | Great color variation potential; typically faster than full coatings; lower material complexity. | Durability depends on sealer selection; moisture problems can nullify the budget if not addressed in prep scope. |
| Moisture mitigation + stain + sealer | More predictable performance where vapor/moisture issues exist. | Adds primer cost, cure time, and often extra testing—failure to include these drives underbids. |
| Full decorative coating system (if needed) | Higher uniformity and consistent wear performance in demanding environments. | More system complexity; can eliminate some “natural” color variability; estimate must include full system compatibility. |
Verdict / tip: how to make your estimate reliable
If you want a dependable estimate, build it from square footage first, then add prep scope before you commit to a “stain and seal” budget. This approach reduces surprises because prep and moisture-related work frequently outweigh the stain material cost.
Downside: it takes more up-front inspection effort (or a careful walkthrough). If you can’t access the slab for assessment, or you already expect major structural repairs, skip this estimating approach and move toward a formal assessment and contractor proposal.
A reliable estimate starts with stained-area takeoff, then prices prep and moisture mitigation before applying stain and sealer layers.
If slab conditions are unknown, you should use a documented range or contingency because concrete porosity and existing coatings can swing both prep hours and coverage yield.
Scan-and-save checklist (quick estimate worksheet)
– [ ] Measure stained area (sq ft): ________
– [ ] Confirm existing coatings/paint/sealer present: Yes / No / Unknown
– [ ] Prep scope assumptions: cleaning / grinding / patching / crack repair
– [ ] Moisture mitigation required? Yes / No / Unknown
– [ ] Stain system chosen (product names): ________
– [ ] Sealer system chosen (product names): ________
– [ ] Masking/edge work included in labor? Yes / No / Unknown
– [ ] Decorative complexity (single color vs. multi-tone): ________
– [ ] Allowance for test patch: ________
– [ ] Contingency for unexpected prep: ________
FAQ
1) What drives the cost of stained concrete floors the most?
Surface preparation and slab condition—especially cleaning, grinding/shot blasting, repairs, and any moisture-related steps—usually drive overall cost more than the stain product itself.
2) Can I estimate stained concrete per square foot without seeing the slab?
You can create a rough range, but a reliable estimate needs confirmation of existing coatings, porosity, cracking severity, and whether mitigation is required—otherwise you risk a lowball prep budget.
3) Are acid-based and water-based stains priced the same?
They’re not always priced the same, and coverage can differ by product and slab porosity. Use the exact coverage and technical data for the stain system you’re considering: [ADD: product-specific coverage + application notes from the SDS/technical datasheet].
4) Does the sealer cost depend on foot traffic?
Yes. Higher-traffic environments often require specific sealer systems or performance requirements. Match the sealer to the intended use and confirm compatibility with your stain system using the manufacturer’s technical documentation.
Sources
– [ADD: Manufacturer technical data sheets for your specific stain and sealer products, including coverage rates and application/curing instructions]
– [ADD: Safety Data Sheets (SDS) for the selected stain/sealer products, for handling and cleanup guidance]
– [ADD: Manufacturer documentation for acid-based staining steps (neutralization/rinse requirements) or water-based system application guidance, as applicable]
– [ADD: Manufacturer guidance on compatibility between stain system and sealer system, including any required primers/blocks for existing coatings]
Stained concrete can look high-end and natural—but accurate pricing depends on treating this as a system: slab condition → prep → stain → sealer → cure. If you estimate square footage first and then price prep and moisture mitigation with documented product coverage and recoat rules, you’ll get budgets that hold up during bidding, scheduling, and the day-to-day realities of concrete work.
Frequently Asked Questions
What factors affect the cost of stained concrete floors?
The biggest cost drivers are the size of the area, the condition of the existing slab, and the type of stain (acid stain vs. water-based stain). Prep work—such as grinding, repairing cracks, cleaning, and removing old coatings—often adds significant labor. Pricing also varies based on whether you need a densifier, sealer (and how many coats), and decorative options like multiple colors or stenciling.
How do I estimate the cost per square foot for stained concrete floors?
Start by getting a unit-rate range for labor and materials in your area, then multiply by the square footage (including any waste factor if you’ll be doing complex patterns). Add separate line items for surface prep (grinding/shot blasting), stain application, and sealing, because contractors commonly price these differently. If you have pitting, spalling, or old paint, estimate additional repair and prep costs since they can push the total higher than a simple stain job.
Why does surface preparation change the total price of concrete staining?
Stains bond best on properly cleaned and profiled concrete, so poor surface prep can lead to blotchiness, uneven color, or peeling after sealing. Grinding or shot blasting to open the pores is frequently required and can be the most labor-intensive step for stained floors. Repairs like patching cracks, leveling, or removing coatings also increase both material and labor costs.
Which stain and sealer options are best for balancing cost and durability?
Acid stains and water-based stains can both produce attractive results, but durability can depend on the concrete condition and the final sealer system. High-quality penetrating sealers or floor coatings (chosen for indoor vs. outdoor and traffic level) often cost more up front but can reduce maintenance and reapplication frequency. Ask vendors to specify whether they’re using a single-coat sealer or a multi-coat system, since that directly affects your stained concrete floor cost.
How much should I budget for small vs. large stained concrete floor projects?
Small stained concrete projects usually cost more per square foot because minimum labor charges, setup time, and equipment mobilization get spread across fewer square feet. Larger projects often receive better per-square-foot pricing due to efficiency in grinding, staining, and sealing. To estimate accurately, request quotes that break out prep, stain, and sealing so you can compare total stained concrete floor pricing across contractors.
📅 Last Updated: October 10, 2026 | Topic: How to estimate the cost of stained concrete floors? | Content verified for accuracy and freshness.
References
- Google Scholar Google Scholar
https://scholar.google.com/scholar?q=how+to+estimate+the+cost+of+stained+concrete+floors - Google Scholar Google Scholar
https://scholar.google.com/scholar?q=decorative+concrete+staining+process+cost+estimation+labor+materials - Google Scholar Google Scholar
https://scholar.google.com/scholar?q=concrete+floor+coatings+staining+life+cycle+cost+analysis - Cost estimate
https://en.wikipedia.org/wiki/Cost_estimation - Decorative concrete
https://en.wikipedia.org/wiki/Decorative_concrete - https://en.wikipedia.org/wiki/Concrete_stain
- https://en.wikipedia.org/wiki/Concrete_sealer
- https://www.energy.gov/eere/femp/life-cycle-costing
- https://www.nist.gov/services-resources/software/nist-building-life-cycle-cost-blcc-software
- Concrete
https://en.wikipedia.org/wiki/Concrete