Disposing of industrial floors safely and compliantly is easiest when you follow the correct pathway: clean removal and reuse when the surface is intact, or certified disposal when contamination, coatings, or under-slab materials are present. This guide answers how to dispose of industrial floors based on what they’re made of, what’s been applied to them, and your local waste regulations. You’ll get the practical compliance checklist and the safer option to choose before demolition, grinding, or transport.




Disposing of industrial floors safely usually comes down to two things: correctly identifying the floor system and confirming whether it’s contaminated before you remove or ship it. Once you know what you’re dealing with (e.g., concrete vs. epoxy/resin coatings vs. tile plus adhesives), you can route it to the right waste stream and licensed facility with the documentation they require—so you don’t get loads rejected or create compliance risk.
Disposing of industrial flooring is often more complex than it looks because industrial floors are frequently multilayer (substrate + primer + coating + adhesive + toppings), and the “hazard” may be embedded in what was applied to the surface—not just in the base slab. In 2024 and beyond, regulators and receiving facilities are also tightening how they review construction and demolition (C&D) waste, particularly when surface preparation involves grinding and generates fine dust. That’s why a planning-first approach (identify → test as needed → control removal → segregate → document) is typically the most reliable way to stay compliant.
Who this is for / when it applies:
This is for facility owners, maintenance managers, EHS teams, and contractors planning to replace or remove industrial flooring in warehouses, factories, workshops, and similar sites. It’s especially relevant when you’re unsure whether your floor is eligible for standard demolition disposal or needs special handling due to coatings, adhesives, or contamination.
Confirm the floor material and what’s on it
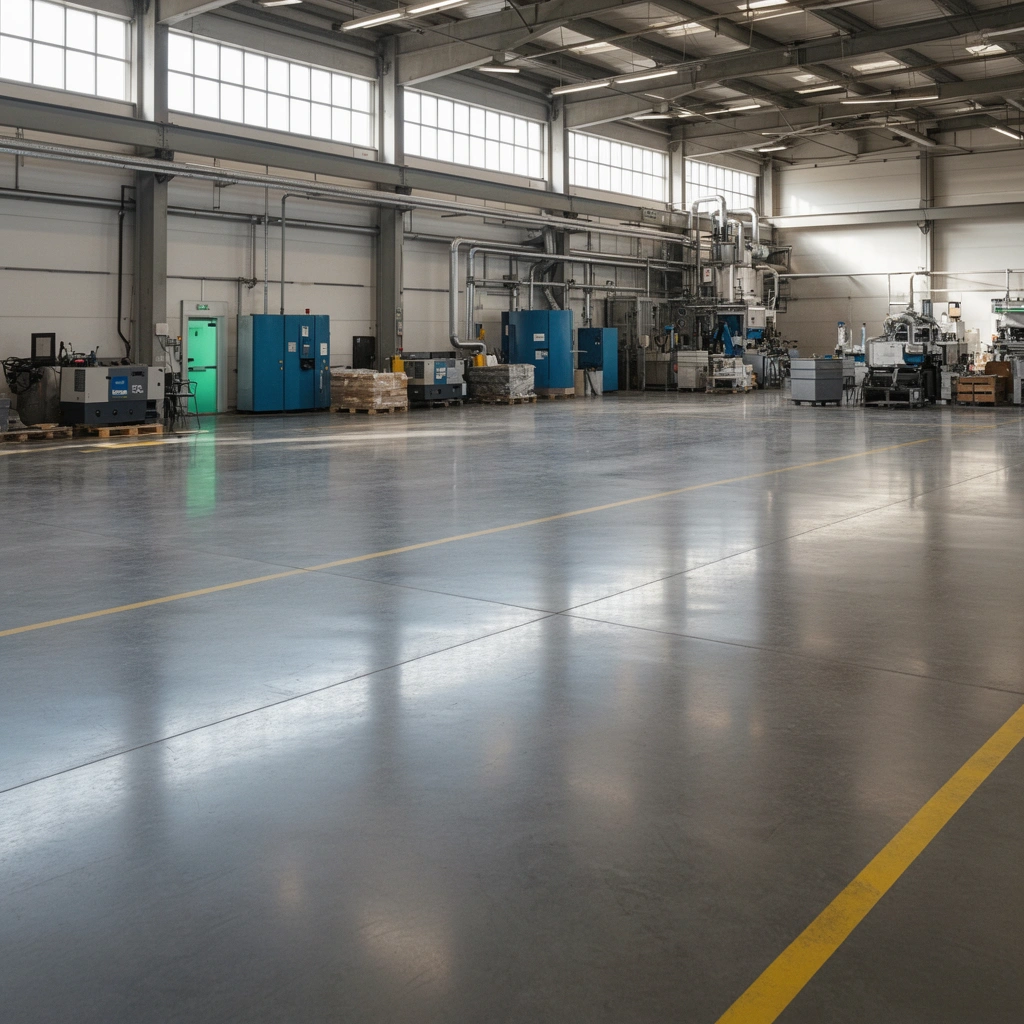
You should start by treating industrial floor disposal as a materials identification job, not a “dump it” job. The base flooring type and every attached layer (coatings, primers, adhesives, sealers, anchor systems) determine how the waste will be classified, handled, and accepted.
Industrial floor disposal begins with identifying the base slab and every attached layer (coatings, primers, adhesives), because those layers change waste classification and facility acceptance rules.
If you cannot confirm what’s on the floor system, professional testing or documentation review is safer than guessing what can be placed into standard construction debris streams.
Identify the base flooring type (and note structure)
Start with the substrate and system build-up:
– Concrete (with or without surface grinding, toppings, or sealers)
– Epoxy/urethane/resinous flooring (often primer + broadcast aggregate + topcoat)
– Resin toppings (thin or thick; sometimes chip/broadcast finishes)
– Rubber tiles / roll goods / VCT (vinyl composition tile) with adhesives
– Troweled cementitious/overlays (with possible chemical hardeners or impregnation)
When possible, capture thickness and layer structure (even approximate ranges from drawings, maintenance logs, or product data sheets). Those details help disposal facilities decide whether your waste is “clean concrete,” “coated debris,” or something regulated.
Document “extras” that change the waste stream
Industrial floors often include elements that materially affect disposal routing:
– Coatings and sealers (epoxy, polyurethane, acrylic, “polyaspartic,” etc.)
– Adhesives (mechanically mixed adhesives, resin adhesives, mastic—especially with tile)
– Primers (often more chemical than the final coating)
– Anchor systems (embedded fasteners, grouting compounds)
– Markings (epoxy stripe systems can be a separate waste stream)
– Build-up aggregates (silica-containing broadcast media can affect dust control requirements)
When the site history is uncertain, escalate to testing
If the floor could have been exposed to chemicals (chemical storage, oil systems, solvent use, unknown maintenance work, or older industrial history), arrange testing rather than assuming the cured finish is inert. This is also the time to request manufacturer documentation (SDS and technical data) for known coating systems—those documents don’t just describe hazards; they guide proper removal methods and potential dust hazards during surface prep.
Determine contamination risk and legal disposal path
You should treat contamination risk as the gatekeeper to the entire disposal plan. If contamination is possible (oils, solvents, heavy metals, asbestos, regulated coatings, or residues from surface preparation), you may need a different waste category and additional documentation before a landfill or recycler accepts the material.
Waste is often regulated based on the presence and leachability of constituents, so confirming contamination risk upfront is the most cost-effective way to avoid load rejection and rework.
Even “cured” coatings can create regulated dust or carry residues during grinding, so contamination assessment should include surface preparation activities.
Look for practical indicators of contamination
Use both visual and process-based indicators:
– Staining: dark oil stains, solvent discoloration, persistent brown/gray halos
– Surface residue: tackiness, chemical odor during grinding, unusual sheen changes
– Associated waste: rags, absorbents, pump-out residue, floor drain residues
– Grinding waste: fine dust generation during diamond grinding/scarifying (dust can carry residues)
Use local rules and facility acceptance criteria to confirm the waste category
At this stage, confirm how your local EHS/waste authority and receiving facility classify the floor debris. You typically need answers to:
– Is it general construction debris, C&D coated debris, industrial waste, or hazardous/regulated?
– Does removal create waste that must be profiled (e.g., due to coating chemistry, contaminants, or unknown history)?
– Are you required to provide hazardous waste manifests and chain-of-custody if regulated?
Three compliance anchor facts to ground the decision
– According to the U.S. Environmental Protection Agency (EPA), C&D debris was about 600 million tons in 2018 in the United States, which is why many jurisdictions emphasize C&D sorting and correct classification to protect disposal capacity and reduce contamination. [ADD: U.S. EPA official C&D debris statistic source]
– According to the U.S. Occupational Safety and Health Administration (OSHA), the Permissible Exposure Limit (PEL) for respirable crystalline silica is 50 µg/m³ as an 8-hour time-weighted average (for certain general industry construction contexts). [ADD: OSHA silica PEL / standard reference]
(This matters because grinding industrial floors can create silica-containing dust and therefore trigger both worker protection and dust containment requirements.)
– According to EPA RCRA toxicity characteristic values used for hazardous waste determinations, lead in the Toxicity Characteristic Leaching Procedure (TCLP) has a regulatory threshold of 5.0 mg/L (and similar specific thresholds exist for other metals). [ADD: EPA TCLP toxicity characteristic values source]
Plan removal to control dust, chips, and runoff
You can prevent many compliance problems before disposal even starts by controlling removal impacts. A well-planned removal controls airborne particulates (including dust from grinding), captures debris, and prevents contaminated wash water or debris from reaching drains.
Dust and runoff control are disposal risk controls: uncontrolled dust can spread residues and create worker and site contamination problems before waste classification is finalized.
Plan removal methods based on the floor system (e.g., coatings that generate fine dust during grinding), because the removal process affects the waste stream and cleanup obligations.
Use containment where appropriate
Containment isn’t only about housekeeping—it’s also about controlling cross-contamination and reducing the amount of material that becomes “dirty”:
– Plastic sheeting, barriers, and negative-pressure setups where required
– Dust collection with HEPA filtration for grinding/sanding operations (where mandated or needed)
– Dedicated tool zones to avoid spreading residues beyond the work area
Match removal method to the floor system
Different systems respond differently:
– Resinous coatings: grinding and scarifying can generate fine particulate; avoid “uncontrolled break-up” approaches that spread dust.
– Tile/VCT with adhesives: removal often creates adhesive-bearing waste that should be handled as coated/adhesive debris rather than clean demolition rubble.
– Slabs with integrated anchors: plan for mechanical separation so metal trims/fasteners don’t contaminate otherwise recyclable streams.
Manage runoff and wash-down
If you’re doing wash-down cleanup:
– Prevent debris from entering storm drains or sanitary lines
– Plan collection of wash water where applicable (and confirm whether it must be treated/disposed as a regulated waste)
– Keep wash-down records for the contractor and EHS file, especially if contamination is suspected
Sort materials for recycling vs disposal
You should segregate waste streams during removal, because mixing “coated” and “clean” materials commonly destroys recycling options and increases disposal costs. Proper sorting also reduces the chance your load is rejected for not matching the facility’s acceptance criteria.
Segregating concrete from coated/resin debris during removal is one of the most reliable ways to protect recycling eligibility and avoid load rejection.
Labeling containers and controlling site workflow are compliance actions—facilities typically verify packaging and documentation before they accept loads.
Separate by functional material type
A practical segregation approach:
– Cured coating/resin (epoxy/urethane/polyaspartic topcoat and associated residues)
– Adhesives (mastic, resin adhesives, backing materials)
– Concrete or topping (ideally clean, uncontaminated)
– Aggregates (broadcast media attached to coatings)
– Metals (edge trims, anchors, embedded fasteners)
– Backings (rubber underlayment, tile backing)
Keep coated/construction debris out of clean concrete loads
If your recycler requires segregation, treat this as non-negotiable:
– Use separate bins or dumpsters
– Prevent commingling during loading and transport
– If you do incidental mixing (e.g., in a shared skip), you may need re-sorting or additional profiling—both can be expensive
Use labeled containers and document the workflow
Create a simple labeling plan (bin IDs, floor area IDs, coating system references, and suspected contamination status). Then align that with manifests and load descriptions.
Key trade-off comparison: segregation vs speed
- Segregate correctly (recommended)
- Higher upfront planning and packaging effort, but better recycling yield and fewer rejected loads.
- Send mixed loads (tempting)
- Often faster on paper, but it can push more material into disposal—and may violate acceptance criteria for coated debris.
Typical Industrial Floor Waste Routing Patterns (U.S. operations)*
| # | Floor debris stream | Best initial destination | Segregation priority | Compliance risk if mixed | Confidence |
|---|---|---|---|---|---|
| 1 | Clean concrete (no coating residue) | C&D concrete recycling | Medium | Low ★★☆☆☆ | ★★★☆☆ |
| 2 | Concrete with primer/overcoat residue | Coated debris disposal | High | Medium ★★★☆☆ | ★★★★☆ |
| 3 | Cured epoxy/urethane coatings | Regulated construction plastics/debris disposal (site-dependent) | Very High | High ★★★★☆ | ★★★★☆ |
| 4 | Grinding dust / scarification fines | Bagged/contained special handling (facility-defined) | Very High | High ★★★★☆ | ★★★☆☆ |
| 5 | Tile + adhesive mastic | Adhesive/coated debris disposal | Very High | High ★★★★☆ | ★★★★☆ |
| 6 | Metal trims / anchors | Scrap recycling (if uncontaminated) | Medium | Low ★★☆☆☆ | ★★★☆☆ |
| 7 | Associated contaminated absorbents (if present) | Hazardous waste or regulated disposal (if confirmed) | Very High | Very High ★★★★★ | ★★☆☆☆ |
This table summarizes common routing patterns and does not replace jurisdiction-specific classification or receiving-facility acceptance criteria. Always confirm with the licensed disposal facility. [ADD: your region-specific routing references or facility examples]
Coordinate with licensed haulers and disposal facilities
You should coordinate with haulers and receiving facilities early, because acceptance criteria and required documentation are what make disposal “work” in practice. Facilities don’t just judge the waste by material—they judge it by load description, packaging, and paperwork.
Written facility acceptance criteria (what they take, packaging requirements, documentation) prevent the most common disposal failure: rejected loads due to mismatched waste streams.
If waste is hazardous or regulated, correct manifests and chain-of-custody handling are essential for legal transport and disposal.
Provide accurate descriptions up front
When you contact disposal providers, be specific:
– Floor type and thickness (as known)
– Coating type (epoxy/urethane/resin), and whether broadcast media is present
– Adhesives and tile/backing details (if applicable)
– Any suspected contamination (oils/solvents/stains/chemical use nearby)
– Whether removal includes grinding, scarifying, or water wash-down
Get written confirmation of acceptance criteria
Ask for:
– What they will accept (and what they won’t)
– Packaging rules (bagging fines, labeling bins, tarping loads)
– Testing documentation requirements (profiling, TCLP results, or coating SDS review)
– Segregation requirements (whether coated concrete must go separate from clean concrete)
Handle manifests/chain-of-custody correctly if regulated
If the waste stream is classified as hazardous or regulated:
– Confirm whether the transporter must hold the right credentials
– Ensure manifests reflect the correct waste codes/category
– Track responsibility between generator, transporter, and facility
From a practical standpoint, the most frequent “surprise” we see is paperwork mismatch—loads arrive described as “concrete debris” but contain coated/resin material. [ADD: your site’s real-world example or a non-sensitive anonymized case summary if you have it.]
What can go wrong (common mistakes and edge cases)
You can avoid most problems by not treating industrial floor disposal as a single-step activity. The biggest failures usually happen when teams skip testing, fail to segregate, or underestimate how removal creates new waste forms (dust and wash water).
A common compliance failure is sending coated/resinous floor debris into general demolition disposal—many facilities treat coated systems differently from clean concrete.
Fine dust from grinding can carry coating/adhesive residues, so dust control and waste classification must be planned as part of removal—not after.
Common mistakes
– Assuming “it’s just flooring”: coated/resinous systems are often rejected by recyclers or routed to disposal instead of recovery.
– Skipping testing with unclear site history: older adhesives, resin systems, or residues may trigger special handling.
– Letting dust and wash water spread: airborne particulates complicate site cleanup; contaminated water can create additional disposal liabilities.
– Mixing waste streams: combining coated debris with otherwise recyclable concrete can remove recycling options and increase total cost.
Edge cases that deserve extra scrutiny
– Older buildings with unknown maintenance: coating chemistry may vary even within the same “floor area.”
– Floor drains and sumps nearby: removal activities may contaminate drainage components.
– Broadcast aggregate finishes: aggregate can contain different constituents than the cured binder, affecting classification.
– Partial removal and then “patching”: mixed residues can be created on the edges, complicating segregation.
Quick pros/cons summary (decision framing)
| Approach | Pros | Cons |
|---|---|---|
| Segregate coated vs clean concrete during removal | Higher recycling eligibility; easier acceptance | More containers, more workflow steps |
| Mix loads to “save time” | Lower immediate handling effort | Higher rejection risk; may increase disposal costs |
Verdict / tip
If you want the simplest path that’s also defensible, treat industrial-floor disposal like a two-step job: (1) identify the material and contamination risk, then (2) sort and ship according to your local rules and receiving facilities’ acceptance criteria. This approach has downsides: it can require additional time for testing/documentation and more careful removal practices (especially dust control and segregation containers). If you’re dealing with unknown site history, suspect hazardous contamination, or complex multilayer flooring, don’t rely on “standard” dumpster disposal—use a qualified contractor and confirm requirements with a licensed disposal facility first.
Quick checklist for safe industrial floor disposal
| Step | What to do | Save/verify |
|---|---|---|
| 1 | Identify floor type + layers/coatings/adhesives | Photos, product data (if available), substrate notes |
| 2 | Assess contamination risk | Facility history, chemical use records, test results if needed |
| 3 | Control removal impacts | Dust containment, debris capture, runoff control |
| 4 | Sort waste streams | Separate containers for concrete vs coated/resin waste |
| 5 | Confirm disposal acceptance | Written facility acceptance criteria + required documentation |
| 6 | Transport with correct paperwork | Manifests/chain-of-custody if regulated |
FAQ
Do I need testing before disposing of industrial floors?
Often you do if there’s any chance of hazardous materials (unknown site history, chemical contamination, older systems, or heavy staining). If you’re confident the floor is clean and made of a known material with no regulated coatings/contamination, the receiving facility may accept it with documentation—still, confirm with them first.
Can epoxy or resin floor coatings go to regular construction debris disposal?
Sometimes, but it depends on coating type, substrate, and whether contamination is present. Many disposal sites treat coated/resinous materials differently, so you should ask the facility what they accept and what proof/documentation they require.
Is grinding dust from floor removal considered contaminated waste?
It can be. Even if the surface looks “clean,” grinding can create fine particulates that may carry coating/adhesive residues. Plan dust control and follow your waste classification requirements based on the floor system and contamination assessment.
How do I keep disposal loads from being rejected?
Segregate waste streams during removal, package and label properly, and provide accurate descriptions up front. Rejection often happens when coated debris is mixed with clean concrete or when documentation/testing doesn’t match what’s on the load.
Sources
– [ADD: U.S. EPA official hazardous waste classification guidance for TCLP thresholds and RCRA toxicity characteristic values (include specific metal thresholds used for hazardous determinations)]
– [ADD: U.S. OSHA respirable crystalline silica standard reference (PEL value and relevant requirements for abrasive/grinding dust)]
– [ADD: U.S. EPA official construction and demolition debris statistics (e.g., total tons generated and year)]
– [ADD: Manufacturer documentation for the specific coating/floor system you’re removing (SDS/technical data) to understand hazards related to cured material and removal methods]
– [ADD: official occupational safety guidance on dust control/worker protection during abrasive removal (agency guidance matching your jurisdiction)]
When you align identification, contamination assessment, controlled removal, waste segregation, and written acceptance criteria, industrial floor disposal becomes a manageable process rather than a last-minute scramble. The goal isn’t just to “get rid of the floor,” but to produce defensible, accurately classified waste streams that licensed facilities can accept—safely and legally.
Frequently Asked Questions
How do I dispose of industrial floor coatings safely and legally?
Start by identifying the coating type (epoxy, polyurethane, polyurethane mortar, MMA, or other resin systems) and check the Safety Data Sheet (SDS) for disposal guidance. Remove floor samples or test for hazardous materials such as lead, asbestos, or heavy metals when required by local regulations. Collect debris and spent consumables in labeled, sealed containers, and dispose of them through a licensed hazardous waste or construction waste facility, especially if the industrial floor coating contains solvents or regulated contaminants.
What is the best way to dispose of demolished concrete from industrial floors?
For industrial floors, demolition concrete is often recyclable, but it must be assessed for contamination (e.g., oil, solvents, chemicals, or heavy metals) before reuse. Segregate clean concrete from contaminated material, then transport clean concrete to a permitted recycling center for processing as aggregate. If the concrete is stained or contaminated, treat it as construction waste or hazardous waste depending on test results, and follow local requirements for manifests and landfill acceptance criteria.
Which methods are acceptable for disposing of industrial flooring waste like grinding dust and slurry?
Grinding, shot blasting, and floor leveling commonly generate dust and slurry that may contain fine particulates and residue from industrial floor coatings. Use dust collection systems with proper filtration and collect slurry using containment berms or vacuum systems, then dewater and dispose according to whether it meets local “non-hazardous” limits. If the slurry contains regulated materials, handle it as hazardous waste and coordinate with an environmental contractor experienced in industrial floor waste management.
Why is proper disposal of industrial floor materials important for environmental compliance?
Industrial floors can trap chemicals, metals, oils, and curing agents in the substrate, so improper disposal can lead to soil and water contamination. Many jurisdictions require waste profiling, documentation, and licensed transporters for construction debris and demolition materials. Following compliant disposal practices helps you avoid fines, reduces liability, and supports smoother project closeout with waste manifests and inspection-ready records.
How do I prepare industrial floors for disposal before removal to reduce waste and disposal costs?
Reduce contamination and waste by removing loose debris first, then containing the work area with barriers and dust suppression to limit cross-contamination of surrounding surfaces. Where practical, use the right removal method for the industrial flooring system—such as controlled milling, minimal-dust grinding, or bead blasting—so you remove only what’s necessary. Keep waste streams separated (coating flakes, concrete dust, bulk concrete, and chemical residues), label them accurately, and plan transport early to match each stream with the correct permitted disposal route.
📅 Last Updated: October 12, 2026 | Topic: How to dispose of industrial floors? | Content verified for accuracy and freshness.
References
- https://www.epa.gov/hw
- https://www.epa.gov/smm/construction-demolition-debris
- https://www.epa.gov/asbestos/asbestos-disposal
- https://www.epa.gov/pcbs/pcb-disposal
- Asbestos – Overview | Occupational Safety and Health Administration
https://www.osha.gov/asbestos - https://www.hse.gov.uk/asbestos/clearance/index.htm
- https://www.cdc.gov/niosh/topics/asbestos/default.html
- Google Scholar Google Scholar
https://scholar.google.com/scholar?q=industrial+floor+disposal+asbestos+hazardous+waste - Google Scholar Google Scholar
https://scholar.google.com/scholar?q=construction+demolition+debris+concrete+floor+disposal+landfill+regulations - Google Scholar Google Scholar
https://scholar.google.com/scholar?q=RCRA+contaminated+concrete+disposal+industrial+floors