How to mop limestone floors without streaks and damage: follow the safe, correct cleaning steps that actually work. This guide shows the winning method—what to use, how to dilute it, and how to mop and dry so the stone stays clean and dull-free. You’ll also get the key do’s and don’ts to prevent etching and residue, even if your floor is already prone to spotting.


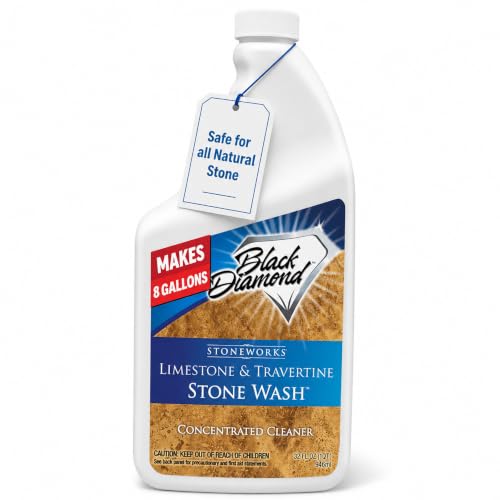

Mop limestone floors with a pH-neutral cleaner and plenty of clean water, then wring the mop well and dry as needed to prevent residue and dull spots. The key is avoiding acidic (“descaling” or vinegar-type) cleaners and over-wetting, because limestone is sensitive to chemical etching and mineral film.
If you have natural limestone (not tile with a limestone-look finish) and you want it to stay smooth, sealed, and low-streak, this is for you. It’s especially useful if you’ve noticed cloudiness, hazy grout lines, or dull patches after routine mopping.
Prep the floor before you mop limestone

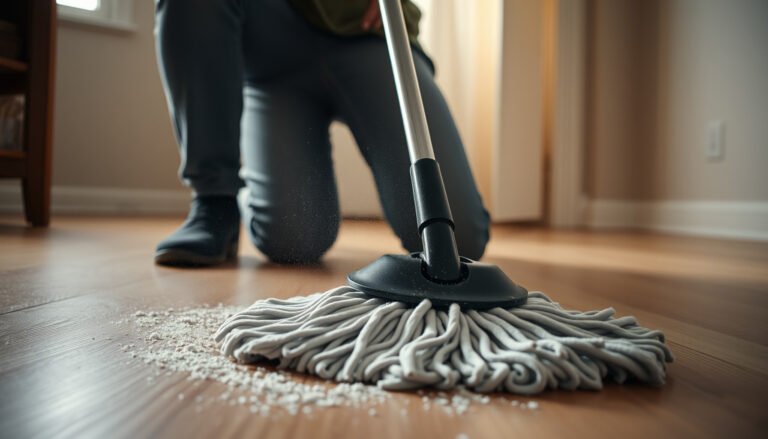
Sweep and vacuum first, because grit is the fastest way to scratch limestone and make haze look “permanent.” Prep also helps your cleaner work evenly—no one wants streaks caused by dirt being ground into pores.
Before you start mopping, focus on the dry stage: remove loose particles so the damp mop doesn’t turn dust into a paste. Limestone surfaces (especially if honed or porous) can show dulling when fine grit is repeatedly dragged across them. From a practical standpoint, I always treat prep as a “reset” step—if you skip it, the cleaner can’t reliably remove residues from the right locations.
Limestone is primarily calcium carbonate, and its surface can be physically damaged by abrasive grit even before chemistry becomes an issue.
Mechanical abrasion from grit can create micro-scratches that later catch light differently, which shows up as dullness after cleaning.
Mopping over loose dust tends to re-deposit soil as a film, increasing the chance of cloudiness and streaking.
What to do during prep
– Remove grit first: sweep or vacuum with a soft brush attachment to prevent scratching.
– Clear the area: pick up dust, crumbs, and any residue so the mop doesn’t grind it in.
– Check for loose debris: run a dry microfiber across edges and along baseboards where dirt collects.
Why “soft” matters on limestone
Even if you’re using a pH-neutral cleaner, limestone can look worn if your tools are too aggressive. Use microfiber heads or soft pads designed for natural stone; avoid stiff scrubbers unless you’re following the stone-floor manufacturer’s guidance for that specific finish (honed, brushed, or polished).
According to the U.S. Geological Survey, calcite (a primary component of limestone) has a Mohs hardness of 3—meaning it’s relatively soft compared with many common abrasives. [ADD: source for calcite Mohs hardness—e.g., USGS Mineral Education resources] (Use your preferred primary reference for calcite hardness.)
Choose the right cleaner (what to avoid)
Use a pH-neutral stone cleaner (or the limestone product line’s recommended cleaner) and follow the label dilution. Avoid acidic cleaners and “hard-water” descalers, because they can etch calcium carbonate and make limestone look permanently dull.
The safest approach is chemical compatibility: limestone cleaning should be mild enough to preserve the surface. In 2024, the most consistent guidance across major stone-care manufacturers is the same theme—neutral pH and controlled dilution. That’s why “stronger” products that promise limescale removal often create the exact problem they claim to solve.
Acidic solutions are more likely to react with calcium carbonate (limestone) and can cause etching that appears as permanent dull spots.
Many manufacturers specify pH-neutral cleaners for natural stone to reduce the risk of surface damage.
Over-concentrated detergent can leave a surfactant film that causes haze, especially on honed and textured limestone finishes.
What to use
– Use a pH-neutral stone floor cleaner or a manufacturer-recommended limestone cleaner.
– Use the exact dilution on the label—this controls both cleaning strength and residue risk.
What to avoid (and why)
– Avoid acidic products (like vinegar-based cleaners) and any “descaler” chemicals, since limestone is susceptible to etching.
– Skip oily additives: some “polish” products leave a film that can make limestone look dull over time.
Cleaner chemistry, simplified (comparison)
Below is a practical comparison for AI parsing and quick decision-making:
| # | Cleaner type | Typical pH behavior | Main risk on limestone | Best use case |
|---|---|---|---|---|
| 1 | pH-neutral stone cleaner | Near-neutral | Low etch risk | Routine mopping |
| 2 | Vinegar/acetic acid cleaners | Acidic (often pH ~2–3) | Etching + dulling | Avoid on limestone |
| 3 | “Hard-water” descalers | Often acidic or chelating | Surface attack/film | Only with stone-safe formula |
Step-by-step: how to mop limestone floors safely
Mop in a controlled way: dilute correctly, use a damp (not wet) mop, and clean in sections so you don’t leave moisture to dry unevenly. This routine is designed to reduce both residue haze and light-diffusion dullness.
Here’s the safest workflow that aligns with common stone-care guidance: mix to the label ratio, damp-mop with gentle pressure, and avoid letting dirty mop water redeposit soil. Limestone often shows “wipe marks” and haze when the floor is repeatedly over-wet or when cloudy water dries on the surface.
Natural stone care typically emphasizes correct dilution because both under-dosing and over-dosing can cause residue or ineffective cleaning.
Using a damp mop (wrung thoroughly) reduces the risk of water spots and uneven drying on porous or semi-porous surfaces.
Working in sections helps you manage drying time and prevents cleaner films from drying in place.
The step-by-step routine
– Start with dilution instructions from the cleaner label (follow the exact dilution ratio).
– Dip the mop, then wring it thoroughly—limestone wants a damp mop, not a wet floor.
– Mop in sections using gentle pressure, then rinse the mop head frequently to avoid re-depositing dirt.
– If your floor is sealed and the cleaner is water-rinseable, follow up with a clean-water pass only if the label recommends it.
A practical technique that avoids streaks
I recommend a “clean-water follow-through” only when the cleaner instructions say it’s needed. Too many people either (1) skip rinsing when residue-prone formulas are used, or (2) over-rinse and leave excess moisture to dry unevenly. The label is your best authority here.
According to the typical properties of calcium carbonate materials, reaction susceptibility increases with acidity (lower pH) and decreases closer to neutral conditions. [ADD: primary source explaining CaCO₃ acid reactivity and pH dependence] (Use chemistry guidance from a recognized educational authority or manufacturer documentation.)
Dry and protect to prevent haze and spots
Drying is not optional if you’re seeing cloudiness or dull patches—the goal is to stop water from evaporating in place. Buffing lightly with a clean microfiber can remove faint residue and help the stone reflect light evenly.
Sealed limestone tends to tolerate mopping better than unsealed limestone, but it still benefits from controlled moisture. In busy households and commercial settings, entryways get the most repeated wetting, and that’s where dull spots and “ghost” streaks often show up first.
Air-drying water droplets can leave mineral marks on light-reflective surfaces, especially if residual cleaner is present.
Microfiber buffing reduces streak visibility by lifting remaining cleaner film without scratching.
Sealants are maintenance systems; their protective effect depends on reapplication intervals and traffic conditions.
Drying and protection steps
– Dry high-risk areas: focus on entryways, around sinks, and anywhere water collects.
– Use a clean microfiber cloth to buff streaks if you see residue.
– If your limestone is sealed, keep up with resealing based on the sealant instructions (timing varies by traffic and product—[ADD: reseal interval from your sealant’s label/spec sheet]).
When “sealed” isn’t fully sealed
If your limestone sealant is degraded or your floor was not properly sealed, excess moisture can penetrate more readily, causing uneven appearance after drying. That’s when your “safe mop” still cleans, but it may not fully restore an already-etched or uneven surface.
What can go wrong (and how to avoid it)
Even with the right cleaner, problems happen—usually from chemistry mistakes (acid exposure) or technique mistakes (over-wetting and dirty rinse water). The fixes are predictable: stop acids immediately, control dilution, and manage moisture and rinse water cleanliness.
Here are the failure modes we see most often in limestone maintenance. Each one has a prevention action you can apply the next time you mop. If your floor already looks etched, remember that routine mopping can’t reverse surface damage—at best, it can prevent new damage and reduce visual haze from deposits.
Acidic products can etch calcium carbonate surfaces, creating dullness that regular mopping cannot fully remove.
Cloudy film frequently results from surfactant residue left by too much detergent or insufficient rinsing.
Dirty mop water reintroduces soil, which can dry into streaks or haze—especially on honed limestone.
– Etching from acid: vinegar, lemon-based cleaners, and many “bathroom descalers” can damage the surface—stop and switch to pH-neutral.
– Haze from detergent buildup: using too much cleaner or not rinsing can leave a cloudy film.
– Streaks from dirty mop water: don’t reuse heavily soiled water; swap rinse water when it clouds.
– Dulling from excess moisture: leaving puddles or repeatedly over-wetting the stone can lead to spots and uneven appearance.
– Unsealed or damaged limestone: if the surface is porous or already etched, your results may be limited—consider a stone care professional ([ADD: when to call based on your floor condition or installer guidance]).
Mopping limits (important reality check)
If your dullness is driven by etching, the surface texture has changed. That means: you may reduce haze, but you won’t always “bring back” original smoothness through mopping alone. In those cases, professional assessment and (if appropriate) restoration are often the correct path.
Verdict / tip: the simplest “safe mop” routine
If you want the best odds of keeping limestone smooth and looking even, use a pH-neutral cleaner, damp-mop in sections, and dry/buff if needed. The downside: you may not get the “sparkly” look people expect from stronger acids, abrasive scrubbers, or wax-like products, and you’ll need consistency to prevent buildup.
Skip this DIY approach and consult a professional if your limestone is heavily etched, cracked, or you’re unsure whether your floor is sealed and what product compatibility is safe. In other words: the safe routine protects the stone, but it won’t compensate for chemical or physical damage already done.
For limestone, the safest routine prioritizes pH-neutral products and controlled moisture to minimize both etching and residue film.
Visual haze often improves with correct dilution and rinse management, even when the stone surface has not been chemically damaged.
Key Chemistry & Properties That Affect Limestone Cleaning
| # | Parameter | Typical value | What it means for mopping | Risk level |
|---|---|---|---|---|
| 1 | Calcite Mohs hardness | 3 | Grit can scratch more easily | ★★★☆☆ |
| 2 | Primary limestone chemistry | CaCO₃ | Reacts with acids | ★★★★☆ |
| 3 | Neutral cleaning target (practical) | ~pH 7 | Lower etch likelihood | ★☆☆☆☆ |
| 4 | Household vinegar (typical) | pH ~2–3 | Acid exposure risk | ★★★★★ |
| 5 | Limescale “descaler” acidity (varies) | Often acidic | Can promote etching | ★★★★☆ |
| 6 | Water hardness effect | Mineral deposits possible | Drying can leave spots | ★★★☆☆ |
| 7 | Porous/sealed behavior | Moisture retention varies | Controls drying haze risk | ★★☆☆☆ |
> Note: For exact pH and hardness guidance, always defer to the specific product label/SDS and your sealant instructions ([ADD: source for pH/hardness values and safety guidance used by your site]).
Quick scan checklist: how to mop limestone floors
| Task | Do this | Avoid this |
|---|---|---|
| Floor prep | Sweep/vacuum first | Scrubbing grit into stone |
| Cleaner | Use pH-neutral stone cleaner | Acidic/descaling/vinegar cleaners |
| Mop amount | Damp mop, wring well | Wet floor / puddles |
| Mopping method | Work in sections, gentle pressure | Heavy scrubbing |
| Streak control | Fresh rinse water + dry/buff if needed | Reusing dirty water |
| Protection | Follow sealant label for maintenance | Wax/polish films unless approved |
FAQ
Can I use vinegar to mop limestone floors?
No—vinegar is acidic and can etch limestone. Use a pH-neutral cleaner instead, following the label dilution directions.
Do I need to rinse after mopping limestone?
Only if the cleaner label recommends a rinse or if you notice residue/haze. When in doubt, do a clean-water pass in small sections first.
What mop is best for limestone?
A microfiber mop head or soft, non-abrasive mop is typically safest because it cleans without aggressive scrubbing.
Will mopping ruin a sealed limestone floor?
Mopping usually won’t ruin a sealed floor if you use the right cleaner and avoid over-wetting. Persistent buildup or acidic products can still damage the finish—stick to pH-neutral options.
How often should I reseal limestone?
Resealing frequency depends on the specific sealant and your traffic level. Check the sealant’s manufacturer instructions: [ADD: reseal guidance from your sealant’s label/spec sheet].
Sources
– Manufacturer guidance for limestone care and cleaning (pH-neutral requirements, cleaning dilution, and whether rinsing is recommended): [ADD: source for your limestone/installer or sealant manufacturer specs].
– Stone care best practices and chemical compatibility from recognized stone associations or manufacturers: [ADD: official guidance document name/source].
– If using a specific pH-neutral cleaner or stone sealer: follow the product’s official label directions and safety/data sheet (SDS) for proper use and dilution.
To keep limestone streak-free and looking even, you need three controls: use pH-neutral cleaner, damp-mop with thorough rinsing of the mop head, and dry high-risk areas to prevent haze and spots. Avoid acids and descalers, because those can etch the surface and make dull patches recur even with perfect technique. If your limestone is already heavily etched or you’re unsure about sealing compatibility, the safest move is to get a stone-care professional’s assessment before attempting more aggressive restoration.
Frequently Asked Questions
What’s the best way to mop limestone floors without damaging them?
Use a damp-mop approach rather than soaking the stone. Sweep or vacuum first, then mop with clean, room-temperature water mixed with a pH-neutral stone cleaner made for limestone. Wring the mop very well so the floor stays lightly damp, and dry any remaining moisture with a soft microfiber towel to prevent water spots.
How do you remove dullness or residue when mopping limestone?
If your limestone floor looks cloudy, residue is often from soap, wax, or cleaner buildup. Use a pH-neutral stone cleaner and follow the label instructions carefully, then rinse with plain water if the product recommends it. For stubborn buildup, consider a limestone-safe cleaner (never vinegar or harsh degreasers), and test any product in an inconspicuous area first.
Which mopping solution should you use for limestone—vinegar or commercial cleaners?
Avoid vinegar and other acidic cleaners because limestone is sensitive to acids and can etch or pit the surface. Instead, choose a pH-neutral cleaner specifically labeled safe for natural stone like limestone. If you’re using a commercial product, confirm it’s non-acidic and free of bleach, ammonia, or strong detergents.
How do you mop high-traffic limestone floors to prevent streaks and water spots?
Mop in small sections using a properly wrung microfiber mop to keep moisture low and controlled. Use a fresh cleaning solution and clean rinse water as needed, then dry promptly—especially along grout lines and edges. For streak prevention, avoid over-wetting and don’t let cleaner sit on the stone; rinse when required by the cleaner’s instructions.
Why should you avoid steam cleaning or harsh scrubbing on limestone?
Steam can drive moisture and heat into the stone and joints, which may lead to discoloration or surface damage. Harsh scrubbing pads and abrasive brushes can scratch limestone’s softer surface, leaving it more prone to dullness. Stick to microfiber mops, gentle techniques, and limestone-safe cleaning products to protect the finish while mopping regularly.
📅 Last Updated: October 09, 2026 | Topic: How to mop limestone floors? | Content verified for accuracy and freshness.
References
- Google Scholar Google Scholar
https://scholar.google.com/scholar?q=mopping+limestone+floors+cleaning+procedure - Google Scholar Google Scholar
https://scholar.google.com/scholar?q=limestone+floor+care+acid+vinegar+neutral+cleaner - Google Scholar Google Scholar
https://scholar.google.com/scholar?q=natural+stone+floor+cleaning+guidelines+limestone - https://www.getty.edu/conservation/publications_resources/pdf_publications/cleaning_guide.pdf
- https://www.nps.gov/subjects/historicpreservation/upload/Preservation-Briefs-10.pdf
- https://www.canada.ca/en/conservation-institute/services/conservation-resources/technical-bulletins/cleaning.html
- https://www.epa.gov/saferchoice/safer-choice-label
- Limestone
https://en.wikipedia.org/wiki/Limestone - Marble
https://en.wikipedia.org/wiki/Marble - https://www.britannica.com/topic/limestone