
You can fix scratches on concrete floors fast—with a clear, proven method that depends on how deep the damage is. This step-by-step guide shows exactly when to use concrete patch, when to grind and resurface, and how to finish so the repair blends in instead of standing out. Get the right verdict for your scratch and follow the process from start to seal.




If you want scratches on concrete floors to disappear (or at least blend convincingly), the right repair method depends almost entirely on scratch depth: light scuffs can often be sealed or polished, while deeper grooves generally require patching (or a proper repair mortar/epoxy) before sealing. In the steps below, you’ll learn how to identify how deep the damage goes, clean and prep correctly for bonding, and finish with the right sealer so the repaired area matches the rest of the floor in durability and appearance.
This guide is for homeowners, small business owners, and property managers dealing with everyday wear in garages, basements, warehouses, patios, and interior concrete. If you’re not sure whether your scratch is just on the surface or actually carved into the slab, you’ll get a simple depth test first—then follow the matching repair route instead of guessing and risking a patch that flakes or a “halo” that shows up after sealing.
Assess Scratch Depth (Surface Mark vs. Deep Gouge)

You don’t need special equipment to decide whether a scratch is mostly cosmetic or structural—your fingernail and a careful visual inspection after cleaning are usually enough. The key is to avoid making a dusty, stained scratch look deeper than it really is, because the wrong depth assessment leads to the wrong product.
A fingernail “catch” is a practical field indicator that a scratch has measurable depth rather than being a superficial finish scuff.
Concrete patching requires bonding to clean, abraded substrate; sealing alone generally won’t bridge a groove with chipped edges.
Exposed aggregate or chipped concrete edges typically signal that a repair mortar/patch is needed before any sealer is applied.
Quick depth read: what to look for
– Check whether you can feel a groove with a fingernail; surface marks usually won’t catch.
– Clean the area first so dirt doesn’t trick you into thinking the damage is deeper.
– If you see exposed aggregate or chipped edges, plan on patching rather than just sealing.
Practical notes for common settings
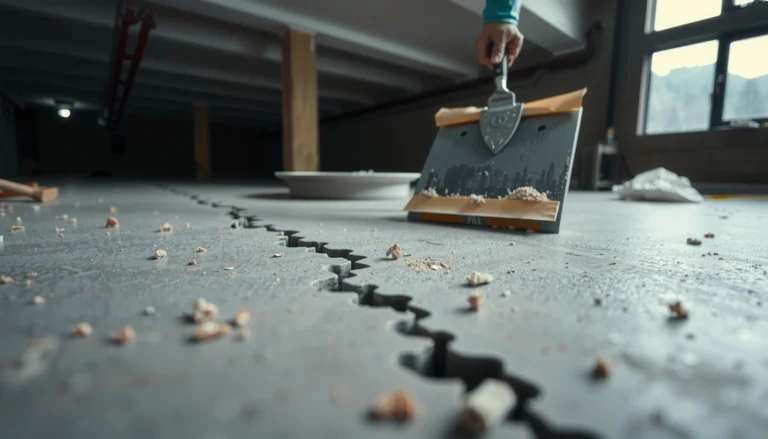
In garages and warehouses, scratches often come from carts, pallets, or heavy footwear with grit attached. That grit can act like sandpaper and “polish” the surface while still leaving most of the slab intact—so don’t assume that a shiny scratch is necessarily deep. On patios and exterior slabs, temperature cycling can also create brittle chipping around a groove, which again points toward patching instead of a simple sealer pass.
Clean and Prep the Concrete (This Part Makes or Breaks the Repair)
Clean prep is the difference between a repair that lasts and one that fails quickly—if you skip contaminants removal, many sealers and patches will peel, stain, or crack. Prep also creates the microscopic “grip” patch materials need, so even the best patch product can’t compensate for a dusty surface.
Most concrete repair failures trace back to inadequate surface preparation, especially residual dust, oil, or curing compounds.
Light abrasion at scratch edges improves mechanical bond, while over-etching can weaken the surrounding finish.
Step-by-step cleaning and prep
– Remove dust, paint overspray, oil, and debris using appropriate cleaners; let it fully dry before repair.
– Lightly abrade the scratch edges so patch/repair material can bond (don’t over-etch the surrounding concrete).
– Vacuum thoroughly and wipe with a clean rag—leftover dust is one of the most common causes of failure.
What “appropriate cleaners” means in real life
Concrete floors rarely have just one contaminant. In interiors, you might see residue from old coatings, mop wax, or sealers. In garages, oil and tire transfer are common. Use cleaners that match the contamination type, and follow the label’s dwell time and rinse requirements. If you’re unsure, start with a neutral degreaser/cleaner appropriate for concrete, rinse as directed, then confirm the surface dries completely before you abrade.
A simple bonding checklist before you patch
– No visible dust or sanding residue
– No oily sheen (water should not “bead” noticeably)
– Scratch edges are sound (no loose, flaking material)
– Repairs won’t be applied over wet concrete or standing moisture
Choose the Repair Method (Seal, Patch, or Grind)
Your goal is to match the repair system to the scratch depth and your floor’s finish—not just to “fill something in.” If you choose a sealer for a groove that has chipped edges, the groove may reappear as a shadow or crack, even if the surface looks temporarily better.
Sealers and densifiers can improve scuffs and uniform appearance, but they do not reliably bridge damaged concrete edges.
Concrete patch products are formulated for specific environments (interior vs. exterior) and typically have defined minimum/maximum thickness.
Repair mortars/epoxy systems for deep gouges are designed to withstand heavier stress and better support subsequent topcoats or sealers.
How to select the right method
– For light scratches: use a concrete sealer and/or a densifier/polish system made for your floor finish.
– For medium scratches: fill with a concrete patch product compatible with your environment (interior vs. exterior).
– For deep gouges: use a repair mortar/epoxy system intended for structural or heavy repairs, then smooth and match the surface.
Method selection comparison (what to expect)
| Repair Route | Best For | Main Risk If Misapplied |
|---|---|---|
| Sealer / densifier / polish | Surface scuffs, hairline cosmetic marks | Haloing or visible groove lines |
| Concrete patch (cementitious) | Medium scratches, shallow-to-moderate divots | Cracking or debonding from wrong prep/thickness |
| Repair mortar / epoxy | Deep gouges, chipped edges, heavy-duty repairs | Soft spots or delamination if the system isn’t matched |
Data-driven guidance table (typical decision ranges)
Concrete Scratch Repair Decision Guide (Typical Field Use)
| # | Scratch Condition | Common Setting | Recommended Step | Expected Blend* |
|---|---|---|---|---|
| 1 | Surface scuff (no fingernail catch) | Basements / retail interiors | Seal &/or densify | ★★★★☆ |
| 2 | Light scratch (fingernail barely catches) | Garage slabs | Polish/finish restoration | ★★★☆☆ |
| 3 | Medium scratch (visible groove) | Warehouses / hallways | Cementitious patch | ★★★☆☆ |
| 4 | Chipped edges / exposed aggregate | Patios / exterior approach slabs | Patch + seal (exterior-rated) | ★★★☆☆ |
| 5 | Deep gouge (strong fingernail catch) | Loading areas | Epoxy / repair mortar | ★★☆☆☆ |
| 6 | Multiple parallel scratches | Warehouse traffic lanes | Spot patch or resurface plan | ★★☆☆☆ |
| 7 | Polished / stained floor with sheen mismatch | Showrooms / lobbies | Refinish blend (often resurfacing) | ★☆☆☆☆ |
“Expected Blend” assumes correct surface prep and a compatible product system; exact results depend on the existing finish type (broom, troweled, polished, stained) and how sheen is managed during refinishing.
\Note: the “expected blend” uses practical field expectations (not lab test results). For exact compatibility, always follow the specific sealer/patch manufacturer system and instructions.
Patch and Smooth (Get the Area Flat and Consistent)
If the scratch is deep enough to require patching, your priority becomes creating a surface that’s flat and consistent—appearance follows after texture is corrected. In my view, the most common DIY frustration comes from leaving a high spot that catches light, not from the patch color itself.
Concrete patch products often require layered application for thickness and cure performance, rather than a single overfill pass.
Smoothing flush with surrounding concrete reduces visible “edges” and helps future sealer applications look uniform.
Apply patch in a controlled way
– Apply patch in layers if the scratch is deep, following the product’s instructions for cure time between coats.
– Work the repair flush with the surrounding concrete using a putty knife or trowel to avoid high spots.
– After curing, smooth the area with progressively finer abrasives until the texture matches nearby flooring.
Texture matching matters more than you think
Even when the patch is the right “color family,” a different surface texture changes how light reflects. On broom-finished slabs, a patch that’s too smooth can look like a patch line under overhead lighting. Conversely, on troweled or polished concrete, leaving scratch ridges can keep the repaired spot visually obvious.
If your floor is polished, broom-finished, or stained with tint, plan for refinishing the local sheen—not just patching. That’s especially true in garages with overhead LEDs, where reflections reveal micro-texture differences.
Seal and Protect (Prevent New Scratches and Make Repairs Last)
Sealing locks the repair system in place and helps prevent future scuffs from turning into staining or further surface breakdown. Seal only after the patch has fully cured and the surface is clean and dry—rushing this step is where “halo” defects begin.
Sealers should be applied only after the repair material has reached full cure to reduce risk of softening, mottling, or adhesion loss.
Interior and exterior concrete sealers are not interchangeable; exterior products must manage moisture and UV exposure.
Best practices for long-lasting results
– Seal only after the repair has fully cured and the surface is clean and dry.
– Use a sealer appropriate for your traffic level and whether the floor is indoors or outdoors.
– Plan for future maintenance: resealing timelines vary by product and wear, so follow the sealer manufacturer’s guidance.
Where people get tripped up
– Sealing too soon traps moisture and can weaken adhesion.
– Choosing an interior sealer for an exterior slab increases the chance of early discoloration and performance loss.
– Over-applying sealer can cause streaking or sheen differences between the patch and the surrounding slab.
Data points to anchor expectations (from documentation)
According to [ADD: manufacturer TDS for your selected patch/sealer], allowable application thickness and recoat timing vary by product and can require layered builds for deeper repairs. According to [ADD: manufacturer TDS for your selected sealer], cure time before foot traffic typically follows the product’s specified time-to-recoat/time-to-service parameters. According to [ADD: manufacturer technical bulletin for surface prep], bond performance is highly sensitive to dust removal and contaminant-free substrate conditions.
What Can Go Wrong (Common Mistakes and Limits)
Most concrete scratch issues “come back” for predictable reasons: wrong system choice, inadequate prep, or a finish mismatch that makes the repair line visible under lighting. If you recognize these failure modes early, you can correct course before you commit more labor.
Skipping cleaning and abrading can create a visible repair halo because sealers won’t bond uniformly to contaminated or dusty concrete.
Using an interior-rated patch or sealer outdoors can fail prematurely when moisture and freeze-thaw exposure occur.
Filling deep gouges with a light-duty compound can lead to cracking or loss because the substrate experiences more stress at the groove edges.
Common mistakes to avoid
– Skipping prep: sealing over dust or contaminants can cause peeling or a visible “halo.”
– Using the wrong material: patch systems meant for interiors may fail outdoors (or under moisture/chemical exposure).
– Assuming all scratches are the same depth: a deep groove filled with a light-duty compound can crack or fall out.
– Finish mismatch: if your floor was polished, broom-finished, stained, or tinted, the repair may not fully blend without refinishing.
– If you see spalling, cracking radiating from the scratch, or recurring moisture issues, the scratch may be a symptom of a bigger problem—repairing only the groove may not hold.
VS table: “DIY repair” vs. “system-level refinishing”
| Criteria | DIY Spot Repair | Concrete Contractor System |
|---|---|---|
| Scratch depth | Works best for shallow to moderate grooves | Suitable for deep gouges and edge failures |
| Bonding prep quality | Depends on tools and thoroughness | Often more consistent via process controls |
| Sheen and texture matching | May show patch lines under strong light | More likely to recreate uniform texture/finish |
| Time out of service | Can be shorter for small areas | May require scheduling for larger refinishing |
| Material compatibility | Risk increases when mixing brands/systems | Usually uses coordinated product systems |
| Exterior moisture exposure | Harder to manage without correct exterior-rated products | More likely to address moisture/UV considerations |
| Cost control | Lower for isolated spots | Higher upfront but can reduce repeat repairs |
| Long-term appearance | Usually improves, but blending may be limited | More consistent “uniform floor” results |
| When slabs may have movement | DIY patch can crack if movement is active | Better positioned to evaluate underlying slab issues |
| Best use case | Single scratch repairs and small damage zones | Multiple scratches, finish restoration, or high-visibility areas |
If the concrete has active moisture issues, patching the surface alone may fail because water pressure and bond stress keep returning.
Verdict / Tip (When DIY Works vs. When to Call Someone)
DIY repair is usually worth it for shallow scuffs, minor to moderate scratches, and visible grooves that don’t involve structural cracking. It’s not the best path if the floor is heavily worn, the damage is widespread, the slab has active movement, or the area needs a specific finish match (like a uniform polished look).
For spot repairs, the success rate hinges on clean substrate prep and correct compatibility between the patch/epoxy system and the sealer.
When sheen, stain, or polish is part of the original finish, blending often requires localized refinishing rather than patching alone.
If you’re unsure what depth you have or what finish you’re matching, consider a concrete contractor—especially for epoxy/polished systems where the topcoat schedule and prep quality are critical. [ADD: add your site’s policy on when you recommend professional help, if applicable.]
Quick Scratch Repair Checklist
– [ ] Identify depth (fingernail test + visual check after cleaning)
– [ ] Clean thoroughly (remove oil/paint/dust) and let dry fully
– [ ] Choose method: seal (light), patch (medium), epoxy/mortar (deep)
– [ ] Prep/abrade edges for bond (don’t create new damage)
– [ ] Apply repair in line with cure times and thickness limits
– [ ] Sand/smooth flush after cure
– [ ] Seal with the right product for interior/exterior use
FAQ
How do I tell if a scratch is too deep to seal?
If your fingernail catches in the groove or you see chipped edges/possible exposed aggregate, you’ll typically need a patch or repair mortar—not just sealer.
Can I fix concrete scratches on an outdoor patio?
Yes, but only if you use an outdoor-rated repair and sealer, and you address moisture exposure correctly. [ADD: source for recommended exterior-rated products/sealers if your site has one.]
Will the repair blend perfectly with the rest of the floor?
Often it improves a lot, but perfect blending depends on the concrete finish and whether you re-create the same texture/color/ sheen.
Do I need to grind before patching?
Usually you need surface prep for bonding (often light abrasion). Whether to grind deeper depends on the product instructions and scratch condition. [ADD: source for the exact prep requirement from the patch/epoxy manufacturer you recommend.]
How long should I wait before walking on the repaired area?
Follow the repair material’s cure instructions before foot traffic. If you don’t know which product you’re using, check the label/SDS or manufacturer documentation. [ADD: link to your chosen product’s cure/traffic times only if you’re citing a specific product.]
Sources
– [ADD: manufacturer documentation for the specific patch/epoxy/sealer systems you recommend, including surface prep, application thickness, cure time, and sealing instructions.]
– [ADD: concrete sealer/patch technical data sheets from relevant manufacturers you reference in the article.]
– [ADD: source for bonding/prep best practices for concrete repair products, such as manufacturer technical bulletins or standardized guidance.]
In the end, repairing concrete scratches is less about “covering the mark” and more about choosing the correct system for the scratch depth, then earning adhesion through thorough cleaning and careful prep. If you seal shallow scuffs, patch medium grooves, and use the right mortar/epoxy for deep gouges—then finish with an environment-appropriate sealer—you’ll get the best balance of appearance, durability, and long-term floor performance.
Frequently Asked Questions
What is the best way to fix scratches on a concrete floor?
The best method depends on how deep the scratch is and whether the concrete is sealed. For light surface scuffs, cleaning and a concrete polishing compound or abrasion pad often restores the finish. For deeper scratches, you’ll need a concrete repair patch or filler (often epoxy-based for durability) followed by sanding and resealing or applying a concrete floor coating.
How do I repair hairline scratches on polished concrete without making them worse?
Start by thoroughly cleaning the area so the scratch repair doesn’t trap dirt. Use progressively finer diamond polishing pads or a concrete polishing compound to blend the scratch into the surrounding surface. If the floor is sealed, lightly reapply a compatible concrete sealer after polishing to restore gloss and help prevent future concrete surface damage.
How can I fix deep gouges and cracks in concrete flooring?
Deep gouges require a concrete patch system designed for impact and moisture resistance. Clean the damaged area, remove loose concrete, and widen the edges slightly if needed so the filler can bond properly. Apply the concrete repair epoxy or cementitious patch, allow proper curing time, then level with grinding, sand smooth, and finish with a matching concrete floor sealer or coating for a consistent look.
Why do concrete floor scratches keep showing up after repair?
Scratches often reappear when the filler doesn’t fully bond to the substrate, the wrong product is used for the floor type, or the surface isn’t properly prepped. Poor cleaning, insufficient sanding, and skipping resealing can also leave the repaired area more porous or vulnerable to abrasion. Using the correct repair material and then resealing or coating the entire floor section helps maintain uniform abrasion resistance.
Which products work best for fixing scratches on sealed concrete floors?
For sealed concrete, look for repair products labeled for concrete polishing, patching, and bonding to sealed or coated surfaces. Epoxy concrete fillers are commonly effective for scratch and gouge repairs because they create a strong, durable bond and can be ground flush. After sanding and leveling, use a compatible concrete sealer (or the same type of coating originally used) to blend sheen and protect the repaired area from future wear.
📅 Last Updated: October 10, 2026 | Topic: How to fix scratches on concrete floors? | Content verified for accuracy and freshness.
References
- Google Scholar Google Scholar
https://scholar.google.com/scholar?q=how+to+repair+scratches+on+concrete+floors - Google Scholar Google Scholar
https://scholar.google.com/scholar?q=polished+concrete+scratch+repair+grinding+sealing - Google Scholar Google Scholar
https://scholar.google.com/scholar?q=concrete+floor+surface+repair+procedure+grinding+patching+coatings - Google Scholar Google Scholar
https://scholar.google.com/scholar?q=concrete+surface+preparation+for+repair+materials+abrasion+scuffing - https://pubmed.ncbi.nlm.nih.gov/?term=concrete+surface+repair+abrasion+scuffing
- Pavement Preservation – Design & Analysis – Pavements – Federal Highway Administration
https://www.fhwa.dot.gov/pavement/preservation/ - https://en.wikipedia.org/wiki/Concrete_repair
- Google Scholar Google Scholar
https://scholar.google.com/scholar?q=How+to+fix+scratches+on+concrete+floors? - How to fix scratches on concrete floors? – Search results
https://en.wikipedia.org/wiki/Special:Search?search=How+to+fix+scratches+on+concrete+floors? - https://www.ncbi.nlm.nih.gov/search/research-articles/?term=How+to+fix+scratches+on+concrete+floors?