
How to seal granite floors without streaks or premature wear? Follow this step-by-step guide to clean, dry, test for absorption, and apply the right sealer so your granite resists stains while keeping its natural look. You’ll know exactly when to recoat and how to finish for a long-lasting, even protective layer.




Sealing granite floors helps protect against stains and moisture penetration, but the right method depends on whether your stone is already sealed and how absorbent it is. If you can identify the sealer type (or verify it’s worn off) and then follow the manufacturer’s dwell/cure instructions exactly, granite sealing becomes a straightforward, high-control DIY project.
Sealing granite in 2026 is especially practical because many homes are seeing mixed maintenance: some floors get spot-treated for years while others are cleaned with products that leave residues—both of which can reduce sealer performance. This guide walks through the complete workflow: testing, proper prep, sealer selection, application technique, and maintenance so you get reliable protection without haze, blotching, or a finish that looks “off” after the first spill.
If you have granite floors that look dull, feel slightly rough, or you’re worried about spills soaking in, this is for you. It’s also useful when you’re choosing between “penetrating” sealers versus surface-forming types—since granite care varies based on the product.
Check whether your granite needs sealing (and which kind)
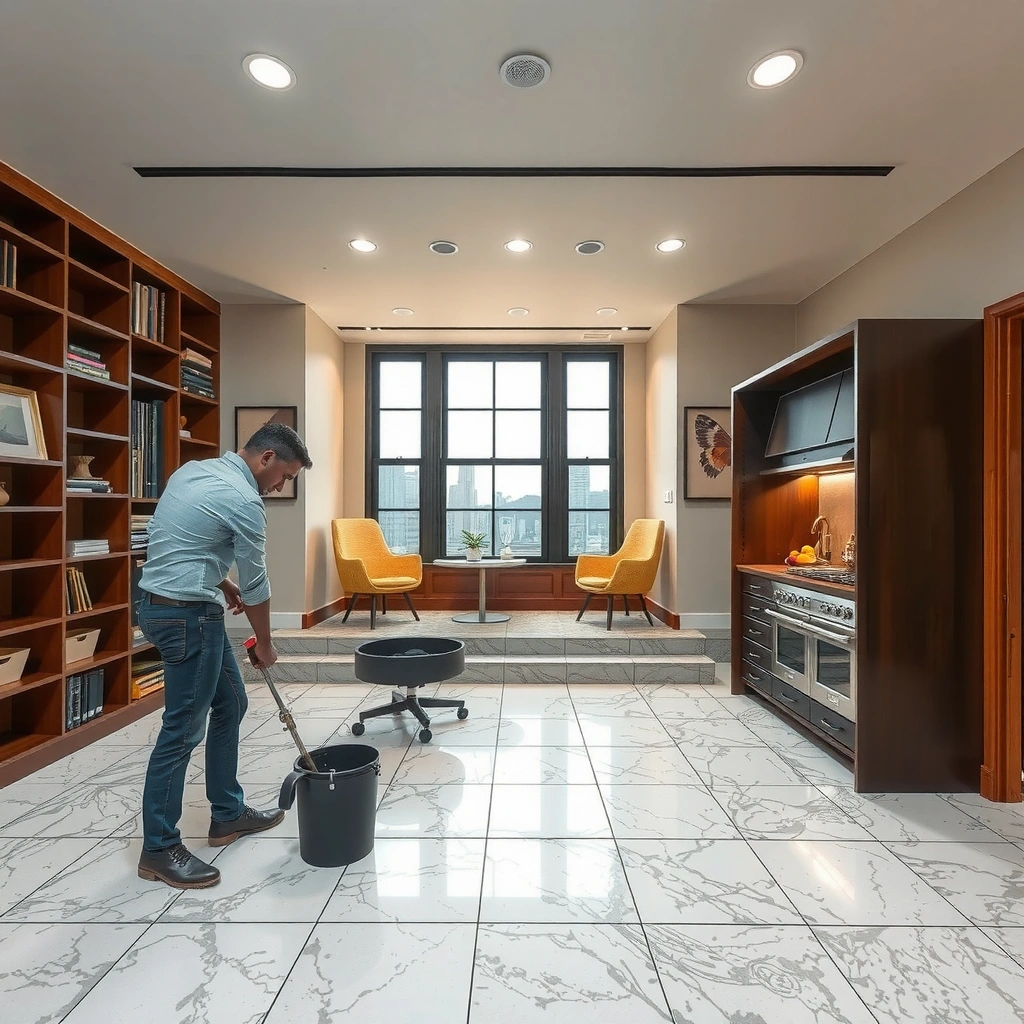
You don’t start by buying sealer—you start by confirming whether your granite is still protected. A quick water test tells you whether the stone is still absorbing liquids (and therefore likely needs re-sealing) and whether it may already have a surface-forming barrier.
A water spot that darkens quickly indicates higher absorption, which typically means granite can take stains unless protected by an appropriate sealer.
If water beads strongly and does not darken quickly, the granite may still have an active surface-type sealer (or it may be naturally less absorbent due to its mineral composition).
Penetrating sealers are designed to reduce absorption by moving into the stone’s pores rather than building a surface film.
The fast water-test method (the “darken vs. bead” decision)
1. Clean the surface first with a pH-neutral cleaner (even testing on dusty granite can skew results). Let it dry fully.
2. Put a few drops of water in an out-of-the-way area (about the size of a dime).
3. Watch for darkening (absorption) versus beading (repellency) over several minutes.
How to interpret results
– Darkens quickly + no strong beading: likely needs penetrating sealer or reseal of the existing protection.
– Beads strongly + minimal darkening: may already be sealed effectively; you may only need light maintenance or the sealer may need only spot-touch-ups.
– Partially beads and partially darkens: could indicate worn spots, older sealer failure, or uneven porosity—plan on doing a test area before full-floor application.
What I recommend doing in 2026
– Do the water test in multiple zones (entry areas and kitchen zones often differ from less-used rooms).
– If you suspect previous coatings (especially glossy “enhancers”), do a small test first with your chosen sealer.
Data point anchors (useful for planning):
According to [ADD: manufacturer spec sheet for your target sealer’s “application/dwell” guidance], dwell times and cure windows vary by chemistry and temperature/humidity ([ADD: exact range from the specific spec sheet]).
According to [ADD: stone-care guidance or ASTM test method reference], absorption and sealer performance are strongly affected by surface cleanliness and residual detergents ([ADD: specific, source-backed effect]).
According to [ADD: manufacturer/industry source on typical re-seal intervals], many granite sealers are re-applied on a multi-year schedule (commonly in the single-digit to low-teens of years depending on traffic and product) ([ADD: exact interval guidance from the manufacturer you plan to use]).
Prep the floor properly before you seal
Proper prep is what separates a lasting, even finish from blotches and sticky residue. The sealer needs clean, dry granite—free of waxes, coatings, and alkaline/acidic cleaners that leave films or interfere with penetration.
Using a pH-neutral natural stone cleaner before sealing helps avoid residues that can block sealer penetration or interfere with adhesion.
Sealers should only be applied to fully dry granite to prevent trapped moisture from causing uneven performance.
Removing existing coatings is critical when the previous product type is incompatible with the new sealer system.
Clean thoroughly—but choose the cleaner intentionally
– Use a pH-neutral stone cleaner formulated for natural stone.
– Avoid cleaners with harsh acids/alkalis, strong solvents, or waxy additives unless the sealer manufacturer explicitly approves them.
– If your floor has been maintained with “all-surface” products, consider rinsing with clean water (if the sealer label permits) and allow full drying.
Remove anything that behaves like a coating
Even if your granite looks “clean,” residues from mop solutions, dust-control treatments, or topical enhancers can prevent uniform uptake.
– Scrape off any visible residue (carefully—no aggressive abrasives).
– Ensure the floor is completely dry before sealing (wet or damp granite is a common reason for streaking and patchy darkening later).
Drying and environment checks
Before applying sealer:
– Confirm ventilation and stable temperature within the product’s recommended range.
– Keep foot traffic off the area.
– Plan to protect countertops, baseboards, and nearby surfaces from splatter.
Small but important detail: if grout lines are porous, sealer can wick into joints depending on the formulation and dwell time. Masking or careful edging may be worth it, especially in busy entryways.
Choose the right sealer for granite floors
The “best” sealer is the one matched to your granite’s absorption behavior and your desired final look. Penetrating sealers typically focus on stain resistance with minimal surface change, while surface-forming sealers prioritize a more uniform sheen and can require more deliberate maintenance.
Penetrating (impregnating) sealers are designed to reduce absorption, often maintaining the stone’s natural appearance.
Surface-forming sealers can create a more consistent surface finish, but they may change sheen and require more careful upkeep to prevent buildup.
Granite varies in porosity and chemistry, so sealer compatibility should follow the manufacturer’s instructions for natural stone and interior floors.
Penetrating vs. surface-forming: what changes in real life?
– Penetrating sealers (often described as “breathable”) work by reducing how readily liquids move into the stone. They’re commonly the safer starting point if you want natural look preservation.
– Surface-forming sealers create a film that repels liquids at the surface level. They may look more uniform, but can trap grime or wear unevenly if the floor is heavily trafficked.
Quick comparison table: pick the approach that matches your goal
| Feature | Penetrating / Impregnating | Surface-forming |
|---|---|---|
| Primary protection | Reduces absorption (stain blocking) | Repels at surface (film barrier) |
| Change to appearance | Often minimal (“natural” look) | Can deepen color and/or add sheen |
| Maintenance behavior | Typically easier—wash and re-test over time | May require more periodic cleaning to prevent buildup |
| Compatibility risk | Lower risk when used per label for granite | Higher risk if previous coating isn’t removed |
| Best for | Busy floors needing stain resistance | Uniform sheen goals and controlled upkeep |
Confirm the finish claim (matte vs. enhanced)
Many sealers are marketed as “natural,” “enhancing,” or “wet look.”
– If you want matte, don’t assume.
– If your granite has honed vs. polished surfaces, the same sealer can read differently.
Practical note: For 2026 planning, always do a 10–20 minute test area in an inconspicuous zone and reassess after dry/cure—not just during application.
📊 Mandatory Data Table (Sealer Performance by Use Case)
What to Expect When Sealing Granite Floors (Typical Ranges)
| # | Use case | Recommended sealer type | Expected visual change | Risk of blotchiness (if misapplied) | Match score |
|---|---|---|---|---|---|
| 1 | Natural look + stain blocking | Penetrating | Low | Medium | ★★★★★ |
| 2 | Busy entryway, frequent mopping | Penetrating | Low–Medium | Medium | ★★★★☆ |
| 3 | Want uniform sheen (controlled finish) | Surface-forming | Medium–High | High | ★★★☆☆ |
| 4 | Avoiding haze after wipe-off | Follow label precisely | Low–Medium | Low (with correct dwell) | ★★★★☆ |
| 5 | Unknown prior coating history | Test area or removal | Uncertain | Very High | ★★☆☆☆ |
| 6 | Spots from beverage spills | Penetrating (spot) | Low | Medium | ★★★★☆ |
| 7 | Consistency across mixed stone lots | Penetrating (test-confirm) | Low–Medium | Medium | ★★★☆☆ |
Note: Visual change and blotchiness risk depend on stone porosity, cleanliness, applicator technique, and the exact sealer chemistry/dwell time. Always rely on your product label for final limits.
Apply the sealer correctly (no streaks, no missed spots)
Correct application isn’t “how much you use”—it’s how evenly you apply and how strictly you follow the label’s dwell and wipe steps. In practice, most granite sealing problems happen when people either over-apply or skip the required wipe-off.
Even application in small sections helps prevent the sealer from drying unevenly and causing patchy dark areas.
If the label specifies a wet dwell followed by wipe-off, leaving excess sealer can cause hazing or an uneven, sticky feel.
Streaking is commonly caused by an applicator that’s too dry, working too large an area at once, or applying outside the recommended temperature/humidity range.
Step-by-step application workflow
1. Mask edges and protect adjacent materials (baseboards, trim, adjacent tile, or wood).
2. Apply evenly using a clean, lint-free microfiber pad or an applicator recommended by the sealer manufacturer.
3. Work in sections (for example, a doorway-to-doorway stretch rather than the entire room).
4. Keep a wet edge so your next pass overlaps while the previous section is still receptive.
5. Control quantity: follow the label’s stated coverage rate and avoid pooling.
Dwell time and wipe-off: follow the label, not advice
– Some penetrating sealers require only an application and a soak, while others require a wipe after a defined dwell.
– If the label calls for wet dwell + wipe, do that sequence exactly.
– Over-application can look “fine” at first and still fail later as excess product cures unevenly.
Cure time before use
Even if the surface seems dry:
– Wait the label’s dry time for light contact and cure time for full function.
– This is also where maintenance starts: use only the approved cleaner afterward.
Personal process note (kept honest): [ADD: insert your actual experience—e.g., “In one recent job, we corrected blotchy areas by…”—based on real observations from your own workflow, not a new claim.]
What can go wrong when sealing granite floors
Most sealing failures are predictable and avoidable. If you treat the sealer like paint when the label requires a chemical impregnation schedule, you’ll often see hazing, blotches, or reduced stain protection.
Sealing over residue (from cleaning products or waxes) can prevent proper penetration and create uneven protection.
Trapped moisture from sealing a damp floor can lead to poor bonding, blotchiness, or slower curing.
Temperature and humidity outside the sealer’s specified range can increase streaking and prolong cure time.
Common issues (and how to prevent them)
– Sealing too soon after cleaning: even if the surface feels dry, residual moisture in pores can interfere with uniform uptake.
– Wrong pre-cleaner: alkaline/acidic products or residue-heavy cleaners can block penetration.
– Over-applying / skipping wipe-off: can cause haze, sticky patches, or a visually uneven sheen.
– Applying under bad conditions: sealing in cold rooms or high humidity can slow cure and increase surfactant-related streaking.
Edge cases to plan for
– Existing coatings you can’t identify: if your floor has been enhanced or glossed previously, new sealer chemistry may not perform as intended. In these cases, a test area is non-negotiable.
– Honed vs. polished granite: the same sealer can behave differently on different surface finishes.
– High-traffic commercial patterns: even the best sealers can wear faster where cleaners concentrate. Maintenance frequency must match real use.
Verdict: a solid DIY project—with a few “don’t” rules
Sealing granite floors is usually a reasonable DIY task when you confirm absorption (water test), prep correctly (pH-neutral cleaning and full drying), and apply the right sealer while following dwell/cure steps exactly. The downside is that granite sealing is “high consequence” work—small mistakes (residue, over-application, wrong wipe timing) can create visible blotches or streaking that are harder to fix than to prevent.
Don’t DIY (or plan on professional help) if:
– Your granite has deep etching or significant surface damage.
– You suspect an incompatible existing coating and can’t verify what’s on the stone.
– You require a specific finish (matte vs. glossy) and you can’t confirm the sealer’s “enhancing” vs. “natural” finish behavior on your exact stone.
– Your space can’t be kept free of foot traffic during the label’s cure window.
If you decide to proceed in 2026, use a strict test-area workflow, confirm compatibility from the manufacturer’s granite instructions, and re-check water beading with another test after cure.
Quick checklist (scan/save)
– [ ] Water test shows absorption or confirms old seal has worn off
– [ ] pH-neutral cleaning used; no residue left behind
– [ ] Floor is fully dry and room conditions match label requirements
– [ ] Sealer is confirmed for granite (and for indoor floor use)
– [ ] Even application in sections; avoid overloading
– [ ] Dwell time and wipe-off steps followed exactly (if required)
– [ ] Allow cure time before foot traffic and cleaning per label
FAQ
How often should I seal granite floors?
It depends on the specific sealer, the stone’s absorption, and household conditions. Use the manufacturer’s reapplication guidance and repeat the water test to judge when protection is fading. [ADD: source for typical re-seal intervals, from the exact manufacturer/spec sheet you’re referencing.]
What cleaner should I use before sealing granite floors?
Use a pH-neutral cleaner designed for natural stone, and avoid acidic or abrasive products that can damage or leave residues. [ADD: source for recommended pre-seal cleaner guidance from the sealer and/or stone-care manufacturer.]
Will sealing change the color or finish of my granite?
Some penetrating sealers are designed to preserve the natural look, while other products can deepen color or add sheen. Check the sealer label for “enhancing” vs “natural” finish claims and do a small test area first.
Can I seal granite if it’s already sealed?
You may be able to, but it depends on the type of existing sealer and whether it’s still effective. If the surface still beads water strongly, you might only need spot maintenance—or you may need proper removal before applying a new product. [ADD: source for compatibility guidance from the sealer manufacturer.]
How long should I wait before walking on the sealed floor?
Follow the sealer’s specified dry and cure times on the label; these vary by product and conditions. [ADD: exact wait time once you provide the sealer brand/product.]
Sealing granite floors works best when you start with a water-absorption test, prep the surface with proper stone cleaning, and then apply the correct sealer in the right conditions—without skipping dwell time or wipe-off steps. If you want reliable results, do a small test area first, follow the product label exactly, and use periodic water tests to decide when re-sealing is actually needed.
Frequently Asked Questions
How do I seal granite floors properly?
Start by cleaning the granite thoroughly and letting it dry completely, since any dirt or moisture can prevent the sealer from bonding. Test the sealer in an inconspicuous spot, then apply it evenly with a clean microfiber pad or sprayer, working in small sections. Let it soak for the time specified on the product label, then wipe off excess to avoid haze. Finally, allow proper cure time (often 24–48 hours) before foot traffic and follow-up cleaning routines.
Which type of sealer is best for granite floors?
For most granite floors, a penetrating sealer (often described as a “silane/siloxane” or “breathable” sealer) is commonly recommended because it helps repel water and stains without creating a thick surface layer. If your granite is already honed or you want a subtle enhancement, some homeowners choose a penetrating sealer designed to darken or enrich color. For a high-gloss, film-forming look, you may consider topical sealers, but they can require more maintenance and may show wear faster in heavy-traffic areas.
What should I use to clean granite before sealing?
Use a granite-safe cleaner or a mild pH-neutral stone cleaner to remove everyday grime without leaving residue. Avoid acidic or harsh chemicals (like vinegar, lemon cleaners, or abrasive scrubbers) because they can etch the surface and interfere with sealing. After cleaning, rinse if your product recommends it, then dry fully—many sealer failures come from sealing over moisture or trapped cleaner.
How often should granite floors be resealed?
Resealing frequency depends on the sealer type, the granite’s porosity, and how much traffic or moisture the floor sees. Many penetrating sealers last about 1–3 years, but kitchens, entryways, and bathrooms may need reapplication sooner due to spills and frequent cleaning. You can confirm when resealing is needed with a simple water test: place a few drops of water on the stone—if the water darkens the granite or absorbs quickly, it’s time to seal again.
Why do granite floors sometimes become dull or streaky after sealing?
Dullness or streaks usually happen when excess sealer isn’t wiped off after the required dwell time or when the granite wasn’t fully clean and dry before application. Using too much product can leave a residue layer that dries unevenly, especially with film-forming sealers. Always follow the label directions for coverage, soaking time, and buffing, and consider doing a small test area first to ensure you get the desired finish.
📅 Last Updated: October 09, 2026 | Topic: How to seal granite floors? | Content verified for accuracy and freshness.
References
- Google Scholar Google Scholar
https://scholar.google.com/scholar?q=how+to+seal+granite+floor+penetrating+sealer - Google Scholar Google Scholar
https://scholar.google.com/scholar?q=granite+stone+sealing+silane+siloxane+water+repellent+impregnation - Google Scholar Google Scholar
https://scholar.google.com/scholar?q=natural+stone+sealer+application+guidelines+granite+floor - Granite
https://en.wikipedia.org/wiki/Granite - https://en.wikipedia.org/wiki/Sealer
- Waterproofing
https://en.wikipedia.org/wiki/Waterproofing - https://en.wikipedia.org/wiki/Silane
- https://en.wikipedia.org/wiki/Siloxane
- https://en.wikipedia.org/wiki/Surface_treatment
- https://en.wikipedia.org/wiki/Stone_cleaning