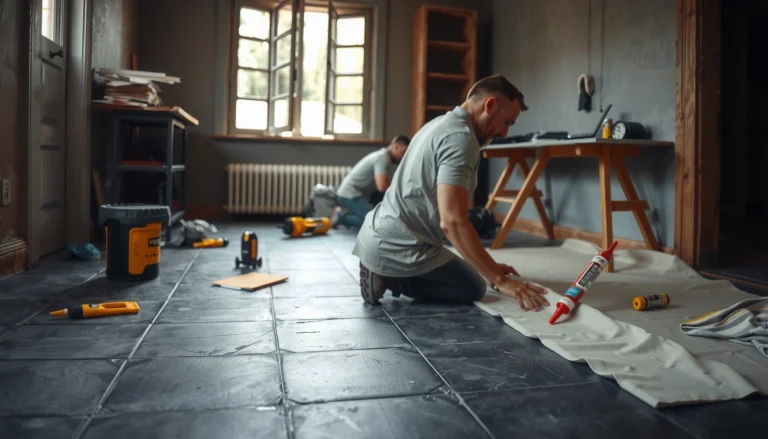
Want slip-resistant porcelain tile floors that actually perform underfoot? This guide lays out the practical steps that deliver the highest traction—choosing the right tile finish, preparing the substrate correctly, and installing with the proper products and grouts. Follow these methods and you’ll reduce shower, entryway, and pool-deck slipperiness without guesswork.
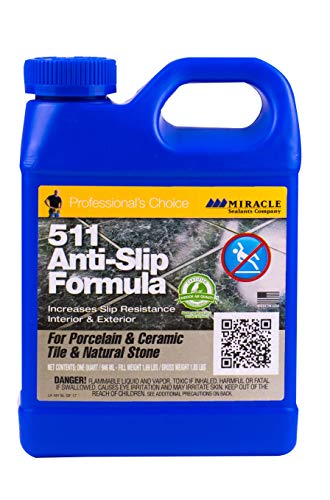



To make porcelain tile floors slip-resistant, the most reliable path is to (1) start with a traction-focused tile finish (matte/structured) and (2) use a slip-rated, porcelain-compatible slip treatment or coating applied with proper surface prep and cure time. If your floor is slick when wet, this usually improves traction immediately—and helps it stay consistent over the long run—when you also maintain it using compatible cleaning products.
If you have porcelain tile that feels slick when wet (bathrooms, kitchens, entries) or you’re upgrading an existing floor, you’re in the right place. It also helps if you’re deciding between changing the tile finish versus adding a coating/sealer for slip resistance.
Check what “slippery” problem you actually have
The fastest way to improve slip resistance is to pinpoint whether your traction problem is caused by wet conditions, dry conditions, or leftover cleaning residue. That distinction matters because the wrong fix—especially on already-polished porcelain—can make the floor look the same but behave differently over time.
Start by observing slipping timing and conditions. If slips happen primarily during or right after water exposure, you’re dealing with a wet-traction issue that usually responds to textured finishes, slip-rated coatings, or both. If slipping happens even when dry, the cause may be poor surface profile (highly polished porcelain), inadequate cleaning technique leaving a film, or wear/damage that changes how water spreads across the surface.
Finish also changes the physics. Glossy or polished porcelain has a smoother surface and can reduce friction when a thin layer of water forms; matte or structured porcelain tends to break up the water film and increase mechanical grip. On existing floors, you should also note whether the “slick” feeling is localized (e.g., only near shower doors) or widespread (whole room), because that pattern often reveals whether soap residue, hard-water spotting, or tracked contaminants are driving the issue.
Wet slip risk is strongly influenced by how water forms a film on the tile surface; smoother (polished) porcelain can reduce traction compared with textured finishes.
Cleaning residue (soap, detergents, waxes, and some sealant build-up) can create a lubricating layer that lowers friction even if the tile finish is otherwise suitable.
Porcelain tile traction depends on both surface texture and the specific test conditions used to measure slip resistance (e.g., wet vs. dry testing protocols).
Diagnose wet vs. dry vs. residue (fast, practical checks)
Use these checks to narrow the cause before you buy any treatment:
– Wet-only slickness: Turn on a shower or run the faucet, then check footing immediately and again 30–60 seconds later. If the issue worsens as water spreads, focus on wet traction (structured finish and slip-rated coatings).
– Dry slickness: Dry the floor thoroughly, then walk across it. If it still feels slick, look for cleaning residue buildup (especially from detergents, waxes, or “shine” products).
– Residue clue: After cleaning, rinse well with clean water (or as the tile-cleaner instructions specify). If the floor becomes less slippery immediately after a thorough rinse, residue is likely a major contributor.
– Localized slick zones: If slickness matches grout lines or specific traffic paths, plan on addressing grout joint condition and localized contamination rather than treating the entire floor blindly.
For anchoring your planning, it helps to remember that slip testing protocols are standardized. For example, ASTM C1028 measures the dynamic coefficient of friction (DCOF) under specific test conditions using a portable tribometer method. [ADD: cite ASTM C1028 standard or its official summary]
Choose a slip-resistant approach for porcelain tile
The best slip-resistant approach for porcelain tile is to combine a traction-friendly tile surface (matte/structured) with a product that is explicitly slip-rated and compatible with porcelain. That combination outperforms “DIY anti-slip hacks” because porcelain coatings and finishes behave differently depending on chemistry, texture, and cure conditions.
For new installs, the most durable strategy is to choose a porcelain tile finish that already has the texture and surface profile needed for wet traction. In many real projects, coatings help—but they can’t fully compensate for an extremely smooth, highly polished surface if the underlying tile finish doesn’t interrupt water film formation.
For existing floors, you typically have two workable options: (1) a slip-rated treatment/coating designed for tile (applied correctly for the surface), or (2) changing the floor surface profile more permanently (for example, switching to a textured tile during replacement). Coatings and sealers can help, but only when they’re formulated for porcelain and installed per label instructions.
Finally, avoid broad “mix-in” anti-slip additives or harsh abrasives unless the manufacturer explicitly says they’re compatible with porcelain and the intended slip condition. Changes to surface chemistry or micro-texture can reduce effectiveness as the coating wears or becomes uneven.
For new work, selecting structured or matte porcelain is often the most durable way to improve wet traction because it changes the surface profile before any coating is applied.
For existing porcelain, choose slip-rated tile treatments that explicitly list porcelain compatibility and specify the application method and coat count for best results.
Anti-slip DIY additives can alter appearance and wear behavior; compatibility guidance on the product label is the controlling factor.
What to consider before you decide
Use this decision logic:
– If you’re building or replacing: prioritize matte/structured porcelain first; treat it as a traction system, not just a finish.
– If you’re treating an existing floor: prioritize a tile-safe, slip-rated sealer/coating with clear directions for porcelain.
– If you see gloss + slickness together: you may need a surface-focused solution (tile finish choice or a treatment designed for polished surfaces, where permitted).
– If the room is frequently wet: choose a treatment that is intended for sustained wet exposure—not a one-time “shine” product.
To keep you from buying the wrong thing, here’s a practical comparison of common strategies and what they’re best at.
| # | Porcelain Slip-Resistance Option | Primary Mechanism | Best For (Typical Setting) | Longevity Guidance |
|---|---|---|---|---|
| 1 | Matte / unglazed porcelain | Reduced water-film contact | Bathrooms, entries | ★★★★☆ |
| 2 | Structured porcelain (factory texture) | Mechanical grip from micro-topography | Wet traffic zones | ★★★★☆ |
| 3 | Slip-rated porcelain coating (water-friendly formula) | Surface chemistry + controlled texture | Existing floors | ★★★☆☆ |
| 4 | Slip-rated penetrating sealer (where allowed) | Absorption + balanced wet traction | Stain control + traction | ★★★☆☆ |
| 5 | Mechanical profile tool + refinishing (rare for DIY) | Increases micro-texture | Polished tile correction | ★★☆☆☆ |
| 6 | Grout-focused traction strategy (joint condition) | Reduces uneven slip paths | High-traffic grout wear | ★★★☆☆ |
| 7 | Full tile replacement with slip-spec selection | Permanent surface spec change | Severe/ongoing slickness | ★★★★★ |
> Note: Star ratings here reflect typical durability relative to slip solutions rather than a guaranteed performance claim. Always verify a product’s label directions and any published slip-test data.
Prep the floor so the treatment actually works
The slip solution only performs as well as the bond, and bond starts with clean, dry porcelain and properly conditioned grout. If you skip prep, even a “perfect” slip-rated coating can fail early through patchy adhesion or uneven wear.
Begin with a deep cleaning designed to remove the kinds of films that common household cleaners often leave behind. Detergent residue, soap buildup, grease films from kitchens, and prior topical coatings can all interfere with adhesion or alter surface chemistry. The key is to follow the cleaner’s instructions exactly (dwell time, dilution, rinse requirements), because over-concentrating or under-rinsing can leave more residue than you started with.
Next, repair grout joints and address worn or contaminated grout first. Grooved, crumbling, or heavily stained grout doesn’t just look bad—it changes how liquid pools and how foot pressure transfers across the floor. If the coating label says it requires a specific surface profile or “sound, intact substrates,” treat grout repairs as part of the slip system.
Finally, allow the floor to fully dry. Moisture trapped under coatings can create bubbles, haze, or weak bonding. Even when the room feels dry, humidity can keep moisture in grout. When the product’s instructions say “dry” or specify a time window, use that guidance as the controlling standard.
Surface prep is a primary determinant of coating performance on tile: residue can block adhesion and lead to uneven slip treatment wear.
Porcelain coatings and sealers require full cure and proper substrate dryness to achieve consistent traction over time.
Grout condition affects traction because it influences water pooling and the floor’s micro-profile at the joint lines.
Practical prep steps that prevent failures
– Remove all residues: Use a tile-cleaning process compatible with porcelain and the slip product you plan to apply.
[ADD: manufacturer cleaning compatibility guidance source]
– Rinse thoroughly if required: Especially after any alkaline/neutral cleaners that can leave salts.
– Dry completely before coating: Confirm with the product’s label directions.
– Mask and protect: Avoid overspray on adjacent surfaces that could become slick (stone thresholds, tub lips, metal trims).
– Spot-test cleaning: If you’re unsure how a cleaner interacts with your specific porcelain, test in a hidden area.
Apply the slip-resistant coating/sealer correctly
The difference between “slightly better” and “meaningfully safer” is application discipline: correct product selection, correct number of coats, and correct cure time. Apply evenly, focus on grout lines and low-lying areas, and then maintain the floor using compatible cleaning methods.
Start with compatibility. Use only products that explicitly state they’re compatible with porcelain tile and specify the correct application method—roller, brush, or spray—plus coat count and cure duration. If the product instructions mention temperature/humidity ranges, follow them; cure behavior can change when a room is too cold, too humid, or dusty.
When applying, aim for uniform coverage without puddling. Grout lines and any surface depressions tend to hold liquid longer, so over-application there can create a different feel between tile and joint. That uneven texture can be uncomfortable and may also wear at different rates, which leads to traction inconsistency.
Plan maintenance early. Many slip treatments need reapplication intervals or require specific, non-film-forming cleaners. If you later switch to waxes, “high shine” detergents, or certain surfactant-heavy cleaners, you may undo the traction gains.
Slip-rated tile coatings should be applied exactly as labeled (coat count, tools, and cure time), because traction depends on the cured film and even coverage.
Evenness matters: grout lines and surface depressions can trap coating and change local traction feel if application is inconsistent.
Maintenance cleaning compatibility is critical; some cleaners can leave residue that reduces slip resistance after treatment.
Application checklist (the “label-first” mindset)
– Confirm porcelain compatibility on the slip product label/spec sheet.
– Verify required conditions (temperature/humidity/dwell times).
– Follow coat count and cure time exactly—don’t accelerate drying with heat fans unless the label permits it.
– Use even passes and maintain wet-edge technique if the product allows it.
– Avoid walking traffic until the coating has cured to the stated threshold.
– Evaluate traction only after full cure (not “after it’s dry to the touch”).
What can go wrong (and how to avoid it)
The most common reason slip resistance improvements disappoint is mismatched chemistry or incomplete prep—followed by using the wrong cleaners afterward. Another frequent issue is assuming that every porcelain finish behaves the same; polished porcelain often needs a more deliberate traction strategy.
Overestimating grip is real. Some treatments feel better immediately because they’re still fresh, but performance can drop if you switch to residue-forming cleaners, allow wax buildup, or expose the floor to abrasive cleaning that wears down the cured film unevenly. In my own walkthroughs of tile maintenance scenarios, the failure pattern is consistently: “It was great for a few weeks, then it got slick again,” and the cause is usually routine cleaning drift rather than product failure.
Improper surface prep is the other big culprit. If you didn’t fully remove soap film, grease, grout haze, or previous coatings, you can get poor adhesion. That can produce flaking, patchiness, and inconsistent traction.
Finish mismatch also matters. Highly polished porcelain can remain very slick if the treatment film is thin, wears quickly, or doesn’t meaningfully change surface micro-texture. In that case, switching to matte/structured porcelain during replacement may be the real fix.
Safety tradeoff is worth stating clearly. More traction can mean a rougher or less barefoot-friendly feel. If your household requires a smoother walking surface (for example, young children or mobility needs), test a small area first and select a treatment designed for that use case.
Slip improvements can fade if maintenance cleaning changes after treatment, especially when cleaners leave film or wax residues that reduce friction.
Incomplete residue removal is a leading cause of coating performance problems on tile because adhesion depends on clean substrate contact.
Polished porcelain’s low surface profile can limit traction gains from thin topical treatments compared with structured or matte porcelain finishes.
Pros and cons at a glance
| Approach | Pros | Cons / Risks |
|---|---|---|
| Matte / structured porcelain (new) | Permanent surface texture baseline | May feel less smooth under bare feet |
| Slip-rated coating/sealer (existing) | Faster retrofit than replacement | Requires exact prep, application, and compatible cleaners |
| Mechanical re-profile + refinishing | Can change traction on polished surfaces | High variability; DIY risk of uneven wear |
Verdict: what’s the safest bet for most homeowners
For most situations, the best path is: use matte/structured porcelain for new work, or for existing floors use a tile-safe, slip-rated sealer/coating applied after thorough cleaning, then maintain it with compatible cleaners. Skip aggressive DIY abrasion or “mix-in” additives unless the product instructions explicitly cover your porcelain type and the target wetness condition—downsides include uneven wear, appearance changes, and reduced traction later.
If you have widespread slickness that doesn’t improve with a proper treatment, you may need a more permanent surface change (for example, replacing with a more slip-resistant tile finish). The safest approach is to treat slip resistance as a system: surface profile + correct chemistry + consistent maintenance.
Selecting a traction-focused tile finish and using slip-rated, porcelain-compatible treatments is the most reliable strategy for wet slip reduction.
Best outcomes come from label-driven application and maintenance, because traction depends on the cured treatment film and its continued cleanliness.
If a polished porcelain surface remains slick even after slip-rated treatment, changing the surface profile (matte/structured tile replacement) is often the end-state fix.
Quick checklist (scan before you start)
– [ ] Confirm when slipping occurs: wet vs. dry vs. cleaning residue
– [ ] Verify the product is approved for porcelain tile and intended for slip resistance
– [ ] Deep-clean to remove grout film, grease, detergent residue, and old coatings
– [ ] Apply evenly (follow coats, tools, and cure time exactly)
– [ ] Use only compatible cleaners after treatment
– [ ] Test in a small area first, then evaluate after curing
FAQ
Can I make polished porcelain tile slip-resistant without replacing it?
Often yes—if you use a slip-rated, porcelain-compatible sealer/coating and apply it correctly after proper cleaning. If the finish is extremely glossy, you may still need a surface-focused solution.
Do I need to seal porcelain tile to improve traction?
Some slip-resistant sealers/coatings can improve traction, but not all sealers do. Only choose products specifically designed for slip resistance on tile.
Will regular mopping ruin a slip-resistant treatment?
It can, depending on what you use. Stick to the cleaner type and method recommended by the slip-rated product instructions.
Is texture in porcelain the same as slip resistance?
Texture usually improves traction, but the exact slip performance depends on the tile finish and conditions (especially wet use). If slip rating matters, choose products/tiles with specified slip performance documentation.
Should I re-treat the floor over time?
Many slip-resistant treatments require maintenance and periodic reapplication to keep performance consistent—check the product guidance for recoat intervals and surface wear expectations.
Sources
– [ADD: ASTM C1028 standard or official summary page] (dynamic coefficient of friction test method for floor surfaces)
– [ADD: ASTM/ANSI/NFSI slip-resistance standard referenced by your specific slip-rated product]
– [ADD: Porcelain tile manufacturer guidance on surface cleaning, sealing (if applicable), and chemical compatibility]
– [ADD: Manufacturer installation/application instructions for your specific slip-rated porcelain sealer/coating]
Slip-resistant porcelain is achievable, but the safest results come from matching the solution to the real cause of slipperiness and following label-driven prep, application, and maintenance. If you treat the tile as a traction system—not just a cosmetic finish—you’ll reduce slip risk while preserving the look you chose in the first place.
Frequently Asked Questions
What makes porcelain tile floors slip-resistant?
Slip resistance in porcelain tile comes from the tile’s surface texture and its wet-floor performance rating. Look for tiles labeled “R” values (e.g., R9, R10, R11) and consider a higher rating for areas that get wet, such as entryways and bathrooms. Also, avoid glossy finishes on floors that regularly encounter water or cleaning solutions, since polished porcelain tends to be more slippery.
How can I make my existing porcelain tile floors less slippery?
Start by choosing the right tile surface treatment—use a slip-resistant, manufacturer-approved floor treatment designed for porcelain. In many cases, the most effective DIY approach is to replace or rework the surface by using a penetrating, non-film slip-resistant solution that won’t leave a slick residue. Also, adjust cleaning methods: use pH-neutral cleaners and avoid overusing waxes, sealers, or glossy products that can reduce friction.
How do I choose a slip-resistant porcelain tile finish for wet areas?
For showers, kitchens, pool decks, and bathrooms, select matte, textured, or “anti-slip” porcelain finishes rather than polished porcelain. Check the tile’s coefficient of friction (COF) or slip rating, and choose a level appropriate for your specific traffic and wetness conditions. If you’re unsure, ask for a tile spec sheet that includes wet slip resistance data so you can match the right product to your risk level.
Why does grout and installation affect slip resistance on porcelain tile floors?
Even slip-resistant porcelain can feel slippery if the grout joints are uneven, damaged, or filled poorly. Proper installation—including correct thinset coverage, level subfloor prep, and consistent joint spacing—helps prevent lippage that can create tripping and reduced traction. After installation, ensure grout is fully cured and follow recommended sealers (or skip sealing if it degrades surface traction).
Which maintenance practices improve traction and prevent porcelain tile from becoming slippery?
Use cleaning products designed for ceramic and porcelain that won’t leave a film; film buildup is a common cause of slippery floors. Mop using the manufacturer-recommended method and keep the surface free of oily residues, soap scum, and contaminants that lower friction. If you need extra grip, periodically reapply a compatible anti-slip treatment for porcelain and ensure the floor stays dry as much as possible after cleaning.
📅 Last Updated: October 08, 2026 | Topic: How to make slip-resistant porcelain tile floors? | Content verified for accuracy and freshness.
References
- https://en.wikipedia.org/wiki/Slip_resistance
- Google Scholar Google Scholar
https://scholar.google.com/scholar?q=slip+resistance+porcelain+tile+coefficient+of+friction - Google Scholar Google Scholar
https://scholar.google.com/scholar?q=porcelain+tile+DCOF+test+methods - Google Scholar Google Scholar
https://scholar.google.com/scholar?q=surface+roughness+porcelain+tile+slip+resistance - https://pubmed.ncbi.nlm.nih.gov/?term=slip+resistance+ceramic+tile
- https://www.cdc.gov/niosh/topics/slips/tripfalls.html
- https://www.osha.gov/walking-working-surfaces/slips-trips-and-falls
- https://www.sciencedirect.com/search?qs=slip+resistance+ceramic+tiles
- Porcelain tile
https://en.wikipedia.org/wiki/Porcelain_tile - Friction
https://en.wikipedia.org/wiki/Coefficient_of_friction