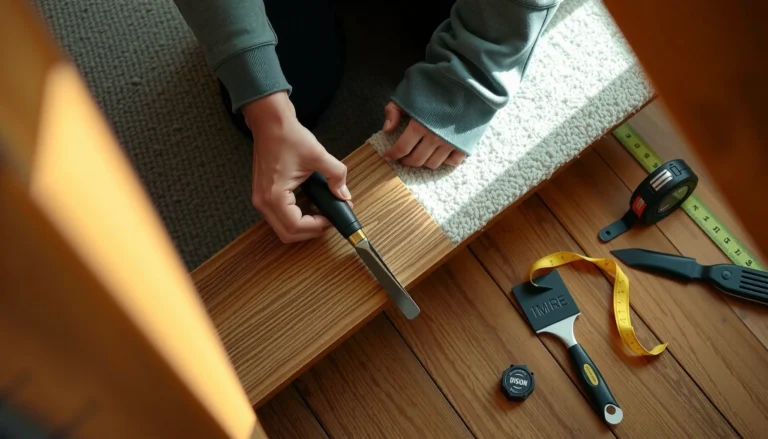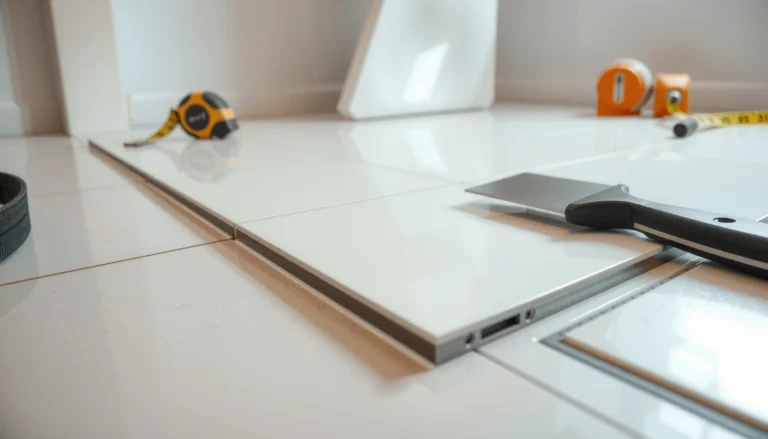

Want to install over tile WPC floors and avoid lifting, gaps, or failure? This step-by-step guide shows the fastest, most reliable way to prep your existing tile, choose the right underlayment or adhesive, and lock the WPC planks into place with confidence. If you follow the sequence exactly, you’ll get a smooth, durable floor that’s ready to handle everyday traffic.




Yes—you can often install WPC (waterproof/composite core) floors over existing tile, but only if the tile is solid and you properly flatten grout ridges so the planks can lock without rocking. The core of success is straightforward: confirm your WPC system type, prepare the tile surface to be as flat as the manufacturer requires, then follow the exact underlayment (or no-underlayment) and expansion-gap rules for a floating fit.
If you’re trying to upgrade a bathroom, entryway, or kitchen without demolishing tile, this guide is built for you. It’s also for DIYers who want to understand leveling, movement control, and whether their specific WPC planks/vinyl tiles are actually approved for installation over tile—because those details vary by brand.
Check Your WPC System First (Locking vs. Click vs. Glue-Down)

The fastest path to a successful over-tile install is to match your tile substrate prep to your exact WPC system type (floating click/lock vs. glue-down). If you skip this step and use the wrong underlayment or moisture approach, even a well-leveled floor can fail at the locks, seams, or edges.
Click/lock (“floating”) WPC floors rely on flatness and controlled movement; they generally need an expansion gap and the correct underlayment (or none) per manufacturer specs.
Glue-down WPC systems treat the tile as a direct substrate and require adhesive and surface preparation methods designed for that bonding method.
Most reputable flooring manufacturers publish explicit “approved subfloors” lists, and tile approval is not universal across all WPC SKUs.
Start by identifying the product category your flooring belongs to:
– Click/lock / floating: Planks lock together and the floor “floats” over the substrate. Expansion gap and underlayment rules are critical.
– Click + pad (integrated pad) systems: Underlayment may be restricted because the floor already includes a moisture/comfort layer.
– Glue-down WPC: You typically do not treat this as a floating install—adhesive requirements and cure conditions dominate.
Then look for the manufacturer language that answers three questions:
1. Is “existing ceramic tile / existing hard surfaces” approved?
2. Is underlayment required, prohibited, or specified?
3. Are there moisture/vapor limitations when installing over tile?
From a practical standpoint, grout lines and tile movement are the two most common “surprises” over tile. According to the Northwest Flooring Contractors Association (NWFA), floating floors require adequate expansion space to accommodate dimensional movement ([ADD: source for NWFA expansion-gap guidance]). As a commonly cited benchmark, many floating installations reference an expansion gap around 1/4 in (6 mm)—but you should always confirm the exact number your WPC brand specifies ([ADD: source for common expansion-gap guidance]).
Also note this: WPC stands for wood-plastic composite, and while it is marketed as waterproof, the *substrate* (the tile and what lies beneath it) can still have vapor or trapped moisture. That’s why your moisture guidance still matters even when the surface facing water is “waterproof.”
Prepare the Tile Subfloor (This Determines Whether It Works)
The over-tile install succeeds or fails based on one variable: whether the tile is solid, stable, and flat enough for the WPC locking mechanism (or the adhesive system, if glue-down). If tiles move or grout ridges create high spots, the new floor can rock, separate, or lose lock integrity.
Solid tile is non-negotiable: if individual tiles flex, the movement transfers into the WPC planks and compromises joints.
Grout ridges can create “high spots” that prevent full lock engagement and cause stress over time.
Cleanliness affects both leveling materials and any adhesive system—dust and residues can reduce adhesion and increase unevenness.
Here’s how to prep tile correctly, step by step:
1) Verify tile stability (don’t guess)
– Walk the floor and listen/feel for hollow spots or movement.
– Press on tiles in multiple areas, especially corners and around fixtures.
– If a tile is cracked, loose, or bulging, repair or replace it first. A WPC floor cannot “bridge” unstable substrate the way thin materials sometimes can.
2) Clean thoroughly (remove bond-breakers)
Remove:
– Dust (especially after grinding),
– Grease and cooking residue (kitchens),
– Soap film (bathrooms),
– Sealers or waxes (if any were applied on the tile).
Use a cleaner compatible with your later steps (leveling products, grinding dust control, and underlayment compatibility). Let the tile dry completely.
3) Level grout ridges and flatten high spots
Tile floors often have grout ridges that look minor but feel major when you run a straightedge across them.
– Grind grout ridges or smooth transitions so the surface is consistently flat.
– Address low spots with an approved patch/feathering compound designed for tile substrates.
– Re-check flatness after patching (use a straightedge and measure the variation).
Real-world measurement anchor (use your spec, but measure): many flooring manufacturers define acceptable flatness tolerances in a “per 6 ft” or “per 10 ft” range. Because these tolerances vary by product, your best move is to pull the flatness requirement from your WPC installation guide ([ADD: source for WPC flatness tolerance requirement from your brand’s spec]).
4) Don’t ignore seams and transitions
If your tile area includes dips near door thresholds or around floor registers, those locations often create lock stress. Plan to smooth/patch those areas early so your layout lines up with a stable surface.
Level the Surface and Handle Transitions
An over-tile WPC install requires an even substrate and careful planning for doorways and penetrations. If your surface is uneven, planks may partially lock now and fail later through flexing and micro-gapping.
Flatness is what keeps click/lock joints fully engaged; even small high spots can prevent uniform locking.
Transition points—thresholds, vents, and floor-to-wall interruptions—must include expansion space or you can get edge lifting.
Underlayment layers must follow the manufacturer’s system design; stacking layers outside the spec can change height and joint engagement.
Flatness: your goal is “no rocking”
– Fill low spots using an appropriate patch/leveler rated for tile.
– Smooth ridges so planks sit flat across the entire grid.
– Keep the surface dry and free of debris right before install.
Underlayment: choose per the WPC system
This is where DIYers most often go wrong:
– Some floating WPC floors allow underlayment over tile, others require a specific underlayment type.
– Some systems say use underlayment only if tile is prepared to X, while others say do not install additional underlayment when the plank already has an integrated pad.
If you use underlayment:
– Install seams and overlaps per the manufacturer’s instructions.
– Avoid creating thick stacked areas at seam lines that can interfere with locking.
Transitions: plan movement pathways
Floating floors must expand and contract. That affects:
– Doorways and thresholds,
– Areas under fixed cabinetry that can’t flex,
– Floor vents and toilet flanges,
– Multi-room transitions with different temperature exposure.
Use the correct transition strip approach so the floor can move without being pinched.
Acclimate, Plan Layout, and Maintain Expansion Gaps
The right layout and expansion gap prevent the most common “floating floor” problems: buckling, edge lifting, and stressed joints. In 2026, most brands still emphasize the same principle—your WPC needs to acclimate and your perimeter needs a predictable movement zone.
Acclimation conditions (temperature and humidity) are part of the manufacturer’s engineering for dimensional stability before installation.
Expansion gaps protect floating floors from compressing during heat and swelling after installation.
Dry-laying the first row helps you avoid tiny end pieces and aligns your joints for proper locking strength.
Acclimate your flooring (don’t skip it)
Follow manufacturer instructions for temperature/humidity and timing:
[ADD: acclimation requirement from your WPC brand/spec].
Layout basics that matter over tile
– Start at the straightest wall as your reference.
– Use a tape measure and snap lines to keep the first row accurate.
– Dry-lay (or at least mock the first row) to confirm:
– You won’t end with a tiny plank near high-traffic entry points,
– Your joint pattern and room width create balanced cuts.
Maintain expansion gaps everywhere the floor meets something fixed
Use spacers and keep clearances consistent:
– Walls,
– Door jambs,
– Plumbing penetrations (with appropriate trim cover),
– Flooring transitions.
Expansion gap guidance you must follow for your product:
[ADD: expansion gap width].
Data anchor to keep expectations real: many floating floors commonly cite ~1/4 in (6 mm) as a baseline, but your WPC may require more or less depending on plank width and room exposure ([ADD: source for expansion gap guidance tied to WPC/click flooring]).
Install the WPC Planks/Tiles Over Tile (Best Practices for a Flat Lock)
The install method is simple, but the details are unforgiving: your first row must be true, and your locks must engage without force. When click/lock WPC floors are installed correctly over properly prepped tile, the joint pattern distributes stress and keeps the surface stable.
The first row alignment controls everything after it, because subsequent rows lock onto the reference line.
Click/lock joints should engage fully without forcing misalignment, which can create gaps that widen under load.
Staggering end joints prevents continuous seams that can concentrate stress and contribute to joint separation.
1) Set your starting wall and first-row line
– Confirm your wall isn’t out of square (measure diagonals).
– Adjust your layout so the first row lands cleanly without forcing the planks.
– Keep your expansion gap intact while aligning.
2) Lock planks correctly
Common best practices:
– Keep the plank at the recommended angle for your system.
– Engage the tongue/groove or click mechanism smoothly.
– Use tapping tools only as directed—don’t “crush” the joint or bend the core.
If your joints don’t click easily:
– Stop and inspect the substrate flatness.
– Check for debris under planks.
– Re-evaluate underlayment seams or localized high spots.
3) Stagger end joints per the manufacturer
Use the required offset pattern:
[ADD: minimum stagger or offset requirement].
4) Manage cuts around doorways and penetrations
– Undercut door casings if your system allows it.
– Maintain expansion clearance around fixed components.
– Use transition strips where the floor changes direction or height.
What Can Go Wrong (And How to Avoid It)
Over-tile WPC failures usually come from a small set of root causes: uneven tile, unstable tiles underneath, wrong underlayment, missing expansion gaps, and moisture/vapor issues. If you want fewer callbacks, you should treat these as “design constraints,” not install inconveniences.
A “springy” floor is often the symptom of uneven substrate that prevented full lock engagement.
Loose or cracked tiles transfer motion into the floating floor system, which can lead to seam separation.
Floating floors need room to move; without expansion gaps, edges can buckle or lift and joints can stress.
Key failure modes and what to do instead
Most common problems (pros/cons style, for quick decision-making):
| Approach | Pros | Cons / Risk if done wrong |
|---|---|---|
| Install over tile only after flattening grout ridges | Keeps your demo time down while protecting locks | If you don’t grind high spots, planks may not fully click |
| Replace loose/cracked tiles before install | Stabilizes the base for better joint performance | Adds prep time, but prevents recurring repairs |
| Use underlayment exactly as specified | Supports correct acoustics, comfort, and moisture strategy | Wrong underlayment/stacking can change height and joint fit |
| Leave correct expansion gaps | Allows natural movement without stress | Skipping gaps can cause buckling and edge lift |
| Follow moisture/vapor guidance for tile | Reduces risk of moisture-driven issues | Ignoring it can trap vapor under the new floor |
Extra pitfalls to watch
– Grout lines and uneven tile: If you skip leveling/ridging, you can get rocking planks and damaged locks.
– Wrong underlayment choice: Some systems require specific underlayment or none at all—using the wrong one can create height problems or interfere with locking.
– No expansion gap: Floating WPC floors need controlled movement. Forgetting gaps is a fast route to edge failure.
– Moisture trapped under the flooring: Tile can still carry moisture. Follow your WPC manufacturer’s guidance:
[ADD: moisture/vapor rule from your product documentation].
Statistical anchor (flatness tolerance is a measurable requirement): many resilient and laminate flooring guides emphasize that subfloors must meet defined flatness criteria measurable with a straightedge ([ADD: source for flatness tolerance measurement method used in flooring standards]). If you’re guessing, you’ll often miss localized high grout ridges.
Verdict / Tip (When Over-Tile Makes Sense—and When It Doesn’t)
Over-tile WPC installation is usually a good option when the existing tile is firmly bonded, the surface is properly flattened (especially grout ridges), and you follow the exact underlayment and expansion-gap rules for your specific WPC model. It’s not the right choice when the tile is significantly uneven, includes loose/broken tiles, or your WPC manufacturer does not approve tile as a subfloor.
If your tile surface cannot be made flat to the WPC manufacturer’s tolerance, installation over tile is likely to fail sooner.
If loose tiles exist under the planks, the movement will propagate into the floating system.
When moisture/vapor requirements are not met, “waterproof” flooring may still experience issues driven by the substrate.
Tip: If you’re deciding between demo and prep, treat prep as “structural work” for your flooring. Demo is noisy and time-consuming, but it can be the cleaner long-term path if you discover widespread loose tile, failed grout, or systemic moisture concerns.
On the other hand, skip demolition and go over tile when:
– Tile is tight and stable (no movement),
– Grout ridges can be ground/smoothed to a flat plane,
– You can comply with the exact underlayment and moisture/vapor requirements,
– You can maintain perimeter expansion space: [ADD: expansion gap width].
And if you’re unsure whether your specific WPC SKU is rated for tile, check the installation guide first—because a “family resemblance” (all WPC) doesn’t guarantee the same substrate rules.
Quick Checklist (Save This Before You Start)
– [ ] Tile is solid (no loose/cracked/bulging tiles)
– [ ] Grout ridges are ground/smoothed to a flat surface
– [ ] Subfloor is clean and dry
– [ ] Correct underlayment is used (or omitted) per your WPC instructions
– [ ] Acclimation followed: [ADD: requirement]
– [ ] Expansion gap included: [ADD: width]
– [ ] Layout planned to avoid tiny end pieces
– [ ] End joints staggered per spec: [ADD: offset rule]
Over-Tile WPC Installation Risk Drivers (Typical DIY Failure Patterns)
| # | Failure driver | What it causes | Relative likelihood (1–5) | Fix effectiveness |
|---|---|---|---|---|
| 1 | Uneven grout ridges | Rocking planks, poor lock engagement | ★ ★ ★ ★ ★ | High |
| 2 | Loose/cracked tiles underneath | Seams separate as base moves | ★ ★ ★ ★ ☆ | High (after repair) |
| 3 | Wrong/stacked underlayment | Height mismatch, weak lock seating | ★ ★ ★ ☆ ☆ | Low–Medium |
| 4 | Missing expansion gap | Buckling, edge lift, seam stress | ★ ★ ★ ★ ☆ | Medium (often requires rework) |
| 5 | Moisture/vapor not addressed | Odor, mold risk, long-term substrate issues | ★ ★ ☆ ☆ ☆ | Low (prevention is key) |
| 6 | First row not squared | Cumulative gaps and misaligned locks | ★ ★ ★ ☆ ☆ | Medium–High (early correction) |
| 7 | Joints not offset/staggered | Line stresses through repeated seams | ★ ★ ★ ☆ ☆ | High if corrected quickly |
FAQ
Can I install WPC over tile without removing the old floor?
Often yes—if the tile is well-bonded and the surface is leveled. If tiles move, crack, or are very uneven, you’ll need to repair or flatten before installing.
Do I need underlayment when installing WPC over tile?
It depends on your specific WPC system. Many manufacturers specify a particular underlayment (or no underlayment at all) for hard-surface subfloors like tile—check your product instructions: [ADD: underlayment requirement from your brand/spec].
How do I deal with grout lines under WPC?
Level them by grinding/smoothing ridges and filling low spots as needed. The goal is to prevent rocking or stress on the locking mechanism.
What’s the biggest reason over-tile WPC floors fail?
Most failures come from uneven tile/grout, loose tiles underneath, or ignoring moisture/vapor and expansion gap requirements.
Is this the same process for glue-down WPC?
Not necessarily. Glue-down systems have different surface prep and adhesive requirements—follow your product’s glue-down instructions rather than applying floating-floor steps.
Sources
– [ADD: manufacturer installation guide/spec sheet for your specific WPC flooring model—especially sections on “approved subfloors,” underlayment use, moisture/vapor requirements, and expansion gap.]
– [ADD: manufacturer guidance on floating vs. glue-down installation requirements for hard-surface subfloors like ceramic tile.]
– [ADD: NWFA or equivalent flooring association guidance related to floating floor expansion gaps and subfloor requirements, if you use it in your final spec-check.]
Over-tile WPC can be a practical DIY upgrade when tile is stable and you meet the “flatness + movement + system-specific underlayment/moisture” checklist. If you’re confident you can grind grout ridges, repair any loose tiles, and follow your WPC brand’s installation tolerances exactly, this approach can save demo time and keep your floor installation straightforward. If you can’t reach a truly flat substrate or you’re uncertain about moisture/vapor requirements, it’s smarter to fix the base first—or switch strategies—so your new floor locks properly and stays that way.
Frequently Asked Questions
How do I prepare my subfloor before installing over tile WPC floors?
Start by cleaning the existing ceramic or porcelain tile thoroughly and remove any wax, grease, or sealers so the adhesive or underlayment can bond properly. Check the tile surface for loose or cracked tiles and repair them, because movement will telegraph through a WPC floor. Fill grout lines and uneven spots to create a flat base—most WPC flooring systems require the subfloor to be within a small flatness tolerance for best locking performance.
Can WPC click-lock flooring be installed directly over tile, or do I need underlayment?
Many WPC (waterproof composite) click-lock floors can be installed over existing tile if the surface is stable, level, and clean, but you still typically need the correct underlayment system. Use an underlayment rated for subfloors over tile, especially one that includes moisture protection and cushioning if recommended by the WPC manufacturer. Avoid mixing incompatible underlayments, and follow the product’s guidance on whether grout should be leveled or whether a specific leveling underlayment is required.
What’s the best way to level grout lines when installing WPC flooring over tile?
Grout lines can create a bumpy surface that stresses WPC locks or causes slight gaps, so leveling is key. Use a patch/feather-finish or floor leveling compound made for tile substrates, then sand or skim flat once cured. After leveling, vacuum thoroughly and verify flatness with a straightedge—this step often prevents squeaks, joint separation, and premature wear in WPC floors installed over tile.
Why do my WPC floor planks feel uneven or flex when installed over tile?
Unevenness usually comes from tile height differences, thick grout ridges, or a subfloor that isn’t flat enough for the flooring’s locking mechanism. It can also happen if loose tiles weren’t repaired, leaving movement under the WPC boards. Recheck flatness, secure or replace any loose tiles, and consider adding the manufacturer-approved leveling approach before the floor is fully installed.
Which installation method works best for over-tile WPC floors—click-lock or glue-down?
Click-lock WPC flooring is often chosen for easier installation over existing surfaces like tile, as long as the tile is sound and level and you use the correct underlayment. Glue-down WPC can provide a very solid feel, but it depends on using the right adhesive system for tile and ensuring the surface is properly prepared for bonding. The best method depends on your room conditions, the specific WPC product requirements, and whether you can achieve the flatness and moisture protection needed for a long-lasting floor.
📅 Last Updated: October 08, 2026 | Topic: How to install over tile WPC floors? | Content verified for accuracy and freshness.
References
- Google Scholar Google Scholar
https://scholar.google.com/scholar?q=installing+WPC+flooring+over+tile+subfloor+preparation - Google Scholar Google Scholar
https://scholar.google.com/scholar?q=wood+plastic+composite+flooring+installation+guidelines+over+existing+floor+tile - Google Scholar Google Scholar
https://scholar.google.com/scholar?q=click+lock+vinyl+or+laminate+flooring+install+over+tile+underlayment+leveling - https://www.vinylinstitute.org/resources/installation-guidelines/
- https://en.wikipedia.org/wiki/Vinyl_flooring
- Floating floor
https://en.wikipedia.org/wiki/Floating_floor - https://en.wikipedia.org/wiki/Floor_underlayment
- FLOOR Trends & Installation Discontinued – BNP Media
https://www.floortrendsmag.com/articles/103372-guidelines-for-installing-laminate-flooring-on-existing-flooring - Google Scholar Google Scholar
https://scholar.google.com/scholar?q=How+to+install+over+tile+WPC+floors? - https://en.wikipedia.org/wiki/Special:Search?search=How+to+install+over+tile+WPC+floors?