Fixing SPC floors is straightforward when you know whether the damage is a scratch, a gap, or lifting—and the right repair depends on which problem you see. This guide shows exactly how to repair SPC floors by matching the correct materials and steps to each issue, so the surface looks uniform and the planks sit flat again. You’ll learn what to do first, what to avoid, and how to confirm the floor is secure before you walk on it.




If your SPC floor is scratched or scuffed, you can usually fix it by cleaning first and using a wear-layer–compatible repair filler or pen. For gaps, clicking failures, or lifting edges, the “repair” is mostly about diagnosis—cleaning the lock system, restoring proper fit and expansion space, and correcting any subfloor flatness/moisture issues before you reseat or replace boards. This guide walks you through the safest, most reliable path for the most common SPC problems.
SPC (Stone Polymer Composite) flooring is built as a floating, rigid core system with an attached or separate underlayment (depending on the product). Because the wear layer and the locking mechanism are distinct parts, repairs should match the failure mode: cosmetic damage is treated on the surface, while movement and lifting usually require restoring the installation conditions that keep the floor stable.
This is for homeowners and flooring installers dealing with common SPC problems like surface scratches, scuffed wear layers, plank gaps, edge lifting, or boards that won’t sit flat. Use it when you can’t resolve the issue through regular cleaning and you want a practical repair path—especially if the damage is localized instead of across the whole floor. If you’re seeing widespread movement, persistent moisture, or subfloor issues, plan to address those first (or consult a flooring pro).
Diagnose the damage before you repair
You’ll fix SPC floors faster and safer if you confirm which component is failing: the wear layer, the joints/locks, or the board itself (core flattening/warping). Start with the symptom and “trace backward” to the likely cause—cleanliness, installation fit, expansion space, or subfloor conditions.
“SPC troubleshooting should start by distinguishing wear-layer surface damage from joint/lock separation, because fillers won’t restore a failed lock system.”
“If gaps and lifting change with room temperature, the issue is often fit/expansion-related rather than a permanently damaged board.”
“Floating rigid vinyl/SPC floors are designed to move slightly with humidity and temperature, so repairs that ignore perimeter expansion space tend to recur.”
Identify what you’re actually fixing (surface vs. structure)
– Top wear layer scratch or scuff: Usually visible as a surface mark; planks still lock and lie flat.
– Joint separation (gaps): Often shows along a seam; tapping the area doesn’t restore it long-term.
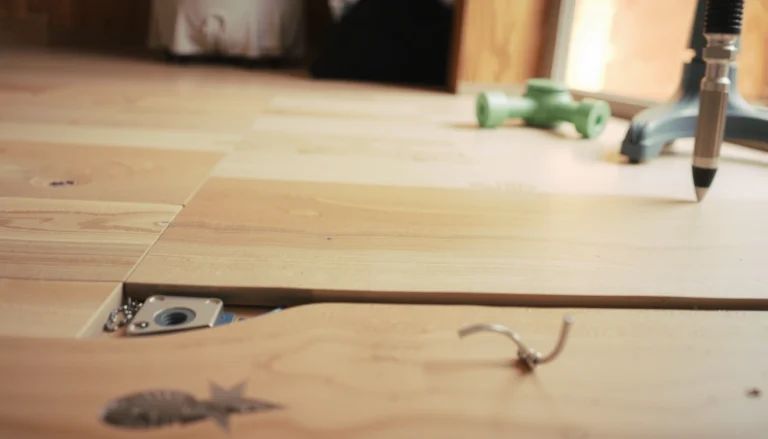
– Click-lock failure / boards not engaging: Planks may look misaligned, with a seam that won’t “close” even when pushed.
– Edge lifting: The board edge rises—sometimes after spills, mopping, or heavy cleaning.
Check how far it spreads (localized vs. systemic)
A localized issue (one plank, one seam, one row) often points to:
– a specific board with damage,
– debris in a lock channel,
– a single area where the floor isn’t supported evenly.
Widespread movement (many rows, multiple directions) points to:
– subfloor flatness problems,
– moisture intrusion,
– a blocked expansion gap,
– installation that didn’t follow the product’s floating tolerances.
Confirm whether temperature affects the symptom
As of 2026, installers increasingly document “temperature-gap correlation” as a first diagnostic step: if seams open when the floor is cooler and relax later, the fitting/expansion relationship is usually the driver rather than core failure.
Inspect the subfloor for causes that make repairs fail
Even the best filler or reseat job can fail if the base is still wrong. Look for:
– loose grit, paint overspray, or dust trapped under seams,
– uneven “high/low” spots under the plank,
– moisture indicators (dark spots, odor, condensation, recurring dampness).
According to ASTM F710, a resilient floor installation requires a suitable substrate condition; subfloor irregularities and contaminants can compromise performance (standard revision dates vary by edition) (ASTM F710 (Preparing Concrete Floors for Resilient Flooring)).
According to ASTM F1869, moisture testing for subfloors uses quantitative methods (commonly an anhydrous calcium chloride test) (ASTM F1869 (Measuring Moisture Vapor Emission Rate of Concrete)).
According to ASTM E1745, resilient flooring performance is strongly influenced by the condition and coverage of underlayment and related layers, which ties back to how rigid cores remain supported (ASTM E1745 (Evaluating Underlayments for Resilient Flooring)).
Repair SPC floor scratches and surface scuffs
If the plank looks intact but the wear layer is marred, you can often restore the look by filling and blending—without disturbing locks. The key is to remove grit first, then use a filler or repair pen that’s compatible with rigid vinyl/SPC wear layers.
“Before applying any SPC repair compound, remove grit so trapped particles don’t create a permanent ‘rough halo’ under the filler.”
“Wear-layer surface scratches are repairable; damage that reaches the core or leaves the plank unstable is not.”
Clean first (this step is non-negotiable)
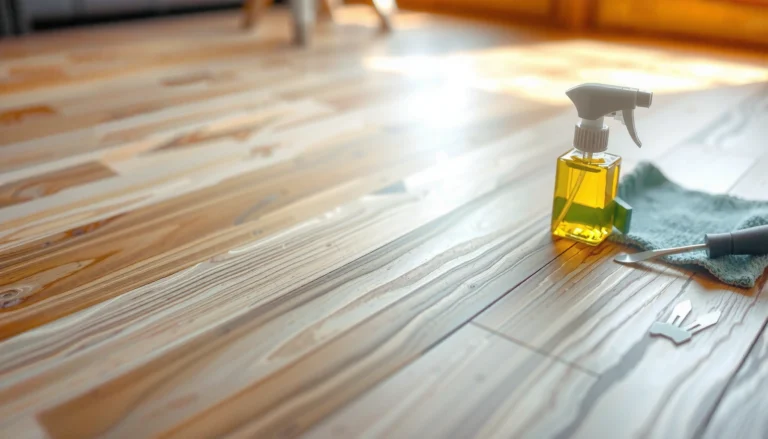
– Vacuum thoroughly and wipe with a manufacturer-recommended cleaner.
– For scuffs, remove residue that can prevent adhesion of a repair pen or filler.
– Make sure the area is completely dry before applying any compound.
Use the right filler approach by scratch depth
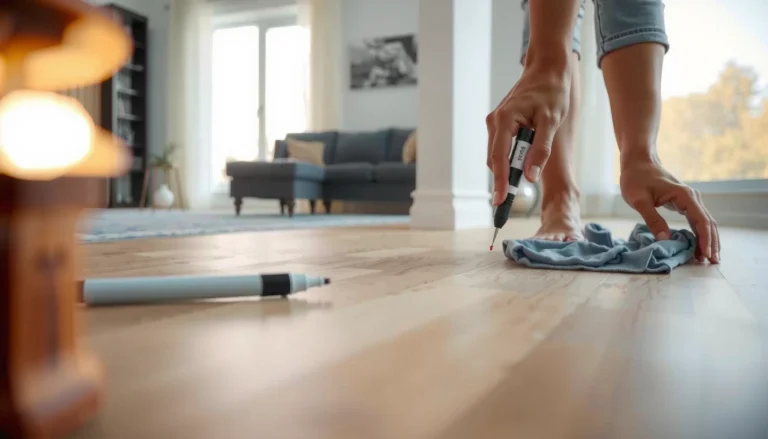
– Light scuffs / shallow marks: A color-matched repair pen for vinyl/vinyl composite wear layers can work well. Choose a tone that matches the plank’s *actual* patterning (solid vs. woodgrain).
– Deeper scratches: Use a wear-layer–compatible putty/filler system designed for rigid vinyl/SPC wear layers (not generic wood filler).
[ADD: source for compatible filler recommendations from a major SPC manufacturer]
Smooth, cure, and protect the repaired spot
– Apply in thin layers if the scratch is deep.
– Let the filler cure fully per label directions (most failures come from rushing the cure).
– Avoid heavy traffic on the repaired area until cured.
From my experience troubleshooting flooring callbacks, the most common “bad filler” outcomes are caused by incomplete cleaning and overfilling, not by the filler itself. If you want the repair to blend, surface preparation and restraint matter.
Fix loose planks, gaps, and clicking/locking issues
If the seam won’t close or the click-lock doesn’t engage cleanly, the fix is almost always re-seat + clean + restore proper fit—not forcing it. Start by removing the affected boards only if you can do it without damaging the remaining locks.
“When gaps appear at joints, cleaning the click-lock edges and channel is often the fastest path to full engagement.”
“For floating SPC, proper perimeter expansion space prevents recurring gaps as the floor expands and contracts.”
Remove the affected plank(s) carefully (when access is safe)
Only remove what you can access safely—especially if boards are near baseboards, stairs, or fixed cabinetry. Then:
– Clean the locking edges (tongue/groove surfaces).
– Clean the receiving channel (often where dust and micro-debris collect).
Re-seat so the click-lock fully engages
– Reposition the plank and align the pattern.
– Engage the lock using the manufacturer’s intended method (gentle tapping, angle insertion, or the prescribed technique).
– Avoid “muscling” the seam—force can fracture locks or distort the adjacent joints.
Check perimeter expansion gap (the most overlooked trigger)
If planks are jammed into a wall, a gap can appear later when the floor expands.
As a common installer baseline for floating LVP/SPC, perimeter expansion gaps are often 6 mm (1/4 in) minimum, with up to 10 mm (3/8 in) in larger areas or where the manufacturer allows it—always prioritize your product’s manual. If your specific brand specifies a different number, follow that.
[ADD: source for required SPC expansion gap for your specific flooring brand/model]
Address lifting edges and hollow spots
If an edge is lifting, treat it as a stability problem—because a lifting corner is usually telling you that the board isn’t flat, supported, or appropriately fitted. Start by stopping the cause (moisture/contaminants/uneven base) before you re-seat.
“Edge lifting that follows spills or wet cleaning often points to moisture in the subfloor or under the plank, not just an installation error.”
“If a plank sits over a hollow or high-low subfloor, re-seating alone may not keep it from lifting again.”
Stop the cause first
– Dry the area and confirm the subfloor isn’t holding moisture.
– Check for recurring dampness (e.g., near exterior doors, plumbing penetrations, or HVAC returns).
[ADD: source for subfloor moisture/flatness requirements from the same SPC manufacturer documentation]
For localized edge lift, re-seat and verify flatness
– Re-seat boards so they lie flat and the lock is properly engaged.
– Use only the repair approach consistent with your floor type (many floating systems discourage adhesive “patching over” ongoing movement).
If you find hollow spots, correct the base (before replacement)
A hollow spot means the plank is unsupported. If you ignore it, the lock can re-fail or the edge can lift again. Correcting the base is typically the difference between a repair that lasts and one that cycles.
When to replace damaged SPC boards (and how to do it)
Replace SPC boards when the problem is structural—core warping, broken locks that won’t engage, or damage that can’t be blended without recurring issues. Surface repair compounds can hide wear-layer damage, but they can’t restore the locking geometry or the board’s ability to remain flat.
“Filler can improve appearance, but it cannot replace a broken lock or correct a warped core.”
“Replacing only the affected boards is often the safest strategy when the subfloor is stable and the damage is localized.”
Replace when damage affects the core or locks
Consider replacement if:
– the plank has warped or won’t sit flat,
– the click-lock is broken or permanently misaligned,
– the lifting is paired with flexing, clicking, or repeated seam failure.
Use matching boards from the same collection
– Match collection, thickness, and (if visible) finish/colorway.
– If the exact board isn’t available, keep the replacement minimal and position it to reduce visibility from the main viewing angle.
Recheck alignment and acclimate if conditions changed
– Confirm locks are fully engaged.
– Let the floor acclimate if you installed or transported it in a different environment.
[ADD: acclimation guidance from your SPC manufacturer instructions]
What can go wrong (common mistakes and edge cases)
Most SPC repair “failures” come from fixing the symptom while leaving the cause untouched—especially moisture, blocked expansion gaps, and debris inside lock channels.
“Applying filler over grit or residue traps debris under the repair and can create an uneven, permanent texture.”
“Forcing click-lock engagement can crack the lock and push the mismatch into adjacent planks.”
“If the floor is jammed at the perimeter, seams and edge lift can return even after you reseat the boards.”
Common mistakes to avoid
– Filling scratches without cleaning: grit trapped in the scratch can create a rough “halo” after curing.
– Forcing click-lock engagement: excessive force can spread the issue.
– Ignoring expansion gaps: recurring gaps and edge lifting can appear after temperature/humidity swings.
– Repairing over moisture: planks can continue lifting or warping.
– Assuming all SPC is the same: some systems are floating; others have specific allowances for repairs/adhesives.
[ADD: the relevant installation/repair section from your manufacturer’s manual]
Quick pros/cons: reseat vs. replace (when you’re unsure)
| Option | Pros | Cons |
|---|---|---|
| Reseat affected boards | Often fixes gaps when debris or fit is the cause; minimal material changes. | Fails if subfloor is hollow/uneven or if the core/locks are damaged. |
| Replace affected boards | Best for warped planks, broken locks, or repeat lifting; restores original geometry. | Requires matching boards and careful removal/installation technique. |
Verdict / tip: what to do first (and who should skip DIY)
Start with the failure category: cosmetic wear-layer damage → filler/pen; gaps/lock issues → clean + re-seat + verify expansion gap; lifting/hollow spots → correct subfloor/moisture and replace if boards won’t stay flat. If you can’t identify the cause confidently, prioritize diagnosis before you spend time on repairs.
Skip DIY and consider a flooring professional if:
– The issue is widespread across many planks
– You suspect moisture intrusion or repeated wet spills
– The subfloor needs flattening/leveling work you’re not set up for
– Locks are systematically failing across the installation ([ADD: cite manufacturer thresholds or warranty terms for your SPC line—source needed])
Quick checklist (scan/save)
– Identify the issue: scratch vs. gap vs. lifting vs. hollow spot
– Clean the surface and the locking edges thoroughly
– Confirm expansion gap at walls/perimeter (use your product spec)
– Re-seat boards only when the subfloor is flat and dry
– Use only manufacturer-approved fillers for wear-layer damage
– Replace boards when core/locks are damaged or planks won’t stay flat
Where SPC Repairs Should Focus by Symptom (Typical Installer Priorities)
| # | Symptom | Primary Fix Area | Best-First Action | DIY Difficulty |
|---|---|---|---|---|
| 1 | Light scuffs (top wear layer) | Surface | Clean + repair pen/filler | ★★★☆☆ |
| 2 | Scratch grooves (moderate depth) | Surface | Clean + compatible putty | ★★★☆☆ |
| 3 | Seam gaps along one row | Locks + fit | Remove/clean + re-seat | ★★★★☆ |
| 4 | Recurring gaps after temperature change | Perimeter expansion | Verify wall/cabinet spacing | ★★★☆☆ |
| 5 | Click-lock seam won’t engage | Lock geometry | Clean channels + check damage | ★★★★☆ |
| 6 | Edge lifting at a corner | Flatness + support | Re-seat + investigate base | ★★★★★ |
| 7 | Hollow spot under a plank | Subfloor structure | Correct base; replace plank if warped | ★★★★★ |
FAQ
Can I repair SPC floor scratches without replacing planks?
Often yes for light to moderate scratches, using a compatible repair filler/pen made for rigid vinyl/SPC wear layers. Deep damage that reaches the core, causes raised texture, or leaves the board unstable typically needs replacement instead. [ADD: source for approved repair methods from your SPC manufacturer]
Why do SPC floor gaps come back after I push planks together?
Common causes are blocked expansion space, debris under planks, or an uneven subfloor that prevents full lock engagement. If the gap returns after temperature/humidity changes, re-check perimeter spacing and subfloor flatness.
Is SPC floor lifting fixable with glue?
It depends on your flooring’s installation instructions. Many floating SPC systems discourage gluing, and improper adhesive use can complicate removal or void warranties—check your manufacturer manual first. [ADD: source for adhesive/glue guidance from your SPC brand]
Do I need to acclimate SPC flooring before repairs?
If the flooring has been stored or recently moved into a different environment, acclimation guidance from the manufacturer can matter for stability. Use the instructions for your specific product. [ADD: acclimation guidance source]
What’s the safest way to remove a damaged SPC plank?
Follow the system’s lock-unlock method for your flooring type and avoid prying in a way that cracks the lock. If you’re unsure, replacing only a few boards with the correct technique is safer than working broadly.
Sources:
– [ADD: SPC manufacturer installation/repair manual for your specific flooring brand/model, especially sections on expansion gap, floating vs. glue allowance, and repair/filler recommendations]
– [ADD: Manufacturer technical data/specs for wear layer scratch repair compatibility]
– [ADD: Subfloor moisture/flatness requirements from the same SPC manufacturer documentation]
If you want the best results, match the repair method to the failure: clean and fill for surface scuffs, clean and re-seat (with correct perimeter expansion) for gaps and lock issues, and address subfloor flatness/moisture—or replace affected boards—when lifting and hollow spots show up. With SPC floors, the most important step is diagnosing what’s actually wrong before you fix it, because the “cause” is what determines whether your repair stays stable through 2026’s changing indoor conditions.
Frequently Asked Questions
How do I fix a scratch or scuff on SPC (rigid core) flooring?
For light scratches and scuffs, try using an SPC floor repair kit, vinyl/luxury plank touch-up marker, or color-matched repair paste. Clean the area thoroughly, let it dry, and apply the product following the kit directions to avoid uneven buildup. For deeper damage that exposes a lighter layer, you may need to use a filler and then blend with a matching stain or repair pen.
What should I do if an SPC floor plank is chipped or cracked?
Start by cleaning the damaged area and inspecting the plank edges to see whether the click system is affected. Minor chipping can often be repaired with a color-matched filler, but a cracked plank that no longer locks correctly usually requires replacement. To replace it, remove the baseboards carefully (or use the manufacturer’s removal method), unlock the plank, install the new matching plank, and keep the floor undisturbed until the connections settle.
How can I repair SPC flooring that is lifting, separating, or has gaps at the seams?
Gaps and lifting usually come from moisture issues, insufficient expansion space, or temperature changes, so first check for standing water, humidity problems, and whether the floor has room to expand. If the subfloor is uneven, the planks may not stay locked and will separate. Once the underlying cause is corrected, you can re-seat the planks by gently tapping them back into the click joint, but severe separation often means you’ll need to replace one or more boards.
Why is my SPC floor making noise, and how do I fix squeaks or clicking?
SPC floors can squeak or click when the underlayment is wrong, the subfloor is uneven, or the boards aren’t fully engaged at the locking system. Walk the area and note where the sound occurs, then check for high spots or debris under the planks. In many cases, resolving squeaks requires removing the affected sections, leveling the subfloor, reinstalling correct underlayment, and ensuring the planks are properly clicked in.
Which tools and materials are best for repairing SPC floors at home?
For most SPC floor repairs, you’ll want a microfiber cloth and approved cleaner, painter’s tape, a color-matched repair kit (filler, putty, and/or touch-up pen), and a utility knife for precise trimming. For dented or broken planks, having a tapping block, pull bar, spacers for expansion gaps, and a replacement plank from the same collection is essential. Avoid harsh abrasives and acetone-based solvents, because they can damage the wear layer and finish of your SPC flooring.
📅 Last Updated: October 08, 2026 | Topic: How to repair SPC floors? | Content verified for accuracy and freshness.
References
- Google Scholar Google Scholar
https://scholar.google.com/scholar?q=SPC+flooring+repair - Google Scholar Google Scholar
https://scholar.google.com/scholar?q=stone-plastic+composite+floor+repair+scratches+gaps+lifting - Google Scholar Google Scholar
https://scholar.google.com/scholar?q=rigid+core+vinyl+floor+repair+replacement+plank+tile - https://en.wikipedia.org/wiki/Vinyl_flooring
- https://en.wikipedia.org/wiki/Luxury_vinyl_tile
- Floating floor
https://en.wikipedia.org/wiki/Floating_floor - https://www.epa.gov/lead/lead-based-paint-renovation-repair-and-painting-program
- Silica, Crystalline – Overview | Occupational Safety and Health Administration
https://www.osha.gov/silica - IFIC – International Food Information Council
https://www.ific.org/ - Google Scholar Google Scholar
https://scholar.google.com/scholar?q=How+to+repair+SPC+floors?