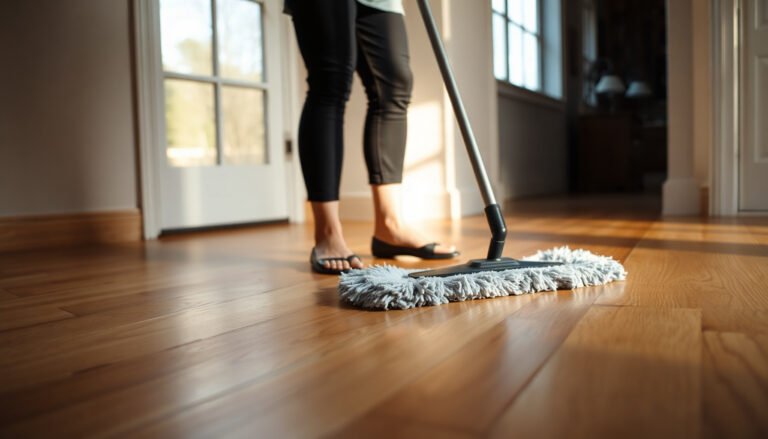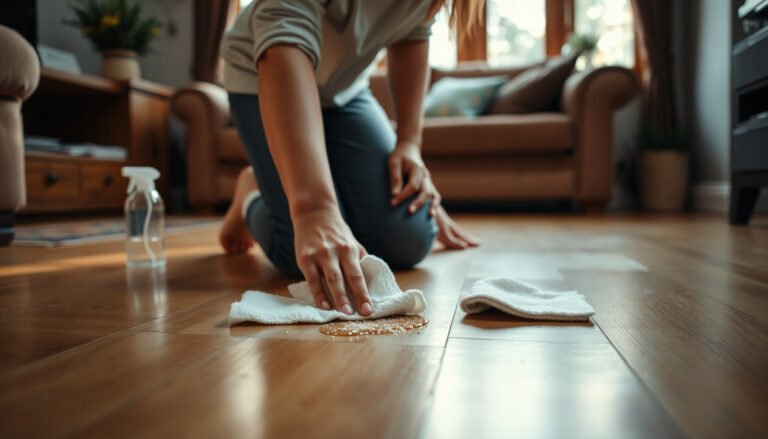

This step-by-step guide shows you how to restore LVT floors the right way—fixing dullness, scuffs, and everyday wear without replacing planks unnecessarily. You’ll learn the exact cleaning, prep, and repair sequence, plus when resurfacing or re-sealing makes sense and when it won’t. Follow these steps and you’ll get LVT that looks close to new, with protection that lasts.




You can usually restore dull, scuffed, or lightly worn LVT by deep-cleaning first, removing residue that causes haze, and then choosing the least-invasive resurfacing/repair method that matches the damage. Start with pH-neutral cleaning, verify how the floor reacts in a test area, and escalate only if haze persists or seams/scratches require repair rather than surface-only treatment.
If you’re managing LVT in a home, office, retail space, or facility hallway, the biggest win is avoiding incompatible cleaners/coatings. Many “DIY restorations” fail because residue gets spread wider, abrasives damage the wear layer, or edge lift turns into a moisture/installation problem that cleaning can’t fix. This guide helps you decide what to do based on what you can actually see—dullness, haze, scuffs, scratches, or seam separation—without guessing product compatibility.
Assess the damage before you start
Before you apply any cleaner or restorative, identify what type of problem your LVT is showing so you pick the correct (and safest) next step. A quick inspection usually tells you whether you need deep-cleaning, residue removal, spot repair, or a full refinishing/resurfacing approach.
“Dullness” on LVT is often residue-related (soap film, cleaning-product buildup, or incompatible coatings), not true wear-through of the surface.
Most LVT floors rely on a wear layer; cleaning should support that layer rather than abrade it or trap new buildup on top of it.
Before changing methods, test your chosen cleaner in an inconspicuous area to confirm the surface clears instead of hazing further.
– Identify what’s actually wrong: dirt/haze, surface scratches, peeling edges, or joint gaps.
– Check the floor type and finish: many LVT floors have a wear layer and some are designed to be refinished while others aren’t—follow the manufacturer guidance when available.
– Do a small test in an inconspicuous spot with your chosen cleaner to see how the surface reacts (especially if your floor is cloudy or has residue).
What to look for (fast triage):
– Cloudy/filmy look after routine mopping → suspect residue trapped in the finish.
– Scuffs that wipe off → often just surface transfer; cleaning + gentle technique is usually enough.
– Scratches that catch a fingernail → may need repair filler; cleaning won’t “erase” abrasion.
– Lifting seams/edges → stop treating it as a cosmetic issue; you may need repair/reinstallation or adhesive work (for glue-down).
– Pattern/shine differences by room → often caused by different cleaners, different traffic patterns, or spot re-cleaning with incompatible chemicals.
Three practical benchmarks (useful for planning):
– A “neutral” target for pH-neutral cleaners is typically around pH ~7 (neutral) and often falls within ~6–8 for “balanced” products. *(Verify your product label.)*
– Floating/click LVT installations are commonly given expansion gap guidance such as ~1/4 in (≈6 mm) at perimeter areas—blocking gaps can lead to seam stress over time. *(Confirm the exact requirement in your flooring manual.)*
– Wear layers vary widely by product; before refinishing, confirm whether your LVT supports resurfacing per the manufacturer’s maintenance instructions. (This is often the difference between “restorable” and “not designed to be refinished.”)
Deep-clean LVT to remove haze and embedded grit
Once you’ve identified haze/residue as a primary issue, deep-cleaning with vinyl/LVT-safe chemistry and proper rinsing is usually the fastest path back to clarity. The goal isn’t aggressive scrubbing—it’s removing embedded grit and the film-forming residue that scatters light.
Using a pH-neutral cleaner made for vinyl/LVT helps reduce the risk of dulling the wear layer compared with harsh alkaline degreasers.
Vacuuming or dry sweeping first prevents grit from becoming an abrasive that scratches during wet cleaning.
If your cleaner requires rinsing, skipping it can leave behind residue that re-creates haze after the floor dries.
– Use a pH-neutral cleaner made for vinyl/LVT and avoid harsh degreasers or abrasive scrubbers that can dull the surface.
– Sweep/vacuum first (use a soft-brush setting if your vacuum has one) to prevent grit from grinding into the wear layer.
– Follow with proper rinsing if your cleaner requires it—left-behind residue is a common cause of that “filmy” look.
Step-by-step deep-clean approach (damage-minimizing):
1. Remove loose soil first: Sweep, then vacuum using a soft-brush setting. Pay attention to corners and under chair legs where grit collects.
2. Choose the right tool: Use a microfiber mop (clean, not saturated with old residue) or a mop head rated for hard floors. Avoid stiff bristle heads.
3. Use dilution correctly: Mix exactly per the product label. Too strong cleaning solution can leave residue even if it “works” at first glance.
4. Clean in sections: Work in manageable areas so the solution stays wet long enough to lift film without drying into streaks.
5. Rinse when required: If the label calls for rinsing, do a clean-water rinse pass. This is a common missing step that creates persistent haze.
6. Dry with air + controlled wiping: Let the floor dry completely. If haze remains, it’s often residue that needs targeted removal, not more scrubbing.
Restore shine by correcting residues (not “scrubbing harder”)
If the floor remains dull after deep-cleaning, the most likely cause is residue from prior products—soap buildup, softeners, or incompatible cleaners/coatings. Instead of escalating to abrasives, use an approved residue-removal strategy and then return to pH-neutral cleaning.
Light “haze” is frequently a scattering effect from residue left on the surface, not a reduction in the LVT’s wear layer thickness.
When manufacturers allow it, residue removers designed for vinyl/LVT can clear film without attacking the finish.
Incompatible waxes/coatings can trap dirt and increase dullness over time, even if they look good at first.
– If the floor still looks dull after cleaning, the likely culprit is residue from prior products, soap buildup, or improper cleaning chemicals.
– Use the approach recommended by your LVT manufacturer (or use a vinyl-safe residue remover if the manufacturer specifically allows it)—then re-clean with pH-neutral solution.
– Avoid waxes/coatings unless your manufacturer explicitly permits them, because incompatible layers can trap dirt and increase dullness over time.
How residue restoration usually works (conceptually):
– Residue-removal products are formulated to dissolve film rather than grind it off.
– After dissolution, you re-clean to remove lifted chemistry, then rinse/dry so nothing remains to resoften or re-haze.
What I recommend you verify before trying residue removers:
– Your LVT brand/model maintenance guide (many specify what cleaners/coating systems are compatible).
– Whether the floor has had burnished coatings, polishes, or waxes applied previously.
– Whether your haze appears as patchy spots (often localized residue) or uniform cloudiness (often widespread cleaning/chemical residue).
> Important limitation: If the prior product is a coating that is not compatible with vinyl/LVT residue-removal chemistry, “easy clearing” may not work. In that case, replacement or professional floor-system restoration may be the realistic outcome.
Address scratches and scuffs based on severity
Scuffs and light surface marks often improve with proper cleaning and careful technique; deeper scratches require a repair approach. The key is matching your method to severity so you don’t waste time or worsen the finish.
Many scuffs are actually surface-transfer marks that improve once embedded grit is removed with gentle, vinyl-safe cleaning.
If scratches are deep enough to snag a fingernail, a surface-only clean is unlikely to fully restore the original appearance.
For true abrasion, vinyl/LVT repair filler is typically used to blend the damaged area, followed by controlled cleanup.
– For light scuffs: try targeted cleaning first; many “scratches” are actually surface marks or embedded grit.
– For deeper scratches: you may need a repair filler/putty made for vinyl floors, followed by careful cleanup so excess doesn’t smear across the finish.
– For extensive wear: determine whether your specific LVT is designed for refinishing (some benefit from resurfacing; others only support cleaning/repairs).
Decision rule (simple, reliable):
– If it wipes away with a damp microfiber → focus on cleaning and residue removal.
– If it doesn’t wipe away but doesn’t catch → treat as scuff/surface wear; cleaning plus gentle touch usually helps.
– If it catches your fingernail → plan for repair filler or a system-level restoration method.
Repair filler best practices:
– Clean and dry the area thoroughly before filling.
– Apply sparingly and blend carefully.
– Remove excess before it sets to avoid smears and color mismatch.
Be realistic about expectations: blended repair can reduce visibility, but exact factory-level uniformity is not guaranteed—especially on high-traffic patterns.
Fix edge issues and plank/tile problems
When edges lift or seams separate, the fix is often structural rather than cosmetic. Cleaning and resurfacing can’t restore adhesion or correct installation stress if the underlying cause is moisture, blocked expansion gaps, or failing bonds.
Lifting seams commonly indicate installation stress or adhesive failure, so surface restoration alone usually won’t solve the root cause.
For floating/click LVT, changes in humidity/temperature can increase seam stress if gaps are blocked or the floor was restrained.
For glue-down LVT, loose tiles may require re-adhering with the correct adhesive system specified for your flooring type.
– If you see lifting edges or separation at seams, the solution may be repair (or replacement) rather than surface restoration.
– For clicking/float-style floors: check whether the room conditions changed (humidity/temperature) and whether expansion gaps are blocked.
– For glue-down LVT: if tiles are loose, restoration may require re-adhering using the correct adhesive specified for your flooring type—surface-only methods won’t solve bond failures.
Common edge/seam causes to investigate:
– Perimeter restraints: Furniture or trim can restrict expansion.
– Moisture movement: Basements, slabs with moisture, or spills can weaken adhesive bonds in glue-down systems.
– Improper subfloor flatness: LVT joints can open when the floor isn’t level/flat within tolerances.
– Temperature swings: Radiant heat settings or HVAC changes can shift planks and stress seams.
Practical “do not miss” checks:
– Verify expansion gaps around vents, pipes, and the perimeter.
– Check for any soft or discolored subfloor areas in lift/loosened areas.
– Confirm whether your LVT is click-lock (floating) or glue-down and follow that system’s repair guidance.
Pros/cons: surface restoration vs. installation repair
| Approach | Best for | Pros | Cons / risks |
|---|---|---|---|
| Deep-clean + residue removal | Haze, film, dullness | Usually low cost and reversible | Doesn’t fix lift, gaps, or bond failure |
| Spot repair filler for scratches | Localized abrasion | Improves appearance without redoing the room | Color/texture blending varies by product and pattern |
| Resurfacing/refinishing (if allowed) | Broad dullness or uniform surface wear | Can restore overall look when supported by the wear layer | Not all LVT is designed for it; wrong method can worsen adhesion/finish |
| Seam/edge repair or replacement | Lifting edges, recurring separation | Addresses the root issue | Often higher labor; may require professional help for moisture/adhesion |
What can go wrong (common mistakes to avoid)
Most failed LVT restorations come from skipping diagnosis and using incompatible chemicals or abrasives. If you avoid these common missteps, you’ll protect the wear layer and reduce the chance of repeat haze.
Abrasive pads, steam, and alkaline cleaners can haze or degrade the surface finish depending on the LVT wear-layer design.
Generic floor polishes or waxes may bond poorly—or trap dirt—when they’re not specifically approved for your LVT product.
If seams lift due to moisture or bond failure, cosmetic refinishing won’t stop recurrence.
– Using abrasive pads, steam, or alkaline cleaners that can haze or damage the wear layer.
– Applying generic “floor polish” or wax without confirming compatibility—this can create an uneven shine or sticky buildup.
– Skipping assessment: trying to “refinish everything” when the real issue is residue, moisture, or lifting seams.
– Not testing a small area first when your floor has had previous products applied.
Other edge cases that change the plan:
– Existing coatings (unknown chemistry): If previous owners used an incompatible floor finish, you may need a manufacturer-approved removal sequence—or a professional restoration.
– Pattern depth and relief: Some LVT visuals (embossing) can make uniform shine harder to achieve even when the floor is clean.
– Commercial traffic habits: Grease, road salt, and disinfectants can accelerate dulling; you may need a maintenance protocol change after restoration.
Quick compatibility reminder: If you’re unsure about any cleaner, start with a small test patch. LVT finishes can respond differently across brands and wear-layer systems.
Verdict / tip: pick the restoration path that matches your LVT
The safest restoration strategy is: deep-clean first, correct residue next, then repair only the localized damage you can identify. If your LVT is severely damaged (large areas of wear, widespread seam failure, or repeated lifting), refinishing may not bring it back—replacement or professional reinstallation is often the more honest fix.
When haze is present, the highest-success path usually starts with pH-neutral cleaning and proper rinsing, not abrasive escalation.
Refinishing should only happen when the manufacturer’s care guide explicitly allows resurfacing for your exact LVT product.
If you suspect moisture or adhesive failure, treat restoration as a building-system issue, not a cosmetic one.
Who should skip DIY and move to a specialist sooner:
– You see persistent seam lifting after addressing obvious restraints/cleaning.
– You suspect moisture intrusion (basement slabs, recurrent dampness, swelling).
– Glue-down LVT tiles are loose or hollow-sounding, suggesting bond failure.
– You cannot obtain the manufacturer’s care/refinishing guidance for your exact product line.
Downside of the “clean-first” approach: If the dullness is caused by real wear-through or finish damage, cleaning will improve clarity but won’t fully restore the original factory look. In that case, plan for repair or replacement rather than repeating harsher chemical cycles.
pH Compatibility Targets for LVT Cleaning (General Ranges)
| # | Cleaner type | Typical pH range | LVT shine risk | Suitability |
|---|---|---|---|---|
| 1 | pH-neutral LVT cleaner (vinyl-safe formula) | ~6–8 | Low | ★★★★★★★☆ |
| 2 | Mild detergent-based cleaner (general hard floors) | ~7–9 | Low–Moderate | ★★★★★★☆☆ |
| 3 | Ammonia-based glass cleaner (not floor-rated) | ~10–12 | Moderate | ★★★☆☆☆☆☆ |
| 4 | Vinegar-based acidic solution (DIY) | ~2–3 | Moderate | ★★☆☆☆☆☆☆ |
| 5 | Alkaline degreaser / heavy-duty stripper | ~10–13 | High | ★☆☆☆☆☆☆☆ |
| 6 | Steam cleaning (moisture/heat exposure) | — | High (system-dependent) | ★☆☆☆☆☆☆☆ |
| 7 | Generic floor polish/wax (unapproved) | — | Variable (often high) | ★★☆☆☆☆☆☆ |
Note: “Typical pH” values reflect common chemistry categories; always follow your specific cleaner label and your LVT manufacturer’s care instructions.
Quick checklist: restore LVT floors fast
– [ ] Identify: haze/residue, surface scuffs, scratches, or lifting seams
– [ ] Sweep/vacuum with a soft-brush setting
– [ ] Deep-clean with pH-neutral cleaner made for vinyl/LVT
– [ ] Re-check for film/spotting before doing anything more aggressive
– [ ] Repair only what’s actually damaged (filler/spot repair)
– [ ] Confirm whether your specific LVT supports resurfacing/refinishing
– [ ] If edges lift or seams separate, plan for repair/reinstall—not just cleaning
FAQ
Can I restore LVT floors with steam?
Usually no—steam can cause damage or leave moisture issues. Use vinyl/LVT-approved cleaning methods instead, and [ADD: confirm with your LVT manufacturer’s care instructions].
Will polishing or waxing make LVT look new again?
Sometimes it causes more haze or buildup if it isn’t compatible with your floor’s wear layer/finish. Only use products your manufacturer explicitly allows—[ADD: cite your specific LVT brand/product care sheet if available].
What’s the best way to remove cloudy film on LVT?
Start with a pH-neutral vinyl/LVT cleaner, then address possible residue buildup if haze remains. If you have older coatings on the floor, follow the removal steps recommended by the flooring maker or [ADD: recommended residue-removal method for your product].
Can scratches be fully removed from LVT?
Light scuffs often improve with cleaning, but deeper scratches may only be partially improved with repairs. For full restoration, some LVT systems can be refinished—others require replacement—so it depends on your specific product.
When do I need to replace LVT instead of restoring it?
Replace rather than restore if you have widespread wear through the top layer, persistent separation at seams, or recurring lifting that indicates an underlying installation/moisture problem.
Sources
– [ADD: Manufacturer care and maintenance document for your exact LVT brand/product—include any notes on approved cleaners, whether steam is prohibited, and whether refinishing/resurfacing is allowed.]
– [ADD: Manufacturer installation guidelines for floating/click-lock LVT regarding expansion gaps and moisture/humidity limits.]
– [ADD: Technical data sheet or installation instructions for your specific LVT type (glue-down vs. click/float), including approved adhesives if lift/seam issues occur.]
Restoring LVT is mostly about choosing the correct “level” of intervention: deep-clean and residue correction for haze, targeted repair for scratches, and true structural fixes for lifting seams. If you follow the manufacturer guidance, test before you commit, and avoid steam/abrasives/polish when not approved, you’ll protect the wear layer while recovering the floor’s clarity and appearance.
Frequently Asked Questions
What are the first steps to restore LVT (LVP) floors after water damage or lifting?
Start by stopping the source of moisture and removing any standing water immediately to prevent further swelling. Inspect the LVT planks for cupping, lifted edges, or delamination, then remove baseboards if needed to access the perimeter. Dry the subfloor thoroughly using fans or a dehumidifier, and replace any damaged planks that cannot lay flat.
How do I fix scratched LVT floors and restore their appearance?
Clean the area with an LVT-safe cleaner and a soft microfiber mop to remove grit that can worsen scratches. For light scuffs, try a color-matched LVT polish or repair kit designed for luxury vinyl tile, following the manufacturer’s instructions. Deep scratches may require replacing individual planks or using a vinyl filler/marker repair product to blend the damaged surface.
Why is my LVT floor showing gaps or separating seams, and how can I restore it?
LVT gaps typically occur from improper acclimation, subfloor movement, or moisture-related expansion. Restore the floor by checking for high spots or unevenness, then ensuring the subfloor is flat and dry before re-locking planks where possible. If gaps persist or click-lock connections are damaged, replacing affected planks is usually the best way to fully restore the look and stability.
Which LVT floor cleaner and repair products are best for restoring the surface without damage?
Use cleaners labeled safe for luxury vinyl tile floors and avoid harsh chemicals, wax, or ammonia-based products that can dull or break down the finish. For restoration, choose a non-abrasive LVT polish or protective top coat that matches your floor’s wear layer type. For repairs, select an LVT-specific crack or scratch repair kit rather than wood filler or generic adhesives, since the wrong products can cause discoloration or poor adhesion.
Best practices—how do I restore LVT floors that look dull or worn (without re-laying the whole floor)?
Begin with a deep clean to remove embedded dirt using a pH-neutral, LVT-safe cleaner, then allow the surface to dry completely. If the wear layer is intact but looks faded, apply an LVT polish designed to refresh shine and color consistency; always spot-test first. If the floor is heavily worn through the protective layer, the only true “restore” is to replace the damaged LVT tiles or planks, since sanding or refinishing is not recommended for most luxury vinyl floors.
📅 Last Updated: October 07, 2026 | Topic: How to restore LVT floors? | Content verified for accuracy and freshness.
References
- https://en.wikipedia.org/wiki/Luxury_vinyl_tile
- Vinyl flooring
https://en.wikipedia.org/wiki/Vinyl_flooring - https://www.britannica.com/technology/vinyl-flooring
- https://www.cdc.gov/coronavirus/2019-ncov/community/clean-disinfect/index.html
- Coronavirus (COVID-19) and Disinfectants | US EPA
https://www.epa.gov/coronavirus - https://www.who.int/publications/i/item/cleaning-and-disinfection-of-environmental-surfaces-in-the-context-of-covid-19
- https://pubmed.ncbi.nlm.nih.gov/?term=resilient+flooring+maintenance+cleaning
- Google Scholar Google Scholar
https://scholar.google.com/scholar?q=luxury+vinyl+tile+repair+replacement+maintenance - Google Scholar Google Scholar
https://scholar.google.com/scholar?q=lvt+flooring+scratch+repair+how+to+refinish - https://www.sciencedirect.com/search?qs=luxury%20vinyl%20tile%20maintenance%20cleaning