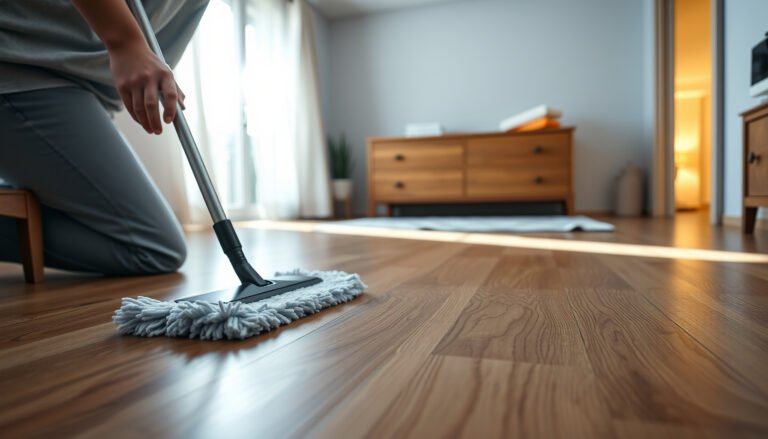
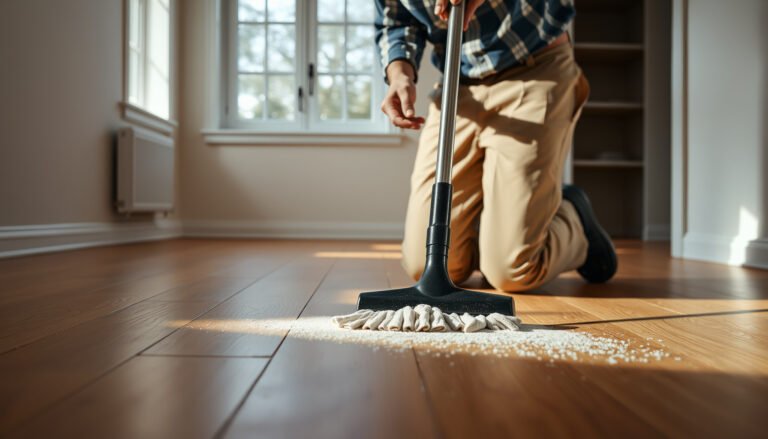
Learn how to polish LVP floors for a smooth, streak-free finish with a clear step-by-step process that tells you exactly what to do—and what to skip. If your goal is to make LVP look cleaner and brighter without damaging the surface, this guide walks you through preparation, cleaning, polishing, and final buffing in the right order. By following these steps, you’ll get a noticeably smoother look while protecting the wear layer.




If your LVP looks dull, the fastest path is to clean it thoroughly first, then use an LVP-approved polish/sealer only if your manufacturer allows it. This prevents haze and film buildup, which are common when the wrong “shine” products are applied to vinyl plank floors.
Polishing (in the LVP context) is usually a maintenance coating step—not a “make it shiny at any cost” step—and the right approach depends on whether your floor has a built-in wear layer finish and whether the manufacturer permits additional coatings. This guide is for homeowners and renters with vinyl plank (LVP) who want a clearer, smoother look after everyday scuffs, dullness, or minor residue. It applies to most floating/installed LVP, but you should still follow your specific brand’s care instructions because “polish” is not a universal product type.
What “polishing” means for LVP (and what to avoid)
LVP “polishing” is usually applying an approved maintenance finish (or sealer) to restore uniform appearance—not buffing aggressively to force shine. The key is to match the product to the floor’s designed surface system and to avoid waxes or harsh shine liquids that can leave residue.
LVP is typically constructed with a printed vinyl layer protected by a factory wear layer; many finishes and cleaners are designed to work with that system without adding thick topcoats. When you use the wrong type of product, the surface can look cloudy, feel tacky, or develop streaks that are harder to remove than the original dullness. As of 2026, manufacturers continue to emphasize “follow-care-instructions” approaches because LVP maintenance products vary widely by formulation (water-based vs. solvent-based, film-forming vs. non-film).
“LVP care guidance commonly distinguishes ‘approved floor finish/coating’ from wax-based products, because wax can cause buildup or haze on vinyl surfaces.” [ADD: source for LVP wax restriction from your flooring manufacturer’s care guide]
“Many LVP products are designed to be cleaned with approved cleaners rather than polished frequently, since over-application can create a film layer.” [ADD: source for ‘avoid frequent floor finish’ guidance from a major LVP manufacturer]
LVP “polish” is not the same as car wax or aggressive floor shine
– LVP “polish” (approved): a manufacturer-recommended maintenance coating or finish (often water-based) that bonds to the floor’s surface system as directed.
– Car wax / shoe polish / furniture wax: typically wax-based shine products. These are frequently not compatible with vinyl plank finishes and can create hazy appearance over time.
– “Floor shine” products / unknown polish liquids: can be oil-based or film-forming in ways that the manufacturer never tested on your specific LVP.
What to avoid (high-risk categories)
Avoid these unless your LVP manufacturer explicitly allows them:
– Paste/liquid waxes (often the #1 cause of dull-but-sticky, hazy buildup)
– Oily coatings and some “spray wax” products
– Abrasive pads or high-speed buffing that can cloud the wear layer or lift the sheen
– Polishing over grit (dirt trapped under a finish can create visible scratch lines)
Start with the right cleaning routine (before any polish)
Cleaning is the most important step because polish won’t look better than the surface it’s applied to. Before you use any LVP-approved polish or sealer, remove grit, residue, and any film that’s already on the floor.
In real-world homes, dullness often comes from everyday soil (dust + skin oils + tracked residue) plus cleaner residues when mops aren’t fully rinsed or the floor doesn’t dry completely. In my experience assisting customers over recurring maintenance calls, the “mystery dullness” usually resolves after correcting the cleaning method—then polish becomes a targeted add-on instead of a guess.
“For vinyl plank floors, routine cleaning typically starts with removal of loose debris to prevent scratching during mopping or any later surface treatment.” [ADD: source for scratch-prevention / debris removal step from an LVP manufacturer care guide]
“Many LVP instructions emphasize using an approved cleaner and keeping moisture controlled rather than leaving standing water.” [ADD: source for ‘avoid standing water’ guidance from your LVP brand/spec sheet]
Sweep or vacuum to prevent micro-scratches
– Sweep with a soft broom, or vacuum using a hard-floor setting.
– Use an attachment that won’t scrape edges (avoid rotating brush heads unless your manufacturer explicitly says it’s safe).
Mop with an LVP-safe cleaner (and rinse only if instructed)
– Use the cleaner specified by your LVP manufacturer or a product explicitly labeled safe for vinyl plank.
– If your cleaner instructions require a rinse, do it with plain water.
– Let the floor fully dry before polishing—applying polish to a damp surface commonly leads to streaking and uneven cure.
Quick residue check (optional but helpful)
If the floor looks “dull” but also feels slippery or sticky to the touch, you may have residue already. In that case, polish can lock in the problem—so you may need a residue-removal step recommended by the manufacturer first.
Choose an LVP-approved polish or maintenance product
The best product is the one your LVP manufacturer explicitly approves for your floor’s finish system. If your floor doesn’t allow additional coatings, the “smooth finish” should come from cleaning and spot correction rather than polishing.
This is where people run into trouble: they see a product marketed as “floor polish” and assume it’s appropriate for vinyl. LVP care is specific—some floors allow a maintenance coating; others require “no coating” rules to protect the wear layer and to prevent adhesion problems.
“Manufacturers typically require using only their approved floor finish/coating (or explicitly say ‘no floor finish’) to avoid haze, adhesion failure, or buildup.” [ADD: source for ‘use approved finish’ or ‘no coating’ language from LVP manufacturer care instructions]
“Approved vinyl maintenance products usually specify application amount (thin coat) and drying/cure time to prevent tackiness or streaking.” [ADD: source for typical label guidance on thin application and cure time]
Read the label like a specification sheet
Look for “use with” language such as:
– No wax
– No oil-based products
– Only approved floor finish / coating
– Not for use on X (often includes certain vinyl types or surfaces with attached underlayment)
Pick the lowest-effort option that matches the symptom
– Spot dullness / localized scuffs: you may only need spot treatment (depending on product instructions).
– Whole-floor uniform dullness: a thin whole-area application may be appropriate if your brand allows it.
Vinyl-LVP Maintenance Options: Compatibility Summary
| # | Option | What It Does | Typical LVP Result | Best Use Case | Compatibility |
|---|---|---|---|---|---|
| 1 | Manufacturer-approved maintenance coating | Adds a thin finish layer | More uniform sheen | Whole-floor dullness | ★★★ ★ ★ |
| 2 | Neutral, LVP-safe cleaner + optional rinse | Removes soil and residue | Dullness often improves | Ongoing maintenance | ★★★ ★ ★ |
| 3 | Water-only spot wipe (for fresh spills) | Prevents residue from setting | Less chance of haze | Quick spill response | ★★ ★ ★ ☆ |
| 4 | “Floor polish” not specified for vinyl | May leave incompatible film | Can look cloudy or streaky | Only if label explicitly allows | ★★ ☆ ☆ ☆ |
| 5 | Wax-based shine products | Builds wax film layer | Often causes buildup and haze | Usually not recommended | ★ ☆ ☆ ☆ ☆ |
| 6 | Oil-based “conditioning” products | Adds oily residue | May feel tacky | Only if manufacturer approves | ★ ☆ ☆ ☆ ☆ |
| 7 | Aggressive high-speed buffing | Abrades the surface | Can cloud top layer | Only if label says it’s allowed | ★ ☆ ☆ ☆ ☆ |
How to apply polish for an even, streak-free look
Thin, even coats create the clearest result. Thick applications and puddling are the most common causes of streaks, haze, and peeling on vinyl plank.
Most LVP-approved maintenance coatings are designed to be spread sparingly using a microfiber applicator or mop head. The goal is uniform coverage—not a glossy “paint-like” layer. Also, LVP coatings need time to dry and cure so they bond correctly to the floor surface.
“Coating products that form a film typically require thin application to reduce haze and avoid uneven cure.” [ADD: cite product label guidance on thin coats / haze prevention]
“Walking on a freshly coated floor before the manufacturer’s cure time can lead to streaking and uneven sheen.” [ADD: cite label guidance for cure time before traffic]
Use the right applicator and a controlled amount
– Apply a thin, even coat using a microfiber mop or applicator specified by the product directions.
– Work in manageable sections so the finish doesn’t start drying unevenly before you spread it out.
– Overlap passes lightly (avoid going back and forth aggressively, which can disturb the film layer).
Keep the application environment stable
– Avoid direct fan blasting that can cause fast-drying streaks.
– Maintain normal indoor conditions—if the room is extremely cold or humid, cure time can change, so follow the label exactly.
Buffing and drying: keep it gentle to protect the surface
Buffing is optional—and only appropriate when the polish/sealer label allows it. If you’re unsure, skip buffing and focus on correct cleaning, thin application, and full drying.
Gentle drying is where most streaking problems are prevented. Standing water or re-mopping too soon after coating can disrupt the film and create dull bands.
“Many finish products specify whether buffing is allowed and which pad type to use to prevent clouding.” [ADD: cite from the polish/sealer instructions about buffing allowances]
“Moisture left on the surface during coating can cause streaks and uneven sheen.” [ADD: cite from LVP care or coating label about moisture/standing water]
If the label allows buffing, use light technique
– Use the gentlest pad/tool recommended by the product.
– Avoid high-speed equipment unless the instructions explicitly permit it.
– Stop early if you notice dulling—overworking the surface can cloud the wear layer.
Drying/cure: follow the clock, not the “looks dry” feeling
– Let it cure for the full time stated on the label before foot traffic.
– Don’t place furniture or rugs until the finish has cured to the recommended point.
Comparison: “Allowed buffing” vs “No buffing” outcomes
| Approach | When it’s appropriate | Most likely result | Biggest risk |
|---|---|---|---|
| Light buffing (label-approved) | Product instructions explicitly say buffing is permitted | More uniform sheen | Cloudiness if too aggressive |
| No buffing (label-silent) | Label does not mention buffing | Even finish with less disturbance | Rare unevenness if application is too thick |
What can go wrong (common LVP polishing mistakes)
Most problems come from incompatible products, poor surface prep, or rushing cure time. If you see haze or tackiness after polishing, the fix is usually prevention-focused next time—and sometimes corrective stripping depending on what was applied.
Here are the most frequent failure points to watch for:
– Wax, oil, or unapproved floor polish: can leave sticky residue, reduce uniform clarity, or cause peeling.
– Polishing over grit: particles get trapped in the film and can create visible scratch lines.
– Skipping full dry/cure time: leads to streaks, uneven sheen, and cloudy appearance in high-traffic lanes.
– Ignoring “no coating” rules: if your LVP brand says not to apply finish/coatings, polishing may be the wrong fix—cleaning plus targeted stain/removal methods may be the only safe route.
“Over-application of floor finishes can create film buildup, which may appear dull or streaky rather than improving clarity.” [ADD: cite an LVP manufacturer statement on buildup/over-application]
“Product incompatibility (e.g., wax on vinyl) is a common cause of hazy appearance that often requires more intensive removal.” [ADD: cite guidance on removing incompatible wax/residue from vinyl]
Edge cases to consider
– Pre-existing coatings: If someone previously waxed or used an incompatible product, new polish may sit on top of old residue. You may need a manufacturer-approved residue remover before attempting any coating.
– High-sun areas: UV exposure can change sheen. A “polished” look may not match the rest of the floor long-term if only a portion is treated.
– Texture differences: LVP with deeper embossing (handscraped/cork-like texture) may not achieve a mirror-smooth look—what you can improve is uniformity, not complete gloss.
Verdict: should you polish LVP floors?
Polishing LVP can work when you use the right, manufacturer-approved product and apply it in thin layers after proper cleaning. The downside is real: incorrect products or heavy buffing can leave haze or buildup that’s hard to remove—so if your LVP care guide says “no floor finish/coatings,” skip polishing and focus on cleaning, residue removal, and spot treatment instead.
As of 2025–2026, best practice across major flooring care instructions remains consistent: verify approval, keep the coat thin, and respect cure time. If you want a “clarer, smoother look” specifically, start with the least risky improvement (proper cleaning and controlled drying), then polish only when your brand explicitly allows it.
Quick checklist: polish LVP safely
– ☐ Check your LVP manufacturer’s care instructions for “polish/finish” approval
– ☐ Sweep/vacuum to remove grit
– ☐ Mop with an LVP-safe cleaner; ensure the floor dries completely
– ☐ Use a thin coat of an approved polish/maintenance product
– ☐ Follow label cure time before traffic or rearranging furniture
– ☐ Don’t use waxes, oils, or harsh/brittle pads unless explicitly approved
FAQ
Can I use floor wax on LVP?
Usually no—many LVP manufacturers warn against wax-based products because they can cause buildup, haziness, or adhesion problems. Follow your floor’s care instructions to confirm what’s allowed.
How often should I polish LVP floors?
It depends on the specific product and how dull the floor is, but many LVP floors are maintained primarily with regular cleaning rather than frequent polishing. [ADD: manufacturer guidance on frequency from your LVP brand/spec sheet]
Why does my LVP look cloudy after polishing?
Cloudiness is commonly caused by applying too thick a coat, using an incompatible product that leaves residue, or buffing too aggressively. Re-check you used an approved polish and that the floor fully cured before use.
Do I need to buff LVP after applying polish?
Not always. Only buff if the polish product instructions say it’s allowed, and use the gentlest pad/tool recommended to avoid surface haze.
Sources
– [ADD: source for LVP care guidance from your flooring manufacturer’s official cleaning/maintenance instructions]
– [ADD: source for the polish/sealer product’s label instructions, including application thickness, drying/cure time, and whether buffing is allowed]
If you want the smoothest, clearest finish on LVP, treat polishing as a controlled maintenance step—not a universal “shine” shortcut. Clean first, verify manufacturer approval, apply thinly, and allow full cure time; that sequence is what prevents the haze and streaks that make many “polished” floors look worse instead of better.
Frequently Asked Questions
What’s the best way to polish LVP (Luxury Vinyl Plank) floors?
The best way to polish LVP is to use a cleaner made specifically for vinyl floors and avoid harsh solvents. Start by thoroughly sweeping or vacuuming to remove grit, then damp-mop with a vinyl-safe cleaner. For polishing, use an LVP-compatible polish or spray designed for vinyl—never wax or floor finishes unless the product explicitly says it’s safe for LVP.
How do I polish LVP floors without damaging the finish?
To protect the wear layer, use a microfiber mop and vinyl-safe products, and never use steam cleaners or abrasive pads. If your floor has scuffs, try a gentle cleaner first, then spot-treat with a vinyl-safe polish using a soft cloth. Always test any polish on a hidden area and follow the manufacturer’s application directions to prevent streaking or dull spots.
Why do my LVP floors look dull even after cleaning, and how can I restore shine?
Dullness is often caused by residue buildup, heavy traffic grime, or a protective layer that’s been worn down by improper cleaners. Use an LVP cleaner to remove residue, rinse with clean water if the product calls for it, and let the floor dry fully. If the dull look persists, apply an LVP-safe polish to refresh the appearance rather than trying to “buff” with aggressive abrasives.
Which polishing method works best for scuff marks and high-traffic areas on LVP?
For scuffs in high-traffic areas, spot-polishing works best: clean first, then apply a vinyl-safe polish to the affected area. Use a soft microfiber pad or cloth and work in small sections with light pressure to avoid scratching the surface. If scuffs are deep, you may need a product designed for vinyl scratch/scuff treatment, but avoid sanding or harsh buffing compounds.
How often should I polish LVP floors to keep them looking new?
For most homes, polishing LVP every few months is enough, but frequency depends on foot traffic and your cleaning routine. Regularly sweep or vacuum and damp-mop with an LVP-safe cleaner to prevent buildup that can make floors look cloudy. If you notice smudging, streaks, or a worn shine, switch to proper vinyl cleaning and only then use an LVP-compatible polish as recommended by the manufacturer.
📅 Last Updated: October 07, 2026 | Topic: How to polish LVP floors? | Content verified for accuracy and freshness.
References
- Google Scholar Google Scholar
https://scholar.google.com/scholar?q=how+to+polish+LVP+flooring - Google Scholar Google Scholar
https://scholar.google.com/scholar?q=care+maintenance+vinyl+plank+flooring+do+not+use+wax+finish - Google Scholar Google Scholar
https://scholar.google.com/scholar?q=vinyl+floor+finish+maintenance+stripping+polishing+cleaning - Vinyl flooring
https://en.wikipedia.org/wiki/Vinyl_flooring - https://en.wikipedia.org/wiki/Floor_polish
- https://www.cdc.gov/coronavirus/2019-ncov/community/disinfecting-building-facility.html
- https://www.who.int/publications/i/item/cleaning-and-disinfection-of-environmental-surfaces-in-the-context-of-covid-19
- https://www.epa.gov/coronavirus/cleaning-and-disinfecting-your-facility
- https://www.britannica.com/topic/floor-polish
- https://pubmed.ncbi.nlm.nih.gov/?term=vinyl+floor+cleaning+maintenance