


Want to install engineered wood floors over plywood, fast and correctly? This step-by-step guide shows the exact prep, underlayment, fastening, and expansion-gap details that make an over-plywood installation hold tight and stay flat. Follow it and you’ll avoid the common failure points—warping, squeaks, and board buckling—so the floor performs the way it should.




If your plywood subfloor is flat, solid, and properly acclimated, you can install engineered wood floors over it using a nail-down or click/float system (and sometimes glue-down). The key is doing the prep and checks first—subfloor flatness, moisture readiness, and expansion gaps—because those variables control whether you’ll get squeaks, gapping, and premature seam failure.
Covering plywood is common in interior remodels and in “avoid-the-slab” plans where you’re not installing over concrete. This guide is built for homeowners and contractors who want a clear, spec-driven sequence: verify plywood conditions, choose an approved installation method, prep the surface, then install with layout discipline so the floor behaves as designed.
Confirm your engineered wood installation method (nail, click/float, or glue)
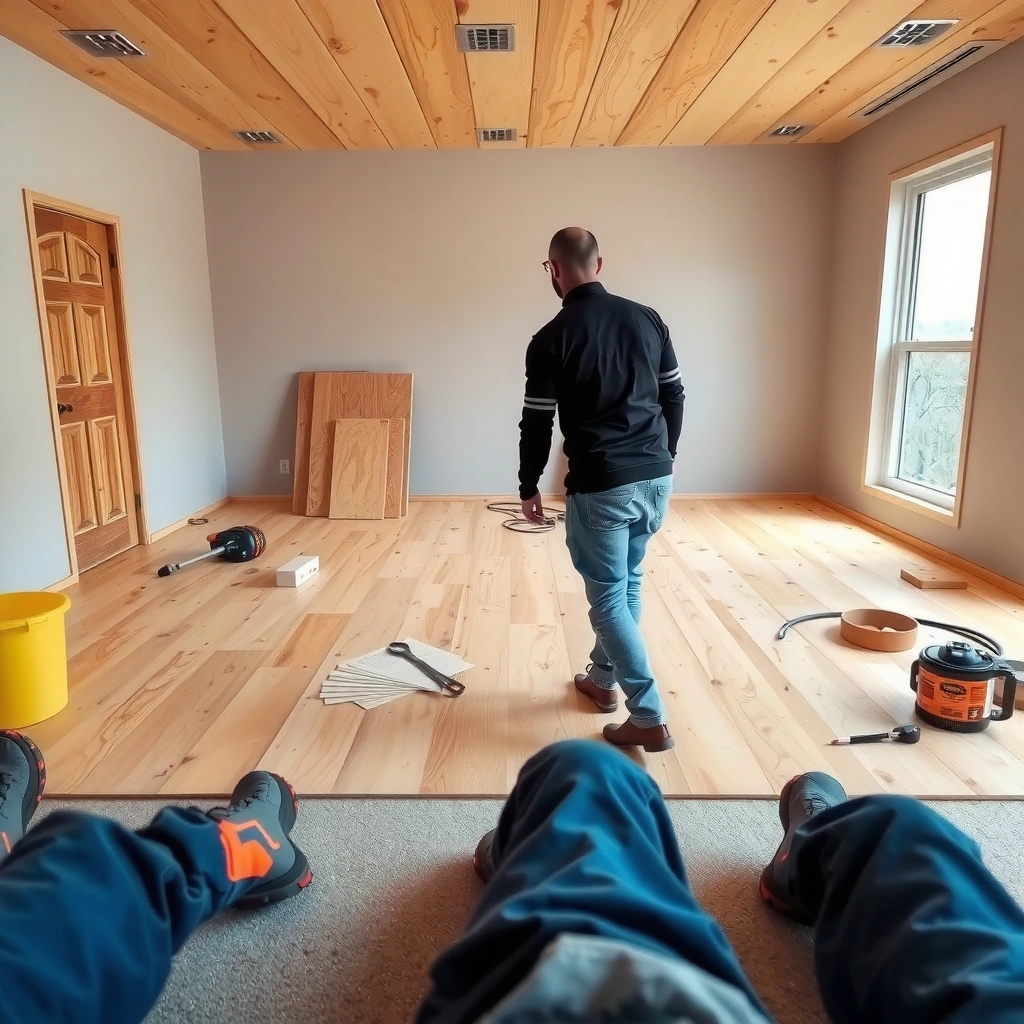
Pick the installation method that your specific engineered wood product and underlayment/vapor system approve for plywood. “Over plywood” can still mean different approved systems, and using the wrong method is one of the fastest ways to void performance expectations.
“Over plywood” installation requirements are not universal; the engineered wood and underlayment manufacturer approvals determine what’s allowed.
Click/float systems rely on an expansion gap plus an approved underlayment—not adhesive bonding—to manage seasonal movement.
Nail-down systems depend on correct nail type, spacing, and sufficient plywood fastening—flatness alone isn’t enough.
The three common systems behave differently:
– Nail-down engineered wood: The planks are fastened mechanically (often through the face or tongue using cleats/nails). Your plywood must be firm enough to accept nails and flat enough to keep boards supported.
– Click/float engineered wood: Planks lock together and “float” over an approved underlayment (and sometimes a separate vapor layer). The underlayment’s role is cushioning/support, while expansion gaps handle perimeter movement.
– Glue-down engineered wood: Planks are bonded with a moisture-safe adhesive system (adhesive type, trowel notch size, open time, and curing conditions matter). Glue-down over plywood is only correct when your manufacturer explicitly permits the system.
According to typical flooring installation frameworks used in the industry, moisture control and flatness are prerequisites regardless of method—because engineered wood is dimensionally responsive to humidity. For example, ASTM F2170 measures in-situ relative humidity (RH) using probes; wood-floor guidance commonly references product-specific RH targets at installation time ([ADD: source for ASTM F2170 + a cited example target from an engineered wood manufacturer spec]).
Quick comparison (what method usually prioritizes)
| Feature | Nail-down | Click/float | Glue-down |
|---|---|---|---|
| Primary success factor | Plywood fastening + flatness | Locking-joint support + gaps | Adhesive system + moisture limits |
| Most sensitive failure mode | Squeaks from movement/loose plywood | Seam stress from poor flatness/gaps | Adhesive bond failure from wrong adhesive or moisture |
| Best for | Durable installs with sound subfloor | Quieter floors and faster projects | Where manufacturer-approved bonding is feasible |
[ADD: Optional: add your site’s internal link to a “how to choose underlayment” page if you have one.]
Inspect plywood: flatness, fastening, and moisture readiness
You should only install engineered wood over plywood that is flat, securely fastened, and within the moisture conditions required by your floor manufacturer. If you correct the subfloor now, you prevent squeaks, gapping, and seam failures later.
“Flatness tolerance” is defined in the installation spec; exceeding it can cause locking-joint stress even if the plywood looks level.
Loose plywood sheets behave like a spring; that movement often becomes squeaks after installation.
Moisture issues are cumulative—fixing only the surface (paint/dust) won’t correct trapped moisture under plywood.
Start by assessing the structure:
1. Check for movement: Walk the floor area. If any plywood panels flex or shift, fasten them down before installing.
2. Verify panel fastening: Look for loose edges, missing screws/nails, and “springy” spots around seams. Re-secure per the engineered wood instructions and good building practice.
3. Confirm flatness: Use a long straightedge (commonly 6–10 ft) and measure gaps under it. Then apply the manufacturer’s tolerance rule exactly: [ADD: subfloor flatness tolerance from your floor manufacturer].
4. Address high spots and low spots: Many failures come from small ridges or dips that prevent uniform contact under nail lines or underlayment.
Next, test moisture readiness—especially in basements, crawlspaces, bathrooms, or any area with prior water history:
– Use the testing approach required by your flooring instructions: [ADD: test method requirement from your manufacturer, e.g., RH/equilibrium moisture].
– Record results and compare to the product’s installation limits: [ADD: target limits from your flooring spec].
For anchoring, note that industry-standard moisture testing methods include ASTM approaches such as:
– ASTM F2170 for in-situ RH using probes ([ADD: cite ASTM F2170 reference]).
– ASTM F1869 for calcium chloride (mostly used over concrete slab, but sometimes referenced as guidance in moisture workflows) ([ADD: cite ASTM F1869 reference]).
Also: panel geometry is consistent—most residential plywood sheets are 48 in × 96 in (4 ft × 8 ft)—so seam locations are predictable and you can plan underlayment seams and fastener patterns accordingly.
Plywood condition decision table
Typical Subfloor Readiness Targets for Engineered Wood Over Plywood (Installation Day Benchmarks)
| # | Readiness item | What to measure | Common acceptable range | Risk if out of range |
|---|---|---|---|---|
| 1 | Flatness over 10 ft | Straightedge gap | ≤ 3/16 in (4.8 mm) | High ★ |
| 2 | Plywood fastening | Movement underfoot | No panel “bounce” | High ★ |
| 3 | Moisture testing method | RH probes / EMC (per spec) | Use manufacturer-required method | Medium–High ★ |
| 4 | Moisture target at install | RH / equilibrium moisture | Spec-dependent (often ≤ 75% RH for wood) | High ★ |
| 5 | Underlayment compatibility | Thickness + vapor rating | Only approved product/system | Medium ★ |
| 6 | Perimeter expansion gap | Distance to walls | Spec-required (often 1/4 in min) | High ★ |
| 7 | Seam support under boards | No voids at sheet seams | No unsupported transitions | Lower ★ |
Note: The flatness, moisture, and expansion-gap targets must be taken from your exact engineered wood and underlayment manufacturer installation documents; the ranges above reflect common industry benchmarks, not a substitute for your specific spec.
Prep the surface so the floor locks, nails, or bonds correctly
Prep decides outcomes: a clean, compatible plywood surface helps underlayment seating, fastener holding, and adhesive bond performance. If you skip debris removal or miss an approved vapor layer, you can lose the engineered wood system’s designed behavior.
Engineered wood performance relies on contact—dust, paint overspray, and debris can create micro-gaps that show up as squeaks.
If your method requires underlayment or a vapor layer over plywood, install only the thickness and material the flooring manufacturer approves.
Before fastening, verify plywood edges and seams are stable; prep does not fix structural movement.
Do this in a disciplined order:
1. Clean thoroughly: Vacuum (HEPA if available), remove construction dust, and scrape off paint drips, texture debris, or drywall dust.
2. Remove interference ridges: If you have ridges between plywood sheets, follow your floor manufacturer guidance for leveling/sanding. Use this spec requirement: [ADD: whether sanding/leveling is required per your flooring spec].
3. Address adhesive contamination risks (glue-down only): Never glue over sealers or unknown coatings unless the manufacturer approves them.
4. Install underlayment/vapor layer only when approved: Some click/float systems require a specific underlayment thickness and type; nail-down systems may require a vapor layer only; glue-down systems typically do not use a soft cushioning underlayment (adhesive needs direct, controlled bonding).
In my own projects, the most common “surprising” issue has been how much fine dust remains after sanding—those residues create a slightly uneven contact plane that makes locking joints feel tight on day one but opens seams after humidity swings. If you’re unsure, re-vacuum immediately before installing underlayment or planks. ([ADD: your site can link to your cleaning/vacuuming tool guide if desired.])
Plan the layout and leave the right expansion gap
Plan before you cut: the best-looking floor can still fail if you ignore expansion space, door transitions, and end-joint staggering. A dry layout helps you hit straight rows and avoids forcing click seams into uncomfortable shapes.
Expansion gaps aren’t optional; they prevent perimeter restriction that leads to buckling or gapping.
Dry-laying rows makes alignment problems visible before you commit with nails or glue.
Staggered end joints reduce stress concentration at seam lines and improve overall stability.
Your planning sequence:
1. Choose a starting reference: Use the longest straight wall or the flattest plane as your guide.
2. Account for transitions and clearances: Plan around doorways, hearths, and floor vents so you don’t trap a floating system under a fixed threshold.
3. Dry-lay: Lay a few rows (without fastening) to confirm how planks behave at end joints and whether your row widths are consistent.
4. Maintain expansion gaps: Use your floor’s required gap at the perimeter and at fixed objects—[ADD: expansion gap size from your flooring instructions].
5. Stagger end joints properly: Follow the product’s minimum staggering—often at least [ADD: minimum staggering requirement]—and ensure you keep joints aligned to the system’s locking profile.
Layout mindset that avoids callbacks
– Don’t “tighten” gaps out of fear—engineered wood needs space to move.
– Don’t end a row with a tiny offcut unless the manufacturer allows it; narrow boards are harder to install straight and can compromise joint strength.
Install the engineered planks over plywood (by method)
Install using the system-specific workflow: straight first rows, correct fastening patterns (nail-down), proper locking technique (click/float), or the exact adhesive trowel and timing (glue-down). When you follow the manual sequence, the floor behaves predictably through seasonal changes.
Nail-down installs require the correct nail/cleat spacing and edge distances because plywood support directly affects squeak risk.
Click/float flooring works when you lock seams without forcing and when the subfloor stays within flatness tolerances.
Glue-down success depends on adhesive selection, proper trowel notch geometry, and staying within spread/open time limits.
Nail-down installation
– Snap chalk lines and keep the first row straight.
– Fasten with the pattern and spacing specified in your installation manual—[ADD: nail spacing/pattern from your installation manual].
– Maintain edge/face distances exactly as stated to avoid splitting tongues or undermining joint strength.
– Work in consistent rows; do not “chase” crooked walls by bending planks.
Click/float installation
– Use the approved underlayment and install it per system direction.
– Lock rows together using the correct angle/pressure method; don’t hammer joints.
– Keep the floor elevated from fixed points using the required perimeter expansion gap—[ADD: gap size].
– Periodically check seam alignment so you don’t accumulate error.
Glue-down installation (only if your product approves plywood + glue)
– Use the required adhesive type and trowel notch size from your manufacturer docs—[ADD: adhesive type and trowel size from manufacturer docs].
– Follow spread time and working/open time rules so adhesive stays tacky as you set boards.
– Ensure you use the correct adhesive coverage pattern; under-coverage can mimic flatness problems by creating hollow bonds.
What can go wrong (and how to avoid it)
Most installation failures trace back to three root causes: subfloor movement, moisture imbalance, or incorrect system compatibility (wrong method/underlayment/gaps). If you treat these first, the visible problems usually don’t show up.
Gapping is often a moisture or expansion-gap problem more than a “bad plank” problem.
Squeaks typically indicate insufficient plywood fastening or voids/high spots that prevent uniform support.
Locking-joint separation in click/float systems is frequently linked to flatness exceeding the manufacturer tolerance.
Here’s a practical pros/cons contrast you can use to decide how strict you need to be with subfloor correction:
| Choice | Pros (typical) | Cons / risks |
|---|---|---|
| Click/float over plywood | Fewer fastener variables; often quicker install | Seam issues if flatness/gaps/underlayment aren’t within spec |
| Nail-down over plywood | Firm feel; strong mechanical hold when subfloor is correct | Squeaks if plywood isn’t solid or nail plan isn’t followed |
| Glue-down over plywood | Stable, crisp feel when executed correctly | Bond failure if adhesive system isn’t exactly matched or moisture limits are exceeded |
Most common failure modes to watch
– Gapping/cupping: Often starts with moisture issues, inadequate acclimation, or missing expansion gaps.
– Squeaks: Usually indicates plywood movement (loose sheets, weak fastening) or poor support due to high spots.
– Weak click joints: Forcing seams, inconsistent pressure/angles, or incompatible underlayment that reduces joint performance.
– Glue-down failures: Wrong adhesive/under-coverage or applying outside adhesive open time.
– Underlayment mismatch: Using too thick/soft a layer under click/float can reduce support and stress seams.
For moisture measurement credibility, align with ASTM methodologies and use manufacturer thresholds: ASTM testing methods define how readings are obtained ([ADD: cite ASTM F2170 and/or moisture standard referenced by your floor manufacturer]), while your flooring warranty defines the acceptable limits.
Verdict / tip: choose based on your plywood condition—and don’t skip the specs
If your plywood is flat, dry, and solid (no movement underfoot), engineered wood over plywood is usually a straightforward install. Click/float is often the most forgiving day-to-day as long as you follow flatness and gap requirements; nail-down can be durable but demands strict fastening and subfloor stability.
The “best” method is the one your engineered wood warranty actually approves for plywood and for your moisture/flatness conditions.
If flatness or moisture is out of spec, correct the plywood first—installing over it usually just transfers the problem into the planks.
That said, there are downsides and “do not proceed” situations:
– Skip/stop if moisture testing does not meet your engineered wood limits—especially in basements or any area with previous leaks.
– Skip/stop if you cannot achieve the required flatness tolerance after flattening/repair.
– Skip/stop if your engineered wood documentation doesn’t approve your chosen method (including underlayment/vapor requirements) for plywood.
If you’re unsure whether your subfloor meets the spec, consider a qualified flooring installer or flooring inspector to validate measurements before you commit. ([ADD: consider pro installation link for your site, if applicable, without affiliate claims.])
Quick checklist to save for install day
– [ ] Confirm your engineered wood allows installation method over plywood ([ADD: method + warranty statement])
– [ ] Plywood is flat within the manufacturer’s tolerance ([ADD: tolerance])
– [ ] Plywood is securely fastened; no movement or squeaks
– [ ] Moisture testing matches flooring requirements ([ADD: test method + target limits])
– [ ] Underlayment/vapor layer is approved for your method
– [ ] Expansion gap around perimeter and fixed objects ([ADD: gap size])
– [ ] First rows are straight; end joints are staggered per spec ([ADD: minimum staggering])
– [ ] Install follows nail/glue patterns and timing rules exactly ([ADD: nail spacing or adhesive open time])
FAQ
Can I install engineered wood directly over plywood without sanding?
Sometimes—only if the plywood is clean and meets the installation spec for flatness and surface condition. If there are ridges or low spots beyond the allowable tolerance, you’ll likely need sanding/leveling or other flattening steps per your flooring instructions ([ADD: your product’s flatness guidance]).
Do I need underlayment over plywood for engineered wood?
It depends on your engineered wood and locking system. Many click/float floors require an approved underlayment, while some nail-down installs need a specific vapor layer only (or none). Use your flooring manual’s plywood compatibility statement and underlayment thickness/material requirements ([ADD: underlayment/vapor layer requirement from your manual]).
What’s the biggest cause of gaps after installing over plywood?
The most common causes are missing or incorrect expansion gaps, insufficient acclimation, and moisture imbalance between the subfloor and flooring. Flatness issues can also contribute by stressing joints and preventing consistent contact.
Is nail-down always better than click/float on plywood?
Not necessarily. Nail-down can feel more solid, but it requires correct plywood fastening and strict nail pattern compliance. Click/float can perform very well when flatness, underlayment, and expansion gap rules are followed—again, based on the product documentation.
What should I do at doorways or floor transitions?
Use the transition profile and method specified in your flooring guide—usually involving expansion space and a transition that allows movement. Dry-fit the layout so floating sections aren’t pinned by the threshold or transition trim.
Sources
– [ADD: Manufacturer installation guide for your specific engineered wood product—subfloor requirements, flatness tolerance, expansion gap, and approved underlayment/vapor layer]
– [ADD: Manufacturer instructions for your chosen underlayment (if applicable)—vapor barrier and compatibility notes]
– [ADD: Adhesive manufacturer technical data sheet (only if glue-down is used)—trowel/spread rate and open time requirements]
– ASTM standard references used by moisture testing frameworks: [ADD: cite ASTM F2170 and/or ASTM F1869 documents used in your flooring moisture workflow]
– [ADD: If your floor manufacturer references a specific moisture standard or target methodology, list it here]
A plywood-underlayment engineered wood floor succeeds when the system is installed exactly as specified: verify moisture readiness, confirm flatness and fastening, use approved underlayment/vapor layers, plan your layout with correct expansion gaps, and install using the correct workflow for nail-down, click/float, or glue-down. If any one of those prerequisites fails, correct the subfloor first—because most “mystery problems” (squeaks, gapping, seam separation) are really spec and preparation problems in disguise.
Frequently Asked Questions
What preparation steps should I take before installing over plywood engineered wood floors?
Start by ensuring the plywood subfloor is clean, dry, and securely fastened with no squeaks or loose spots. Check subfloor flatness with a straightedge—most engineered wood manufacturers require the floor to be within about 1/8″ over 6 feet (or similar tolerances). Confirm moisture conditions using a moisture meter, and address any high spots or dips by sanding or leveling as needed. Finally, remove dust and verify you can maintain the manufacturer’s required expansion gap at walls and fixed objects.
How do I choose the right underlayment when installing engineered hardwood over plywood?
The best underlayment depends on whether your engineered wood has an attached pad and the installation method (floating vs. nail/glue-down). For floating installations, use an underlayment system approved for engineered wood that provides cushioning and vapor control, particularly over plywood. For nail-down or glue-down engineered wood floors, you typically need either no underlayment or a thin, manufacturer-approved underlayment to avoid interfering with fastener spacing and bonding. Always follow the engineered wood manufacturer’s underlayment and moisture barrier guidance to prevent cupping or failure.
How do I install over plywood engineered wood floors if the subfloor is slightly uneven?
Minor unevenness can often be corrected by sanding high spots and using a suitable underlayment designed to help with small irregularities. If the plywood has dips, use a plywood-safe leveling compound or patch system recommended for floors, then re-check flatness before installation. Skipping leveling work can cause joint gaps, squeaks, and premature wear, especially with tongue-and-groove engineered hardwood flooring. Aim to meet the exact flatness tolerance listed in your product instructions before you begin.
Why is acclimation important before installing engineered wood over plywood?
Acclimation helps the engineered wood reach equilibrium with your home’s temperature and humidity, reducing the risk of expansion, contraction, and floor buckling. Bring the boxed planks into the room where they will be installed and allow time for acclimation according to the manufacturer’s schedule, which often ranges from a few days depending on conditions. Keep the HVAC running and maintain normal living conditions so the plywood subfloor and flooring are in sync. This step is especially important when installing over plywood engineered wood floors in climates with significant seasonal swings.
Which installation method is best for plywood engineered wood floors—floating, nail-down, or glue-down?
Floating (click-lock) engineered wood is often the easiest over plywood, but it requires the right underlayment and careful attention to expansion gaps. Nail-down or staple-down methods can provide a more solid feel, but only work when the engineered wood is rated for fastening and the subfloor is properly flat and fastened. Glue-down installation can be very stable, but it demands correct moisture conditions, approved adhesives, and strict surface preparation for the best bond. Choose based on your engineered wood’s installation instructions, your subfloor condition, and whether you want maximum stability versus simpler installation.
📅 Last Updated: October 07, 2026 | Topic: How to install over plywood engineered wood floors? | Content verified for accuracy and freshness.
References
- Google Scholar Google Scholar
https://scholar.google.com/scholar?q=installing+engineered+wood+flooring+over+plywood+subfloor - Google Scholar Google Scholar
https://scholar.google.com/scholar?q=engineered+wood+floor+installation+guidelines+plywood+subfloor+moisture - Google Scholar Google Scholar
https://scholar.google.com/scholar?q=engineered+hardwood+floor+underlayment+plywood+subfloor+glue+down+click+lock - Engineered wood
https://en.wikipedia.org/wiki/Engineered_wood - https://en.wikipedia.org/wiki/Engineered_wood_floor
- Floor
https://en.wikipedia.org/wiki/Subfloor - NWFA | National Wood Flooring Association
https://www.nwfa.org/ - https://www.apawood.org/
- Google Scholar Google Scholar
https://scholar.google.com/scholar?q=How+to+install+over+plywood+engineered+wood+floors? - How to install over plywood engineered wood floors? – Search results
https://en.wikipedia.org/wiki/Special:Search?search=How+to+install+over+plywood+engineered+wood+floors?


