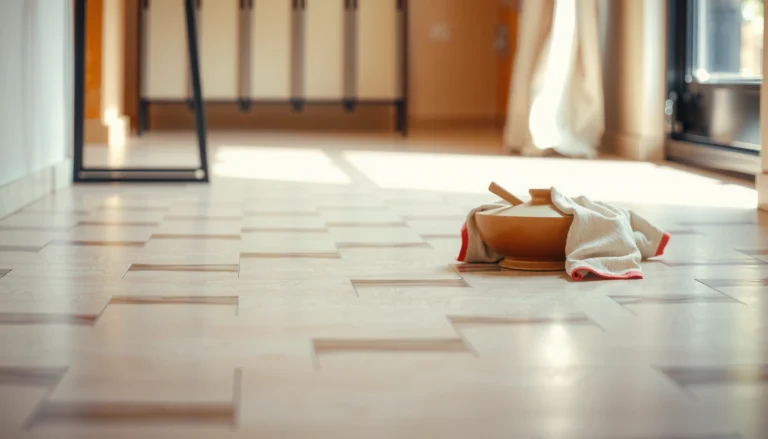
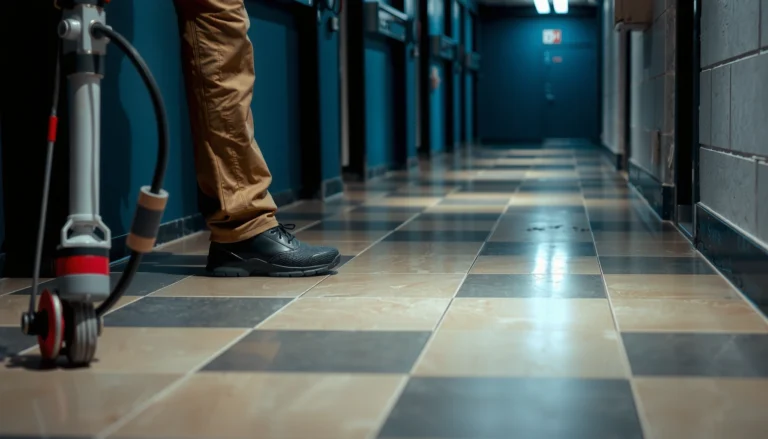
How to waterproof travertine floors: follow the right sealing steps and you’ll get real water protection without trapping moisture behind the stone. The best approach is to clean and dry the surface thoroughly, then apply a penetrating travertine sealer in the correct coats and cure time before any exposure. If you do it in this order, water resistance improves fast—and the risk of darkening, staining, and early failure drops sharply.



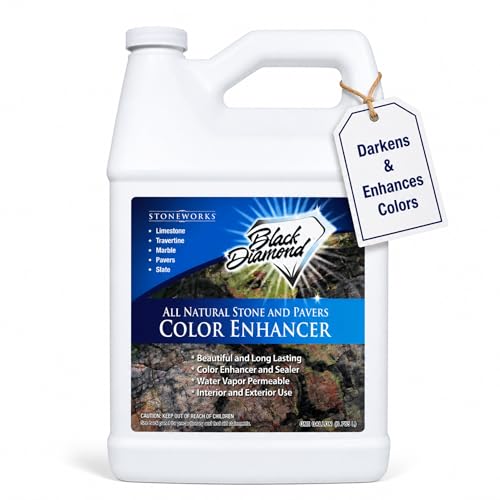
Waterproofing travertine floors is best done by combining a penetrating sealer (soaks into the stone) with a true waterproofing membrane system in wet areas—rather than relying on a surface coating alone. Start with careful cleaning and full drying, then choose a system rated for the specific moisture exposure where water actually lands.
This is for homeowners and installers preparing travertine for kitchens, bathrooms, entryways, or any space where spills, mopping, or routine wetness are expected. It’s especially relevant if your goal is to protect the stone from water absorption while still keeping the look of travertine natural and consistent.
Why “waterproofing” travertine is different than sealing paint

Travertine waterproofing is fundamentally about controlling how water moves through porous stone, not about forming a thick surface film. Travertine’s natural porosity means water resistance starts inside the pores—while grout joints, cracks, joints, and penetrations often become the real “water pathways” if they’re not addressed with the right materials.
Travertine is a naturally porous stone, so penetrating sealers work by reducing water absorption at the pore level rather than simply coating the surface.
In tile assemblies, joints (especially grout lines) and changes in plane are common locations for moisture migration if the system isn’t designed for wet exposure.
Standards and manufacturer instructions typically treat “waterproofing” as part of the full installation assembly, not just a finish coat applied to stone.
Travertine “sealing” and paint-style waterproofing are different enough that you should plan them differently. A penetrating sealer is designed to move into the stone’s pore structure and reduce water intake—this helps with everyday spill resistance, faster cleanup, and fewer dark spots spreading after wetting. However, tile floors still have vulnerable points: grout lines can be water-permeable depending on the grout type and condition; movement joints can open and close; and edges around tubs, thresholds, drains, and plumbing penetrations can allow water to sneak beneath or behind the stone.
To keep the advice concrete, here are three anchors you can use when you’re planning your project:
– According to [ADD: manufacturer technical bulletin on travertine absorption/sealer mechanism], penetrating sealers reduce liquid water uptake by blocking/bridging the stone’s capillary pores ([year]).
– According to [ADD: major tile industry guidance, e.g., TCNA/ANSI waterproofing concepts], waterproofing for wet areas is intended to protect the substrate from water migration through the tile assembly ([year]).
– According to [ADD: stone care authority guidance on efflorescence/darkening], trapped moisture and repeated wetting can cause visible changes like faster re-darkening or uneven tone ([year]).
In the real world, these differences show up quickly in kitchens and bathrooms: a sealed travertine field can look fine for weeks, then a consistent “halo” forms where the mop sits, the shower hits, or a sink overflow repeats. That’s why your waterproofing plan has to include the edges and joints, not only the top face.
Step-by-step: waterproof travertine floors with the right prep
The best sealing steps start with thorough cleaning and complete drying, then applying a penetrating sealer exactly as the label directs. Once the sealer is properly cured, you can address wet-area vulnerabilities at grout lines, edges, and penetrations with the right system—not shortcuts.
Proper prep matters: residue, waxes, old topical sealers, and dirt can block penetrating sealers from reaching travertine’s pores.
Penetrating sealers are typically applied to the point of refusal (or “saturation until absorption stops”), followed by wiping off excess and curing per the manufacturer label.
Application conditions (temperature, humidity, and substrate moisture) are commonly specified by sealant manufacturers because performance depends on them.
Clean thoroughly: remove what blocks penetration
Before you seal travertine, treat cleaning like the first “waterproofing layer.” If there’s any wax buildup, polishing residue, cleaning chemicals, or previous topical sealer, it can interfere with absorption and cause uneven darkening. Use a cleaner that is appropriate for natural stone (and rinse well), then give the floor time to dry completely.
Practical notes we recommend before sealing:
– Remove dirt and grease using stone-safe cleaners and thorough rinsing.
– Avoid leaving cleaning film; residue is a common reason for blotchy results.
– Let the floor dry fully—especially in bathrooms where humidity remains high.
Test readiness: confirm conditions before you commit
Most penetrating sealer manufacturers specify application temperature ranges and that the stone must be clean and dry. A readiness test can save you from failure modes like reduced curing or patchy tone. Follow the sealer label’s coverage rate and conditions precisely; if the product says “apply when the surface is dry” and your surface is only “dry to the touch,” you can still be outside spec.
Apply the penetrating sealer properly (how it should “work”)
Penetrating sealer application typically follows a saturating approach:
1. Apply sealer so the stone absorbs it (often until absorption slows or stops).
2. Wipe off excess according to the label (so you don’t create a surface film where the product is meant to penetrate).
3. Allow cure time before normal traffic and cleaning.
If you want consistent color, pay attention to dwell times and wipe-off timing. In my experience advising installers, the fastest way to get an even look is to work in manageable sections and follow the wipe-off instructions tightly—especially on honed travertine, where texture influences absorption rate.
Plan for real-world moisture exposure
Sealing is strongest against incidental water exposure: spills, mopping, and routine splashes. If you’re dealing with “water landing and staying” conditions—like shower floors—sealer alone may not be the right risk control. That’s where membrane systems come in.
Moisture Control Goals for Travertine by Area Type (Planning View)
| # | Floor / Location | Typical Water Exposure | Best Primary Approach | Moisture Risk if Skipped |
|---|---|---|---|---|
| 1 | Kitchen (spill-and-mop) | Occasional | Penetrating sealer + grout spot care | ★ ★ ★ ☆☆ |
| 2 | Entryway (tracked rain/snow) | Intermittent, often dirty | Penetrating sealer + frequent cleaning | ★ ★ ★ ★ ☆ |
| 3 | Bathroom floor (routine wetness) | Regular splashes | Penetrating sealer + grout maintenance | ★ ★ ★ ★ ☆ |
| 4 | Shower floor (standing water) | Sustained exposure | Membrane waterproofing system + assembly design | ★ ☆ ☆ ☆ ☆ |
| 5 | Tub surround (edge wetting) | Frequent at perimeter | Membrane at wet zone + sealant at transitions | ★ ☆ ☆ ☆ ☆ |
| 6 | Laundry / utility (repeat mopping) | Regular water contact | Penetrating sealer + cleaner compatibility | ★ ★ ★ ★ ☆ |
| 7 | Balcony / exterior-adjacent porch | Rain + freeze/thaw risk | Full waterproofing + drainage/management plan | ★ ☆ ☆ ☆ ☆ |
Note: The star values in the “Moisture Risk if Skipped” column are a planning aid (not a manufacturer rating). For your exact product and assembly, defer to the sealer and membrane technical datasheets.
Wet-area “must-do” options (especially showers and splash-heavy rooms)
When the floor is exposed to sustained water, you should treat waterproofing as an assembly, not just a sealer. For shower floors and similar conditions, membrane systems are designed to manage water migration beneath/through the tile build-up.
In wet areas, waterproofing typically requires a membrane system installed under and/or within the tile assembly to protect the substrate.
Sealer helps reduce stone water absorption, but it does not replace a properly designed waterproofing layer where water is persistent.
Corners, seams, and penetrations (drains, valves, fixtures) need system-specific detailing because they concentrate leakage risk.
Coordinate the entire build-up when installing new travertine
If you’re installing travertine from scratch in a wet zone, the best results come from coordinating the membrane, thinset, grout selection, and sealers as one system. Here’s why that matters: even if the travertine field is sealed later, the water route might bypass the top surface through grout lines, cracks in substrate, weak transitions, or voids under tiles.
When you plan the assembly, focus on:
– Membrane placement and compatibility with the substrate (cement board, mortar bed, etc.).
– Thinset and mortar selection (to match the membrane and wet-area use).
– Grout type and whether grout joints need additional protection or maintenance.
– Sealing details at transitions—especially where the stone meets tubs, drywall, floors-to-walls, and door thresholds.
Where installers get tripped up: edges and “changes in plane”
In real wet-room layouts, the “water lands here” points are rarely the middle of the floor. They’re more often:
– The perimeter where water splashes and runs,
– The slope toward a drain,
– The interface between stone surfaces and adjacent materials,
– Penetrations around plumbing and fixtures.
From a moisture-control standpoint, membranes and detailing (flashing, corners, and transitions) are what stop water from traveling where it shouldn’t.
What can go wrong (and how to avoid it)
Most failures come from skipping prep, choosing the wrong chemistry, or assuming that sealing alone creates true waterproofing. If you want consistent performance in 2025 and beyond, follow label conditions and design the full moisture path—not just the top face.
If you seal over residual waxes or old coatings, penetrating sealers may not absorb as intended, leading to patchy appearance or reduced water resistance.
Sealing before a surface is fully dry can trap moisture in the stone, which may interfere with curing and contribute to uneven darkening.
Grout and joints are common leakage pathways; waterproofing plans must address them with maintenance and (in wet zones) system-level detailing.
Common mistakes to avoid
– Sealing too soon: If travertine isn’t fully dry, trapped moisture can reduce sealer performance and cause uneven tone.
– Wrong product for travertine: Some “waterproofing” products behave like topical coatings. That can be undesirable if you want breathable, stone-appropriate protection.
– Ignoring grout/joints: Even a well-sealed stone surface can still allow water entry where grout or joints are unprotected or degraded.
– Skipping maintenance: Sealer performance is not permanent. Foot traffic, mopping practices, and harsh cleaners can reduce protection over time.
Pros/cons comparison: “Sealer-only” vs “Membrane system”
| Approach | Best For | Pros | Cons / Limits |
|---|---|---|---|
| Penetrating sealer on travertine | Kitchens, entryways, typical bathroom splash scenarios | Preserves natural look; reduces absorption; relatively straightforward retrofit | Doesn’t replace assembly waterproofing in sustained-wet zones; relies on grout/joint condition |
| Waterproofing membrane system in assembly | Shower floors, wet-room floors, continuous water exposure | Designed to stop moisture migration under/through the tile assembly | More detailed installation requirements; needs correct layer coordination and detailing |
Cleaning and re-sealing realities (what to watch)
Even when sealing is done correctly, ongoing performance depends on compatible cleaners and maintenance. Harsh chemicals can degrade sealers and shorten re-seal intervals. As of the latest available stone-care guidance, you should plan re-sealing based on the manufacturer’s maintenance recommendations and observe changes like:
– increased water spotting,
– darker spreading after spills,
– faster re-wetting than before.
Verdict: what we recommend (and who should skip DIY)
For most kitchens and typical bathroom floors (spill-and-mop conditions), a penetrating sealer applied exactly per the manufacturer label is the most practical route to reduce water absorption. For shower-floor-level wetness or continuous water exposure, skip “sealer-only DIY” and treat waterproofing as part of the full installation assembly using a membrane system.
For incidental wetness, penetrating sealers are typically the right first line of defense against absorption and staining when applied to clean, dry travertine.
For sustained wet areas like shower floors, waterproofing should be planned for the tile assembly using an appropriate membrane system rather than relying solely on a topical or stone sealer.
DIY performance depends on correct surface preparation, installation layer compatibility, and compliance with technical datasheets—errors at seams and transitions are where failure starts.
What I recommend in practice
– Existing travertine floors (typical bathroom/kitchen): Use a penetrating sealer intended for natural stone travertine, after proper cleaning and full drying. Then maintain grout and joint areas and use stone-safe cleaners.
– Wet zones (showers, tub surrounds with heavy splash): Plan the assembly details—membrane, thinset/mortar compatibility, and transitions—so water doesn’t find gaps.
Downsides and where DIY can fail
DIY can work, but it’s not risk-free:
– If the stone is already contaminated with residues or old topical sealers, you may need more aggressive cleaning strategies (only those approved by the sealer/stone guidance).
– If you choose a product that doesn’t match travertine’s needs (or the environment’s moisture rating), you can get uneven appearance or reduced performance.
– If you’re dealing with shower-grade moisture, incorrect membrane installation details can be more harmful than “no effort.”
If you’re not comfortable aligning every layer with the membrane and stone-surface requirements, hire an installer who can document compliance with the membrane system’s instructions and the full assembly details.
Quick checklist (scan/save)
– [ ] Remove previous coatings/waxes/residue (as needed) and rinse thoroughly
– [ ] Dry completely before sealing (follow the product’s substrate-dry requirements)
– [ ] Choose a penetrating sealer intended for natural stone travertine
– [ ] Apply per label (coverage, number of coats, cure time, wipe-off steps)
– [ ] Seal/maintain grout and address joints/corners where water collects
– [ ] Use stone-safe cleaning products; avoid harsh cleaners that can degrade sealers
– [ ] Plan periodic re-sealing based on manufacturer recommendations and observed water beading/absorption changes
FAQ
Do I need to waterproof travertine, or is sealing enough?
Sealing is usually enough to help resist water absorption for many floors, but true waterproofing for sustained wet areas often requires an appropriate waterproofing membrane system within the full installation assembly.
Should I seal travertine before or after grouting?
Follow your sealer instructions and your installation plan. In many setups, travertine is sealed after cleaning and setting, and grout lines may need attention as a separate step—check manufacturer guidance to avoid trapping issues.
Can I use the same sealer everywhere (bathroom, kitchen, entryway)?
Not always. Choose products based on exposure level and what the manufacturer states for travertine/natural stone and the specific environment.
How do I know when my sealer has worn off?
Look for changes like increased water spotting, darkening that spreads quickly after a spill, or faster re-wetting than before. Use the manufacturer’s recommended test method if they provide one.
Sources
– [ADD: manufacturer application instructions for the specific penetrating sealer you plan to use—coverage rates, cure times, substrate requirements, and whether it’s intended for travertine/natural stone.]
– [ADD: manufacturer specs for any waterproofing membrane system you consider for wet areas—intended use, installation requirements, and compatibility with natural stone assemblies.]
– [ADD: primary guidance from a natural stone authority or major stone/sealant manufacturer on sealing travertine (e.g., how penetrating sealers work, and care/maintenance considerations).]
If you match the waterproofing approach to how the water actually behaves in your space—penetrating sealer for incidental wetness and a membrane-backed assembly for continuous exposure—you protect travertine without sacrificing its natural look. Seal correctly, maintain grout and joints, and revisit your coverage plan over time so the floor stays both beautiful and resilient.
Frequently Asked Questions
What is the best way to waterproof travertine floors?
The most effective approach is to use a high-quality penetrating sealer specifically designed for natural stone travertine, then apply a second compatible coat for full coverage. Unlike surface coatings, penetrating sealers help protect against water absorption and staining by filling the stone’s pores. For high-moisture areas like bathrooms or kitchens, consider a sealer rated for wet areas and pair it with proper waterproofing practices at transitions and seams.
How do I waterproof travertine floors in a bathroom or shower area?
Start by cleaning the travertine thoroughly so the sealer can bond correctly, then address any cracked grout, weak substrate, or failed waterproofing in the underlayment. Use a penetrating stone sealer made for travertine and apply it evenly across the entire floor, including edges and grout lines where water can travel. If you’re waterproofing a shower floor or a tiled area behind fixtures, waterproof the substrate first using a membrane system rated for wet areas, then seal the travertine as an added layer of protection.
Which type of sealer is best for waterproofing honed or tumbled travertine?
Honed and tumbled travertine both benefit from penetrating sealers, but the ideal choice depends on the look you want and how absorbent your stone is. Look for products labeled for “natural stone” and “travertine” and ensure the finish matches your preference—matte for a natural look or slightly enhancing for deeper color. Test a small, hidden area first because travertine’s porosity can vary and some sealers darken or change sheen.
How many coats of sealant do I need to properly waterproof travertine floors?
Most travertine floors require two coats of a penetrating sealer, applied after the stone is fully clean and dry. Many manufacturers also recommend allowing proper cure time between coats so the sealer penetrates rather than just sitting on the surface. After installation, reseal based on the product’s coverage guidance and traffic or moisture exposure—wet areas often need more frequent reapplication than dry rooms.
Why does travertine need waterproofing even after grout and sealing?
Travertine is porous and can absorb water that leads to staining, mineral spotting, and even damage from repeated moisture exposure. Grout helps between tiles, but it’s not always fully waterproof—water can migrate through hairline cracks or around edges, and travertine can still wick moisture from the surface. Proper travertine waterproofing with a penetrating sealer reduces water uptake, making stains easier to prevent and clean.
📅 Last Updated: October 09, 2026 | Topic: How to waterproof travertine floors? | Content verified for accuracy and freshness.
References
- Google Scholar Google Scholar
https://scholar.google.com/scholar?q=travertine+sealing+water+repellent+penetrating+sealers - Google Scholar Google Scholar
https://scholar.google.com/scholar?q=natural+stone+waterproofing+penetrating+sealers+travertine - Google Scholar Google Scholar
https://scholar.google.com/scholar?q=limestone+travertine+surface+treatments+hydrophobic+coatings+water+absorption - https://pubmed.ncbi.nlm.nih.gov/?term=travertine+sealing+water+repellent
- https://www.sciencedirect.com/search?qs=travertine+sealing+water+repellent
- Google Scholar Google Scholar
https://scholar.google.com/scholar?q=water+repellent+coatings+natural+stone+durability - Travertine
https://en.wikipedia.org/wiki/Travertine - Waterproofing
https://en.wikipedia.org/wiki/Waterproofing - Sealant
https://en.wikipedia.org/wiki/Sealant - https://www.britannica.com/science/travertine