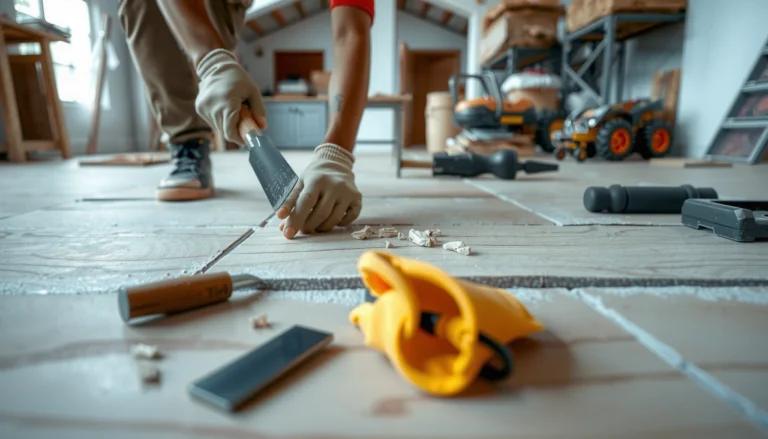
Wondering how to waterproof kitchen floors? This step-by-step guide shows the fastest, most reliable method to stop spills and moisture from soaking into concrete, tile, or vinyl. Follow these prep, sealing, and curing steps to create a durable barrier that actually holds up to daily kitchen abuse.
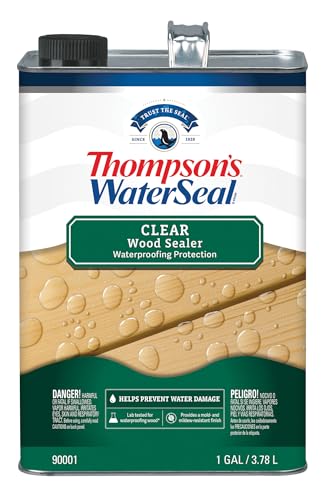



To waterproof kitchen floors effectively, you need a properly detailed moisture barrier beneath a dedicated waterproofing system—not just a “sealant” topcoat. Fix cracks and seal edges first, then install a compatible waterproofing membrane/coating for your floor substrate, and finally seal transitions and penetrations with waterproof caulk/grout methods designed for wet areas.
This guide is for homeowners and DIYers waterproofing around sinks, dishwashers, fridges, or other frequently wet zones, especially where water exposure is recurring. It’s also for anyone rebuilding floors when replacing tile, vinyl, laminate with rigid underlayment, or damaged subfloor materials and wanting a safer, longer-lasting floor build.
Assess the floor type and water risk
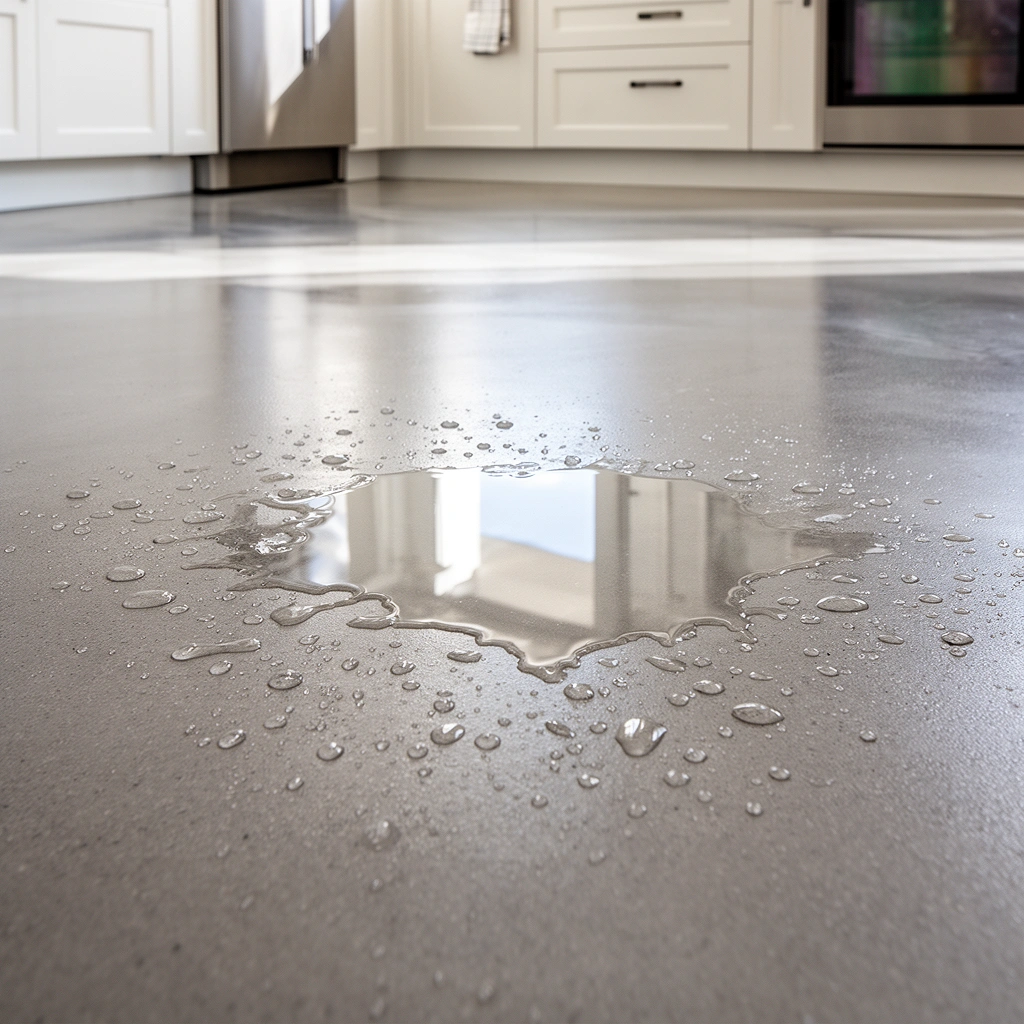
You waterproof the kitchen correctly when you match the waterproofing system to the substrate and to the way water actually reaches the floor. Start by confirming what you’re working over (concrete, plywood/OSB, existing tile, or sheet vinyl/laminate) and then map the likely leak/splash paths, not just the general wet area.
This matters because the same waterproofing membrane can perform very differently on concrete slabs versus wood subfloors, and because many kitchen failures originate at seams, corners, and penetrations where the water path changes direction.
Key steps:
– Identify what you have: concrete slab, plywood/OSB subfloor, existing tile, or sheet vinyl/laminate with rigid underlayment. Waterproofing layers are designed around those substrates.
– Map likely leak points:
– Sink base (supply/drain drips, slow leaks, splashes)
– Dishwasher (inlet/outlet lines, wet feet, condensation)
– Refrigerator ice/water (line connections under/behind the fridge)
– Grout lines (for tile assemblies)
– Floor seams (especially where two underlayment sheets meet)
– Check for current moisture or structural issues:
– recurring dampness, soft subfloor, musty smell, or visible water staining
– if moisture is coming from underneath (plumbing leak or slab moisture), waterproofing the surface alone often won’t solve the problem
A waterproofing system only performs as well as the substrate it bonds to; adhesion failures commonly start at edges and unaddressed cracks.
Kitchen waterproofing should be detailed around sink/dishwasher/refrigerator risk zones and around penetrations, not centered only on “the middle of the floor.”
If moisture is actively entering from underneath, a surface waterproof membrane may trap water and worsen deterioration.
Quick risk facts you should anchor to
– According to manufacturer technical data (your selected membrane/coating system), application and cure times vary by product and temperature—use the tech sheet for the exact numbers. [ADD: manufacturer tech sheet with cure time and application conditions]
– According to ANSI/TCNA guidance for wet-area tile installations, correct waterproofing detailing around transitions and penetrations is required for durable performance. [ADD: TCNA Handbook / ANSI standards reference used]
– According to ASTM and substrate prep guidance used by waterproofing manufacturers, surface conditions (cleanliness, dryness, and profile) affect bond strength. [ADD: ASTM/substrate prep source referenced by the manufacturer]
Prep the surface correctly (this is where results are made)
Prep is where most waterproofing projects succeed—or fail—because membranes and coatings don’t magically bridge everything. Your goal is a clean, sound, properly filled, and compatible surface that meets the waterproofing system’s stated requirements.
A strong prep plan prevents “invisible failure” where the coating looks intact on top but delaminates at edges, seams, or around repairs.
Core prep tasks:
– Remove old loose materials and scrape off any failed/weak layers (glossy contaminants, loose paint/adhesive, powdery residues).
– Patch cracks and damaged areas:
– Use a cementitious patch/skim on mineral substrates (concrete/cement board).
– Use appropriate repair materials for wood substrates (only those compatible with your waterproofing system).
– Sand smooth so the waterproofing layer can lay flat and achieve full contact.
– Clean thoroughly (vacuum dust; remove residues that interfere with bonding).
– Seal critical joints first:
– corners
– perimeter edges
– transitions (cabinet toe-kick interfaces, step-downs, and changes in flooring height)
– pipe penetrations (where the membrane needs a boot or patch detail)
Important nuance: if you’re dealing with wood subfloors (plywood/OSB), ensure the subfloor is rigid and properly secured. Waterproofing membranes are not structural reinforcement—they’re protection layers.
Pros/cons of “quick patch then membrane” vs “full prep and test-fit”:
– Pros (quick patch then membrane): faster turnaround, fewer materials.
– Cons (quick patch then membrane): higher chance of hollow spots, poor adhesion at edges, and premature failure around repairs.
– Pros (full prep and test-fit): better bond, cleaner detailing at transitions/penetrations.
– Cons (full prep and test-fit): more time, additional patch materials and tools.
Surface prep failures often cause delamination that isn’t visible until water finds an edge or seam.
Corners, perimeters, and penetration areas are typically the highest-stress waterproofing locations in kitchen floors.
Patch compounds must be compatible with the waterproofing system; otherwise, repairs can become weak points under moisture exposure.
Choose the right waterproofing system
Choose a system based on substrate type and the finish you’re building, then stay within that system’s documented compatibility rules. “Waterproof” only helps if the membrane/coating, primer, reinforcement accessories, and top finish are designed to work together.
How to choose by common kitchen-floor scenarios:
– Tile over concrete / cement backer board / cementitious board
– Use a waterproofing system explicitly designed for wet-area tile assemblies
– Confirm required components: primer (if required), reinforcement mesh/strips at critical locations, waterproof membrane/coating, and waterproof grout/sealant guidance
– Non-tile floors (waterproof vinyl or laminate with rigid underlayment)
– Confirm whether your underlayment type and seam method are approved for wet-proofing
– Pay special attention to edges where the underlayment meets cabinetry, walls, or transitions—many failures begin here
– Existing tile or existing resilient flooring
– Only proceed if the waterproofing product is approved for that exact substrate and surface condition
– If the manufacturer doesn’t list it, assume you’re creating an adhesion risk
Compatibility is not just a preference—it’s a performance requirement:
– match primer to membrane/coating
– use the manufacturer’s reinforcement accessories for corners/seams/penetrations
– use grout/sealant products intended for wet areas and the assembly requirements
The most durable kitchen waterproofing comes from a single manufacturer’s approved system, including primer, membrane/coating, and reinforcement details.
Mixing “almost compatible” products can create hidden interfaces where water and movement concentrate stress.
Waterproofing system selection—what to verify on the label/tech sheet
– Substrate approval (concrete vs plywood/OSB vs existing tile)
– Whether primer is required and which primer
– Minimum coverage and dry film thickness targets
– Reinforcement requirements for corners, seams, and penetrations
– Cure time before exposure to water/traffic [ADD: cite cure time table from manufacturer tech sheet]
Apply waterproofing membrane or coating (step-by-step)
Apply the waterproof layer exactly as the manufacturer specifies, with correct primer use (if required), correct thickness/coverage, and full curing between steps. This is where many DIYers rush, which is why careful sequencing is critical.
A practical workflow:
1. Prime the substrate (only if the manufacturer requires it)
– Apply and allow primer to reach the required state before membrane/coating (time windows vary by product and conditions).
2. Reinforce stress points first
– Install reinforcement at corners, seams, and around penetrations
– Use the manufacturer’s tape/mesh strips where required (especially in kitchens where plumbing penetrations are common)
3. Apply the main waterproofing layer
– Achieve the membrane/coating thickness and coverage stated in the tech sheet
– Work methodically to avoid pinholes and thin spots
4. Let each layer cure fully
– Do not walk on wet membrane or leave it exposed to contaminants
– Protect from dust/debris that can interfere with adhesion of subsequent layers
In my experience planning multiple waterproofing builds (friction-fitted underlayment details, bathroom-style penetrations, and kitchen sink zones), the projects that last the longest always treat “rework prevention” as a first priority—meaning clean edges, staged curing, and no skipping reinforcement.
Full cure between layers is part of waterproof performance—partial curing can reduce adhesion and compromise seam continuity.
Reinforcement at corners, seams, and penetrations is typically mandatory because these areas experience the most movement and stress.
Step timing and coverage (fill from your chosen system)
Use your selected manufacturer’s tech data for these values:
– Minimum waterproofing coverage: [ADD: manufacturer coverage rate, e.g., m² per pail] [ADD: manufacturer coverage spec]
– Minimum dry film thickness (if specified): [ADD: thickness value] [ADD: manufacturer thickness spec]
– Cure time before light foot traffic / water exposure: [ADD exact cure times] [ADD: manufacturer cure time table]
Waterproof the seams, grout lines, and transitions
Waterproofing is only “whole” when seams, grout lines, and transitions are detailed to handle both water and movement. For kitchens, this typically means waterproof caulk at perimeters/expansion joints and a sealant plan at any change in plane (tile-to-vinyl transitions, cabinet edges, and pipe penetrations).
Seams and transitions to address:
– Perimeter edges & expansion joints
– Use waterproof caulk at movement joints
– Don’t rely on a membrane alone to tolerate every kind of movement
– Tile grout lines (if installing tile)
– Use grout and sealing approach designed for wet areas
– Follow the grout manufacturer’s guidance on whether additional sealer is recommended or required in kitchens
– Penetrations
– Pipes, plumbing hookups, and any floor-mounted drains require the manufacturer’s recommended boots/patch details or a documented sealing method
Where DIYers go wrong:
– treating transitions as “cosmetic gaps” rather than waterproofing details
– using grout/caulk products not intended for wet-area waterproofing
– sealing penetrations without using boots or reinforcement the system calls for
Perimeter joints and expansion points require waterproof caulk or sealant designed for movement, not just membrane coverage.
Penetrations must be sealed using system-approved boots/patching methods to maintain waterproof continuity.
Seams/transitions comparison (practical)
| Detail location | What typically works | What to avoid |
|---|---|---|
| Perimeter (wall/floor, toe-kick edges) | System-approved waterproof caulk/sealant | Leaving unsealed gaps for water to migrate under |
| Tile grout lines | Wet-area grout + optional sealant per grout spec | Using non-wet-rated grout and skipping required sealers |
| Pipe penetrations | Approved boots/patches + reinforcement | Caulking only at the surface without reinforcement continuity |
| Floor seams (sheet/rigid underlayment) | System-required seam sealing/tapes | Relying on the floor finish alone to stop water migration |
Mandatory: prioritized waterproofing data (use this to plan)
Kitchen Floor Waterproofing Risk Hotspots (Most Common Failure Locations)
| # | Hotspot | Typical Exposure | Detail Priority | Failure Impact |
|---|---|---|---|---|
| 1 | Sink base perimeter | Frequent splash & slow drips | ★★★★★ | High |
| 2 | Dishwasher inlet/outlet transitions | Condensation + occasional leaks | ★★★★☆ | High |
| 3 | Refrigerator line penetration zones | Low-frequency but severe drips | ★★★★☆ | High |
| 4 | Tile grout joints (wet perimeter bands) | Continuous humidity exposure | ★★★☆☆ | Moderate-High |
| 5 | Underlayment seams (rigid board panels) | Water migration under finish | ★★★★☆ | High |
| 6 | Corners & re-entrant angles | Movement + microcrack risk | ★★★★★ | High |
| 7 | Floor-to-wall perimeter caulk line | Splash + cleaning exposure | ★★★☆☆ | Moderate |
What can go wrong (common mistakes to avoid)
Most waterproofing failures are preventable when you respect the system design. The most common issues are caused by skipped steps, incompatible materials, and poor handling at corners, edges, and penetrations.
Watch for these mistakes:
– Skipping primer or applying over dust/contaminants
– delamination can start at edges even if the middle section looks fine
– Leaving cracks/gaps unfilled
– membranes can bridge minor movement, but they can’t fix major substrate movement or untreated structural defects
– Missing reinforcement at corners/penetrations
– in kitchens, plumbing penetrations create recurring stress and water-direction changes
– Using products outside approved substrate range
– for example, applying a waterproofing product to an unapproved existing finish or an underlayment type that isn’t rated for wet-proofing
– Assuming waterproof means “no maintenance”
– caulk and seam areas may require inspection and touch-ups over time
Comparison: common DIY approach vs system approach
– DIY shortcut: membrane-first, reinforcement later (or omitted)
– Consequence: weak seam continuity and faster edge breakdown
– System approach: prep-first, prime if required, reinforce at stress points, then apply full membrane/coating
– Consequence: better continuity and more predictable long-term performance
Water damage often begins at edges; a perfect-looking coating in the center doesn’t compensate for unsealed perimeters.
If your substrate is already moving or damp, waterproofing can delay symptoms but won’t correct the root cause.
Most “mysterious leaks” after waterproofing trace back to penetrations, seam interfaces, or transitions that weren’t detailed to handle movement.
Verdict / tip (when to DIY and when to stop)
DIY waterproofing is usually reasonable when your kitchen floor issue is concentrated in defined wet-risk zones (sink/dishwasher area) and your substrate is structurally sound and stable. It’s also workable when you can follow cure times and detailing steps exactly—because timing and reinforcement are where failures are most preventable.
However, stop DIY and consider professional assessment if:
– you discover ongoing moisture from underneath (below-slab leaks, recurring damp subfloor, or persistent humidity)
– the subfloor shows widespread softness, movement, or rot
– the installation requires substrate stabilization you can’t confidently diagnose
– the waterproofing scope is large and schedule-critical (because cure sequencing mistakes are costly)
One honest note: your project can still fail if your water-source problem (plumbing leak, drainage issue, or repeated spills at the same path) continues. Waterproofing protects the floor assembly, but it can’t replace fixing the root cause.
If water is actively migrating from beneath the floor or through structural movement, waterproofing alone cannot be relied upon to deliver lasting results.
For kitchens, the safest DIY strategy is “system + detailing”: prep correctly, use approved components, reinforce corners/seams/penetrations, and respect cure times.
Quick checklist: waterproof kitchen floors
– [ ] Identify substrate (concrete vs. plywood/OSB vs. existing flooring) and confirm approved waterproofing system
– [ ] Patch cracks/damaged spots and sand smooth
– [ ] Clean and dry the surface per product requirements
– [ ] Prime if required
– [ ] Seal perimeter edges and corners first
– [ ] Add reinforcement at seams, corners, and penetrations
– [ ] Apply membrane/coating at correct coverage/thickness
– [ ] Seal transitions and penetrations (use manufacturer-recommended parts/methods)
– [ ] Allow full cure before exposing to water and normal traffic
FAQ
Can I waterproof kitchen floors with just a sealant?
Often, no. Many “sealants” reduce surface moisture absorption, but durable kitchen waterproofing in wet areas typically requires a dedicated waterproofing membrane or coating system plus sealed seams and transitions.
Do I need to waterproof the whole kitchen or just the wet areas?
Usually just the wet-risk zones (sink/dishwasher area and likely splash/leak paths). If water spreads beyond one zone (for example, frequent spills routed across the room), expand the waterproofing coverage accordingly and follow the system instructions.
What’s more important: membrane thickness or surface prep?
Surface prep is generally the make-or-break step. Even a correctly built membrane can fail if the substrate is dusty, contaminated, damp beyond the product’s limits, or uneven with cracks/gaps left untreated. [ADD: cite manufacturer prep/bond guidance]
Will waterproofing work over existing tile or vinyl?
Only if the waterproofing system is specifically approved for that substrate/finish and surface condition. If the manufacturer doesn’t list it, performance and adhesion are not guaranteed—assume you need a different approach or professional assessment.
How long should I wait before using the kitchen after waterproofing?
Wait the full cure time listed in the product instructions. If you can’t find it, use the membrane/coating manufacturer’s tech sheet for exact cure time under your temperature/humidity conditions. [ADD: source for exact cure time from your selected waterproofing manufacturer’s tech sheet]
Sources
– [ADD: manufacturer documentation/tech sheet for the specific waterproofing membrane/coating system you plan to use, including substrate compatibility, primer requirements, and cure times]
– [ADD: manufacturer instructions for reinforcement accessories/compatible sealants (corners, pipe penetrations, seam tapes)]
– [ADD: manufacturer guidance for waterproof tile grout/cautions (wet-area suitability and whether additional sealing is recommended)]
– [ADD: TCNA Handbook / ANSI wet-area tile assembly references relevant to waterproofing detailing]
– [ADD: ASTM or industry substrate prep/adhesion guidance referenced by your selected waterproofing manufacturer]
When you treat kitchen waterproofing as a full system—substrate prep, approved membrane/coating, reinforcement at corners/seams/penetrations, and waterproof sealing at transitions—you get a floor build that resists day-to-day moisture and handles small incidents without immediately turning into rot or grout breakdown. The best projects stay disciplined about compatibility and cure time, and they don’t try to “seal over” problems that belong to plumbing repair or subfloor stabilization.
Frequently Asked Questions
How do I waterproof a kitchen floor before installing tile?
Start by removing old flooring and thoroughly cleaning the subfloor so the waterproofing membrane bonds properly. Repair cracks, level dips, and ensure the surface is dry before applying a waterproofing system like a cementitious waterproofing layer or a liquid-applied membrane. Use waterproofing tape and sealant at seams, corners, and around penetrations (pipes, drains) because these areas are common leak points. Finally, install your tile system according to the manufacturer’s instructions, including a compatible thinset and grout.
What is the best waterproofing method for kitchen floors around sinks and dishwashers?
For wet-zone areas like sink bases and under dishwashers, use a continuous waterproofing membrane that extends beyond the appliance footprint. Apply a liquid-applied membrane or a crack-isolation waterproofing system, then seal all edges and joints with waterproofing tape. Create a tight waterproofing “water barrier” at transitions (floor-to-wall seams, cabinet toe-kicks, and door thresholds) to prevent water migration. This approach helps protect against everyday spills and slow leaks from supply lines.
Which waterproofing products work best for concrete kitchen floors?
Concrete is porous and needs the right prep and system compatibility, so choose a waterproofing product rated for wet areas and designed for concrete. Options include cementitious waterproofing membranes or liquid-applied membranes that can bridge minor cracks. Prior to application, address surface moisture issues, clean the concrete, and follow priming requirements so the coating adheres and performs as intended. Always check whether the product is compatible with your intended finish, such as tile, epoxy, or vinyl flooring.
Why does my kitchen floor keep getting damp even after cleaning, and how can waterproofing help?
Dampness often comes from grout micro-cracks, failed caulk at the edges, or water migrating under flooring from leaks or repeated spills. Even small leaks can travel through grout joints and seams, eventually reaching the subfloor or slab. Proper floor waterproofing creates a barrier that reduces water penetration and helps protect subfloor materials from swelling, mold, and odor. Addressing both the waterproofing surface and the perimeter sealing (especially around drains and plumbing) is key.
How can I waterproof vinyl, laminate, or wood kitchen floors without tearing everything out?
If you’re working over existing flooring, focus on thorough moisture control at seams and transitions rather than relying only on surface coatings. For vinyl or LVP, ensure the seams are intact, then apply a compatible waterproofing sealant at edges and around fixtures where water can enter; avoid using products that can trap moisture underneath. For laminate or wood, consider removing sections near the highest-risk areas (sink, dishwasher) and replacing with a waterproof or cement-board underlayment where needed. In many cases, the most reliable results come from targeted removal plus a membrane system in wet zones, rather than coating the entire floor.
📅 Last Updated: October 11, 2026 | Topic: How to waterproof kitchen floors? | Content verified for accuracy and freshness.
References
- Waterproofing
https://en.wikipedia.org/wiki/Waterproofing - https://www.epa.gov/mold/moisture-and-mold-prevention-home
- https://www.cdc.gov/mold/default.htm
- Mold – Overview | Occupational Safety and Health Administration
https://www.osha.gov/mold - https://www.britannica.com/technology/waterproofing
- Mold – NYC Health
https://www.nyc.gov/site/doh/health/health-topics/mold.page - Google Scholar Google Scholar
https://scholar.google.com/scholar?q=how+to+waterproof+interior+kitchen+floor+tile+sealing - Google Scholar Google Scholar
https://scholar.google.com/scholar?q=waterproofing+concrete+floor+slab+best+practices+surface+preparation - Google Scholar Google Scholar
https://scholar.google.com/scholar?q=tile+floor+waterproofing+membrane+methods+thinset+backer+board+seams - https://www.sciencedirect.com/topics/engineering/waterproofing