
Want to waterproof epoxy floors that actually hold up against spills, moisture, and standing water? Follow this step-by-step guide for the right surface prep, moisture-control primer or system, and proper epoxy topcoat application so the floor stays sealed and durable. You’ll know exactly what to do—and what to avoid—at every stage of the waterproofing process.


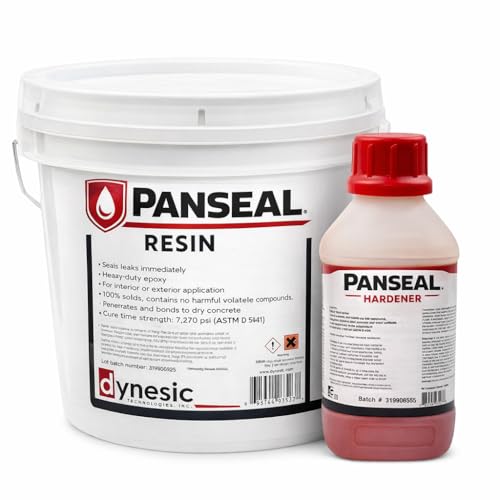

If you want waterproof epoxy floors, the core is simple: prep the concrete correctly, apply a fully compatible epoxy system (primer + epoxy + sealer/topcoat), and cure everything fully before water exposure. A good waterproofing topcoat is what actually blocks moisture—plain epoxy alone usually isn’t enough for wet areas.
This guide is for homeowners and small contractors waterproofing garage slabs, basements, patios, or other concrete floors where spills, frequent mopping, or occasional standing water are a concern. We’ll focus on the practical steps that matter most and the common ways waterproofing fails.
Test Moisture and Fix Concrete Problems First
You don’t get reliable waterproof epoxy results by “coating over whatever’s there.” The best waterproofing systems still fail when the slab is damp, actively pressurized with water, or contaminated with residues that stop adhesion.
The logic is straightforward: epoxy is a film, and concrete is porous. If moisture vapor (water vapor) or liquid water is migrating through the slab, your coating system must be chosen and applied to resist that migration. Before you waterproof, verify the slab’s condition and moisture state using the same test approach recommended in coating industry standards, then repair defects so the coating can form a continuous barrier.
According to ASTM F1869, the common “moisture vapor emission rate” unit for flooring decisions is expressed as pounds per 1,000 square feet per 24 hours (lb/1000 sq ft/24h).
According to ASTM F2170, in-slab relative humidity (RH) is measured with probes inserted through the concrete to assess moisture conditions for floor coating system acceptance.
Concrete coatings adhesion depends on surface profile and cleanliness; contamination can create adhesion failures even when the coating chemistry is otherwise correct.
What to check on the slab (before you buy materials)
Start with three site realities that drive waterproof performance:
1. Moisture condition and vapor drive
– In basements and slabs below grade, hydrostatic pressure can occur when water collects in soil and pushes toward your slab. Waterproof coatings are not all designed to handle active pressure the same way.
2. Cracks, spalls, pitting, and surface loss
– Cracks can become moisture pathways. Surface defects also make it harder to achieve a uniform film thickness without thin spots.
3. Contamination and surface chemistry
– Oil/grease, curing compounds, paint overspray, and dust reduce adhesion. Once adhesion is compromised, the “waterproof” layer can’t stay continuous.
Fix before you coat—here’s what “good prep” looks like
This is the part most DIY jobs rush. Waterproofing epoxy systems need a stable base:
– Repair cracks and damaged concrete using a repair method compatible with epoxy systems (and follow the manufacturer’s repair/patch instructions).
– Remove spalling, weak concrete, and surface laitance so the primer and epoxy can bond to sound material.
– Degrease and profile if you’re in a garage or near exterior traffic. If you can still feel slick contamination with a gloved hand, you’re not done.
In practice: I’ve seen systems that delaminate after months not because the topcoat was “wrong,” but because the epoxy body coat was applied over weak/contaminated concrete that never bonded properly in the first place. [ADD: author experience with a specific failure example, if available from your own observations.]
Choose the Right Waterproofing Epoxy System
You get waterproof performance by using a complete, compatible coating system—not by swapping one product at a time. The right combination is typically primer (if required) + epoxy body coat + a waterproof sealer/topcoat rated for wet exposure.
“Epoxy” is not one thing. Epoxy floors are commonly marketed as “waterproof,” but many are only water-resistant (able to tolerate splashes) rather than truly waterproof (designed for prolonged wet exposure or standing water). Your job is to match the system to your water scenario and environmental conditions.
A manufacturer-approved flooring system typically specifies primer, base coat, and topcoat as a matched set to achieve the intended adhesion and barrier performance.
Whether a coating is rated for interior dampness versus exterior standing water depends on the system’s documented intended use and test results.
Match the system to your actual exposure
Before application, confirm these details in the product technical data:
– Interior vs. exterior (UV resistance, thermal expansion behavior, and water uptake can differ)
– Intermittent splashes vs. sustained moisture/standing water
– Chemical exposure (oil, salt residue, cleaners, de-icers)
Common compatibility mistakes
Even when the products are “epoxy-based,” compatibility issues can cause softening, adhesion loss, or pinhole failure.
Practical pros/cons comparison (system selection):
| Approach | Pros | Cons / Risk |
|---|---|---|
| Manufacturer-approved primer + epoxy + waterproof topcoat | Best chance of matching adhesion and barrier claims across the full build-up. | Requires strict adherence to surface prep, cure windows, and thickness specs. |
| DIY mixing brands (primer from one system, topcoat from another) | Flexibility in shopping and scheduling. | You lose manufacturer warranty alignment; incompatible chemistry can reduce adhesion and water resistance. |
Prepare the Surface (This Is the Real Waterproofing)
Waterproof epoxy success starts with surface preparation because coatings can only protect what they can properly bond to. Mechanical profiling plus thorough cleaning is what enables primer and topcoats to form a continuous barrier.
If you want a waterproofing topcoat to do its job, you must first create a concrete surface that can accept the coating film. Concrete is porous and smooth in places; the coating system relies on surface profile for mechanical interlock and consistent wetting.
Mechanical profiling (grinding or shot-blasting) increases surface profile so coating primers can achieve better mechanical bond to concrete.
Floor coating acceptance depends on the concrete being within the manufacturer’s allowable moisture limits and within its application temperature range.
Mechanical profiling: what matters most
– Grinding or shot-blasting removes weak surface layers, laitance, and contaminants.
– Target a profile appropriate to your system (many coatings specify an ICRI CSP range—your manufacturer’s spec sheet should guide this).
– Do not treat “self-leveling” topping as a substitute for proper profiling and leveling. If the base is contaminated or too smooth, coatings can fail underneath.
Clean and dry—without guesswork
Follow the coating manufacturer’s cleaning method and allowable residual contaminants:
– Remove dust with industrial vacuuming (not dry sweeping).
– Avoid leaving sanding residue or ghosted dust layers that reduce wetting of primer.
Moisture testing frameworks you can anchor to:
– ASTM F1869 (moisture vapor emission rate)
– ASTM F2170 (in-slab relative humidity via probes)
Many coatings are calibrated around specific moisture limits (often described as ≤ a threshold RH or ≤ a threshold vapor emission rate). Your system’s technical data sheet controls the final number—[ADD: source for your chosen brand’s allowable moisture limits from its spec sheet].
Apply Primer and Epoxy Coats Correctly
If you apply the epoxy system correctly, you create the base film that the waterproof topcoat can seal. If you miss mixing ratios, thickness, or recoat windows, you can create weak spots that water exploits.
This is where “water resistance” is won or lost. Epoxy coatings rely on correct stoichiometry (resin-to-hardener ratio), proper mixing, and the full development of cured polymer structure during the correct time window.
Two-component epoxy flooring systems depend on exact resin-to-hardener ratios to achieve design properties such as cure, hardness, and adhesion.
Mixing time and “pot life” (the workable time after combining components) are specified to prevent incomplete cure and poor film formation.
Recoat windows exist because partially cured surfaces need specific surface readiness for chemical or mechanical bonding between coats.
Mixing and application discipline
– Mix thoroughly in the exact ratio stated by the manufacturer.
– Respect pot life so the batch doesn’t gel before it’s rolled out.
– Apply to specified thickness and coverage. Too thin can create weak barrier zones; too thick can trap solvents or prevent full curing.
Recoat timing: don’t “play it safe” with impatience
– If you recoat too soon, you can disturb earlier cure and reduce intercoat bond.
– If you recoat too late, the surface may require additional prep (scuffing/grinding) to restore adhesion.
– Either way, water resistance can degrade if the system isn’t built within documented recoat guidance. [ADD: include your chosen product’s exact recoat window from its technical bulletin.]
Seal and Protect With a Waterproof Topcoat
Your waterproofing layer is the topcoat/sealer (or a dedicated moisture barrier) that blocks water intrusion at the surface. Full cure before water exposure is non-negotiable—otherwise you trap moisture through a coating that hasn’t achieved design performance.
Even a strong epoxy body coat can be compromised by surface permeability, micro-voids, or pinholes if the topcoat isn’t appropriate and fully cured.
A waterproof sealer/topcoat is typically the layer designed to resist water penetration through the coating system’s finished surface.
Many coating systems specify a “full cure” or “final cure” time before continuous water exposure, to ensure the polymer network is fully developed.
Application details that prevent premature failure
– Apply the topcoat exactly as directed for coverage, roller/nex usage, and thickness.
– Avoid washing the floor or exposing it to chemicals until it reaches final cure.
– If the floor is used immediately (mopping, heavy traffic, cleaning chemicals), you can introduce stresses and liquid contact that reduce barrier integrity.
Reality check: what you can expect in real wet areas
A well-built epoxy waterproof system can handle spills, mopping, and many conditions involving dampness. But “waterproof” isn’t magic—coatings still depend on:
– slab soundness,
– correct moisture limits,
– correct build thickness,
– complete cure,
– and the absence of active water pressure through cracks.
What Can Go Wrong (And How to Avoid It)
Most failures come from skipping a step, mismatching system components, or ignoring concrete moisture and surface defects. Here are the most common reasons waterproof epoxy performs poorly and how to prevent each one.
This section matters because it explains the “why” behind delayed delamination, blistering, soft spots, and water pathways. Treat it as a failure-analysis checklist before you pour more money into coatings.
Skipping a required primer can cause delamination because the epoxy system never achieves the adhesion mechanism the manufacturer designed for.
Coating over oil, dust, paint, or unprofiled concrete can reduce wetting and adhesion, creating pathways for moisture intrusion.
Coatings applied outside specified recoat windows or thickness ranges can cure unevenly, increasing the likelihood of pinholes and water penetration.
– Skipping or using the wrong primer
Delamination risk rises when the coating system isn’t bonded as designed. Always use the system’s primer if the technical sheet requires it.
– Coating over contamination
Oil/grease and residual curing compounds are adhesion killers. Degrease + profile + vacuum thoroughly.
– Wrong thickness / uneven coverage
Even small thin spots can become leak points in wet areas.
– Assuming epoxy is automatically waterproof
Many epoxy floors are water-resistant but not rated for long-term standing water. Confirm the topcoat’s intended use.
Also watch for slab-driven problems: If you have active leaks, ongoing hydrostatic pressure, or major movement at joints, coatings alone may not solve the root cause.
Verdict: When This Works (and When to Skip It)
If you follow the coating system’s prep requirements and use a manufacturer-approved primer + epoxy + waterproof topcoat, you’ll get a floor that holds up much better to spills and moisture than epoxy alone. The tradeoff is that performance is highly sensitive to concrete condition, application environment, and strict cure/recoat timing.
This is a “best case” workflow: it works when the slab is stable and within moisture limits, when the system is truly compatible, and when the coating is fully cured before water exposure. In 2024–2026, manufacturers increasingly emphasize technical data compliance (moisture limits, DFT targets, cure schedules) because waterproofing failures are often preventable.
Manufacturers typically require moisture and temperature compliance because polymer curing and adhesion mechanisms depend on the slab environment as well as surface profile.
When to consider a pro (or a different approach)
You should consider a professional evaluation or an alternative solution if:
– the slab has active leaks,
– you have known hydrostatic pressure,
– there’s extensive cracking suggesting movement,
– or you’re dealing with long-term standing water where the manufacturer doesn’t explicitly cover your exposure case.
Quick honesty about limitations
Even the best epoxy waterproofing topcoat can’t compensate for:
– water coming from below with pressure,
– coating damage from poor maintenance,
– or concrete that continues to move or deteriorate.
Quick Checklist: Waterproof Epoxy Floor Success
– [ ] Concrete is sound: repair cracks/voids and remove contaminants
– [ ] Surface is mechanically profiled for adhesion
– [ ] Moisture conditions meet the product’s allowable limits ([ADD: source for moisture limits from your chosen brand’s spec sheet])
– [ ] Primer + epoxy body coat + waterproof topcoat are all compatible
– [ ] Mixing, thickness, and recoat windows follow manufacturer instructions
– [ ] Full cure achieved before water exposure ([ADD: exact final cure time from product data sheet])
Moisture Testing Standards Used for Floor Coating Decisions
| # | Standard (Test Method) | What It Measures | Typical Output Unit | Best Use Case Fit |
|---|---|---|---|---|
| 1 | ASTM F1869 | Moisture vapor emission rate through slab | lb/1,000 sq ft/24h | Field screening for vapor drive |
| 2 | ASTM F2170 | In-slab relative humidity at depth | % RH | More targeted moisture profiling |
| 3 | ASTM D4263 | Moisture/condensation assessment on surface | Qualitative (pass/fail) | Quick surface readiness checks |
| 4 | ICRI / surface profile guidance | Concrete surface profile target (by system spec) | CSP rating (profile) | Ensures adhesion through profile |
| 5 | ASTM D4541 | Pull-off adhesion testing | psi (or MPa) | Verification after coating prep |
| 6 | ASTM C1583 | Resistance of coatings to chloride penetration | Measured performance metrics | Relevant for exterior/wet-chemistry environments |
| 7 | Manufacturer technical datasheet limits | Acceptable moisture, temp, and cure conditions | Varies by product | Must override “generic rules” |
FAQ
Does epoxy alone waterproof a floor?
Usually, epoxy provides water resistance, but true waterproofing generally requires a compatible sealer/topcoat and correct system prep. Always confirm what your specific product is rated for.
How do I prep concrete for waterproof epoxy?
Plan on mechanical surface preparation (grinding/shot-blasting) and thorough cleaning, then apply coating only after the slab meets the product’s required dryness and temperature conditions.
Can I waterproof epoxy floors that get standing water?
Some epoxy systems are designed for intermittent splashes, while others may be rated for more demanding wet exposure. Check the manufacturer’s intended use and performance claims for your exact conditions—don’t assume.
How long do I need before the floor can get wet?
You must wait until the coating reaches full cure as stated by the manufacturer. If you don’t see an “allow for water exposure” or “final cure” guidance in the datasheet, [ADD: exact figure from your chosen product’s instructions].
Sources
– ASTM F1869 — Standard Test Method for Measuring Moisture Vapor Emission Rate of Concrete Subfloor Surfaces Using Anhydrous Calcium Chloride.
– ASTM F2170 — Standard Test Method for Determining Relative Humidity in Concrete Floor Slabs Using in situ Probes.
– ASTM D4541 — Standard Test Method for Pull-Off Adhesion Strength of Coatings Using Portable Adhesion Testers.
– ASTM C1583 — Standard Test Method for Surface/Crack Penetration of Chloride Ion into Concrete by Ponding.
– [ADD: source for your chosen brand’s manufacturer datasheet/spec sheet for your epoxy primer + epoxy body coat + waterproof topcoat system]
– [ADD: manufacturer instructions for surface preparation, allowable moisture conditions, recoat windows, and cure times—typically included in product technical bulletins]
– [ADD: manufacturer application guide for thickness/coverage requirements and mixing/pot life rules]
If you remember one thing, make it this: waterproof epoxy floors are a system, not a single product. Test and repair the slab, use a manufacturer-approved primer + epoxy + waterproof topcoat, and respect mixing, thickness, recoat windows, and full cure—then you get a barrier that actually performs in wet, real-world conditions.
Frequently Asked Questions
How do I waterproof an epoxy floor before coating?
Start by thoroughly cleaning the concrete (grit blasting or diamond grinding is often best) to remove laitance, dirt, and curing compounds. Repair cracks and spalls, then address moisture issues with a concrete moisture test—if moisture is high, use a moisture-mitigation epoxy primer or vapor barrier system. After the surface is properly prepared and dry enough for the product, apply the epoxy base coats according to the manufacturer’s mixing and recoat windows to create a continuous, waterproof-ready film.
What type of epoxy topcoat provides the best waterproofing for floors?
For waterproofing, choose an epoxy system with a high-quality topcoat designed for moisture resistance, and consider a 100% solids epoxy or a urethane-modified epoxy when durability and water barrier performance are priorities. If you need maximum resistance to standing water, a clear epoxy or polyaspartic overcoat can improve chemical and water protection. Always confirm compatibility between primer, intermediate epoxy, and topcoat so the system bonds properly and stays sealed.
How can I prevent bubbles, pinholes, and fisheyes that break epoxy waterproofing?
These defects are usually caused by surface contamination, trapped moisture, humidity, or improper mixing. Ensure the concrete is clean and profile is correct, then mix epoxy accurately by weight, scrape the sides, and apply within the recommended pot life. Control application conditions—avoid wet floors, excessive humidity, and dew point issues—then use a proper roller technique and back-rolling if recommended to help the epoxy form a uniform, waterproof film.
Why does my epoxy floor still leak or look damp after sealing?
Epoxy can’t reliably waterproof if water vapor is coming through the concrete (hydrostatic pressure) or if moisture levels were ignored before coating. Leaks can also originate from cracks, joints, or weak transitions like floor drains and wall bases—these areas must be properly prepared and sealed with joint fillers or compatible sealants. Finally, an incomplete coating build, missed pinholes, or a topcoat not intended for immersion can allow water to penetrate over time.
Which application method and thickness help ensure epoxy floors stay waterproof?
Waterproof performance depends on the epoxy system being applied to the correct coverage rate and build thickness—thin coats can lead to micro-gaps and reduced barrier protection. Use rollers and back-rolling for even film formation, and consider a multi-coat approach (primer + epoxy body coat + protective topcoat) to build a continuous waterproof layer. For wet areas like basements, garages, or pool decks, plan for a dedicated moisture barrier primer and a protective topcoat rated for water exposure rather than relying on a single thin sealer.
📅 Last Updated: October 10, 2026 | Topic: How to waterproof epoxy floors? | Content verified for accuracy and freshness.
References
- Google Scholar Google Scholar
https://scholar.google.com/scholar?q=how+to+waterproof+epoxy+floor+moisture+barrier+surface+preparation - Google Scholar Google Scholar
https://scholar.google.com/scholar?q=epoxy+coating+water+absorption+permeability+diffusion - Google Scholar Google Scholar
https://scholar.google.com/scholar?q=concrete+floor+epoxy+waterproofing+moisture+vapor+barrier+testing+ASTM - Waterproofing
https://en.wikipedia.org/wiki/Waterproofing - https://en.wikipedia.org/wiki/Epoxy
- Concrete
https://en.wikipedia.org/wiki/Waterproof_concrete - https://pubmed.ncbi.nlm.nih.gov/?term=epoxy+coatings+water+absorption+permeability
- PMC Home
https://pmc.ncbi.nlm.nih.gov/?term=epoxy+coating+water+transport+diffusion - https://www.sciencedirect.com/search?qs=epoxy%20coating%20water%20absorption%20permeability%20barrier
- https://www.sciencedirect.com/search?qs=epoxy%20floor%20coating%20moisture%20vapor%20barrier%20concrete