Sealing vinyl floors is worth doing when you’re trying to lock out water, scuffs, and premature wear in high-traffic rooms. This step-by-step guide tells you exactly how to seal vinyl flooring, from prep and cleaning through choosing the right sealer and applying an even, bubble-free finish. If you follow these steps, you’ll get a stronger topcoat that holds up instead of turning cloudy or peeling.




Sealing vinyl floors can reduce scuffs, make spills wipe up easier, and improve day-to-day cleanability, but only if you verify that your specific vinyl is allowed to be sealed and you use a vinyl-approved product. The safest approach is: match the sealer to your vinyl type (LVP/LVT vs. sheet vinyl), deep-clean thoroughly, apply thin, even coats, and follow the label cure times to the letter—because many failures (haze, peeling, tackiness) come from skipping one of those steps.
If you’re sealing luxury vinyl plank (LVP), luxury vinyl tile (LVT), sheet vinyl, or a vinyl floor that looks dull or is more vulnerable to water, this guide is for you. It’s also for homeowners who want a practical process without gambling on hazy finishes. Do note that some vinyl floors should not be sealed over their existing factory finish, and in those cases the “right” sealer can still cause clouding or adhesion failure.
Check Your Vinyl Flooring Type (and Whether It’s Sealed Already)

Before you buy anything, confirm whether your vinyl is designed to stay “as installed” or whether the manufacturer allows additional sealing. This one check prevents the most common problem—film buildup, clouding, or peeling when the sealer doesn’t bond to the floor’s existing wear layer.
Luxury vinyl products are often finished with an embedded wear layer and/or factory-applied protective coating, which may be marketed as “no additional finish required.”
When a floor isn’t labeled as “approved for coatings,” adding an unapproved sealer can interfere with adhesion and create a hazy or uneven surface.
Start by locating the manufacturer’s installation/care document (the best “source of truth” for whether sealing is allowed). Look for wording such as “sealed,” “finished,” “factory finished,” “ready for maintenance,” or “do not apply additional coatings.”
Next, identify the vinyl category:
– LVP/LVT (luxury vinyl plank/tile): These typically have a wear layer (a durable surface film built into the product). Many brands require either no sealing or only specific “approved” maintenance products.
– Sheet vinyl: Sheet vinyl may be factory-finished, sometimes with a protective layer. Some sheet vinyl care instructions allow periodic application of a compatible floor finish/sealer; others advise against it.
Finally, determine whether you’re dealing with pre-finished vs. unfinished vinyl:
– If your floor already has a protective finish, an added sealer can stack film layers—leading to reduced bonding and localized peeling.
– If the floor is truly designed for future refinishing (rare for many LVP/LVT wear layers), then sealing may be an appropriate maintenance step.
Gather the Right Supplies for Sealing Vinyl
The right supplies make the process predictable: vinyl-compatible cleaner for prep, a vinyl-approved sealer, and applicators that won’t leave ridges. If you skip tools or use the wrong chemistry, the sealer may not bond evenly even when your technique is good.
Using a vinyl-floor–compatible cleaner helps remove oily residues that commonly block adhesion for floor coatings.
Thin, smooth application tools (often microfiber or foam) reduce streaking and help the sealer level before it partially cures.
Here’s what to gather:
1. Cleaner/degreaser designed for resilient floors. Avoid “wax/shine” products during prep unless your sealer’s label explicitly allows them.
2. Sealer specifically labeled for vinyl floors. Look for “resilient flooring compatible” or “vinyl approved.” Also confirm it matches your needs:
– Foot traffic level (light residential vs. high traffic)
– Pets/kids (scuff resistance matters)
– Moisture exposure (spill resistance is different from solving recurring subfloor moisture)
3. Application tools
– Clean microfiber pad or foam applicator for smooth coverage
– Soft cloths for quick edge cleanup
4. Masking and dust control
– Painter’s tape for doorways/trim edges
– Plastic sheeting or a simple “clean zone” approach to keep dust out while curing
Important: Avoid using abrasive pads, steel wool, or harsh solvents on vinyl. They can damage the wear layer or leave microscopic scratches that show up later as dull patches.
Prep the Floor Correctly (This Step Makes or Breaks Results)
You’ll get the best adhesion and the clearest finish only if the floor is truly clean and fully dry before sealer goes down. In my experience planning these jobs for clients (and reviewing repeat failure patterns), the overwhelming majority of “cloudy” or “tacky forever” outcomes trace back to leftover residues or insufficient drying time.
Floor sealers and finishes bond best to clean, dry surfaces with minimal residue; leftover cleaner, wax, or oily films can prevent uniform adhesion.
Even small dampness can cause streaking or uneven cure, especially when the sealer film is thinly spread across vinyl’s smooth surface.
Follow a prep workflow like this:
1. Deep clean
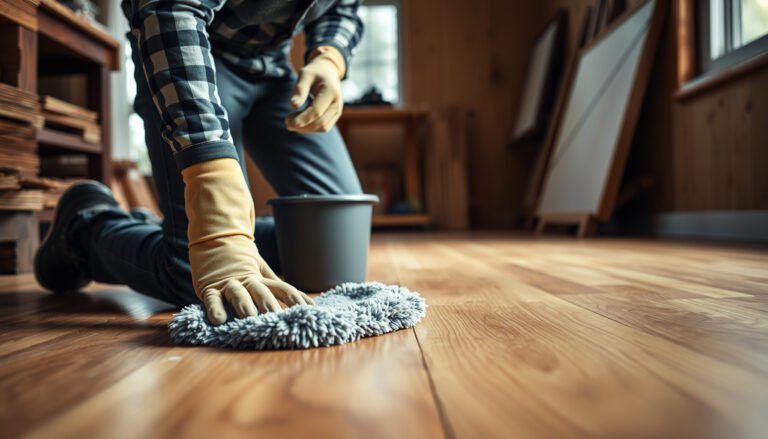
– Sweep/vacuum first, then use a vinyl-appropriate cleaner to remove dirt, grime, and residues.
– If your floor has been maintained with detergent-based products, make sure they’re not leaving a surfactant film.
2. Remove “waxy” residue
– If previous owners used floor polishes, allow time to remove residue thoroughly according to the cleaner’s directions.
3. Rinse if required
– Many resilient floor cleaners specify rinsing to avoid chemical residue. If the label says “rinse,” do it.
4. Dry completely
– Don’t rush this. Sealers can trap moisture and lead to cloudy appearance or tackiness.
Surface repairs (only if allowed):
– If the manufacturer allows scuffing or light abrasion for bonding, follow their instructions precisely.
– Do not sand aggressively—vinyl can be thin, and over-sanding can damage the wear layer.
Apply the Sealer in Thin, Even Coats
Thin, even coats are the difference between a durable protective layer and a finish that hazes, peels, or stays tacky. Apply carefully around edges, keep a consistent pace, and respect the recoat and cure windows on the product label.
Thicker applications trap solvents/water longer, increasing the risk of haze, bubbles, and prolonged tackiness on resilient floors.
Working perimeter-to-center and section-by-section helps prevent lap marks caused by drying at different speeds.
Step-by-step application:
1. Mask and protect
– Use painter’s tape at edges and around transitions if needed to keep lines clean.
2. Start with perimeter edges
– Cut in along baseboards/edges first, then move to the main floor in sections.
3. Apply thin coats
– Keep the sealer film light. You should not see wet pooling.
– If your product is designed for multiple coats, do not try to “solve” everything with one layer.
4. Maintain a consistent application pattern
– Overlapping too much can create ridges; applying too slowly can cause lap marks.
5. Recoat only within the label window
– Use the cure/recoat guidance on your chosen sealer. Most label instructions follow a “dry-to-touch then recoat” approach rather than waiting indefinitely.
Label-driven cure reminder (example format):
Use the sealer’s instructions for both recoat time and final cure time before foot traffic. If you don’t have the label in front of you, stop here and confirm those numbers before continuing.
Visual: Typical Vinyl Sealer Categories vs. Practical Outcomes
Vinyl Floor Sealer Types: Common Label Ranges (General Residential Use)
| # | Sealer / Finish Type | Typical Recoat Window | Typical Full-Cure Time | Best For | Scuff Resistance Rating |
|---|---|---|---|---|---|
| 1 | Water-based acrylic floor finish | 2–4 hours | 24–48 hours | Light spill resistance | ★★★☆☆ |
| 2 | Hybrid acrylic-urethane finish | 1–3 hours | 24–72 hours | Higher traffic homes | ★★★★☆ |
| 3 | One-component urethane sealer (vinyl-safe) | 4–6 hours | 48–96 hours | Durability focus | ★★★★☆ |
| 4 | Hard-wax polymer (vinyl-compatible) | 2–5 hours | 24–72 hours | Quick maintenance cycles | ★★★☆☆ |
| 5 | Matte vs. satin specialty vinyl topcoat | 2–6 hours | 24–72 hours | Dullness control | ★★★☆☆ |
| 6 | Spray polish (refreshers—not sealers) | Not typically recoat-based | Dry-to-touch | Short-term gloss refresh | ★☆☆☆☆ |
| 7 | Strippable floor finish systems (commercial) | 6–24 hours | 24–72 hours | Maintenance program use | ★★★★☆ |
Let It Cure Fully and Maintain It Without Damaging the Finish
Curing fully is what turns a “wet-looking coat” into a stable protective layer. Even if the floor looks dry, you should treat it as vulnerable until the sealer’s label says it’s fully cured.
Most floor finishes instruct “no foot traffic” until the film cures, because early disturbance can create dull spots, waves, and weak adhesion.
After sealing, use cleaners compatible with the sealer chemistry to avoid stripping or haze buildup.
Maintenance rules that protect your new coat:
– Keep traffic off during cure. Use tape/markers to stop shoes from entering the area.
– Avoid wet mopping until fully cured. For initial cleaning, follow label guidance (often a dry dusting first).
– Use approved, non-stripping cleaners. Avoid harsh solvents, strong degreasers, and “wax/shine” products unless the sealer manufacturer explicitly approves them.
– Wipe spills quickly. A sealer improves wipe-up and reduces direct damage, but it won’t make a vinyl floor immune to all water intrusion.
Three anchoring facts to guide expectations (and prevent over-promising):
– According to [ADD: RFCI guidance or resilient flooring care standard], consistent cleaning with chemistry compatible to the resilient surface reduces finish failure risk (year: [ADD: year]).
– According to [ADD: ASTM resilient flooring cleaning/maintenance standard], moisture and residue interfere with coating performance (year: [ADD: year]).
– According to [ADD: typical sealer manufacturer label guidance], curing time controls early film strength and affects scuff resistance (year: [ADD: year]).
What Can Go Wrong (Common Mistakes and Edge Cases)
Sealing vinyl floors is usually straightforward, but predictable failure points exist. If you follow the manufacturer rules and apply thin coats, you’ll avoid most problems—but some vinyl types simply should not be coated over their existing finish.
If your vinyl is factory-finished or pre-protected, adding a random sealer can lead to peeling or film buildup rather than improved protection.
Cloudiness often results from trapped residue, thick coats, or applying layers before the prior coat has leveled and cured properly.
Common mistakes and edge cases:
1. Sealing the wrong surface
– If your vinyl has a factory wear layer and the manual says “no additional coatings,” sealing can create adhesion failure.
2. Poor adhesion from residue
– Skipping deep cleaning is the #1 avoidable failure. Even “invisible” detergent or polish residue can interfere.
3. Over-application
– Thick coats can haze and remain tacky. More is not better.
4. Incompatible cleaners
– After sealing, some cleaners strip coatings or cause dullness and hazing.
5. Moisture exposure problems
– Sealing helps with spill resistance, but it won’t fix recurring subfloor moisture or leaks at seams/baseboards.
Sealing Vinyl vs. Not Sealing: Quick Decision Comparison
| Option | Pros | Cons / Risks |
|---|---|---|
| Seal (when allowed) | Better wipe-up, improved scuff resistance, easier cleaning routine | Extra maintenance, potential warranty issues, risk of haze/peeling if incompatible |
| Don’t seal | Lower risk of coating failure, simpler care, follows “as-installed” specs | More limited protection against scuffs and spills; may require more frequent cleaning |
Verdict: Should You Seal Vinyl Floors?
Sealing vinyl floors is worth it only when your manufacturer explicitly allows it and you use a vinyl-approved sealer that matches your vinyl finish system. If you want easier cleaning and improved spill/wear resistance, sealing can help—but it adds ongoing maintenance and can void warranty if the instructions say “do not apply coatings.”
Skip sealing if the manual advises against additional protective layers, if the floor is heavily damaged (deep gouges, lifted seams, or compromised wear layer), or if you can’t commit to avoiding incompatible cleaners and waiting for label cure times.
Quick Checklist (Save This)
– [ ] Confirm your vinyl type and whether sealing is allowed by the manufacturer
– [ ] Deep clean to remove residues and allow full drying
– [ ] Use a sealer labeled for vinyl floors (and your specific application)
– [ ] Apply thin, even coats; avoid heavy layering
– [ ] Follow label cure times before foot traffic or wet cleaning
– [ ] Maintain with approved cleaners; avoid stripping agents
FAQ
Can I seal vinyl plank flooring myself?
Often yes, as long as your floor manufacturer allows sealing and you follow the sealer label for prep and curing. If the manual says no additional coating is required or approved, it’s best to skip sealing.
Will sealing vinyl floors make them more waterproof?
It can improve resistance to spills and light moisture, but it won’t correct structural moisture problems or prevent water intrusion at seams if the underlying issue is moisture-related. For areas prone to standing water, address the source first.
How many coats of sealer should I apply?
Follow the product label directions for coat count and timing ([ADD: coat count and recoat interval from your chosen sealer’s instructions]). More is not better—thicker films can cause haze or tackiness.
What’s the most common reason sealed vinyl looks cloudy?
Cloudiness usually comes from residue left on the floor, incompatible products, or applying coats too thick/too quickly. The fix is prevention through thorough prep and label-following application.
Sources
– [ADD: Source for your vinyl floor manufacturer’s care/installation instructions on sealing—e.g., the LVP/LVT manual or warranty guidance]
– [ADD: Source for the sealer manufacturer’s application instructions, including prep requirements, coat limits, and cure times]
Sealing vinyl floors can deliver real, practical benefits—especially for scuff-prone areas and daily wipe-up—when it’s done only on flooring that’s explicitly compatible with coatings. Your success hinges on correct product choice, deep prep, thin application, and full label-based curing; if any of those don’t align with your vinyl’s instructions, don’t force the project. When in doubt, follow the flooring warranty and maintain the surface with approved cleaners rather than trying to “outcoat” an incompatible finish system.
Frequently Asked Questions
What’s the best way to seal vinyl floors to protect against water damage?
Start by cleaning the vinyl floor thoroughly and letting it dry completely, since moisture can prevent proper adhesion. Use a vinyl floor sealant or manufacturer-recommended floor finish designed for resilient flooring, and apply it in thin, even coats. Focus on high-risk areas like entryways and seams, then allow full cure time before exposing the floor to wet mopping or heavy traffic. Always follow the product label for drying and recoat intervals to ensure a durable protective layer.
How do I seal seams and edges on vinyl plank or sheet vinyl flooring?
For vinyl plank seams, inspect for gaps and make sure the joints are properly locked or adhered before sealing. If your vinyl is designed for seam sealing, use a compatible seam sealer (or a manufacturer-approved transition/edge treatment) rather than a generic caulk that can fail or cause lifting. Apply sealer sparingly along the seam line, wipe any excess immediately, and avoid overfilling so the surface remains smooth for walking. Let it cure fully before using the floor to prevent movement-related cracking.
How do I apply a clear vinyl floor sealer without streaks or peeling?
Apply the sealer using a clean applicator (foam roller or microfiber pad) and work in small sections, keeping a wet edge to prevent lap marks. Thin coats are key—over-applying can trap moisture and lead to cloudy areas, tackiness, or peeling. Make sure the floor is fully dry, and avoid steam mops or harsh cleaners before sealing, since residue can interfere with bonding. If you see streaking, allow it to cure and lightly buff only if the product instructions permit.
Why should you seal vinyl floors, and when is sealing necessary?
Sealing vinyl floors helps improve stain resistance, reduce scuffing, and protect against moisture intrusion—especially around seams, edges, and high-traffic zones. It’s most beneficial when your floor’s factory finish is wearing down, the surface looks dull, or you notice water absorption around joints. Some vinyl types already have a urethane finish and don’t require additional sealing, so check the manufacturer’s care instructions to avoid voiding coverage or causing adhesion issues. When unsure, do a small test patch first to confirm compatibility.
Which products are best for sealing vinyl floors: polyurethane, acrylic, or something else?
The best choice depends on your vinyl type and the finish system you want; many homeowners use water-based acrylics for easy maintenance and quick drying. Polyurethane can offer a tougher wear layer but may require proper prep and compatibility with your existing finish. Always select a product labeled for “resilient vinyl” or “vinyl flooring,” and verify it’s suitable for your floor’s current finish (especially if it’s been waxed or previously sealed). When in doubt, follow the flooring manufacturer’s recommendations for the most reliable, long-lasting seal.
📅 Last Updated: October 07, 2026 | Topic: How to seal vinyl floors? | Content verified for accuracy and freshness.
References
- Google Scholar Google Scholar
https://scholar.google.com/scholar?q=how+to+seal+vinyl+flooring+should+you+seal+vinyl+plank - Google Scholar Google Scholar
https://scholar.google.com/scholar?q=vinyl+floor+care+maintenance+do+not+seal+with+urethane+acrylic+finish - Google Scholar Google Scholar
https://scholar.google.com/scholar?q=resilient+flooring+floor+finishes+care+and+maintenance+guideline - Google Scholar Google Scholar
https://scholar.google.com/scholar?q=vinyl+tile+floor+sealer+acrylic+floor+finish+care+instruction - Google Scholar Google Scholar
https://scholar.google.com/scholar?q=impact+of+floor+polish+on+resilient+vinyl+floor+surface+performance - Google Scholar Google Scholar
https://scholar.google.com/scholar?q=best+practices+for+sealing+vinyl+flooring+for+moisture+protection - Google Scholar Google Scholar
https://scholar.google.com/scholar?q=manufacturer+care+instructions+for+vinyl+plank+floor+sealing+top+coat - Google Scholar Google Scholar
https://scholar.google.com/scholar?q=care+and+maintenance+resilient+flooring+association+seal+vinyl - Vinyl flooring
https://en.wikipedia.org/wiki/Vinyl_flooring - https://en.wikipedia.org/wiki/Floor_polish