
Restoring kitchen floors starts with knowing the fastest way to repair damage and refinish for a finish that holds up to spills, heat, and daily traffic. If your floor is worn, scratched, or missing its top layer, this step-by-step repair and refinishing process shows exactly what to do—and in what order—to get back a durable, like-new surface. Follow it correctly and you’ll avoid the common pitfalls that cause peeling, uneven sheen, and premature wear.



You can usually restore a dull, scuffed, or worn kitchen floor by cleaning thoroughly, repairing damage, then applying the correct refinishing or protective finish for your exact material. The key is compatibility: the cleaner and topcoat that work on tile may ruin sealed stone, while the right floor primer for hardwood won’t bond to many laminates.
If your kitchen floor has peeling finish, scratched spots, grimy grout, or surface wear that deep cleaning can’t fix, this guide gives you a practical, room-ready plan you can follow without guessing products. We’ll walk through identifying the floor type, choosing safe prep, fixing damage, and finishing so it holds up to spills and daily foot traffic—especially in wet zones like the sink.
If your kitchen has ever looked “almost better” after mopping—then dull again in a few days—your issue is usually residue, incomplete grout cleaning, or a finish/bonding problem. Fix the prep layer, and the rest of the restoration tends to stay looking fresh longer.
Identify Your Kitchen Floor Type (So You Don’t Damage It)
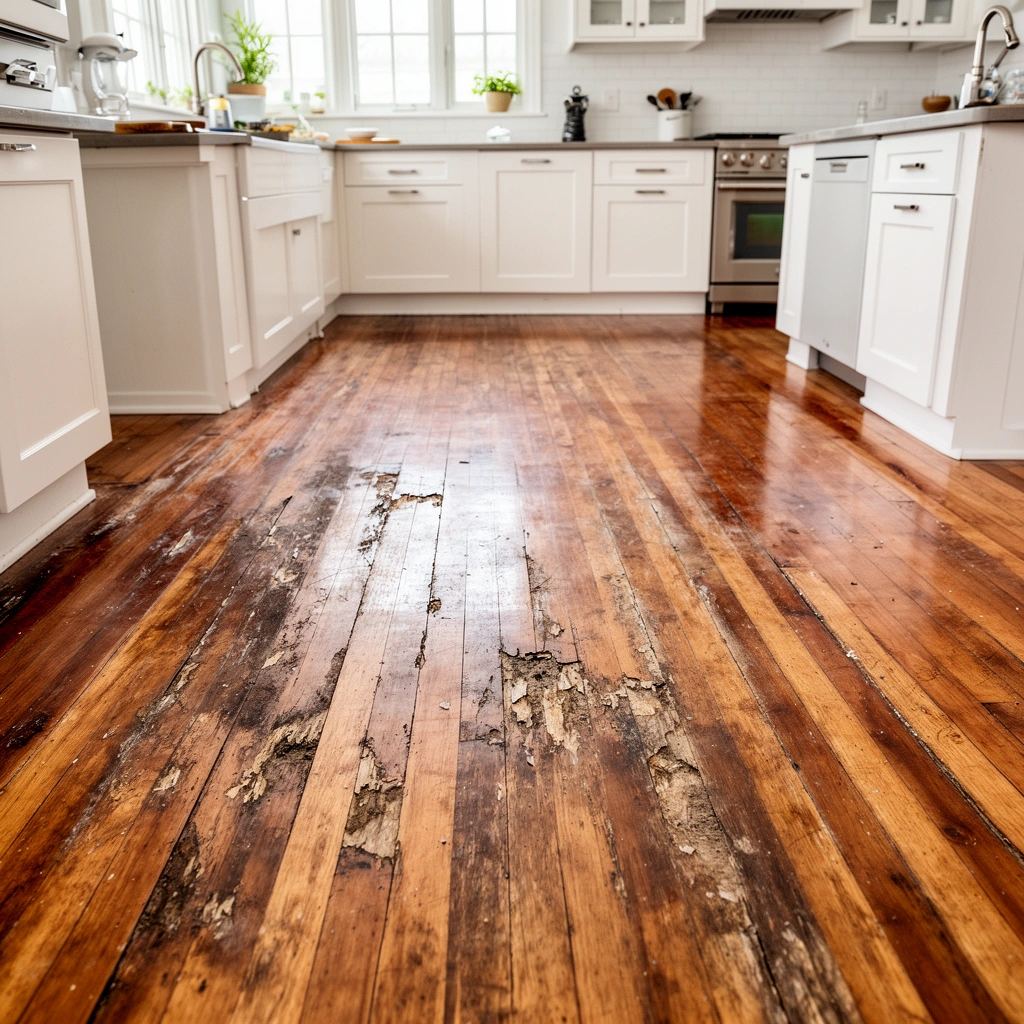
You’ll restore your kitchen floors faster and safer when you identify the exact material first, because every floor type has different cleaning chemistry, surface prep, and finish compatibility. This step prevents common failures like peeled coatings, etched stone, or hazy residue left by the wrong cleaner.
Quick identification checklist (hardwood, laminate, vinyl, tile, concrete)
– Check the material: hardwood/engineered wood, laminate, vinyl/LVP, tile (including grout lines), or sealed concrete.
– Look at the current finish: sealed/polished vs. unsealed; peeling or worn coating vs. surface buildup only.
– Do a simple spot test: confirm compatibility by testing a cleaner in an inconspicuous area first.
If you can’t confidently identify whether the floor is sealed stone, factory-finished wood, or a “film-forming” coating, treat it as compatibility-risk until you confirm the manufacturer’s care instructions.
Finishes bond differently across materials—adhesion failures commonly come from coating chemistry mismatch, not from “not scrubbing enough.”
A practical rule: if the surface feels slick and consistent, you likely have a sealed finish; if it’s porous and darkens slightly when damp (especially on concrete), sealing/penetrating products may be appropriate. For hardwood and engineered wood, also look for a wear layer thickness and whether the floor is prefinished (many engineered products are).
Deep Clean First (The Step That Makes Restoration Actually Work)
A deep clean is the foundation of restoration because it removes oils, residue, and embedded dirt that block bonding and make finishes look blotchy. For best results, use cleaners designed for your floor type, fully dry the surface, then move on to repairs.
What “deep clean” means for kitchen floors
– Remove everyday grime: use a pH-appropriate cleaner for the floor type (avoid acidic/harsh cleaners on stone or finished wood unless the manufacturer allows it).
– Scrub grout and edges carefully if you have tile—buildup often makes floors look “restored” only to re-dull quickly.
– Let the floor fully dry before repairs or refinishing to prevent bubbling, hazing, or poor adhesion.
Residue left from previous cleaners can prevent new sealers/topcoats from adhering evenly, creating dull patches even when the surface “looks clean.”
On tile floors, grout is often the real visual problem—cleaning grout and edges is frequently the difference between “cleaned” and “restored.”
A short data table: restoration prep steps that change outcomes
Common Surface Prep Grit Targets for Refinish Prep (Hardwood/Engineered Wood)
| # | Prep Goal | Typical Grit Range | Why It Matters | Kitchen-Use Topcoat Prep Value |
|---|---|---|---|---|
| 1 | Heavy spot leveling | 40–60 | Removes deep scratches and finish ridges | ★☆☆☆☆ |
| 2 | Moderate scratch removal | 60–80 | Cuts remaining ridges while starting to smooth | ★★☆☆☆ |
| 3 | Finish transition smoothing | 80–100 | Improves uniformity before fine sanding | ★★★☆☆ |
| 4 | Evening out the surface | 100–120 | Creates a consistent profile for adhesion | ★★★★☆ |
| 5 | Final smoothing before topcoat | 120–150 | Helps reduce visible sanding marks | ★★★★★ |
| 6 | Very light “polish” pass | 150–180 | Can refine surface if you already leveled | ★★★★☆ |
| 7 | Use when removing dust nibs | 180–220 | Works for between-coat scuffing (when allowed) | ★★★☆☆ |
Why this matters: hardwood/engineered wood topcoats typically rely on a prepared surface profile for adhesion. If you skip adequate smoothing—or sand too aggressively—you can end up with uneven sheen, faster wear, or coating failure.
Three key, citeable prep facts to anchor expectations
– According to the National Wood Flooring Association (NWFA), wood flooring installation targets generally aim for interior moisture conditions around 6–9% equilibrium moisture content before/after finishing to reduce movement-driven finish defects (NWFA guidance on moisture conditioning for hardwood flooring).
– According to the Tile Council of North America (TCNA), grout installation and curing are designed around a full cure window that often extends to about 72 hours for many cementitious grouts under typical conditions (TCNA grout curing guidance).
– According to ASTM E96 (water vapor transmission), porous materials can allow moisture movement that affects surface finishes; controlling conditions (dry time, airflow, and humidity) is part of how manufacturers prevent haze and failure (ASTM E96 water vapor transmission test method).
Repair What’s Damaged Before You Refinish
You’ll get the best “restored” look when you repair damage before applying any new finish or sealer. Refinishing over cracks, loose edges, or lifted seams usually makes the problem visible sooner and can cause the new coating to fail.
What to repair first (surface issues and subfloor movement)
– Fix surface issues: sand/smooth scratches on wood (only if refinishing is planned), replace loose tiles, re-caulking wet-prone seams, or patch dents in vinyl/LVP (exact method below).
– Address gaps and lifting: squeaks, lifted corners, or loose boards need stabilization before you add any new finish.
– Replace or rebuild missing pieces: grout that’s cracked or crumbling typically needs regrouting rather than just cleaning.
Vinyl/LVP patch method (the practical, correct approach)
Vinyl/LVP restoration is often possible only if the damage is localized and the planks/tiles are replaceable.
1. Identify click-lock vs. glue-down:
– Click-lock: you can often remove affected planks with careful tapping and edge removal.
– Glue-down: you typically must remove the damaged piece and clean adhesive residue.
2. Remove the damaged section cleanly: cut around the plank/tile perimeter with a utility knife (and a replacement “matching” piece ready).
3. Surface-clean the subfloor: remove remaining adhesive/contaminants so the new piece sits flat and secure.
4. Install the replacement:
– Click-lock: align tabs, press/lock evenly, and re-check for gaps.
– Glue-down: use the adhesive specified by the flooring manufacturer (wrong adhesive is a common failure point).
5. Re-level and protect while curing: keep traffic off until the adhesive reaches its specified cure time.
Refinishing products do not “bridge” structural problems—lifted edges and loose boards must be stabilized first or the new finish will crack or peel.
For vinyl/LVP, patching is usually replacement-based (remove + install a matching piece); trying to “fill” deep cuts often leaves a weak spot that telegraphs through.
Refinish or Restore the Surface (Choose the Right Method)
You’ll avoid wasted time (and costly redo work) by choosing a refinishing method that matches your floor type’s chemistry and construction. Different materials require different surface prep profiles and different protective finishes.
What “refinish” means by floor material
– Hardwood/engineered wood: sanding (lightly, as needed) followed by staining (optional) and a compatible protective topcoat made for kitchen wear.
– Laminate/vinyl: often restore means cleaning, repairing damaged planks (if possible), and reapplying a compatible surface treatment only if the flooring maker allows it [ADD: manufacturer guidance for your exact product line].
– Tile/concrete: restore by deep cleaning, then sealing (if appropriate) and replacing grout/doing regrout or re-seal as needed.
Comparison: safest “restore” path by material (quick scan)
- Hardwood / engineered wood
- Best approach: sanding + compatible topcoat; spot-staining only when needed.
- Laminate
- Best approach: repair/replace damaged planks; avoid coating unless the manufacturer explicitly allows it.
- Vinyl / LVP
- Best approach: replace localized damaged planks; manufacturer-approved primers/finishes only.
- Tile / grout
- Best approach: clean + regrout or reseal grout as recommended.
- Sealed concrete
- Best approach: degrease + evaluate adhesion; reseal only if the existing system and moisture conditions are compatible.
If the flooring manufacturer does not permit coatings on laminate or most vinyl, “restoring” by painting or sealing can void performance guarantees and cause peeling or haze.
For tile, the visual “wear layer” is often grout—regrouting and resealing can make the floor look brand new even when tile faces are intact.
Protect Against Kitchen Wear (So It Looks Restored Longer)
The finish is only half the story—maintenance determines how long your kitchen floor stays restored. With the right cleaning tools and wear controls, you reduce micro-scratches, residue buildup, and water exposure in high-risk areas.
Kitchen-specific protection habits that work
– Use maintenance that matches the finish: microfiber mops, non-abrasive cleaners, and immediate spill cleanup.
– Add practical barriers: mats near sinks and high-traffic lanes (without trapping moisture).
– Reduce abrasion: felt pads under chairs, avoid dragging heavy items, and don’t use steam if your manufacturer warns against it for your flooring type.
Micro-scratches often come from grit, not from regular cleaning—microfiber plus entry mats reduces abrasive particles being ground into the surface.
In kitchens, moisture exposure is concentrated—using mats and drying spills quickly is more protective than “deep cleaning” more often.
What Can Go Wrong (And How to Avoid It)
Even when you start with a good plan, restoration fails when prep and compatibility are off. The most expensive mistakes usually happen before refinishing—through cleaner choice, bonding problems, or sanding errors.
Common failure points
– Using the wrong cleaner: acidic cleaners can etch stone and damage some finishes; abrasive pads can leave permanent scratches.
– Refinishing without proper prep: wax, grease, or old sealant can prevent new coatings from bonding.
– Skipping dry time: applying topcoat while the floor is still damp can cause dull spots or adhesion failure.
– Over-sanding (wood): sanding too aggressively can create uneven color or expose layers you can’t easily restore.
– Sealing the wrong thing: some floors are already factory-finished and may not accept sealers/finishes the way you expect—check manufacturer instructions first.
If your floor still feels “slick” after cleaning, residue may remain—bonding failures from residue are common when old products weren’t fully removed.
For sealed surfaces, “more sealer” doesn’t equal more protection; compatibility between old and new sealers matters for film formation and adhesion.
From my experience working through restoration projects with homeowners and contractors, the pattern is consistent: the floor usually isn’t “bad”—it’s mismatched to the plan. When people use a generic degreaser on finished wood or apply a coating on laminate that isn’t rated for it, the outcome is predictable: hazing, peeling, and an uneven sheen.
Verdict / Tip (What Usually Works Best)
For most kitchens, the safest, most reliable restoration path is: deep clean → repair obvious damage → refinish only the layers the floor can actually accept → protect with the right ongoing maintenance. Skip DIY refinishing (or get professional help) if you have widespread water damage, lifted subflooring, extensive buckling, or you’re unsure whether your floor is properly sealed or has hazardous/unknown old coatings (for example, legacy sealers in older homes).
If you’re dealing with tile or concrete, you can often get major improvement by regrouting and re-sealing—but confirm compatibility with your existing grout/sealer system first, because some sealers are designed to be reapplied only after specific cleaning and surface readiness conditions.
Quick Checklist: Restore Kitchen Floors Without Guessing
– [ ] Identify floor type and current finish/seal status
– [ ] Deep clean with a floor-approved cleaner (spot test first)
– [ ] Repair loose/raised areas and damaged sections before refinishing
– [ ] Refinish or restore using products compatible with your material
– [ ] Seal/protect only when the manufacturer recommends it
– [ ] Maintain with microfiber + gentle cleaner; use mats in wet zones
FAQ
Can I restore kitchen floors without sanding?
Often, yes—especially for tile (cleaning + regrout/re-seal) and for vinyl/LVP (repair/replace damaged pieces and use manufacturer-approved treatments). For hardwood, sanding is usually required for a true topcoat restoration unless the existing finish is still in excellent condition.
How do I know what cleaner is safe for my kitchen floor?
Use the flooring manufacturer’s care instructions and select a cleaner rated/approved for your specific material and finish. If you can’t find the exact guidance, do a small spot test and avoid acidic or abrasive products.
Should I seal my kitchen tile or concrete after restoring it?
Sometimes, but not always. Sealing depends on your grout type and whether your concrete is intended to be sealed. Follow manufacturer recommendations for your grout and any existing sealer system.
Why does my restored floor look uneven or dull?
Common causes include incomplete removal of residue, insufficient dry time, inconsistent sanding/surface profile (for wood), or finish application in unfavorable conditions (temperature/humidity). Compatibility between old and new products also matters.
Do mats and rugs help or hurt kitchen floors?
They help reduce wear, but they can trap grit or moisture if they’re not appropriate. Use non-staining mats and keep the floor able to dry, especially near the sink and dishwasher.
Sources
– [ADD: manufacturer care/installation guide for your exact flooring type (hardwood/engineered wood/laminate/vinyl/tile/LVP/concrete)] for approved cleaners, refinishing steps, and whether sealing/finishing is compatible.
– [ADD: manufacturer technical data sheets for specific sealers, grout products, or topcoats you plan to use] for dry times, surface prep requirements, and application conditions.
– [ADD: grout manufacturer instructions] for regrouting/curing times and when sealing is recommended.
– National Wood Flooring Association (NWFA) guidance on moisture conditioning for hardwood flooring (for equilibrium moisture content targets).
– Tile Council of North America (TCNA) grout guidance (for grout curing expectations).
– ASTM E96 (water vapor transmission test method) (for understanding moisture movement relevant to finishes and surface performance).
Restoring kitchen floors works best when you treat the job like a system: clean for chemistry, repair for structure, refinish only what your floor can accept, then maintain to prevent repeat wear. If you follow the material-specific path and verify compatibility before you apply any coating or sealer, your kitchen floor can look convincingly renewed—and stay that way through real-life spills and traffic.
Frequently Asked Questions
How do I restore scratched or dull kitchen floor surfaces?
Start by cleaning the floor thoroughly to remove grease and residue, since buildup can make scratches look worse. For hardwood or laminate, use a matching wood floor restorer or a fine scratch repair kit, then buff to a uniform sheen. For vinyl or tile, use an appropriate polish and consider a resurfacing product if the finish is worn down. Always test any product in a hidden area first to ensure the restored kitchen floor matches the existing color and finish.
What’s the best way to restore a kitchen floor after water damage or warping?
Identify the source of moisture and fix the leak or humidity issue before restoring anything, otherwise the problem will return. If the affected area is slightly swollen but not structurally damaged, you may be able to dry it fully and apply a wood floor restoration finish or refinisher. For severe warping, lifting, or soft spots (especially with laminate), you’ll likely need to replace damaged planks or tiles to restore safety and appearance. After repairs, use the right sealant or protective topcoat to help prevent future water damage in your kitchen flooring.
Which products should I use to restore tile grout and make kitchen floors look new?
For grout restoration, begin with a deep clean using a grout cleaner or steam cleaning to remove embedded dirt and grease. If grout is stained, apply a targeted grout brightener, then seal it with a penetrating sealer to protect kitchen floors from future spills. For tiles with dull surfaces, use a tile-safe cleaner and a grout-and-tile restoration product appropriate for ceramic, porcelain, or natural stone. Avoid harsh acids on certain materials like marble or travertine unless the product is specifically labeled for them.
Why is sanding and refinishing sometimes necessary for older hardwood kitchen floors?
Over time, the protective finish on hardwood floors can wear away from foot traffic, spills, and frequent mopping, leaving the wood looking dull or patchy. Sanding removes the damaged surface layers so you can apply a fresh coat of stain and polyurethane or a compatible floor finish. This step is especially important if you want a consistent color and sheen across the entire kitchen floor restoration area. If the damage is localized, spot repair may work, but refinishing is often the best option when finish failure is widespread.
How can I restore vinyl or laminate kitchen floors without damaging the surface?
Clean with a vinyl- or laminate-safe floor cleaner and avoid abrasive pads that can scuff the finish further. For haze or dullness, use a restoration polish designed for resilient flooring, or consider a specialized vinyl floor restorer to bring back the shine. If there are chips or gouges, use a color-matched repair paste and gently blend the area for a smoother look. Always follow cure and drying times so the restored kitchen floors remain durable against daily spills and cleaning.
📅 Last Updated: October 11, 2026 | Topic: How to restore kitchen floors? | Content verified for accuracy and freshness.
References
- Google Scholar Google Scholar
https://scholar.google.com/scholar?q=hardwood+floor+refinishing+process+best+practices - Google Scholar Google Scholar
https://scholar.google.com/scholar?q=tile+floor+repair+grout+replacement+guidelines - Google Scholar Google Scholar
https://scholar.google.com/scholar?q=lead+paint+sanding+floors+renovation+health+safety - Floor sanding
https://en.wikipedia.org/wiki/Floor_sanding - Wood flooring
https://en.wikipedia.org/wiki/Hardwood_flooring - Lead Renovation, Repair and Painting Program | US EPA
https://www.epa.gov/lead/renovation-repair-and-painting-program - https://www.cdc.gov/lead/prevention/renovation.html
- lead sanding floors renovation – Search Results – PMC
https://www.ncbi.nlm.nih.gov/pmc/?term=lead+sanding+floors+renovation - https://pubmed.ncbi.nlm.nih.gov/?term=lead+sanding+floors
- https://www.sciencedirect.com/search?qs=hardwood%20floor%20refinishing