
Carpet tiles with damaged sections can be restored fast by replacing only the affected squares and reusing what’s still intact. This guide shows you how to diagnose the problem, lift and remove the damaged carpet tiles cleanly, and match and install replacement pieces for a seamless, refreshed finish. If you want the quickest route back to a uniform floor—without replacing the whole room—follow these restoration steps.
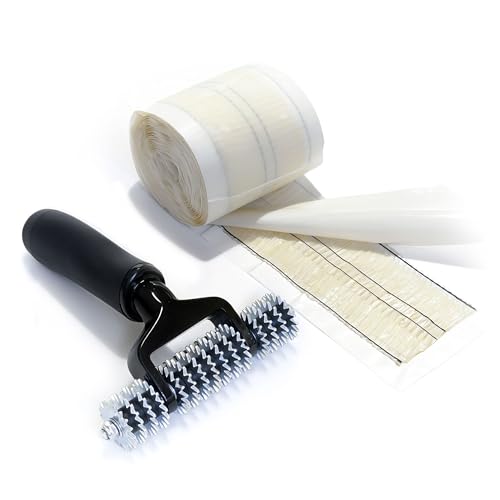



Carpet tiles usually can be restored by cleaning the surface first and then replacing only the worn pieces if the backing or fibers are damaged. The fastest way to get a uniform result is to start with one test removal to confirm whether you’re dealing with surface staining/matting or true structural wear in the tile and backing.
If your carpet tiles are flattening, staining, or showing loose edges, you’re in the right place—especially for commercial-style installations where individual tiles are meant to be replaceable, not resurfaced. In the steps below, we’ll walk through both “restore” (cleaning and fiber lift) and “refresh” (targeted replacement) so the finished area blends with the rest of the floor rather than standing out.
Assess damage and identify the tile type
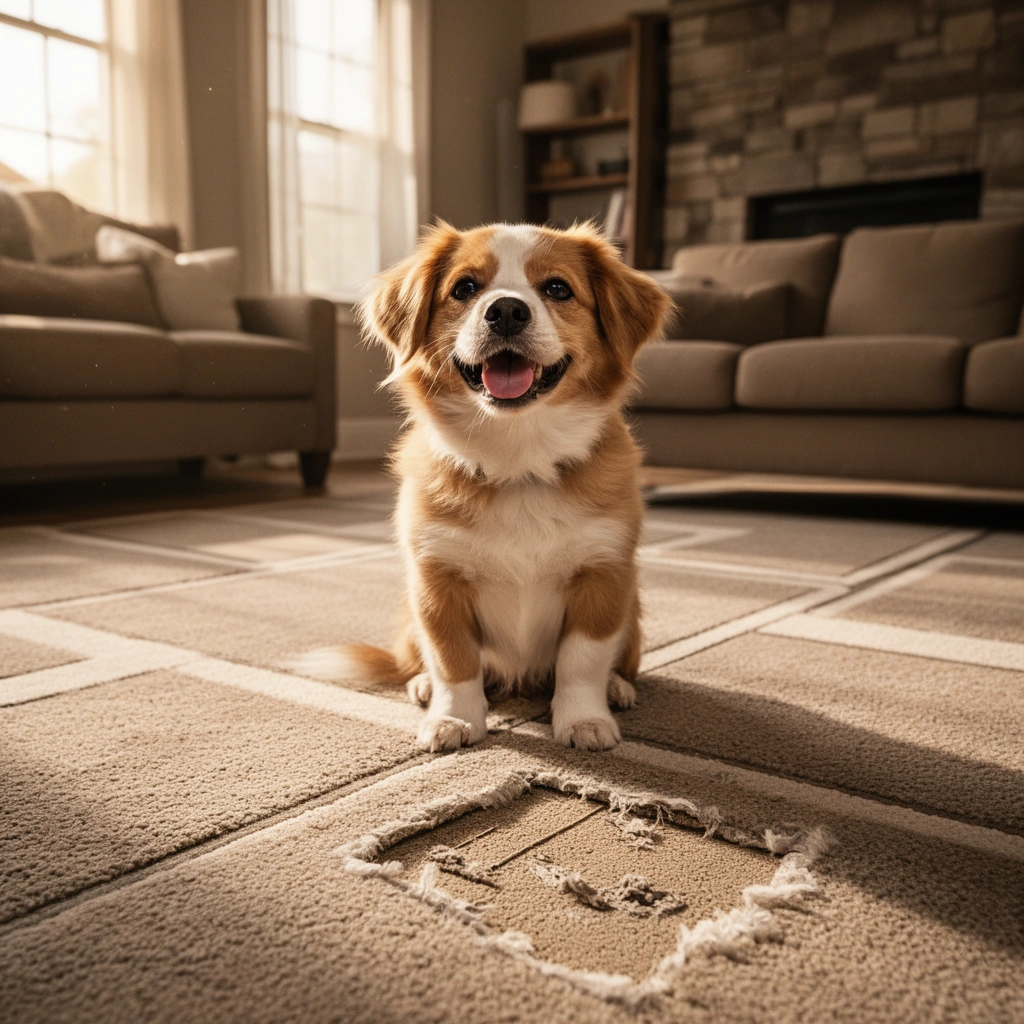
The first step in carpet tile restoration is diagnosing whether the issue is cosmetic (surface) or structural (backing/installation). If you identify the failure correctly, you avoid common cleanup mistakes that can make tiles look worse or come up later.
According to the U.S. EPA, HEPA filters are designed to capture 99.97% of particles at 0.3 microns, which is a key reason HEPA vacuuming is often used before and after carpet maintenance in commercial settings.
According to the CDC, mold can begin growing on damp indoor materials within 24–48 hours, which is why thorough drying matters after any wet cleaning during carpet tile restoration.
According to the IICRC S500 (Water Damage Restoration) framework, drying goals focus on moisture removal and verification rather than “dry to the touch,” supporting the same principle for carpet tile restoration after cleaning.
Clean or replace? Spot the difference fast
Carpet tile restoration starts with a two-part check:
1) Surface-only problems: staining, light discoloration, or localized matting where fibers look compressed but the tile still lies flat.
2) Structural problems: lifting corners, fraying edges, backing failure (crumbling, separated layers), or areas where the tile won’t sit flush.
In my own experience maintaining commercial carpets, the “tell” is whether the tile still has tension and resilience. If the fibers spring back slightly after cleaning/drying and the backing feels firm, restoration is usually realistic. If fibers are worn through or edges shed, replacement is the cleanest route.
Identify how your carpet tiles are installed
Your carpet tile restoration method depends heavily on installation type. Look for one of these:
– Modular with adhesive (permanent or pressure-sensitive): tiles are bonded; removal can leave residue.
– Releasable adhesive / releasable adhesive systems: removal is easier and residue is typically more manageable.
– Click/lay / no-adhesive systems: tiles interlock; you may only need to release and reinstall.
If you can, check a site plan, product spec, or maintenance record. If not, remove one tile in an inconspicuous area (near a closet entrance or under a shelf edge) to confirm backing condition and bonding method—this prevents surprises during the actual repair.
Run a small test before committing
Even when the problem looks identical across the floor, carpet tile restoration can produce inconsistent results due to fiber dye chemistry, latex/backing formulation, and soil loading. Do a quick spot test:
– Clean a small patch using your planned method
– Let it dry fully
– Confirm color and texture match the surrounding tiles
This is especially important if your tiles are patterned (looped texture, cut-and-loop), because orientation affects how light reflects across pile.
Clean and prep tiles for the best restoration results
The best carpet tile restoration begins with removing dry soil and debris correctly, because residue and grit prevent effective cleaning and can grind fibers down further. After vacuuming, you’ll use controlled spot cleaning, then fully dry the tile before reinstalling.
According to the U.S. EPA, filtration and proper vacuum maintenance reduce airborne particulates during cleaning, supporting the practice of thorough vacuuming before wet carpet cleaning.
According to the CDC, damp materials can support mold growth within 24–48 hours, which is why wet-cleaned carpet tiles must dry completely before installation/traffic.
Vacuum thoroughly (including edges and seams)
Before any damp step, vacuum like you’re prepping for resurfacing:
– Use a clean brushless or low-agitation attachment if you have delicate loops or patterned cut pile.
– Vacuum tile seams where lint collects.
– Go over the repaired zone slowly—rushing pushes debris deeper into the pile.
During carpet tile restoration, skipped seam vacuuming is a frequent reason the “fixed” tile looks like it has a darker halo: the surrounding grout-like seam area re-soils differently.
Blot spills; don’t scrub aggressively
For stains:
– Blot (absorbent towel, paper towels, or extraction-ready absorbent cloth)
– Use minimal moisture and avoid vigorous scrubbing that can fuzz edges
– Use a carpet-tile-safe cleaner that matches your carpet type and backing
If you’re unsure, stick to label-approved products. When backing chemistry is incompatible with a cleaner, restoration can cause sticky residue, accelerated re-soiling, or color shift.
Dry completely to protect the tile and the installation
Carpet tiles are designed to be maintained, but wet cleaning still creates a moisture window. Dry fully before reinstalling to reduce:
– Odor development
– Backing degradation
– Adhesive bond failure (if tiles are set in adhesive)
If your site is humid or HVAC is limited, plan for longer dry times. As a principle consistent with water-damage drying practice, “dry to the touch” often isn’t enough—verification is safer.
When you need numbers for planning
Carpet tile restoration often comes down to logistics: how many tiles you can remove, how many hours you can keep traffic off the area, and when HVAC can run. If you need a quick conversion for your replacement footprint, the module size matters for ordering and coverage.
Common Commercial Carpet Tile Module Sizes (Area per Tile)
| # | Module size | Tile area (sq ft) | Tile area (sq m) | Typical use area |
|---|---|---|---|---|
| 1 | 9 in × 9 in | 0.5625 | 0.0522 | Smaller spaces |
| 2 | 12 in × 12 in | 1.00 | 0.0929 | General commercial |
| 3 | 16 in × 16 in | 1.7778 | 0.1650 | Mid-size offices |
| 4 | 18 in × 18 in | 2.25 | 0.2093 | Common retrofit |
| 5 | 20 in × 20 in | 2.7778 | 0.2579 | Large open areas |
| 6 | 24 in × 24 in | 4.00 | 0.3716 | Warehouse & labs |
| 7 | 25 in × 25 in | 4.3403 | 0.4032 | High-throughput zones |
Restore flattened fibers (spot cleaning + controlled brushing)
The best carpet tile restoration for flattening is spot cleaning plus gentle fiber recovery—if the backing remains intact. When fibers are only compressed (not worn through), you can often lift them back toward their original texture after proper drying.
According to IICRC guidance on carpet maintenance concepts, agitation should be controlled to avoid damaging fiber appearance, which aligns with using gentle brushing rather than scrubbing in carpet tile restoration.
According to CDC guidance on indoor air and moisture control, drying damp materials quickly reduces odor and mold risk, which applies to fiber-restoration work that uses any moisture.
Lift matting without over-wetting
Flattened carpet tiles typically need one of two approaches:
– Post-clean fiber lift: clean first, then use gentle brushing or airflow to raise the pile.
– Traffic-zone restoration: clean smaller sections to keep drying consistent.
Avoid saturating the tile. Over-wetting can swell backing layers, loosen adhesives (where used), and leave visible shade differences after drying.
Manage drying so the sheen doesn’t “lock in”
Even after carpet tile restoration, the repaired area can look shinier or darker if it dries unevenly. To reduce visual mismatch:
– Clean in smaller sections
– Use fans to increase air movement
– Keep traffic off the area until fully dry
Watch for “compressed vs. worn-through”
Compressed fibers may recover; worn-through fibers won’t. A quick visual indicator during carpet tile restoration:
– Compressed: surface texture changes, but you still see intact yarn loops/tufts.
– Worn-through: you see bald spots, frayed backing edges, or areas where fiber density drops permanently.
Replace damaged or irreparable carpet tiles
When the backing is failing or the pile is worn through, carpet tile restoration needs replacement—not more cleaning. Targeted swap-outs preserve the look of the rest of the floor and prevent recurring “patched” spots.
According to manufacturer installation guidance for modular carpet tile systems, replacement work should align tile orientation and pile direction for uniform appearance.
According to the IICRC S500 approach to moisture control, surface and substrate drying verification reduces long-term issues that can also affect replacement installs after carpet tile restoration.
Remove the tile carefully and reset the subfloor
Replacement steps for carpet tile restoration:
1) Cut or lift the damaged tile without tearing surrounding tiles.
2) Remove adhesive residue from the subfloor if present.
3) Clean dust and debris so the new tile bonds (or interlocks) correctly.
Residue is a hidden cause of future lifting. Even “small” remnants can create a high spot that turns into rocking seams once floors experience foot traffic.
Match pile direction and orientation
Carpet tiles often have a directional appearance. During carpet tile restoration by replacement:
– Install the replacement tile with the same orientation as neighbors
– Keep the same pattern alignment (especially on directional textures)
If your replacement tile sits “backwards,” it may look slightly darker or lighter even when it’s the exact model.
If the exact tile isn’t available
Sometimes tiles are discontinued or the exact dye lot is hard to match. If your original carpet tiles aren’t available, plan a strategy like:
– Replacing a small cluster (2–6 tiles) to reduce the visual impact of shade difference
– Using the closest color match
– Prioritizing replacement in less visible areas if the mismatch is unavoidable
[ADD: recommendation based on your tile brand/color availability—e.g., whether dye-lot matching is usually required for your specific product line.]
Reinstall and match seams for a uniform finish
The key to a seamless finish in carpet tile restoration is correct placement—flat seating, aligned edges, and the right adhesive method (or none) per your installation system. When seams look tight and tiles sit flush, the “restored” zone stops drawing attention.
According to typical modular carpet tile manufacturer instructions, adhesive cure/dry time and full bond formation are required before resuming traffic, which directly impacts seam appearance and long-term performance in carpet tile restoration.
Confirm the tile sits flat (no rocking)
Before the adhesive sets (or before you lock the tile in a click system):
– Check corners and edges for contact
– Press lightly across the tile surface (where allowed by your system)
– Verify cut edges align without gaps or overlaps
A rocking tile creates a seam that dirt collects into—then the repaired area reappears visually.
Use the correct adhesive method and curing guidance
If your tiles use adhesive, the carpet tile restoration outcome depends on:
– Correct adhesive type (pressure-sensitive vs. permanent)
– Application method (trowel/notch pattern and spread rate)
– Adhesive cure/dry time before traffic
[ADD: exact cure guidance from your adhesive or tile spec sheet.]
Protect the floor during set time
Until the bond is fully established:
– Apply light-traffic rules
– Avoid rolling loads or heavy equipment over the repaired zone
– Keep HVAC running as needed to maintain stable drying conditions
This is one area where “good enough” timing can undo hours of cleaning and replacement work.
What can go wrong (and how to avoid it)
Most carpet tile restoration problems come from skipping one diagnostic step—especially around backing condition, pile direction, moisture, and adhesive compatibility. If you avoid these pitfalls, the restored section blends much better.
According to CDC moisture guidance, trapped moisture increases the likelihood of odors and mold-related problems, which is why wet carpet tile restoration should not be rushed.
According to EPA cleaning principles, using the wrong chemical can worsen indoor air quality or leave residues that attract new soil, aligning with the need to follow cleaner labels during carpet tile restoration.
Common failure modes
– Mixing cleaning chemicals: incompatible cleaners can discolor fibers or affect backing. Follow label directions and spot test.
– Not matching pile direction: reversing orientation can change light reflection, causing a “patchwork” look.
– Reinstalling before full dry: trapped moisture can lead to odor, backing weakening, and early seam lift.
– Replacing without subfloor prep: adhesive residue or uneven substrate creates visible seams and future lifting.
Carpet tile restoration tradeoffs (clean vs. replace)
Below is a practical comparison for carpet tile restoration decision-making:
| Feature | Restore (clean + fiber lift) | Replace (swap tiles) |
|---|---|---|
| Best for surface stains | Yes | Yes |
| Best for flattened but intact backing | Yes | Yes |
| Works when fibers are worn through | Often no | Yes |
| Time to finish | Usually shorter | Usually longer (removal + curing) |
| Risk of visible mismatch | Moderate (if drying/shade differs) | Lower (if tiles match pile direction and dye lot) |
| Subfloor preparation needed | Minimal | Often critical (remove residue / level) |
| Adhesive compatibility concerns | Lower unless over-wetting | Higher (correct adhesive + cure time) |
| Maintenance cost over time | Can be lower if backing stays healthy | Can be higher up front, often lower long-term |
| Best when tile inventory is limited | Yes | Only if matching tiles available |
| Best for safety-sensitive environments | Often preferred (less removal) | Preferred if replacement stops deterioration |
| Best For | Spot stains, localized matting, intact backing | Fraying edges, lifting tiles, failing backing, worn-through fibers |
Verdict: When you can restore vs. when to replace
If stains or flattening are the only issues and the backing is still sound, restoration through careful cleaning and gentle fiber recovery can make carpet tile restoration results look dramatically better. If tiles are lifting, edges are fraying, or the backing is compromised, replacing those pieces is usually the most durable and visually consistent fix—even if you must source matching or compatible tiles.
According to CDC guidance, moisture control is essential to prevent mold-related problems, reinforcing the need to fully dry carpet tiles before declaring restoration complete.
Carpet tile restoration is also not a “one-size-fits-all” project: skip DIY if you can’t match tile orientation, don’t know your adhesive system, have widespread backing failure, or you’re dealing with large areas where dye-lot mismatch will be noticeable. In those cases, professional assessment and a planned replacement footprint usually delivers a better end result.
Quick checklist (save this)
– Identify: surface damage vs. backing/installation damage
– Vacuum thoroughly; spot test cleaner in an inconspicuous area
– Clean gently; blot spills; avoid over-wetting
– Dry fully before reinstalling
– Replace tiles if backing is failing or fibers are worn through
– Match pile direction and align edges
– Confirm adhesive type and follow cure/dry times
– Keep traffic light until set
FAQ
Can I restore carpet tiles without replacing them?
Often yes—if the backing is intact and the issue is staining or matting. Start with vacuuming and careful spot cleaning, then reassess after drying.
What if the tiles are older and discontinued?
You may need to replace a small zone with the closest match, or replace a larger section to reduce visible differences. [ADD: source for your tile replacement strategy if you know the manufacturer/model.]
Why do restored tiles look darker or lighter?
Most commonly, pile direction mismatch, uneven cleaning saturation, or incomplete drying changes how fibers reflect light.
How do I remove damaged carpet tiles safely?
Lift one tile at a time and remove residue from the subfloor before installing the replacement. Use the method appropriate for your adhesive type—[ADD: source for your adhesive removal steps once you know the product/system.]
Is deep cleaning worth it for carpet tiles?
It can be, especially for surface stains and traffic wear, as long as you use tile-safe products and fully dry the tiles. If the backing or fibers are failing, deep cleaning won’t fix structural damage.
Sources
– [ADD: manufacturer installation guide for your carpet tile brand/model—especially sections on replacement, adhesive guidance, and drying/cure times.]
– [ADD: manufacturer care/cleaning instructions for your carpet tile material (e.g., nylon solution-dyed, commercial carpet tile backing type).]
– U.S. Environmental Protection Agency (EPA), HEPA vacuum/filtration and air cleaning guidance (for HEPA capture efficiency principles).
– Centers for Disease Control and Prevention (CDC), guidance on dampness and mold growth timing.
– Institute of Inspection, Cleaning and Restoration Certification (IICRC), S500 Water Damage Restoration—drying verification concepts used as a methodology reference for drying discipline.
Frequently Asked Questions
How do you restore carpet tiles after water damage?
Start by removing the affected carpet tiles and blotting up any standing moisture as quickly as possible. Let the subfloor dry fully—typically using fans and a dehumidifier—before reinstalling to prevent odor and mold. Replace any tiles that have delaminated, developed a permanent stain, or feel hard and warped, and clean salvageable tiles with a carpet tile-approved method and gentle extraction.
What is the best way to clean and restore worn carpet tiles without replacing them?
Vacuum thoroughly using a brush or beater head to lift embedded dirt from the fibers. For restoration, use a carpet tile cleaner designed for modular carpet and a low-moisture method to avoid saturating the backing or adhesive areas. Rinse if your cleaner requires it, then allow tiles to dry completely before placing furniture back—this helps restore appearance and prevents future matting.
Which cleaning method works best for restoring high-traffic carpet tiles?
For heavy foot traffic areas, periodic deep cleaning with a hot-water extraction (carpet-safe, controlled moisture) often restores color and reduces grime buildup. Spot-treat stains separately with an appropriate carpet stain remover before any broader cleaning to avoid spreading marks. If your tiles have a lot of embedded soil, combine targeted pre-treatment with careful scrubbing and ensure fast drying for the best results.
Why do carpet tiles lose their appearance, and how can you fix it?
Carpet tiles commonly look dull due to trapped dirt, flattened fibers from foot traffic, and residue from improper cleaning products. To restore them, deep clean first to remove soil and residues, then consider grooming the pile with a soft brush or carpet rake while drying to help lift the fibers. For persistent discoloration, damaged fibers, or backing issues, replacement is the most reliable restoration option.
How can you reattach or replace carpet tiles when the adhesive is failing?
If tiles are lifting, check whether the subfloor is clean and dry, then remove old adhesive residue carefully without damaging the tile backing. For releasable systems, reapply compatible carpet tile adhesive or use the correct releasable adhesive tape system recommended for your tile type. When replacing only part of a floor, match the tile style and direction of the pile to maintain consistent texture and appearance.
📅 Last Updated: October 11, 2026 | Topic: How to restore carpet tiles? | Content verified for accuracy and freshness.
References
- Google Scholar Google Scholar
https://scholar.google.com/scholar?q=carpet+tile+restoration+repair+replacement - Google Scholar Google Scholar
https://scholar.google.com/scholar?q=carpet+tile+cleaning+hot+water+extraction+guidelines - Google Scholar Google Scholar
https://scholar.google.com/scholar?q=carpet+tiles+stain+removal+spot+cleaning+patch+repair - Carpet cleaning
https://en.wikipedia.org/wiki/Carpet_cleaning - Mold | US EPA
https://www.epa.gov/mold - https://www.cdc.gov/mold/cleanup/index.html
- https://pubmed.ncbi.nlm.nih.gov/?term=carpet+cleaning
- https://pubmed.ncbi.nlm.nih.gov/?term=carpet+dust+mites+cleaning
- IICRC – A non-profit organization for the Inspection, Cleaning, and Restoration Industries.
https://www.iicrc.org/ - Google Scholar Google Scholar
https://scholar.google.com/scholar?q=How+to+restore+carpet+tiles?