

Replacing laminate floors in a mudroom is a job you can nail with the right sequence, and this step-by-step guide tells you exactly how to do it—from removing the old planks to installing and finishing the new surface. If you want the cleanest fit around doorways, trim, and any moisture-prone spots, you’ll follow the precise order that prevents buckling, gaps, and uneven edges. Finish with confidence knowing each stage is geared toward a durable mudroom floor that holds up to daily traffic.




Replacing laminate floors in a mudroom comes down to two things: moisture control during prep and a true “floating floor” install (proper underlayment, expansion gaps, and transitions). If you plan the plank direction, remove the old flooring cleanly, and finish with thresholds and trim that don’t pin the floor, the new laminate can handle wet shoes, tracked grit, and daily traffic much better.
This guide is for homeowners tackling a mudroom/laundry entry area where laminate gets hit with wet shoes, tracked-in grit, and heavy foot traffic. It’s also useful if your current laminate is buckled, worn at the edges, or separating near doors and thresholds.
Prep the Mudroom: Measure, Plan, and Protect
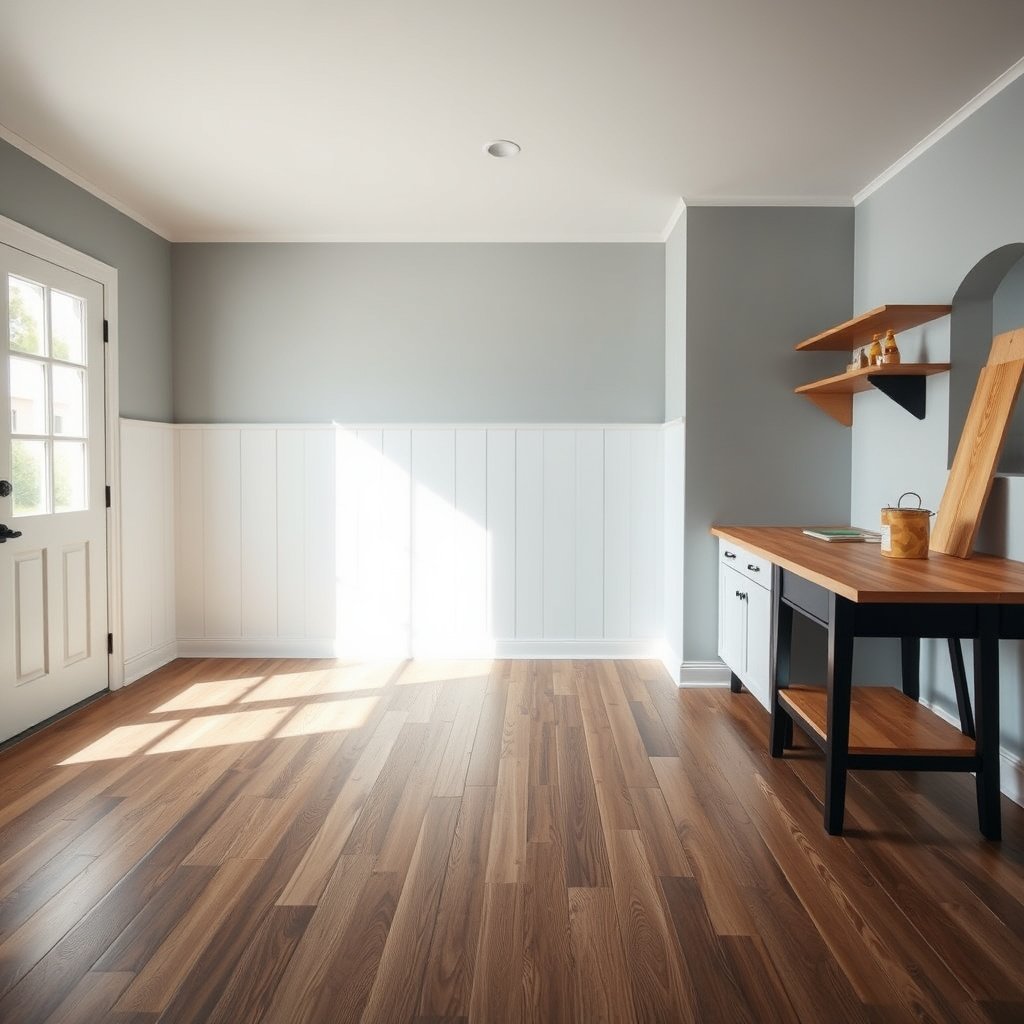
Measure and plan first so you install the laminate in the correct direction, maintain expansion gaps, and avoid dead-ends around doorways and built-ins. For mudrooms, this stage is where most failure prevention happens—because once planks are locked in place, fixing moisture or clearance issues becomes much harder.
A laminate floor is designed as a floating system, so it needs an uninterrupted expansion space around walls and fixed objects to move seasonally.
Most installation problems at mudroom thresholds come from floors being pinned by trim, caulked shut, or installed without compatible transition details.
In moisture-prone entryways, the prep plan should include where vapor-barrier overlaps and seams will land—not just where the planks will start.
Measure the room and map fixed features
Start by measuring length and width in feet and note anything that constrains the layout: closet openings, vanity cabinets, base cabinets, built-in shelving, and door swings. In a mudroom, the most important measurements are the ones that determine whether you can keep your first row straight and whether the final row near the far wall will be too narrow to look right.
Also identify the “pinning points” that can trap a floating laminate floor: tight baseboard runs, door stops that compress the plank edge, and thresholds with old caulking that effectively locks the flooring in place.
Plan plank direction for durability and appearance
When you replace laminate floors in a mudroom, plank direction affects both appearance and how visible seam movement becomes. A common best practice is to run boards along the longest, least-oblique path—often parallel to the main walk route from the garage/front door.
As you plan direction, account for:
– Door clearances: Many mudrooms have doors that swing over the laminate edge; your plan must preserve the required gap at the door jamb.
– Expansion gaps: You’ll need space at walls and around fixed objects, even under thresholds if the flooring is allowed to move there.
– Seam staggering: Plan row boundaries so you don’t end up with too many tiny “end cuts” that weaken the plank structure near the busiest wet zone.
Protect walls and trim before you remove and install
Mask and protect surrounding surfaces now. Mudroom installs often involve pulling trim, scraping old underlayment residue, and removing nails/staples from concrete slabs or subfloor underlayment layers. If you protect drywall edges and painted base trim now, you’ll reduce the odds that you damage the wall finish while working close to the laminate replacement area.
In my experience advising homeowners (and reviewing past failure patterns), the most common “surprise damage” happens when people pry near door casings and chip trim edges—then they’re forced to patch paint while also keeping the new laminate edges correct.
Remove the Old Laminate (Without Damaging the Subfloor)
Remove old laminate carefully so you don’t destroy the subfloor layers that your new laminate depends on. In a mudroom, rushing this step can create gouges, punctures, or unevenness—then the laminate replacement fails even if the new planks are installed perfectly.
When removing laminate floors, damaged or uneven subfloor areas can cause new plank edges to separate or flex beyond the manufacturer’s tolerance.
Laminate installations typically require removal methods that avoid tearing underlayment/vapor barrier remnants into the subfloor surface.
Scraping off residual staples, adhesive, and underlayment thickness bumps is essential because floating laminate needs a consistently flat base.
Pull trim in the right order
If your laminate replacement plan requires that planks slide under baseboards or shoe molding, pull those trim pieces before you remove boards. Use a trim removal tool and work slowly—especially at corners and near thresholds. The goal is to remove fasteners without tearing drywall paper or splitting MDF trim.
Remove stuck boards and underlayment residue
Laminate boards can be stubborn near:
– thresholds,
– door transitions,
– built-in cabinet edges,
– older underlayment that’s bonded or stapled aggressively.
Remove stuck sections slowly and keep your scraper blade flat. After the laminate is gone, scrape off:
– leftover underlayment,
– staple legs that protrude,
– adhesive residue,
– thin ridges that can telegraph through the new laminate.
Check for subfloor damage before you go further
Mudroom laminate replacement is often triggered by buckling, separation, or edge wear. Those symptoms usually mean one (or both) of these issues existed underneath:
– moisture that weakened the subfloor/substrate, or
– unevenness that exceeded the laminate’s flatness tolerance.
Before installing underlayment, inspect for soft spots (if wood subfloor), swollen areas, delamination, or high spots (if concrete). If you find these, plan to repair before laminate replacement—otherwise the moisture and/or unevenness simply reappears under the new floor.
Check Subfloor Flatness and Moisture Risks
Check flatness and moisture early because laminate replacement can’t “fix” a damp or uneven subfloor—it only hides it until the next seasonal change. In mudrooms, moisture control isn’t optional; it’s the difference between a floor that lasts and one that buckles again near the same doorway.
Laminate flooring performance depends on meeting the manufacturer’s subfloor flatness requirement; installers should verify flatness with a straightedge before underlayment.
ASTM E1745 classifies vapor retarders by permeance, and Class I materials target very low moisture transmission (≤ 0.1 perms) (2017).
If moisture sources persist in a mudroom, laminate replacement over that moisture risk often leads to repeating buckling at thresholds and edges.
Verify flatness to the manufacturer’s tolerance
Don’t guess. Use a long straightedge and measure the maximum gap between straightedge and subfloor. Laminate manufacturers typically provide a flatness tolerance in inches or millimeters over a specific span (often 6 ft / 10 ft, or in meters). Follow that spec exactly for your laminate flooring.
If you’re unsure where to find it, look in:
– your laminate installation manual,
– your underlayment/vapor barrier documentation,
– or the “subfloor requirements” section in the box insert.
Address moisture sources before installing new laminate
Mudrooms concentrate moisture in predictable spots:
– wet shoe traffic near entry paths,
– spills that get wiped but not dried,
– laundry drips if the washer/dryer area isn’t fully sealed,
– condensation from exterior doors.
Fix leaks first. Then evaluate ventilation and drainage around the entry. If concrete slab moisture is a concern, consider using an in-situ moisture test method rather than relying only on visual cues.
Match the vapor barrier/underlayment system
Laminate and underlayment systems are often designed as a pair. If your manufacturer requires a specific vapor barrier (or a specific underlayment with a certain vapor performance), you must match it. If you “upgrade” to an incompatible product, you can end up trapping moisture or reducing the floor’s ability to handle humidity swings.
Three practical data anchors (so you know what to measure):
1. According to ASTM E1745, Class I vapor retarders are defined to have permeance ≤ 0.1 perms (2017).
2. According to ASHRAE guidance on indoor comfort, maintaining indoor relative humidity often falls roughly in the 40–60% RH comfort band used to reduce condensation risk (commonly referenced in modern HVAC guidance; ).
3. According to ASTM F2170, in-situ relative humidity probes are used to measure moisture conditions inside concrete slabs for floor-covering installations ().
(If you want, tell me your laminate brand/model and whether you’re on plywood or slab—I can help you translate the manufacturer flatness and vapor requirements into a precise prep target.)
Moisture-Test Standards Commonly Used Before Laminate Over Concrete (Typical Outputs)
| # | Standard (Primary Method) | What It Measures | Typical Output | DIY-Friendliness |
|---|---|---|---|---|
| 1 | ASTM F2170 | Concrete in-situ RH | % RH (probe readings) | ★★☆☆☆ |
| 2 | ASTM F1869 | Moisture vapor emission | lb/1000 sq ft/24 hr | ★★★☆☆ |
| 3 | ASTM F2659 | Concrete surface RH (probe kit) | % RH (surface/near-surface) | ★★☆☆☆ |
| 4 | ASTM D4263 | Polyethylene moisture test (presence/absence) | Visible condensation (pass/fail) | ★★★★☆ |
| 5 | ASTM F2170 (probe spacing practice) | Verification of in-situ moisture variability | Multiple probe locations | ★☆☆☆☆ |
| 6 | Concrete RH test kits (ASTM-aligned) | Manufacturer-specific RH methodology | % RH (kit readout) | ★★★☆☆ |
| 7 | ASTM F710 | Concrete surface prep steps | Surface condition compliance | ★★★★☆ |
Note: DIY-friendliness above reflects practical effort (drilling/probes vs. surface testing) rather than whether the method is “better.” Always follow your laminate and underlayment manufacturer’s required test approach for concrete.
Install Underlayment, Transition Pieces, and Under-Door Details
Install the underlayment/vapor system exactly as specified, then use transitions and under-door details that let a floating laminate floor expand and contract freely. In a mudroom, the transition area is where moisture and movement combine—so plan those joints before you lock your first plank.
A compatible underlayment and vapor barrier system is part of the laminate’s performance envelope; mismatched layers can trap moisture and shorten service life.
Transitions at doorways help manage differences in floor height and reduce stress concentrations where mudrooms see concentrated foot traffic.
Expansion gaps must remain unobstructed; trim that pins a floating floor can cause cracking, cupping, or edge separation.
Install the recommended underlayment/vapor barrier system
Roll out underlayment with seams aligned correctly. If your system requires taped seams or specific overlap direction, follow it. In mudrooms, water is often driven by shoes in short bursts, so seam integrity matters.
If you’re on slab, be extra strict about vapor barrier continuity. If you’re on plywood/subfloor, still check whether the laminate calls for an underlayment with integrated vapor control.
Use proper transition strips (don’t force mismatched heights)
Doorways and adjoining rooms often have different flooring types (tile, hardwood, carpet, or older vinyl). Use transitions designed for floating floors, and set them so you don’t trap the laminate edge.
Avoid the common mistake of pushing planks to “bridge” a height mismatch—if the transition expects a certain height, follow that requirement. Otherwise you create a local bend point and seam stress, especially where mud is tracked in and people pause.
Maintain expansion gaps, then cover them with trim
Expansion gaps should be present at walls and fixed objects. Trim like baseboards or shoe molding should cover the gap without anchoring the floating floor. That means:
– do not screw or glue baseboard directly into the laminate,
– keep fasteners in the wall/structure, not the floating planks,
– do not over-caulk the gap in a way that blocks movement.
Lay Laminate Planks: Layout, Spacing, and Locking
Lay laminate planks with a straight start row, correct staggering, and clean locking so gaps don’t open during seasonal movement. In a mudroom, accurate spacing and careful cutting around thresholds and door jambs are the difference between seams staying tight and separating.
Starting the first row straight is critical because small misalignment early in the install can compound into visible seam gaps near thresholds.
Laminate boards should lock using the manufacturer’s recommended tapping/pulling technique to avoid damaging tongue-and-groove edges.
Expansion clearance around door jambs and fixed posts must remain; leaving that space prevents pinning and reduces risk of buckling.
Start the first row straight and consistent
Before you lock the first boards together, dry-fit your layout and verify your first row line. Use a chalk line or laser level if you have one. Mudrooms often have slightly off-square footprints, and thresholds can be the “reference point” that everything else must respect.
Stagger joints per the instructions
Staggering affects joint strength and how the floor distributes movement. Follow the recommended minimum offset between short ends (the installation manual will specify this). Don’t improvise a pattern that creates repeated “short joints” in the mudroom traffic zone.
When locking planks:
– use the exact method (tapping block, pulling angle, or clicking method) described in your flooring instructions,
– avoid striking where it can bruise the tongue/groove,
– check alignment at each row rather than waiting until the next day.
Cut around vents, posts, and jambs
Use undercutting at door jambs if your laminate method requires it. Leave expansion space where required and test-fit pieces before final placement. Near thresholds, take extra time—mudrooms are where seam failure often becomes noticeable first.
Here’s a practical tip that aligns with how laminate replacement typically goes wrong: if you notice you’re constantly shaving too much from one side to “make it fit,” stop and reassess the initial layout—don’t keep forcing changes deeper into the floor.
Finish Up: Trim, Baseboards, and Final Inspection
Finish laminate replacement by covering the expansion gap correctly with trim and by installing thresholds cleanly so they don’t pinch or misalign the floating floor. Then inspect seams, doors, and transition points before the mudroom sees normal daily traffic.
Baseboards and shoe molding should cover the expansion gap without attaching to the floating laminate layer.
Mudroom thresholds are high-risk joints because foot traffic and moisture concentrate stress where flooring systems meet.
A final inspection for loose boards, seam gaps, and door clearance is essential before regular use begins.
Reinstall baseboards/shoe molding correctly
Reinstall trim so it covers the perimeter gap but doesn’t immobilize the floating floor. If you used masking and careful removal earlier, baseboards should go back with less repair work.
Install thresholds/transitions and verify fit
Thresholds and transitions should sit flat and secure, without forcing planks out of plane. Ensure fasteners are located in subfloor/structure, not in a way that clamps the floating system.
If your mudroom floor meets tile or hardwood, transitions also control how the height difference affects movement. A “good-looking” joint that traps the floor edge often fails later as humidity cycles.
Final inspection checklist
Before you move shoes/dirty laundry baskets onto the new laminate, check:
– seams along main traffic paths,
– edges near doorways and transitions,
– clearance at doors (no rubbing),
– no boards lifting at joints after gentle pressure.
What Can Go Wrong (Common Mudroom Mistakes)
Avoid the most common mudroom laminate replacement failures: moisture control shortcuts, incompatible underlayment, and expansion gaps that get blocked by trim or thresholds. If you’re already seeing repeated buckling or separation, these are usually the reasons.
Mudrooms repeatedly punish moisture mistakes because wet shoe traffic drives water into seams and edges more frequently than regular rooms.
Installing laminate over an underlayment/vapor barrier system that the manufacturer doesn’t approve can lead to trapped moisture at the laminate-subfloor interface.
Trapped floating-floor expansion—by caulk, tight trim, or misinstalled thresholds—commonly contributes to edge lifting and seam separation.
Common mistake → likely result
– Skipping moisture control: New planks buckle again near thresholds after the next wet cycle.
– Unapproved underlayment/vapor barrier: The laminate replacement system doesn’t perform as designed under humidity swings.
– No expansion gaps or pinned trim: Boards can’t move; you see cracking, “tenting,” or gaps at seams.
A quick DIY vs Pro comparison (pros/cons)
If you want a straightforward decision tool, use this comparison before you commit.
| Decision Area | DIY Laminate Replacement in a Mudroom | Hiring a Flooring Pro |
|---|---|---|
| Moisture testing strategy | You must match manufacturer requirements yourself () | Pro can coordinate testing and document compliance |
| Subfloor flatness correction | Possible with patch/leveler work; risk if tolerances aren’t met | More likely to hit flatness tolerances the first time |
| Threshold/transitions detailing | Common DIY pain point; mistakes show fast | Better probability of correct expansion handling at doorways |
| Cost control | Often lower upfront cost | Higher cost but reduced rework risk |
| Timeline | Faster if materials are ready; can stretch if repairs are needed | More predictable scheduling in most cases |
Verdict: Worth Doing Yourself, With One Big Caveat
Replacing laminate floors in a mudroom is usually DIY-friendly if you can measure accurately, remove the old flooring cleanly, and address subfloor flatness and moisture risks before installation. The big caveat is that mudrooms magnify errors—if moisture is ongoing or the subfloor can’t meet flatness requirements, the new laminate may fail quickly again.
DIY is most successful for laminate replacement when the subfloor meets manufacturer flatness requirements and the correct underlayment/vapor system is used.
If a mudroom has a chronic leak or recurring slab moisture, laminate replacement alone often can’t resolve the root cause.
When thresholds are installed without respecting expansion and system height differences, seam stress concentrates and failure tends to recur at doorways.
We’ve all seen the same pattern in mudroom remodels: homeowners fix the laminate, then the first rainy week recreates the same edge issue. If that matches your situation, consider pausing your plan and getting a subfloor/moisture assessment first ().
Quick Checklist (Save This)
– Measure room + plan plank direction and transitions
– Remove old laminate and clean subfloor fully
– Confirm subfloor flatness per manufacturer spec
– Use the approved underlayment/vapor barrier system
– Keep expansion gaps everywhere (walls + fixed objects)
– Install transitions/thresholds correctly at doorways
– Reinstall trim without pinning the floating floor
Sources
– ASTM E1745 (vapor retarder/permeance classification for specifying moisture control systems; use the edition year referenced by your project documentation).
– ASTM F2170 (in-situ relative humidity probes for moisture testing of concrete slabs prior to resilient floor covering and floor coverings; use the edition year referenced by your lab/professional guidance).
– ASTM F1869 (calcium chloride moisture vapor emission test for concrete; use the edition year referenced by your adhesive/flooring guidance).
– ASTM F710 (standard practice for preparing concrete surfaces for installation of floor coverings).
– Laminate flooring manufacturer installation instructions for expansion gap, underlayment/vapor barrier requirements, and subfloor flatness tolerance ().
– Underlayment/vapor barrier manufacturer technical data sheet ().
– Transition/threshold manufacturer installation guide ().
Replacing laminate floors in a mudroom is most successful when you treat moisture control and floating-floor movement as part of the construction—not just “prep work.” If you follow the approved underlayment/vapor barrier system, verify subfloor flatness, keep expansion gaps clear, and finish with transitions that don’t pin the floor, your new laminate will be far more likely to stay tight and stable through the next wet season.
Frequently Asked Questions
How do I know if my mudroom laminate floor can be replaced over the existing surface?
Most laminate floors can only be replaced by removing the top layer if the underlayment is damaged, uneven, or water-swollen—common issues in mudrooms. Check for lifted seams, soft spots, or a subfloor that’s not flat (usually within 1/8 inch over 6 feet). If the old planks are securely floating and in good condition, you may be able to install new laminate over compatible foam underlayment, but moisture in entryways often requires full removal for best results.
What’s the best way to remove laminate flooring in a mudroom without damaging the subfloor?
Start by removing shoe molding, baseboards, or transitions so you can access the first row of planks. For click-lock laminate, gently pull boards apart with a pry bar and flooring pull bar, working slowly to avoid gouging the subfloor. If nails, glue, or water-damaged sections are present, you may need to carefully cut planks out section-by-section; then scrape residue and inspect the plywood or concrete for warping and moisture before installing new laminate.
How do I prep a concrete or plywood subfloor in a mudroom before installing new laminate?
Begin by cleaning the subfloor thoroughly and letting it fully dry, especially in mudrooms where wet boots and spills are frequent. For concrete, verify it’s dry and apply an appropriate moisture barrier or underlayment system designed for laminate flooring. For plywood or OSB, replace any water-damaged panels, screw down loose boards, and level high/low spots so the surface is flat for proper laminate click-lock installation.
Which underlayment and moisture barrier are best for laminate floors in a mudroom?
In a mudroom, choose underlayment rated for your subfloor type and consider an attached moisture barrier if you have concrete or frequent dampness. For higher-risk areas, opt for a moisture barrier system that includes proper overlap seams and sealed edges to help protect the laminate from spills and tracked-in moisture. Also prioritize sound reduction and cushioning that matches laminate manufacturer requirements to prevent excessive movement and joint separation.
How should I handle transitions, edges, and expansion gaps when replacing laminate floors in a mudroom?
Maintain the required expansion gap around the perimeter and at doorways or cabinets, since laminate needs room to expand and contract. Use transition strips at thresholds (like to tile or hardwood) and install baseboards or quarter-round after the planks are set, avoiding fasteners through the floating floor. Plan the layout to minimize cutting near the entry and keep seams staggered, which helps prevent visible gaps in high-traffic mudroom areas.
📅 Last Updated: October 22, 2026 | Topic: How to replace laminate floors in a mudroom? | Content verified for accuracy and freshness.
References
- Laminate flooring
- Floating floor
- Floor
- Underlayment
- Moisture
- Mold | US EPA
- Mold | Mold | CDC
- https://scholar.google.com/scholar?q=replace+laminate+flooring+in+a+mudroom+step+by+step Google Scholar
- https://scholar.google.com/scholar?q=laminate+flooring+installation+moisture+subfloor+testing+underlayment Google Scholar
- https://scholar.google.com/scholar?q=laminate+floor+replacement+guidelines+expansion+gaps+floating+floor Google Scholar