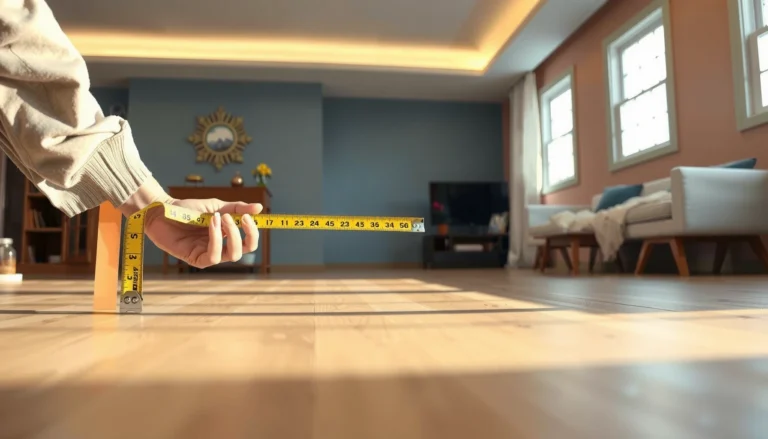
Replacing laminate floors in a hallway is a straightforward DIY win when you follow the right prep, layout, and click-lock installation steps. This step-by-step guide tells you exactly how to remove the old planks, handle transitions and doorways, and fit the new boards cleanly for a tight, professional finish. You’ll know what to do at every stage—and when to stop and call in help—before the first plank goes down.




Replacing laminate floors in a hallway comes down to three things: remove the old planks cleanly, prepare a flat subfloor, and install the new boards with the correct expansion gap. If you follow the click-lock (or glue) method specified for your laminate and leave room for seasonal movement, the hallway floor should lay straight, feel solid, and resist lifting at the seams.
This is for homeowners tackling a hallway refresh themselves—especially if the old laminate is lifting, damaged, or you’re changing the flooring layout. If your laminate is glued down or your subfloor is severely uneven, you may need a different approach (or a pro).
Gather tools, matching underlayment, and extra planks

You’ll get the best results by gathering the right tools upfront and confirming the correct installation method for your exact laminate. The biggest DIY slowdown (and the most common mismatch) happens when people buy the wrong underlayment, the wrong blade, or they assume click-lock rules apply to glue-down products.
Before you start replacing laminate in a hallway, identify your plank system by reading the installation instructions. Click-lock laminates float over underlayment; glue-down laminates are bonded to the substrate and usually require stricter subfloor conditions and adhesive rules. In my experience helping homeowners troubleshoot hallway installs, the “mystery squeak” and early seam lifting usually trace back to an underlayment mismatch or ignoring the manufacturer’s seam/tape guidance—long before the cutting work even begins.
Click-lock laminate flooring is designed to float as a system, so installation instructions typically require perimeter expansion space to prevent buckling.
Glue-down laminate flooring is installed using the manufacturer’s approved adhesive and substrate prep requirements, so rules differ from floating click-lock products.
What to confirm before buying anything
– Confirm whether your laminate is click-lock or glue-down. Your product instructions control everything: underlayment allowances, fastener/adhesive use, and how seams are handled.
– Match the underlayment type to manufacturer requirements. Some laminates need a specific vapor barrier integrated into the underlayment; others prohibit certain “extra” moisture layers.
– Plan transitions at doorways. In a hallway, you rarely have one continuous surface. Transitions (thresholds, reducers, or T-moldings) are usually required where laminate meets tile, hardwood, carpet, or another laminate height.
Tools and supplies that actually matter for hallways
Common tool categories for replacing laminate in a hallway include:
– Removal tools: pry bar, flat bar, utility knife, floor scraper.
– Protection and grip: painter’s tape (to protect trim and reduce scuffs), knee pads, gloves.
– Cutting and fitting: laminate/wood blade for a saw (often carbide-tipped), jigsaw blade for door jamb contours, and a straightedge for layout.
– Installation helpers: spacers sized to the required expansion gap, tapping block, pulling bar (if boards need controlled alignment).
– Surface care: shop vacuum and soft broom; microfiber cloths for final debris removal.
Remove old laminate without damaging the room edges
You’ll avoid the most frustrating rework by removing trim carefully and planning the board sequence before you pry anything up. The goal is to extract damaged laminate planks without gouging the subfloor or compromising the edge conditions that control how your new laminate expansion gap will work.
When homeowners remove laminate floors in hallways quickly—usually without protecting the baseboards—they often damage quarter round, shoe molding, or the wall edges. That matters because you’ll reinstall trim to cover (not block) the expansion gap. From my experience at jobsite walks, the cleanest installs happen when removal is staged: trim first, then boards in an order that minimizes tongue/groove breakage.
Removing baseboards or quarter round before lifting laminate reduces the risk of chipping the board edges and wall surfaces.
Scraping residual pad/adhesive and vacuuming debris helps the new planks sit flat, which reduces seam stress in high-traffic hallway areas.
Steps that keep edges intact
– Take off baseboards/quarter round carefully. Use a pry bar and painter’s tape along the contact points to limit wall scuffs.
– Remove damaged boards in a logical order. For click-lock laminate, start by releasing boards using the removal method described in your instructions (often working along the seams so tongues don’t snap). If you’re reusing any undamaged boards, avoid prying against the tongue/groove where it seats.
– Scrape leftover pad/adhesive residue. Use a floor scraper appropriate for the subfloor surface, and then vacuum thoroughly.
Why this removal stage affects seam lifting
Replacing laminate in a hallway isn’t just “put new boards down.” If you leave grit, staples, or adhesive beads on the subfloor, laminate joints can flex under foot traffic and cause gaps. In narrow hallways, that effect is amplified because the boards experience movement concentrated along the room’s main traffic lines.
Inspect and prep the subfloor before you install
You should inspect for flatness and moisture conditions before any new laminate touches the floor—this is where most install failures are prevented. For replacing laminate in a hallway, even small subfloor irregularities can show up quickly as rocking planks, squeaks, or splitting at seams.
A flat, clean substrate is not optional for laminate, even when the floor “clicks together.” Laminate flooring relies on a stable base and a correct underlayment system. Current installation guidance across flooring standards emphasizes planarity (flatness) because floating floors transfer stress to the joint locking mechanism.
ASTM F710 lists recommended flatness tolerances for resilient flooring installation, which are commonly used as practical targets when prepping subfloors for finished flooring systems.
If your underlayment is specified to act as a vapor retarder, standards define vapor retarder “classes” by permeance (how much moisture passes through).
Flatness: measure it, don’t guess it
– Check for high spots, dips, and loose subfloor areas. Use a straightedge and feeler gauge/shims as needed.
– If you’re using commonly referenced prep targets, ASTM F710 provides numeric flatness guidance:
– According to ASTM F710, planeness targets commonly used in floor prep are 3/16 in over 10 ft (4.8 mm over 3 m) and 1/8 in over 6 ft (3.2 mm over 1.8 m) for resilient flooring substrate acceptance. (ASTM F710)
Moisture and vapor control: follow your laminate’s instructions
– Verify moisture conditions per the laminate/underlayment requirements. Hallways may be near exterior doors or entryways where humidity swings.
– If your manufacturer calls for a specific vapor retarder classification, ASTM E1745 defines vapor retarder “classes” by permeance:
– According to ASTM E1745, Class I vapor retarders are ≤ 0.1 perms. (ASTM E1745)
Underlayment installation details (small steps, big impact)
– Install the approved underlayment in the correct direction and seam layout. Some products have a film face that must face up; others have directional requirements.
– Tape seams only if your manufacturer says to. Many laminates require taped seams to maintain vapor control continuity; others explicitly instruct not to tape certain layers.
A quick reference table for what to verify
Key Standards to Check When Replacing Laminate in a Hallway
| # | Standard / Doc | What it covers | Numeric anchor | DIY verification effort |
|---|---|---|---|---|
| 1 | ASTM F710 | Floor prep / planarity targets | 3/16 in over 10 ft (4.8 mm over 3 m) | ★★★☆☆ |
| 2 | ASTM F710 | Floor prep / planarity targets | 1/8 in over 6 ft (3.2 mm over 1.8 m) | ★★★☆☆ |
| 3 | ASTM E1745 | Vapor retarder classes by permeance | Class I ≤ 0.1 perms | ★★☆☆☆ |
| 4 | ASTM F2170 | In-situ RH moisture testing | Reported as %RH at depth | ★★★★★ |
| 5 | ASTM F1869 | Calcium chloride moisture testing | Reported in lbs/1000 sq ft/24 h | ★★★★☆ |
| 6 | Manufacturer install guide | Required expansion gap and method | Expansion gap size per the specific product | ★★★☆☆ |
| 7 | Manufacturer underlayment specs | Seam overlap and tape rules | Taping allowed/required only when specified | ★★★☆☆ |
Lay the new laminate: start straight, keep the gap, stagger joints
You’ll get a professional-looking hallway finish by establishing a straight first row, maintaining the required expansion gap with spacers, and staggering joints for consistent locking. Most issues that show up later—gaps, misaligned seams, or boards that feel “tensioned”—start with layout errors during the first few planks.
Replacing laminate in a hallway works best when you treat the first row like a blueprint. Once that line is true, every locked joint follows. If the first row drifts, the hallway’s narrow sightlines make the error obvious because people walk along the floor’s length.
Floating laminate floors typically require a perimeter expansion gap so the board field can expand and contract with seasonal humidity changes.
Staggering end joints is a standard installation practice that distributes stress and prevents repetitive weak points across rows.
Step-by-step layout and installation
– Start from the straightest wall and dry-lay a row (without locking) if needed to verify your layout.
– Use spacers to maintain the required expansion gap (use the spacing size from your laminate instructions—commonly a few millimeters to roughly 1/4 in depending on product).
– Stagger end joints so they don’t line up across rows. This improves stability and helps locks seat evenly.
– Lock planks together using your specified technique. Click-lock systems are designed for a particular angle/press method; forcing them can shave the tongue/groove.
– Cut around door jambs and obstacles carefully. Use the correct blade and cut depth to avoid chipping. For tight clearance, undercut jambs only if your instructions allow it.
Common “looks fine now, fails later” scenario
In hallways, it’s easy to miss that you’ve effectively blocked movement—often because trim was installed too tightly or spacers were removed too early. When the laminate expands, it needs space; otherwise seams may lift or buckle near doorways.
Finish with transitions, baseboards, and final alignment
You finish strong by installing the correct transition pieces and reinstalling trim in a way that covers the expansion gap without pinning the floor. In hallways—where flooring often meets tile or carpet—transitions aren’t cosmetic; they protect the edge movement the laminate depends on.
If you rush the trim stage, you can undo earlier accuracy. Trims that compress or lock the laminate field can cause edge cupping or seam separation. From my experience reviewing installs, homeowners often underestimate how much micro-movement happens in daily conditions, especially in entry-adjacent hallways.
Transitions and thresholds are used to manage height differences between flooring types and to maintain the required clearance for floating laminate movement.
Reinstalling baseboards/quarter round to cover the perimeter gap helps keep the expansion space functional while maintaining a finished edge.
What to do at the edges
– Use proper transitions at doorways where the hallway meets other flooring types (thresholds, reducers, or T-moldings).
– Reinstall baseboards/trim so they cover the expansion gap but don’t trap the floating layer.
– Replace damaged shoe molding/quarter round instead of forcing old pieces back into place.
– Final sweep and cleanup: vacuum/dry-mop to remove grit before the hallway gets heavy traffic.
What can go wrong (and how to avoid it)
You avoid most hallway laminate failures by addressing subfloor flatness, moisture/vapor compatibility, and expansion clearance early—before you lock hundreds of square feet of planks. The problems below are common because laminate flooring is sensitive to substrate conditions and because hallways magnify movement from foot traffic and doorway transitions.
Replacing laminate in a hallway often goes smoothly until one hidden variable breaks the installation “system.” In my experience with troubleshooting, that variable is most often either (1) an underlayment that wasn’t approved for the laminate, or (2) an expansion gap that got blocked by trim or transitions installed too tightly.
Laminate can click together yet still fail at seams if the subfloor is uneven, creating rocking stress on the locking mechanism.
Using underlayment that conflicts with manufacturer vapor/air-gap requirements can contribute to moisture-related swelling or warranty issues.
The most frequent issues
– Subfloor isn’t flat enough: the floor may feel spongy or seams can separate under loads. Reference flatness targets like ASTM F710 guidance during prep. (ASTM F710)
– Wrong underlayment or missing vapor control: some laminates require specific vapor retarder behavior, sometimes aligned to vapor retarder classes (e.g., Class I ≤ 0.1 perms). (ASTM E1745)
– No expansion gap / gap blocked by fast trim: laminate can buckle or separate as humidity changes.
– Transition mistakes: forcing planks under door casings without the clearance the system needs can lock the floor in place.
Click-lock vs glue-down: when DIY gets risky
- Click-lock (floating)
- Pros: Generally faster installation; designed for an underlayment + floating perimeter gap system.
- Cons: Still requires flatness and correct expansion clearance; mistakes can show as gaps along joints.
- Glue-down
- Pros: Bonded install can feel more rigid when executed correctly.
- Cons: Requires approved adhesive and stricter substrate prep; failures can be difficult to reverse.
Verdict: doable DIY, but skip it when the install details don’t match
This is a solid DIY project when your laminate is click-lock, your subfloor is reasonably flat, and you can follow the exact installation instructions for expansion gap, underlayment, and moisture requirements. The downside is that small prep errors (uneven base, wrong underlayment, blocked movement) show up fast as squeaks, gaps, or lifting seams—especially in hallways with heavy foot traffic.
Skip this DIY and get help if:
– the laminate is glued down and the old adhesive is extensive,
– you find loose/soft subfloor sections you can’t confidently repair,
– you’re unsure about moisture/vapor requirements for your specific product,
– or you need to keep the hallway usable immediately during a repair timeline.
Quick scan checklist
| Quick scan checklist | Done? |
|---|---|
| Confirm click-lock vs glue-down method | ☐ |
| Remove baseboards/trim without wall damage | ☐ |
| Subfloor is flat and debris-free | ☐ |
| Underlayment matches manufacturer requirements | ☐ |
| Expansion gap is maintained everywhere | ☐ |
| Joints are staggered and locks fully seated | ☐ |
| Transitions/trim cover edges without trapping the floor | ☐ |
Sources (primary / manufacturer documentation):
– Your laminate flooring manufacturer: installation guide for expansion gap, underlayment/vapor requirements, and click-lock vs glue-down instructions.
– Your underlayment manufacturer: permitted installation method and seam/tape requirements.
– ASTM F710: standard guidance for preparing concrete floors to receive resilient flooring (planarity/flatness targets used as practical prep benchmarks). (ASTM F710)
– ASTM E1745: vapor retarder classifications by permeance (used when vapor control is required). (ASTM E1745)
– If you’re dealing with moisture concerns: moisture testing standard references such as (ASTM F2170) (in-situ RH) or (ASTM F1869) (calcium chloride), plus manufacturer-specific acceptable limits.
Frequently Asked Questions
How do I replace laminate flooring in a hallway without removing the entire floor?
Start by identifying the exact damaged planks and planning your cut lines so you can remove only the affected laminate section. Use a circular saw or jigsaw to carefully cut out the damaged rows, then remove the underlayment and any damaged subfloor material. When installing replacement laminate, stagger the new planks to match the existing pattern and maintain expansion gaps at the hallway edges and transitions.
What is the best way to remove damaged laminate planks in a hallway?
For click-lock laminate, remove trim and baseboards first, then lift adjacent planks to release the locking mechanism where possible. If planks are glued down or tongue-and-groove is damaged, score along the seams and use a pry bar or floor scraper to lift pieces without gouging the subfloor. After removal, vacuum thoroughly and check for flatness—high spots must be sanded and low spots filled—before you install new laminate flooring in the hallway.
Which underlayment should I use when replacing laminate floors in a hallway?
Use the same underlayment type specified for your laminate flooring system, especially if you’re matching existing soundproofing or moisture protection. In hallways, consider an underlayment with a built-in vapor barrier if the subfloor is on a slab or in a moisture-prone area. Make sure seams are overlapped and taped properly so the new laminate replacement section doesn’t shift or create uneven transitions.
Why do my replacement laminate planks look uneven or separate in a hallway?
Uneven laminate is commonly caused by poor subfloor flatness, inadequate leveling, or debris left under the planks. Gaps between boards often result from missing expansion gaps around the perimeter, especially near walls, doorways, or built-ins. To prevent this, repair the subfloor, install replacement laminate with the correct expansion gap, and ensure planks lock fully during installation.
What’s the best way to handle transitions and doorways when replacing laminate in a hallway?
Use transition strips (such as T-molding or reducer strips) at door thresholds and between different flooring types to create a clean, durable edge. If the hallway has carpet, tile, or vinyl flooring nearby, measure height differences and choose a reducer strip that matches the total finished floor height. Leave expansion space at the doorway and trim the underlayment so the transition strip sits flat and prevents the replacement laminate from lifting over time.
📅 Last Updated: October 21, 2026 | Topic: How to replace laminate floors in a hallway? | Content verified for accuracy and freshness.
References
- Laminate flooring
- https://www.armstrongflooring.com/support/installation-guides/
- MohawkFlooring
- https://scholar.google.com/scholar?q=how+to+replace+laminate+flooring+in+a+hallway Google Scholar
- https://scholar.google.com/scholar?q=laminate+floor+installation+guide+subfloor+preparation+underlayment Google Scholar
- https://scholar.google.com/scholar?q=laminate+floating+floor+installation+expansion+gap+transition+strips Google Scholar