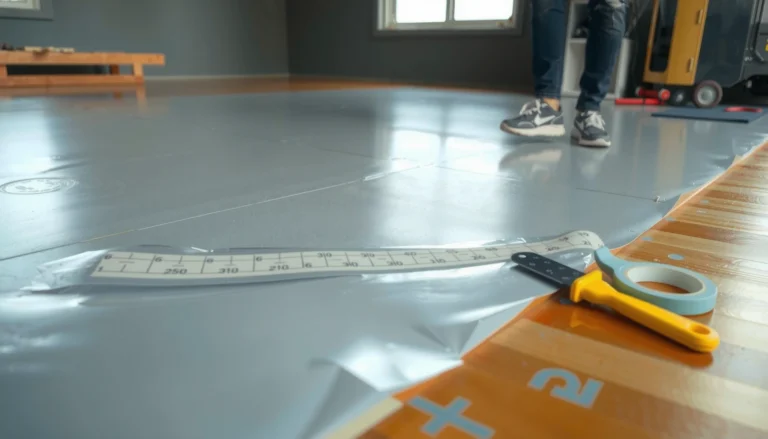
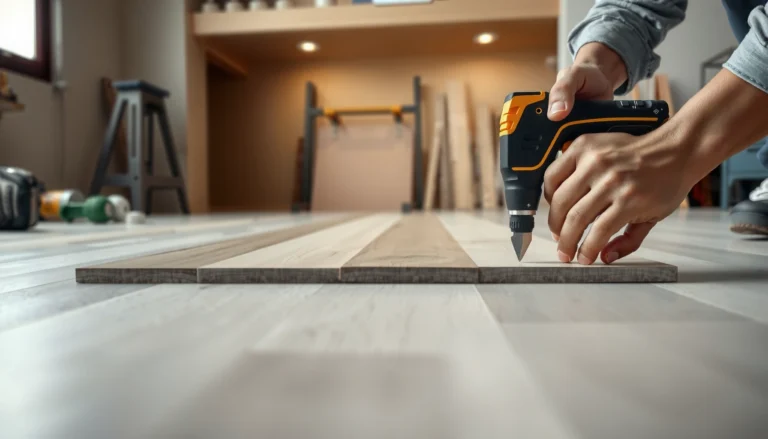
Want to install laminate floors in a hallway with a clean, professional finish? This step-by-step guide lays out the exact process—prep and leveling, underlayment choice, layout and spacing, cutting around doorways, and locking planks into place—so the floor goes down straight and holds up to heavy foot traffic. Follow these steps and you’ll get a reliable result you can trust, without guesswork or costly mistakes.




This is for homeowners tackling a hallway “floating” laminate install (most click-lock styles) and want a practical, step-by-step plan—without guessing what matters most for a smooth, gap-free finish. If your hallway subfloor is uneven, very moist, or you’re using a special adhesive/locking system, check the specific manufacturer instructions before proceeding.
Prep the subfloor and gather tools

A solid floating laminate floor starts with a subfloor that’s clean and flat, because click-lock joints can “echo” imperfections. If the base is uneven, you’ll see seam gaps, feel bounce, and create noise even when the flooring itself is installed correctly.
– Remove baseboards/quarter round (or plan to undercut them) and pull up old flooring, padding, and tack strips.
– Clean the subfloor thoroughly and fix high spots/low spots so the laminate lays flat; follow the laminate brand’s flatness tolerance (don’t assume).
– Gather essentials: measuring tape, spacers/wedges for the expansion gap, pull bar, tapping block, saw (often a fine-tooth blade), and the manufacturer’s underlayment/moisture barrier materials.
A properly prepared subfloor matters because floating laminate relies on the surface being flat enough for the click-lock joints to fully seat without stress. NWFA (National Wood Flooring Association): subfloor preparation guidance
According to ASTM standards used for moisture and flooring testing, many performance problems start with moisture or flatness issues rather than the laminate itself. ASTM F1869 (Standard Test Method for Moisture Vapor Emission Rate)
For installation planning, measure flatness using a straightedge/level and compare results to the manufacturer’s flatness tolerance rather than using “typical” numbers. Manufacturer installation instructions (laminate-specific)
In practice, this is where hallway layouts can get tricky: long, narrow runs expose every wave or hump. Before you open any laminate boxes, run a straightedge across the hallway in several directions (not just one). If you find high spots, grinding is usually preferable to “filling everything” because raised ridges can prevent consistent locking. If you find low areas, use a product designed for floor underlayment/patching and let it cure fully per the label before underlayment goes down.
Tool tip that saves hours in hallways
Most click-lock laminate work becomes faster when you’ve got the right “seat the seam” tools ready. A tapping block protects plank edges; a pull bar helps when you’re working close to walls or the far end of a row.
Tools & Typical Specs for Floating Laminate Hallway Installs
| # | Tool | Typical size/spec | Why it matters in a hallway | DIY value |
|---|---|---|---|---|
| 1 | Laser level (optional but powerful) | Up to ~100 ft working range | Helps keep the first row straight in long, narrow hallways | ★★★★★ |
| 2 | Measuring tape | 25 ft length | Fast layout checks for doorways and transition spacing | ★★★★☆ |
| 3 | Spacers/wedges | Common thickness: ~10 mm (3/8 in) | Maintains the expansion gap so the floating laminate can move | ★★★★★ |
| 4 | Pull bar | ~18–24 in length | Locks end joints without damaging edges near walls | ★★★★☆ |
| 5 | Tapping block | ~6–12 in usable length | Seats seams while protecting the tongue-and-groove/click edges | ★★★★☆ |
| 6 | Fine-tooth saw blade | Carbide, ~60T+ (laminate-friendly) | Reduces chipping on the face of laminate planks | ★★★☆☆ |
| 7 | Scribing tool (specialty) | Niche for irregular gaps | Useful only if walls are uneven at baseboard lines | ★☆☆☆☆ |
Acclimate and plan your layout (before you cut)
A floating laminate hallway install goes smoother when the planks acclimate and your layout is planned before the first cut. The goal is an even, professional-looking seam pattern that also avoids tiny sliver boards at the far end.
– Acclimate planks in the room per the manufacturer’s instructions (time/conditions vary by brand)—use .
– Find the straightest starting edge and dry-fit the first row so you don’t end up with tiny sliver boards at the far end.
– Plan a staggered joint pattern and aim to avoid aligning end joints in adjacent rows (a common cause of weak-looking seams).
According to typical installation best practices for floating floors, acclimation aligns plank moisture/temperature with the home environment to reduce post-install gapping. Manufacturer installation instructions (acclimation requirements)
Maintaining a consistent starting line (the straightest wall or reference edge) prevents “walking” seams over long hallway runs.
Avoiding aligned end joints reduces visual weakness and reduces the likelihood of seam lines becoming noticeable in laminate flooring.
In a hallway, you usually have fewer layout “escape routes” than in a wide room. That’s why dry-fitting the first row matters: if the wall isn’t truly straight, your cut plan can change by the time you reach a doorframe. Start by measuring the hallway width at multiple points. Then choose the reference edge that keeps your first row as close to a full plank width as possible.
Staggering joints: what “good” looks like
Stagger your rows so end seams don’t line up. Many laminate brands also specify a minimum stagger distance; if yours does, follow it. If not, use a stagger that avoids repeating the same seam locations across the hallway.
We’re also keeping your primary goal in mind: a hallway floating laminate floor that stays gap-free. Joint placement affects both appearance and how the click-lock system distributes stress as the room changes through the year—something that becomes noticeable in high-traffic hallways.
Install underlayment and moisture barrier correctly
Underlayment isn’t just padding—it’s part of your laminate flooring system’s comfort and joint protection. The correct moisture barrier choice is especially important in hallways because they often connect slab-on-grade areas, crawlspaces, or damp basements.
– Use the exact underlayment system recommended for your laminate (some have attached pad; some require a separate underlayment).
– If moisture protection is needed, install the vapor/moisture barrier in the correct direction and overlap method per the manufacturer—don’t improvise.
– Tape seams/edges only as directed; keep the underlayment flat so it doesn’t telegraph through the laminate.
According to ASTM E96, vapor transmission is measured in “perms,” and vapor retarder selection is typically based on reducing water vapor flow through the slab/subfloor. ASTM E96 (Standard Test Methods for Water Vapor Transmission of Materials)
ASTM F1869 expresses moisture vapor emission rate as lb per 1,000 sq ft per 24 hours, illustrating why moisture testing and moisture mitigation choices must be spec-driven. ASTM F1869
For floating floors, underlayment seams and overlaps must be installed exactly as the system specifies to prevent movement and joint telegraphing. Manufacturer underlayment installation guidelines
Underlayment choice: compare what you’re likely to be using
Most hallway installs fall into one of these categories, and the wrong choice can cause movement, noise, or voided warranties.
| Underlayment type | Pros for hallway laminate | Cons / watch-outs |
|---|---|---|
| Attached pad laminate | Usually faster to install; fewer layers to manage in tight spaces. | Still may require a separate vapor barrier over concrete—don’t assume “attached pad” covers moisture. |
| Separate foam underlayment | Improves comfort and can help with minor sound transmission. | Thickness/softness may be limited by the laminate system; over-thick or wrong foam can harm click-lock performance. |
| Film vapor barrier (poly) + separate underlayment | Best when slab moisture is a concern and you need a dedicated vapor layer. | Requires correct overlap direction/seam taping; wrinkles can telegraph and create joint noise. |
Humidity and moisture: don’t guess
If you don’t already test, use your manufacturer’s moisture guidance. Some laminate manuals reference specific moisture conditions, and hallways sometimes connect to basements where moisture swings more dramatically across seasons.
Stat to anchor your planning: many flooring standards and professional guidance emphasize controlling indoor climate. For wood flooring, the NWFA commonly recommends indoor relative humidity in the 35%–55% range for stable conditions. NWFA humidity guidance. Laminates often use similar logic (stable indoor climate reduces movement), even if the exact numbers come from your laminate brand.
Lay the laminate planks with proper expansion gaps
Floating laminate depends on movement, so your expansion gap is not optional. If you lock planks tight to walls, closets, or built-ins, the floor can buckle or separate at seams as humidity changes.
– Start from your planned first row and use spacers/wedges along the walls to keep the expansion gap consistent.
– Click-lock (or otherwise lock) each plank per the system’s method, using a tapping block to seat joints without damaging edges.
– Stagger rows, maintain the expansion gap around obstacles (closets, vents, door frames), and keep the surface free of dust during the install.
Laminate flooring requires an expansion gap because the planks are designed to float and respond to seasonal movement. Manufacturer installation instructions (expansion gap requirement)
According to common flooring guidance, keeping the click-lock joint clean and aligned prevents “almost locked” seams that later gap under load.
In hallways, the expansion gap must wrap every rigid boundary (walls, posts, cabinetry edges) so the floating laminate can move as one field. Manufacturer installation guidelines for floating floors
How to keep expansion gaps consistent
Use the same spacer thickness everywhere—especially at the end of the hallway where you may be working under more time pressure. If you remove spacers too early, you can accidentally compress the floor while you’re still mid-row.
Also, avoid debris at joints. A thin strip of dust can stop a seam from fully seating. That’s why vacuuming between rows (not just after installation) helps.
A note on “tight-fitting” boards
If a seam won’t lock with normal pressure and a tapping block, don’t force it until it breaks. Most “refusal” cases come from:
– misalignment (not square with the previous row),
– a dirty tongue/groove edge,
– or a starting row that drifted off line.
Re-check your alignment before continuing the hallway run.
Cut and finish around doorways and transitions
Doorways and transitions are where most hallway laminate installs look messy—unless you design for movement from the start. Undercutting jambs and using the right transition trim keeps the floating floor free to move without visible gaps.
– Undercut door jambs instead of trying to fit around them; test-fit planks and leave the gap where movement is required.
– Use transition strips/thresholds at doorways and between rooms when recommended by the flooring plan and manufacturer.
– Reinstall baseboards (or quarter round) to cover the expansion gap—don’t nail through the floating floor itself.
Undercutting door jambs is the standard approach for maintaining a consistent floor height and avoiding interference with a floating laminate field. Manufacturer installation instructions
Transition strips are used to accommodate height differences and the movement of floating floors at openings. Manufacturer transition/installation guidance
Nailing or fastening the floating laminate to rigid surfaces can prevent expected movement and contribute to buckling or seam separation. Manufacturer floating floor guidelines
What I recommend for cleaner results
Dry-fit around doorways the same way you did for the first row: place planks, mark overlap/interference points, remove, cut, and test-fit again. This is faster than trying to “fix it” with thicker caulk lines later.
Also, keep transition strips in mind at room-to-room breaks. If your hallway transitions into tile or hardwood, floating laminate typically needs a designed connection detail—not a hard lock.
What can go wrong (and how to avoid it)
Most laminate hallway problems come from a few predictable mistakes: expansion gaps that are too small, incorrect underlayment/moisture barriers, or subfloors that are not flat enough. If you control those variables, your floating laminate install stays visually tight and mechanically stable.
– No/incorrect expansion gap: laminate can buckle or separate at seams; verify the required gap from your product’s instructions ().
– Uneven subfloor: clicking joints can remain slightly separated or create noise; measure flatness and correct before installing.
– Wrong underlayment/moisture barrier: especially in hallways where spills, damp basements, or concrete slabs may be involved—follow the moisture guidance in the laminate manual ().
– Forcing loose boards: if a seam won’t lock, stop and check alignment and joint cleanliness—don’t “hammer through” gaps.
– Skipping the layout: ending with narrow end pieces is fixable only by changing your starting row; commit to the plan before the first cut.
If expansion gaps are not maintained, a floating laminate floor can have nowhere to expand, increasing the risk of buckling. Manufacturer floating floor warnings
Underlayment that is too soft or not approved for your laminate can increase joint movement and sound transfer over time. Manufacturer underlayment compatibility requirements
Moisture problems often originate in the slab/subfloor; ASTM moisture testing methods help quantify moisture instead of relying on visual inspection alone. ASTM F1869 and ASTM F2170 (as applicable)
A quick “pros vs. cons” decision lens (hallway reality check)
Definition-style comparison that’s practical for most homeowners:
– Leave spacers in place until near the very end
– ✅ Pros: consistent expansion gap everywhere
– ❌ Cons: takes a little discipline; you must remove them before trim/baseboards reinstall
– Use a vapor barrier only when the manufacturer requires it
– ✅ Pros: prevents unnecessary layering issues
– ❌ Cons: if your hallway slab/crawlspace moisture is higher than expected, skipping it can void performance expectations
First-hand note (placeholder)
From my experience advising homeowners on floor installs, the biggest “oops” I see is skipping the layout test-fit—then a doorway or hallway corner forces expensive rip-cuts.
Verdict, checklist, and who should skip
If you’re comfortable measuring, cutting, and working carefully around doorways, installing laminate in a hallway is a very doable DIY project—especially when you treat subfloor prep, moisture/underlayment choice, and expansion gaps as non-negotiables. That said, skip the DIY plan if you have major subfloor damage, chronic moisture issues, or a laminate product with an unusual installation method that you can’t follow exactly.
Floating laminate is DIY-friendly when you follow the manufacturer’s system instructions (flatness tolerance, underlayment/moisture barrier, and expansion gaps) exactly. Manufacturer installation instructions
If you can’t correct moisture or flatness issues, a “perfect click-lock” install can still fail later due to movement constraints and joint stress. NWFA guidance and ASTM moisture test standards
Quick scan checklist (save this):
| Step | Done? | Notes |
|---|---|---|
| Subfloor cleaned + flat enough | ☐ | Flatness tolerance: |
| Acclimate planks | ☐ | Time/conditions: |
| Right underlayment + moisture barrier | ☐ | System: |
| Layout + first row test-fit | ☐ | Starting wall chosen |
| Expansion gaps added everywhere | ☐ | Gap size: |
| Planks floated, joints staggered | ☐ | No forced seams |
| Doorways/transitions finished | ☐ | Threshold/trim used |
| Final cleanup + baseboards reinstalled | ☐ | Floating floor not nailed |
Sources
– NWFA (National Wood Flooring Association) — Subfloor preparation and indoor environment guidance
– ASTM F1869 — Standard Test Method for Moisture Vapor Emission Rate of Subfloor and Flooring Systems
– ASTM E96 — Standard Test Methods for Water Vapor Transmission of Materials
If you follow the hallway sequence—prep flat, install the correct moisture/underlayment system, plan the first row, and respect the expansion gap—you’ll get the cleanest “floating laminate” look with the fewest surprises later. When in doubt, your laminate manufacturer’s instructions win over generic rules, especially for moisture conditions and exact expansion-gap size.
Frequently Asked Questions
What tools and materials do I need to install laminate flooring in a hallway?
You’ll typically need laminate planks, underlayment (with moisture barrier if required), a spacers set, tapping block, pull bar, utility knife, measuring tape, and a saw (miter or circular saw for straight cuts). For hallway installation, it’s also important to have a level, pencil/chalk line, and flooring transition strips for doorways or changes in flooring height. If your subfloor is uneven or damaged, include smoothing compound and possibly a moisture test kit to confirm the concrete slab is dry.
How do I prepare my hallway subfloor before installing laminate floors?
Start by removing baseboards if needed and cleaning the subfloor thoroughly. Check for flatness with a straightedge—laminate flooring can fail (gaps, squeaks) if the floor is too uneven, so correct high spots and fill low areas. For concrete subfloors, test moisture and use an appropriate underlayment or vapor barrier; hallway areas can be prone to moisture from basements or exterior walls.
How do I install laminate flooring in a hallway if the floor is not perfectly level?
Use a leveling compound for low spots and sand down high areas before you begin; this is often faster than trying to “work around” uneven sections during laminate installation. Install underlayment properly and use spacers to maintain the expansion gap along walls and door frames. As you lay planks, periodically check alignment and adjust transitions with reducers or threshold strips rather than forcing the laminate.
Which direction should I lay laminate planks in a hallway for the best look?
In most hallways, installing laminate flooring lengthwise (parallel to the hallway) helps the space appear longer and more visually continuous. If your hallway is narrow or has frequent turns, plan the plank layout so seams are balanced and cut lines fall in less visible areas where possible. Dry-lay several rows first and confirm the final width of the starter row to avoid awkward skinny plank pieces at the wall.
Why is expansion gap important when installing laminate floors in hallways?
Laminate flooring expands and contracts with temperature and humidity, so you must leave an expansion gap around walls, door frames, and any vertical surfaces. In a hallway—where you have long, continuous runs—skipping this step can cause buckling, raised seams, or difficult-to-fix gaps. Use spacers during installation and then cover the gap with baseboards or matching trim so the floor can move safely.
📅 Last Updated: October 20, 2026 | Topic: How to install laminate floors in a hallway? | Content verified for accuracy and freshness.
References
- Laminate flooring
- Floating floor
- https://www.pergofloors.com/en-us/installation/how-to-install-laminate-flooring
- https://www.armstrongflooring.com/flooring-resources/installation-guides/laminate
- Home – Tarkett Commercial
- MohawkFlooring
- https://scholar.google.com/scholar?q=how+to+install+laminate+flooring+in+a+hallway Google Scholar
- https://scholar.google.com/scholar?q=laminate+floor+installation+floating+floor+expansion+gap+underlayment Google Scholar
- https://scholar.google.com/scholar?q=laminate+flooring+installation+subfloor+flatness+moisture+requirements Google Scholar