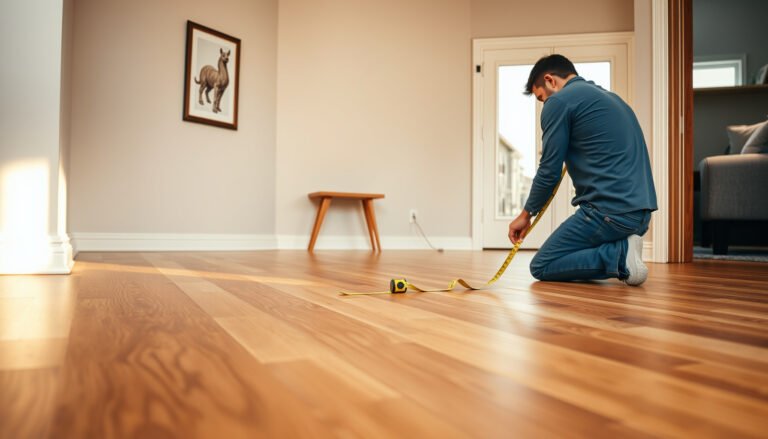
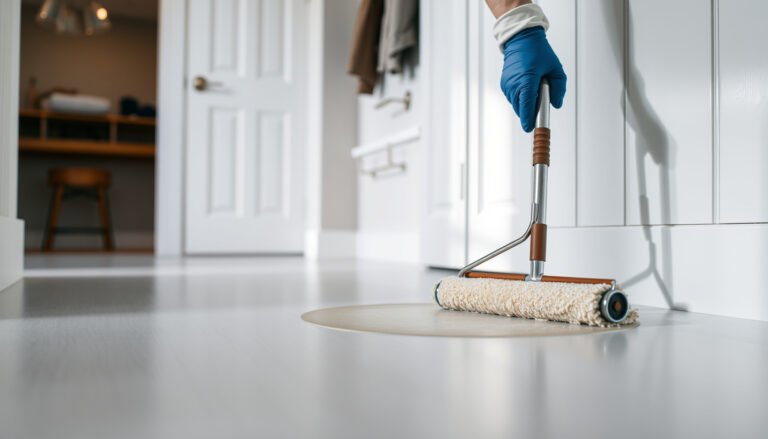
Want to replace laminate floors in a balcony without costly mistakes? This step-by-step guide tells you exactly how to remove the old boards, prep the subfloor, and install new laminate correctly for balcony conditions like moisture and temperature swings. Follow the sequence closely and you’ll finish with a solid, waterproofed-looking floor that won’t buckle or separate.




Yes—you can replace laminate on a balcony by treating the job like an indoor floating floor, but upgrading the “system” for balcony moisture: correct underlayment/moisture barrier, sealed edges/transitions, and expansion gaps that match your manufacturer’s specs. The biggest difference from an interior install is that balcony conditions (rain splash, humidity swings, and potential leaks at penetrations) can turn a small moisture issue into swelling and buckling.
This guide covers when laminate replacement can be straightforward (covered balcony, no recurring standing water) and when you should stop and reconsider waterproofing or flooring choice entirely. It also reflects how installers typically follow industry moisture/flatness expectations, because laminate failures on balconies usually trace back to moisture management—not the click-lock planks themselves.
If your balcony is covered and you don’t get frequent standing water, laminate replacement can be straightforward. If your balcony is regularly exposed to rain or leaks, you’ll need extra waterproofing considerations—or you may be better off skipping laminate and using a flooring type meant for outdoor/wet conditions.
Who this is for / when it applies: This step-by-step guide is for homeowners and maintenance teams replacing an existing laminate “floating” floor on a balcony deck—especially when the old boards are worn, damaged, or have separated joints. It’s also relevant if you’re currently troubleshooting moisture signs (dampness, musty odor, swollen edges) and need a methodical way to rebuild from the subfloor up.
1) Check balcony moisture risk and compatibility

Start by confirming that your specific laminate and underlayment are approved for the balcony conditions you actually have (not just “general humid areas”). Then inspect the deck for leaks or chronic dampness—because no underlayment can compensate for a continuing water source.
Many laminate manufacturers limit installation to specified “interior, climate-controlled” environments; always verify the product explicitly allows humid areas and whether balconies/exterior exposure are excluded.
Exterior balcony failures commonly originate at waterproofing breaks—around penetrations, drains, and balcony edges—so a visual deck inspection is part of moisture compatibility, not optional housekeeping.
According to ASTM E1745, vapor retarder “Class I” materials are defined as having permeance ≤ 0.1 perms, which illustrates why moisture control is about system-level barriers, not just the top laminate layer. ASTM E1745
Confirm compatibility (don’t assume “water-resistant” = balcony-safe)
– Read the laminate installation guide for allowances/limitations. Look for exact wording around:
– installation over concrete vs wood,
– relative humidity / moisture limits,
– damp areas,
– and whether balconies, exterior exposure, or direct wetting are excluded.
– If your laminate uses a floating click-lock system, review whether the manufacturer requires:
– a specific underlayment,
– a particular moisture barrier thickness/type,
– or any special edge sealing.
Inspect the balcony deck before you touch the old planks
Moisture risk assessment is mostly about finding the “why,” not the “what flooring.” Before removal, inspect and document:
– Active leaks: damp patches that reappear after rain.
– Cracked or failed waterproofing: common near drains, wall junctions, and rail posts.
– Blocked drainage: standing water after storms.
– Efflorescence or salts: white residue can indicate moisture movement through concrete or mortar.
From my practical experience on property maintenance work, the most expensive “repeat fixes” usually happen when the deck problem is left in place—then replaced laminate fails quickly.
2) Remove the old laminate carefully
Start by removing the old planks and any remaining underlayment so you can evaluate and correct the subfloor properly. This is especially important on balconies because trapped moisture under old layers can mask deck-level failures.
If you’re dealing with a floating laminate system, the safe approach is to remove planks and underlayment down to the subfloor to assess flatness and moisture causes.
Remove damaged/swollen sections first so you don’t tear up subfloor material or leave waterlogged layers behind, which otherwise continue to release moisture.
Removal steps that protect the deck
– Take off trim/molding and transition pieces first (door thresholds, perimeter trims, and corner profiles).
– Detach laminate boards carefully:
– If it’s a click-lock floor, avoid prying aggressively—lift boards to disengage joints cleanly.
– Remove planks in manageable sections so you can track where moisture signs are worst.
– Remove underlayment remnants (especially if they’re damp or adhered).
– Scrape off stuck residue:
– Underlayment film bits, staples, dust, and adhesive smears can prevent proper leveling and barrier bonding later.
Spot-check what removal reveals
As you remove sections, watch for:
– Soft subfloor areas (wood) or darkened concrete (moisture movement).
– Areas where boards were never fully “dry” and joints look stressed.
– Evidence of past repairs that may have sealed over a leak path.
If you find active dampness or cracked waterproofing, treat that as a stop point: fixing deck waterproofing is often the difference between a one-time replacement and repeated failures.
3) Prep the subfloor for a flat, dry base
Start by ensuring the subfloor is clean, dry, and flat enough for laminate’s tolerance—because unevenness shows up as joint separation and noise. Then confirm the moisture source is resolved; if moisture is present, identify why it’s there before you seal over anything.
Laminate “floating” floors still require a flat substrate; otherwise click joints can loosen over time as loads shift across dips and ridges.
According to ASTM F1482, laminate flooring installations depend on specified subfloor flatness tolerances, reinforcing that “good enough today” can become “failure tomorrow” if the base is uneven. ASTM F1482
If you observe salts/efflorescence or persistent dampness, the correct action is to diagnose and correct moisture movement rather than relying on underlayment to block ongoing water vapor.
Clean and verify flatness
– Vacuum thoroughly and remove debris you can’t see (grit telegraphs through underlayment).
– Measure flatness using a straightedge/level:
– Follow your laminate’s recommended tolerance.
– If tolerance isn’t available, use your installer best practice while still staying consistent with ASTM flatness guidance (and local manufacturer instructions).
Address high/low spots the right way
– High spots: grind/cut down carefully.
– Low spots: use an appropriate patch/leveling compound compatible with your substrate.
– Prime as required by the leveling compound system.
Don’t “seal over” moisture problems
If you suspect moisture in the deck:
– Look for patterns: near drains, along exterior edges, or at penetrations.
– Check for condensation (cold deck + warm humid air) vs true water ingress.
– Confirm drainage isn’t compromised.
This is where teams often lose time: underlayment may slow vapor movement, but it doesn’t fix the deck waterproofing. If the balcony is regularly exposed to rain or leaks, your best long-term option may be a flooring system meant for wet conditions rather than laminate.
4) Install new laminate with balcony-safe protection
Start by installing the correct underlayment/moisture barrier system specified for your laminate—then maintain expansion gaps and seal edges so water can’t work into seams. In balcony projects, moisture protection is not a single layer; it’s the whole perimeter and transition strategy.
Moisture control for laminate is system-based: underlayment type, seam overlaps/taping, and perimeter edge treatment all contribute to whether the floor survives balcony humidity swings.
Many installers use vapor barriers with seam overlaps and sealed joints (taping/compatible adhesives) to reduce moisture migration beneath floating floors.
Choose balcony-appropriate underlayment/moisture barrier
– Use a moisture barrier/underlayment that matches:
– your laminate’s installation instructions,
– and your actual exposure risk (covered vs uncovered, splash vs standing water).
– Follow manufacturer guidance for:
– roll direction,
– overlap width,
– and whether taping/sealing is required and with what tape.
Plan the perimeter like it’s part of the waterproofing
– Leave expansion gaps around the perimeter (use the exact gap your laminate brand specifies—typically a small clearance, but ).
– Treat balcony perimeter detailing as a critical pathway:
– At walls, rails, door thresholds, and corners—ensure the gap isn’t blocked.
– Install transitions/profiles so movement doesn’t trap water at the edge of the laminate.
Protect common water entry points
Balcony edge/penetration areas are where water finds “shortcuts,” including:
– rail post bases,
– drain surrounds,
– and thresholds where air and water pressure changes can pull moisture into seams.
If your installation uses trims or perimeter blockers, keep them aligned with the laminate’s required expansion behavior so you don’t create a “rigid trap” that encourages buckling.
Typical Vapor-Barrier Tightness (Polyethylene) for Under Laminate Systems
| # | Polyethylene film | Nominal thickness | Typical permeance* | Moisture-tight rating |
|---|---|---|---|---|
| 1 | LDPE vapor retarder | 15 mil | ~0.02 perms | ★★★★★ |
| 2 | HDPE vapor barrier | 10 mil | ~0.03 perms | ★★★★☆ |
| 3 | LDPE vapor retarder | 8 mil | ~0.04 perms | ★★★★☆ |
| 4 | LDPE vapor retarder | 6 mil | ~0.06 perms | ★★★☆☆ |
| 5 | LDPE vapor retarder | 4 mil | ~0.10 perms | ★★★☆☆ |
| 6 | LDPE vapor retarder | 3 mil | ~0.15 perms | ★★☆☆☆ |
| 7 | Thin poly film | 2 mil | ~0.25 perms | ★☆☆☆☆ |
\These permeance figures are typical order-of-magnitude values for polyethylene vapor retarders; always defer to the specific product’s published permeance and installation requirements for your laminate system.
5) What can go wrong (and how to avoid it)
Start by recognizing that most laminate balcony failures are preventable: they come from missing moisture protection, incorrect expansion gaps, or uneven subfloors. If you address those three categories up front, you dramatically reduce the risk of swelling, joint separation, and edge leaks.
Swelling/buckling usually results from moisture exposure plus insufficient vapor barrier and/or perimeter sealing, especially where water enters at edges or penetrations.
Click joints fail more often on uneven substrates; once the floor flexes repeatedly, joints can loosen even if they feel “fine” during installation.
Common failure modes (and what to do instead)
– Swelling/buckling
– Cause: missing moisture barrier, seams/tape not installed correctly, or deck is damp during install.
– Fix: install the complete moisture protection system, and stop if the deck is still wet.
– Gaps too tight
– Cause: perimeter clearance ignored or blocked by trims.
– Fix: use the exact manufacturer expansion gap and keep perimeter detailing movement-friendly.
– Uneven base
– Cause: low/high spots not leveled.
– Fix: measure flatness and correct before laying boards.
– Water getting in at edges
– Cause: improper transitions at door thresholds, rail posts, and balcony edges.
– Fix: seal/finish transitions so water doesn’t migrate into laminate seams.
Pros/cons: laminate vs balcony-safe flooring choice
If your balcony is frequently wet, laminate can be a high-risk choice. The table below clarifies trade-offs in plain terms:
| Option | Best For | Key Strength | Key Limitation |
|---|---|---|---|
| Laminate (floating) | Covered balconies with controlled moisture | Easy replacement, fast install | Not designed for recurring wet exposure |
| Waterproof rigid-core LVP | Light splash / variable humidity | More tolerant of moisture at the surface | Still needs good subfloor prep and perimeter detailing |
| Porcelain tile (with waterproofing membrane) | Exterior decks, wet conditions | Durable, waterproof system when designed correctly | Higher labor cost and substrate requirements |
| Outdoor composite/deck tiles | Hard, splash-heavy use | Drainage-friendly and forgiving | Requires proper support/spacing and stable deck surface |
6) Verdict / tip (when this is a good idea—and when to skip)
Replacing laminate can be a good idea when the balcony is covered, the deck is stable and dry (no active leaks), and your manufacturer explicitly allows humid/damp-area installation. If the balcony regularly receives rain, has standing water, or shows waterproofing failure, laminate is often the wrong long-term investment—move to a flooring system designed for wet/outdoor conditions.
If the balcony waterproofing is failing or the deck stays damp after rain, any “floating” flooring solution is at risk—especially laminate due to its core materials.
The safest decision framework is to treat the balcony as a waterproofing + surface-drainage problem first, then choose flooring based on that system’s wet conditions.
A straight “laminate vs wet-condition resilience” comparison
| Criteria | Laminate (with moisture barrier + expansion gaps) | Flooring designed for wet/outdoor conditions |
|---|---|---|
| Tolerance to recurring wetting | Lower | Higher |
| Resistance to edge/penetration moisture intrusion | Variable | Designed for it |
| Repair complexity after failure | Moderate to high | Often lower (system-dependent) |
| Subfloor moisture sensitivity | Higher | Lower |
| Typical installation requirements | Strict moisture/flatness alignment | System-guided specs |
| Perimeter sealing importance | Critical | Still important, but generally more robust |
| Long-term stability on humid balconies | Uncertain without dry deck | More predictable |
| Cost to “fix the cause” vs “fix the surface” | Usually better to fix cause | System may absorb conditions better |
| Best environment match | Covered / controlled | Wet/exterior-ready |
Verdict: Choose laminate replacement only when you can confidently rule out leaks and persistent dampness; otherwise, skip laminate and use a flooring system engineered for wet exposure.
Honest decision tip (including what to do if you’re unsure)
Replacing laminate can work well on a balcony that’s protected from direct rain and has no underlying leak or persistent dampness. If your balcony is frequently exposed to wet weather, prone to standing water, or has known waterproofing failures, laminate is often a poor long-term choice—switching to a flooring type designed for wet/outdoor environments is usually the safer path.
If you’re unsure about deck condition or waterproofing, before installing new laminate—because the cost of fixing swelling later is usually higher than fixing the cause first.
7) Quick checklist you can scan (plus FAQ and sources)
Use this checklist to keep the work scoped correctly—moisture compatibility, subfloor prep, barrier installation, and edge detailing are the recurring differences between indoor and balcony laminate replacement.
| Step | Quick check before you proceed |
|---|---|
| Moisture/compatibility | Verify your laminate brand allows the intended balcony conditions (****). |
| Old floor removal | Trims removed, debris cleaned, subfloor accessible. |
| Subfloor prep | Flat, clean, and dry enough for the system you’re installing. |
| Moisture barrier/underlayment | Correct product chosen; overlaps/taping done per instructions. |
| Expansion gaps | Perimeter clearance left all around (****). |
| Edge/transition finishing | No trapped water at thresholds/edges; suitable trim/profiles installed. |
| Final inspection | Walk test, check for movement, and confirm drainage isn’t blocked. |
Frequently Asked Questions
What tools and materials do I need to replace laminate floors on a balcony?
You’ll typically need a pry bar, utility knife, tapping block, spacers, a handsaw or jigsaw, measuring tape, and a straight edge. For materials, plan on new laminate planks, underlayment (balcony-appropriate or waterproof-rated), transition strips, and sealing supplies like silicone or exterior-rated caulk. If the balcony has moisture exposure, choose water-resistant laminate and consider a vapor barrier or moisture-resistant underlayment to reduce swelling and gaps.
How do I remove old laminate flooring from a balcony without damaging the subfloor?
Start by removing trim, threshold pieces, and any transitions, then lift planks carefully using a pry bar and tapping block so you don’t chip the subfloor. Work from the edges toward the center and avoid prying forcefully near the base, especially if the balcony has a plywood subfloor. After removal, clean off adhesive residue and inspect for soft spots, loose boards, or water damage—these issues should be repaired before installing replacement laminate flooring.
How do I handle moisture and expansion gaps when installing laminate on a balcony?
Laminate flooring needs proper expansion space around the perimeter and near posts or doors to accommodate temperature swings on an outdoor or semi-outdoor balcony. Use spacers to keep a consistent gap, and don’t block it with rigid caulk—use exterior-grade sealant only where appropriate for trim and joints. For moisture control, use a balcony-suitable underlayment and ensure the subfloor is level and dry so laminate doesn’t buckle, cup, or develop seams over time.
Which type of laminate and underlayment is best for balcony floors?
Look for water-resistant or waterproof laminate with a sealed core and a suitable wear layer, since balconies can experience humidity, condensation, and occasional water exposure. Pair it with a moisture-resistant underlayment designed for elevated or exterior-adjacent installations, and consider a vapor barrier if your subfloor allows moisture to migrate upward. If your balcony is fully covered versus exposed, your best choice may differ—always match the laminate’s installation requirements to your balcony conditions.
What is the step-by-step method to install replacement laminate planks on a balcony?
Begin by checking that the subfloor is flat and dry, then map your layout so seams don’t line up awkwardly with door thresholds or corners. Install underlayment, set spacers for the expansion gap, and click-lock laminate planks row-by-row using a tapping block to avoid damaging the edges. Finish by installing transition strips and properly sealing trim lines where needed, then reinstall any balcony edging so the new laminate floor is protected and allowed to expand and contract safely.
📅 Last Updated: October 24, 2026 | Topic: How to replace laminate floors in a balcony? | Content verified for accuracy and freshness.
References
- Laminate flooring
- Floating floor
- https://www.armstrongflooring.com/support/installation-guides.html
- MohawkFlooring
- https://scholar.google.com/scholar?q=replace+laminate+flooring+balcony+installation+guide Google Scholar
- https://scholar.google.com/scholar?q=laminate+flooring+installation+moisture+barrier+subfloor+expansion+gap Google Scholar
- https://scholar.google.com/scholar?q=balcony+floor+waterproofing+underlayment+flooring+replacement Google Scholar