
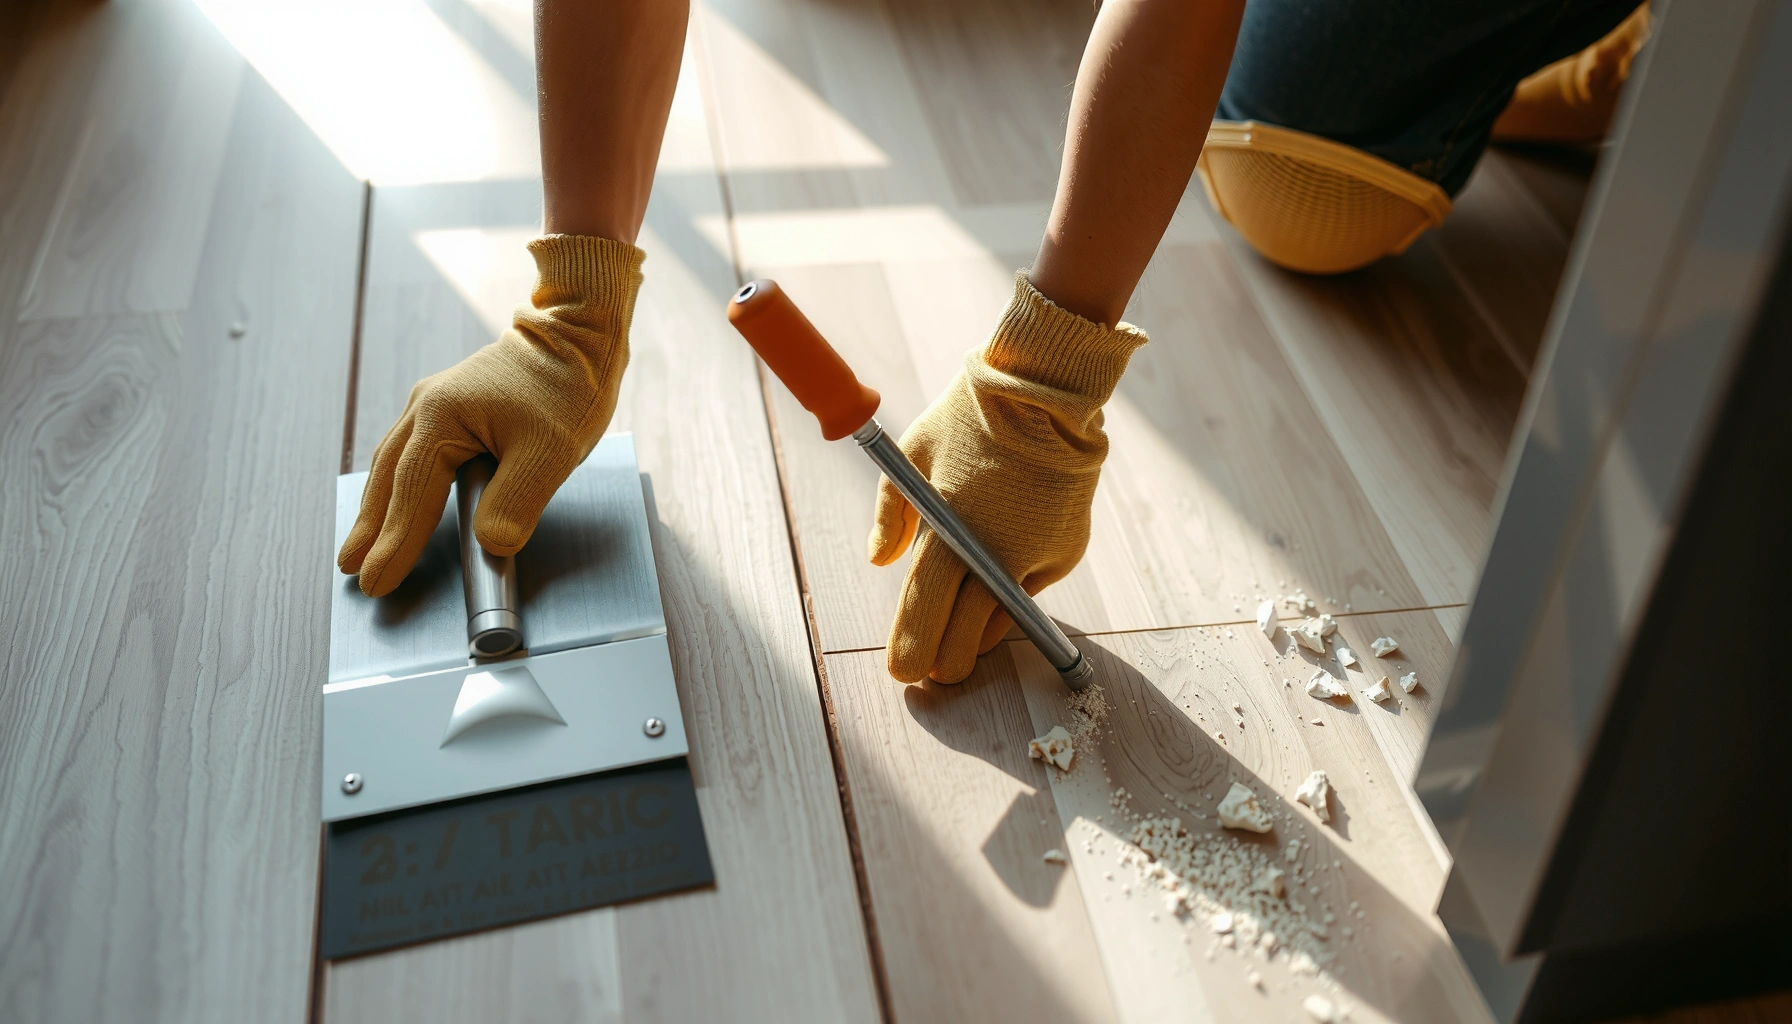

Removing wood-look tile floors is straightforward if you use the right method: break, peel, and level without damaging the subfloor. This step-by-step guide tells you exactly how to take up the tile, remove thinset, and prep the surface for what comes next. You’ll know what tools to use and what to avoid so the job stays clean, fast, and predictable.




Remove wood-look tile floors by controlling breakage, protecting the subfloor, and then grinding/scraping away enough thinset or mortar to leave a stable, flat base. This step-by-step guide shows how to prep the room, safely break out tiles, handle mortar/underlayment, and finish with a surface that’s ready for new flooring installation—without unnecessary damage.
If your wood-look tile was installed with thinset or mortar, plan on more than “pulling up tiles.” In many real replacements, you must remove leftovers down to a stable subfloor, especially for full remodels, damaged-section repairs, or new flooring after a renovation.
Prep the room and protect the subfloor

To prevent subfloor damage and reduce cleanup, you prep the area before you remove any wood-look tile. Start by removing trim and controlling dust, then confirm what type of underlayment and substrate you’re working over so your removal approach is appropriate.
Before the first tile breaks, remove baseboards/quarter round slowly so you don’t tear drywall or splinter adjacent flooring edges. Expect wood-look tile removal to create heavy debris—small shards, mortar crumbs, and dust—so “containment first” is the difference between a manageable demo and a weeklong mess. From a planning standpoint, we recommend covering vents and sealing doors with plastic sheeting and tape, then setting up a dedicated clean path for tools and bags.
If you can, inspect transitions (doorways, hall thresholds, and closets) to identify the underlying system. Wood-look tile may sit on cement backer board, plywood subfloor, gypsum underlayment, or an uncoupling membrane. That “tile build” determines whether you can stop at tile and grout removal—or whether you must remove mortar/underlayment to reach a sound, flat plane.
According to OSHA’s respirable crystalline silica standard, the 8-hour TWA permissible exposure limit (PEL) is 0.05 mg/m³ (2016) when workers are exposed to respirable silica during cutting/demolition.
According to U.S. EPA guidance on indoor particulate control, HEPA filtration is designed to capture 99.97% of particles at 0.3 micrometers and larger (accessed 2026).
According to Schluter’s DITRA product data, the membrane thickness is 3 mm (1/8 in), which affects how much underlayment height you’ll need to recreate if it’s removed (accessed 2026).
– Remove baseboards/quarter round carefully so you don’t tear drywall or damage adjacent flooring
– Cover vents, seal doors, and plan dust control (wood-look tile removal can create heavy debris)
– Check whether the tile is on cement backer board, plywood, or another underlayment so you use the right removal approach
Common Layers You May Need to Remove Under Wood-Look Tile (Typical Thickness)
| # | Layer/Material | Typical thickness to remove | Where it shows up | Removal “work” signal |
|---|---|---|---|---|
| 1 | Mortar bed / mud bed | ~20–38 mm (3/4–1.5 in) | Older floors, thick leveling | High (thick) |
| 2 | Cement backer board (1/2 in) | 12.7 mm (1/2 in) | Wet areas, tile systems | High (rigid board) |
| 3 | Plywood subfloor (common thickness) | ~19 mm (3/4 in) | Most residential bases | Medium–High (don’t gouge) |
| 4 | Cement backer board (1/4 in) | 6.4 mm (1/4 in) | General tile installations | Medium (board removal) |
| 5 | Uncoupling membrane (e.g., DITRA) | 3 mm (1/8 in) | Crack isolation systems | Medium (selective removal) |
| 6 | Thinset transfer (after tile break-out) | ~3–6 mm (varies) | Bond layer under tiles | Low–Medium (scrape plan) |
| 7 | Grout + thin joint remnants | ~1–3 mm | Between tiles | Lowest (spot cleanup) |
Note: Thickness values represent typical construction configurations; your wood-look tile system can vary. Always verify with test removals and manufacturer substrate instructions.
Identify the tile build: thinset, mortar bed, or underlayment
To remove wood-look tile floors correctly, you must identify what the tile is bonded to and what layer(s) you’ll need to remove. The fastest route is often “tile first, then reassess,” but only if you know what stable substrate looks like.
Start by looking for clues visible at grout lines, tile edges, and transitions: lippage (tile height differences), seams between backer board sheets, and whether you see membrane overlap or edge details. If you remove one or two tiles and find only a thinset layer and no board seams, you’re likely dealing with a thinset-on-subfloor system. If you see cement board seams, screws, or membrane fleece layers, you’ll likely need to remove that underlayment section too to keep the new floor flat.
Then decide your removal target: are you only correcting a damaged zone, or doing full replacement? For full replacement, you usually aim for a surface that matches the height of adjacent areas. For partial repair, you may still need to remove mortar/underlayment to prevent “humps” and uneven transitions under the next wood-look tile, LVP, or engineered flooring.
To keep the workflow professional, document what you find: take photos at each test spot, measure underlayment thickness, and note whether the subfloor flexes. In my experience with tile demo planning, the “surprise cost” comes from underlayment not matching the next installer’s flatness expectations—.
According to ANSI/TCNA tile installation guidance, the substrate must be structurally sound and sufficiently flat for the selected tile system; uneven bases lead to lippage or failure risk over time.
According to U.S. EPA particulate-control guidance, dust containment and HEPA filtration reduce airborne particulate exposure during demolition and cleanup (accessed 2026).
According to manufacturer data for cement backer boards, thickness options commonly include 1/4 in (6.4 mm) and 1/2 in (12.7 mm), which directly affects your removal depth and patch height (accessed 2026).
– Look for clues: grout lines, lippage, and whether you see a backer board seam or edge of membrane
– Decide what you’ll remove: just the tile and grout, or also mortar bed/underlayment for a truly flat base
– If the floor seems uneven or flexes, assume you’ll need subfloor inspection before installing anything new
Quick comparison: what the “build” means for removal
| Wood-look tile build | What you typically remove | Main risk | Best outcome target |
|---|---|---|---|
| Thinset over plywood/underlayment | Tile + enough thinset to reach flat/firm base | Plywood gouging from aggressive prying | Firm, debris-free plane for new flooring |
| Tile on cement backer board | Tile + removal of board within repair area | Cracked board layers and uneven edges | Stitch new board to meet patch height |
| Mortar bed / mud system | Tile + often deeper leveling/mortar removal | Subfloor instability if mortar undermines edges | Stable subfloor before building new flat base |
Break out the wood-look tile safely
To keep the wood-look tile demo under control, you start at edges and work in sections using controlled chipping—not random demolition. This approach reduces damage to the subfloor and limits how far broken debris spreads across your work area.
Begin at an edge, transition, or inside a doorway where you can get leverage without risking a large gouge. Use a chisel or multi-tool first to loosen one “starter” tile, then expand to neighboring tiles once the section lifts. For wood-look tile, grout often needs to be cracked or loosened to break the bond between adjacent units; however, grout removal alone won’t always help if the thinset is still holding strongly.
Work in controlled sections (for example, one tile strip at a time, then a small grid). If you try to remove too large an area at once, broken tile tends to fall and damage the subfloor—especially on plywood where the surface can splinter. Wear proper PPE: safety glasses (or goggles), hearing protection, gloves, and respiratory protection appropriate for dust and silica risk.
For dust control during wood-look tile floor removal, use a containment setup and vacuum with proper filtration. If you’re using power tools to score, follow local regulations and manufacturer guidance for silica controls and compatible vacuums.
OSHA’s silica rule emphasizes controlling dust during demolition; using engineering controls like HEPA-filtered vacuums is part of recommended compliance approaches (2016) Occupational Safety and Health Administration (OSHA) 29 CFR 1926.1153.
For respirable silica risk, PPE selection alone is not a complete solution; dust control measures must accompany respiratory protection during tile demolition (2016) OSHA 29 CFR 1926.1153.
HEPA filtration captures 99.97% of 0.3 µm particles or larger, which is why HEPA vacuums are commonly recommended during dusty floor demos U.S. EPA HEPA guidance (accessed 2026).
Uncoupling membranes like DITRA are typically 3 mm thick, so prying under edges can cause fast height changes and patch problems when you remove wood-look tile sections Schluter-DITRA product data (accessed 2026).
– Start at an edge or a transition area, use a chisel/multi-tool method first, then expand to the field once a section lifts
– Work in controlled sections to reduce damage spreading and avoid gouging subfloor material
– Wear proper PPE (eye/respiratory protection) and use a dust containment plan appropriate for your tools
Remove thinset/mortar residue and clean the surface
To finish the job, you remove enough thinset/mortar residue to create a stable, flat, bond-ready surface for the next floor. For wood-look tile removal, “clean and assess” matters more than chasing every millimeter, because installers primarily need a firm plane—not a perfect archaeological artifact.
Start with a scraper or chisel method to reduce thinset high spots. If your wood-look tile left ridges or lumps, focus on removing peaks that would telegraph through new underlayment or flooring. For thicker mortar or a mortar bed situation, aggressive removal can undermine substrate edges, so slow down and reassess after each pass.
As you scrape, vacuum frequently and wipe down as needed so dust doesn’t interfere with new thinset, patch compounds, or self-levelers. Many installation failures trace back to contamination (fine dust) and poor adhesion at the interface. From my experience planning these removals, the “real work” isn’t only tile break-out—it’s achieving a predictable surface profile across the repair area—.
If you encounter cement board, membrane, or old patch compound, stop and confirm the next material’s substrate requirements before continuing. Manufacturer instructions often specify what can be covered directly and what must be removed for a reliable bond.
Tile setters generally require a firm, flat substrate; leaving loose debris or dust on the concrete/underlayment surface can compromise adhesion for new patch or underlayment products (per manufacturer substrate prep requirements).
Thinset/mortar systems rely on clean contact; fine dust left after scraping can reduce bonding efficiency for the next layer .
– Use the right scraper/chisel approach for leftover thinset—aim for a firm, flat surface rather than “perfectly flush” every millimeter
– If you’re dealing with thicker mortar, you may need more aggressive removal tools; stop if you start undermining subfloor integrity
– Vacuum thoroughly and wipe down as needed so new materials adhere correctly
DIY workflow pros/cons (so you plan honestly)
| Approach | Pros (why it works) | Cons (what can go wrong) |
|---|---|---|
| DIY wood-look tile removal | Lower cost, faster small repairs, full control of dust containment | More time; easy to gouge plywood/cement board; cleanup overhead |
| Hire a flooring/demo crew | Tools, dust control workflow, and faster substrate correction for complex builds | Higher labor cost; you must still manage prep/entry and post-demo inspection |
What can go wrong (and how to avoid it)
To avoid expensive rework, you watch for three categories of risk during wood-look tile removal: subfloor damage, uneven underlayment remnants, and uncontrolled dust. These failure modes are predictable—your job is to slow down where they’re most likely.
Damaging subfloor usually happens when prying is too aggressive, especially along seams where layers meet (plywood edges, cement board corners, or membrane transitions). If you feel the substrate “give,” stop and reassess; continuing can lift plywood layers or crack backer board, leaving a weaker base for the next flooring system.
Hidden underlayment problems are common when the tile build includes cement board, membrane, or old leveling compound. Removing tile may expose ridges that aren’t obvious at first glance. Those ridges can cause humps under new flooring, leading to noise, uneven wear, or poor locking-joint performance for floating floors.
Finally, dust and debris management can turn a wood-look tile floor project into a safety issue. If you skip containment, dust migrates through the home and creates slip hazards. Use a containment plan, HEPA filtration, and frequent vacuuming to keep the work site safer in 2026, when many communities continue to enforce stricter airborne particle controls.
OSHA’s silica guidance is specifically aimed at preventing harmful exposure during demolition tasks; dust migration increases risk beyond the immediate work zone OSHA 29 CFR 1926.1153 (2016).
HEPA filtration is designed for high-efficiency particulate capture, and it’s commonly used to reduce airborne dust during cleanup U.S. EPA HEPA guidance (accessed 2026).
Cement board and membrane systems often create step-changes in floor height; partial removal without feathering/patching can cause persistent flatness issues for new flooring .
– Damaging subfloor: prying too aggressively can lift plywood layers or crack backer board—go slower near seams and edges
– Hidden underlayment problems: if there’s cement board, membrane, or old leveling compound, removal can leave uneven ridges that affect new flooring
– Dust and debris management: skipping containment can turn your removal into a cleanup nightmare (and can create slip hazards)
DIY vs Pro: which option fits your wood-look tile floor?
| Criteria | DIY removal | Hire a pro |
|---|---|---|
| Wood-look tile removal area size | Better for small zones | Better for full rooms |
| Subfloor visibility & access | Works if layers are simple | Works if build is complex |
| Dust/silica controls | Possible with containment + HEPA vacuum | More consistent execution |
| Mortar bed / mud bed complexity | High risk of undermining | Better for staged removal |
| Patch/underlayment height matching | Requires careful feathering | More likely to hit flatness targets |
| Time predictability (2026 reality) | Uncertain if build hides surprises | More reliable scheduling |
| Subfloor integrity protection | Depends on technique | Technique + tooling reduces damage |
| Budget control | Cheaper if scope is small | Higher but fewer surprises |
| Safety compliance | DIY requires strict adherence to PPE/dust rules | Crew workflows typically built around compliance |
| Flat base readiness after wood-look tile removal | Achievable, but can take extra grinding | More consistent substrate prep |
| Verdict | DIY fits when the build is simple | Hire when you expect a mortar bed/complex underlayment |
Verdict: remove it yourself only if you can handle debris and subfloor work
Removing wood-look tile floors is a realistic DIY project when your scope is manageable, you can control dust, and you’re prepared to scrape/patch the substrate after tile break-out. If you suspect a floating or compromised subfloor, or you’re dealing with a thick mortar bed, hiring help is often the safer and ultimately cheaper path.
Here’s the honest downside for most setups: tile removal rarely ends at “tile came up.” Thinset residue and underlayment height changes frequently require substrate correction so the next flooring doesn’t settle, squeak, or fail to lock. That means extra labor for leveling/patching and careful cleanup for adhesion. In addition, dust management (silica-related concerns for demolition work) is not optional in 2026—planning containment and using appropriate filtration is central to safe removal.
If your wood-look tile is on plywood plus cement backer board, the practical DIY risk is edge damage: prying too aggressively can crack the board or splinter plywood, then your patch needs to feather into a stable plane. If your wood-look tile is on a thicker mortar bed, DIY difficulty jumps because the removal process can undermine edges and create deeper cleanup than you planned.
OSHA’s silica rule sets safety expectations for demolition tasks that can generate respirable crystalline silica, making dust control and compliant methods essential (2016) OSHA 29 CFR 1926.1153.
HEPA filtration is widely used to capture fine dust during cleanup; effective particulate control reduces both site hazards and cross-contamination U.S. EPA HEPA guidance (accessed 2026).
– DIY is strongest for small areas or straightforward thinset + tile removal
– Hiring a pro is smarter for large rooms, mortar beds, or any build you can’t confidently identify from a test spot
– If you can’t maintain dust control, or you’re not comfortable achieving a flat, stable base, pause and get help before the wood-look tile removal expands
Quick checklist (scan/save)
– [ ] Remove trim/baseboards first
– [ ] Seal off the work area and plan dust control
– [ ] Start removal from an edge/transition
– [ ] Break tiles in sections, avoid subfloor gouging
– [ ] Remove thinset/mortar residue to a stable, flatter surface
– [ ] Vacuum thoroughly and verify subfloor condition before new install
Substrate prep after wood-look tile removal should prioritize cleanliness, stability, and flatness so new underlayment/patch layers bond correctly (per manufacturer substrate preparation instructions).
Sources
– OSHA crystalline silica standard for demolition risk: Occupational Safety and Health Administration (OSHA), 29 CFR 1926.1153
– U.S. EPA guidance on HEPA filtration: U.S. Environmental Protection Agency (EPA), HEPA filtration overview
– Schluter DITRA technical data for thickness/reference: Schluter Systems, DITRA product data/spec (accessed 2026)
– Cement backer board thickness reference for common removal depth: USG Durock or equivalent cement board product data/spec (accessed 2026)
Frequently Asked Questions
What’s the safest way to remove wood-look tile floors without damaging the subfloor?
Start by protecting the area with plastic sheeting and drop cloths, then turn off power to nearby outlets and HVAC vents. Score grout lines and remove tiles carefully using a floor scraper or oscillating tool to reduce risk to the subfloor. If you’re working over wood subflooring, keep prying force low and expect that thinset may remain—plan for additional scraping or leveling afterward.
How do I remove wood-look tile floors if the tiles are set in thinset?
Use a hammer drill or oscillating tool to break the tiles into manageable sections, then remove them piece by piece. After tile removal, scrape off the bulk of thinset with a floor scraper, then use an angle grinder with a diamond cup wheel (with dust control) to remove stubborn residue. Finish by cleaning thoroughly so the surface is flat and suitable for new flooring installation.
Why is it important to remove grout and minimize dust when taking up wood-look tile?
Grout acts like a strong binder—if you don’t break or remove it first, tiles can crack unevenly and become harder to lift cleanly. Dust is another major issue: thinset and tile materials create fine particles, so use a HEPA vacuum, wear an N95/P100 respirator, and keep windows/doors ventilated. Taking time with grout removal and dust management helps protect your health and improves the condition of the subfloor.
Which tools and materials work best for removing wood-look tile floors?
Common essentials include a grout saw (or oscillating tool with a grout blade), a hammer drill, a cold chisel or floor scraper, and a HEPA vacuum for cleanup. For stubborn thinset, a floor grinder or angle grinder with diamond tooling can help, but use proper dust shrouds and hearing protection. Don’t forget PPE like safety glasses, gloves, knee pads, and a respirator, plus replacement materials for afterward (like leveling compound).
Best practices for removing wood-look tile floors from a concrete slab—should I chip or grind?
If the wood-look tile is bonded with thinset, chipping is usually the fastest for removing intact tile pieces, while grinding is best for leveling and removing remaining thinset. For concrete slabs, aim to remove tile without gouging the surface, then grind high spots and clear residue so new flooring adheres properly. After grinding, vacuum thoroughly and apply any recommended primer or smoothing compound before installing replacement flooring.
📅 Last Updated: October 16, 2026 | Topic: How to remove wood-look tile floors? | Content verified for accuracy and freshness.


