Searching for how to repair vinyl floors in an entryway? This step-by-step guide shows you exactly how to fix common damage—chips, cracks, gouges, and loose seams—so your floor looks seamless and holds up to daily traffic. You’ll learn what to patch with, how to prep the area, and how to blend the repair for a durable finish.




Yes—most entryway vinyl floor damage can be repaired by cleaning the area, matching the right repair method to the specific damage type, and sealing or replacing only what’s necessary. If your entryway vinyl is cracked, gouged, or lifting at the edges, the fix usually comes down to cleaning the area, matching the right repair method to the damage type, and sealing or replacing only what’s necessary. In this guide, you’ll learn how to handle everything from scuffs and small cuts to bubbles, loose seams, and replacing a damaged plank.
This is best for homeowners dealing with high-traffic wear in an entryway—things like scuffing from shoes, small tears near the door, or a corner that keeps lifting. If your vinyl is already separating or you’re seeing soft spots, you’ll also see when a patch or plank replacement is the smarter move.
Assess the damage and figure out your vinyl type

You get the best outcome when you identify the failure mode first, then choose the repair system that matches it. Before you touch the surface, confirm whether you’re working with sheet vinyl, adhered luxury vinyl plank/tile (LVP/LVT), or click-lock (floating) vinyl, because the “right” adhesive and repair compound differ.
Entryway vinyl repairs last longer when you diagnose whether the issue is surface wear (scuffs/cuts) or an installation/system failure (lifting seams, bubbles, or plank edge release).
Repair methods differ significantly between sheet vinyl (which often uses welded seams/patch bonding) and LVP/LVT, where plank locking systems and underlayment behavior can control how repairs hold.
Identify what’s wrong (and why it matters)
Start by locating exactly where the damage lives: on the top wear layer, through the finish, at a seam, or along a plank edge. A scuff is typically a surface abrasion; a gouge usually removes material down to the substrate; seam separation indicates bond failure at the joint; and bubbling commonly points to moisture or trapped air beneath the vinyl.
In my experience, entryways reveal these differences fast because shoes, carts, and wet weather all concentrate stress near door swings, thresholds, and corners. As of 2026, manufacturers increasingly emphasize that “spot repairs” should not mask moisture or adhesion problems—so the diagnostic step is not optional.
Confirm the vinyl type (sheet vs. LVP/LVT vs. click-lock)
Here’s the decision point that saves time: the floor’s construction determines whether you patch, fill, or remove and reinstall. Sheet vinyl is typically a continuous field with seams and patches; LVP/LVT comes as individual pieces and may be glued down or designed to float via click-lock.
Click-lock (floating) vinyl planks are typically engineered to move slightly with temperature and humidity, so gluing a plank down can violate the flooring’s designed behavior.
Check for moisture sources before repairing
Before you repair vinyl floors in an entryway, check for “repeat offenders”: leaks near the door, irrigation overspray, wet mopping residue, or condensation from HVAC. Even a perfect filler can fail if moisture keeps reworking the bond line beneath the vinyl.
For factual anchoring on moisture and flatness—two drivers of resilient-floor problems—industry installation guidance often cites tight acceptance targets. According to CRI/RFCI-type resilient flooring guidance, subfloors are commonly required to be flat within about 3/16 in over 10 ft (≈4.8 mm) to reduce point stress that telegraphs damage back through the vinyl.
According to ASTM F1869, moisture vapor emission is measured in lb/1000 sq ft/24h, and many adhesive warranties cite limits around 5 lb/1000 sq ft/24h (values vary by product).
According to ASTM F2170, relative humidity limits for concrete are commonly cited around 75% RH for many resilient-floor adhesives (again, varies by manufacturer).
Quick comparison: sheet vinyl vs. click-lock LVP repair approach
| Scenario | Best-fit vinyl system | Why it matters | Common outcome if you choose wrong |
|---|---|---|---|
| Scuff/cut stays within the wear surface | Sheet vinyl or glued-down LVP/LVT | Repair compounds can bond to a stable substrate | Filled mark may remain, but won’t migrate if moisture isn’t present |
| Seam line opens repeatedly (near door/threshold) | Often adhered sheet or adhered LVP/LVT | Indicates bond/adhesive breakdown at the joint | Repair pops loose and reopens |
| Plank edge lifts, multiple sections “drift” | Often click-lock floating LVP | Movement is part of the design; adhesive rules differ | Glue can create failure by restricting expansion/contraction |
Repair scratches, scuffs, and minor cuts
You can usually fix scuffs, light scratches, and minor surface cuts without replacing planks by cleaning first and using a vinyl-safe filler or kit product designed to bond to resilient surfaces. The key is limiting the repair to the wear layer and respecting the kit’s cure time.
Dust and grit reduce adhesion for vinyl repair products, so cleaning with a vinyl-safe cleaner is the first step before any filler or compound is applied.
Shallow scuffs that don’t penetrate deeply into the wear layer may be improved with careful buffing after cleaning, while deeper cuts generally require a color-matched repair kit.
Clean the surface thoroughly (so the repair can actually bond)
Entryways collect grit: sand particles from shoes can behave like abrasive sandpaper. Start by removing debris with a vacuum, then use a vinyl-safe cleaner and microfiber cloth. Avoid harsh solvents unless your repair kit specifically allows them—many vinyl finishes can haze or soften.
After cleaning, let the area dry fully. If you’re repairing near a door track, wipe away any residue where water or cleaning chemicals may have been pulled in.
Use the right filler for the depth of damage
A vinyl floor repair kit typically includes a color-matched compound and an application method (often a putty knife or applicator). For shallow marks that are still “surface-only,” you may get away with buffing lightly after cleaning. If the cut catches a fingernail, plan to fill.
Apply in thin layers when the kit calls for layering. Thin layers cure more reliably and reduce shrinkage. Then keep traffic off until cured—entryways see impact and lateral movement that can break an undercured patch.
Pros/cons: fill vs. “leave it” for small cosmetic marks
– Fill/color-match (pros): More uniform appearance, better protection of the damaged spot from abrasion and water intrusion.
– Fill/color-match (cons): Requires careful cleaning, exact compound handling, and full cure time.
– Leave it (pros): Zero risk of overfilling or mismatched color in hard-to-repair wear patterns.
– Leave it (cons): Small openings near seams can grow under repeated foot traffic.
Fix chips, gouges, and seam separation
You repair chips, gouges, and seam separation by removing loose edges, filling (for material loss), and re-securing the bond at seams using the correct adhesive/sealant. Done correctly, the repair addresses both appearance and the reason the damage started.
For chips and gouges, the durable approach is to remove loose material and rebuild the damaged area with a color-matched vinyl repair compound in thin layers.
For seam separation, the repair must re-establish the joint bond using the seam adhesive/sealant recommended for your vinyl system, because adhesives designed for one vinyl type may fail on another.
Chips and gouges: build back the missing material
Start by clearing debris from the damaged pocket—loose bits prevent proper bonding and make the repair crumble. Use a vinyl-appropriate putty knife/spreader to apply the compound.
– Apply thin layers (if the kit instructs this).
– Feather edges so the repair blends into surrounding finish.
– Avoid overfilling; excess material can leave a noticeable ridge once cured.
Seam separation: open just enough, then re-secure correctly
Seam separation usually isn’t just “cosmetic.” It can indicate adhesive failure, moisture intrusion, or substrate movement.
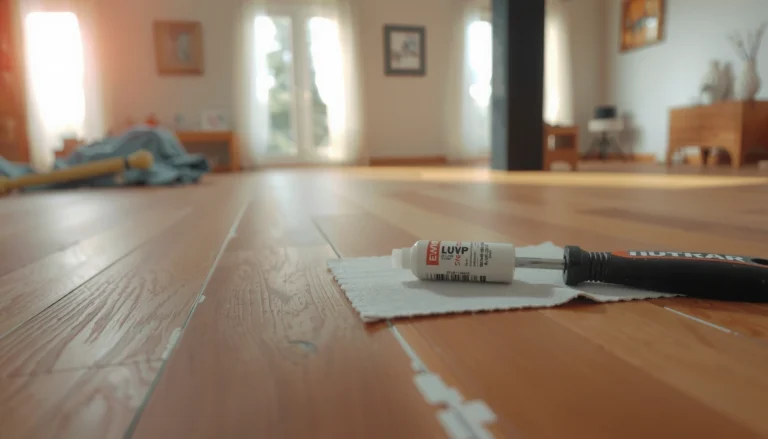
Open the area only as much as needed to address the gap. Then use the seam adhesive/sealant recommended for your flooring type (sheet vinyl seam methods differ from LVP seam/joint treatments). Press or reinstall as directed, and keep traffic off until the adhesive cures fully—walking on it early can re-open the seam.
Entryway reality check: why seams fail near doors
Entryways are high-movement zones. At thresholds, the floor may experience repeated flex from door swings, rolling luggage, or seasonal humidity shifts. As of 2026, many warranties tie seam/edge performance to both adhesive compatibility and proper subfloor prep—so if seam separation recurs, stop and re-check moisture and flatness.
Deal with bubbles, lifting edges, and loose planks
You treat bubbles, lifting edges, and loose planks by locating the cause (often moisture or failed adhesion), cleaning the underside, and then re-seating with the correct bonding approach. If it’s click-lock floating vinyl, the repair may require partial or full reinstallation rather than “gluing everything down.”
Bubbles and lifting in vinyl floors often trace back to moisture trapped underneath or adhesive that has lost holding power, especially near entry doors and thresholds.
Click-lock planks are generally designed to float; if multiple planks are loose, reinstalling the affected sections is often more reliable than spot gluing.
Identify the underlying cause before you commit
If you see bubbles, ask: did water get in? Did a cleaning method saturate the area? Is the subfloor flat? A “surface fix” can mask the symptoms while the cause keeps working.
Also look for patterns: bubbles clustered after wet weather suggest moisture. Lifting at edges that never fully flatten suggests adhesive failure or compromised prep. Loose planks appearing across a broader zone suggests the floor system is moving more than it should.
Re-seat lifted areas (with manufacturer-compatible adhesive)
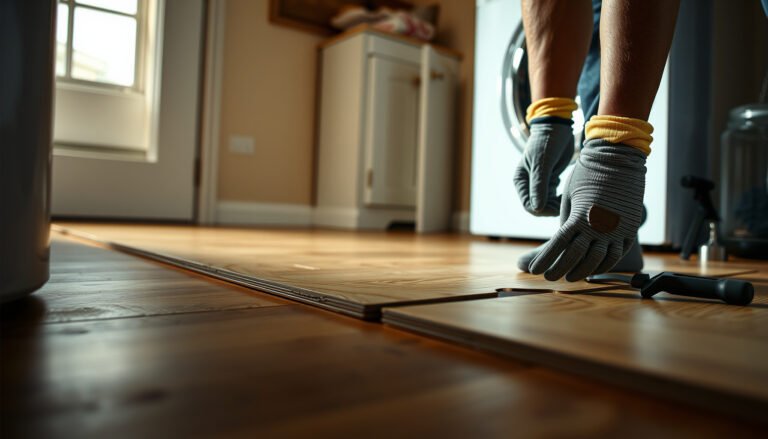
For lifted areas, carefully lift only the affected section. Clean underneath to remove dust and any old residue that prevents bonding. Then re-seat using the correct adhesive for your vinyl system.
Do not assume a universal glue is safe. Adhesives can vary in solvent content, tack profile, and curing behavior—entryway repairs need stable long-term adhesion, not short-term grab.
If it’s click-lock/LVT: remove and reinstall rather than force-gluing
If your floor is click-lock/LVT and you’re seeing multiple loosened sections, you may need to remove and reinstall the plank(s) rather than trying to glue down the whole floor. The locking edges are a critical mechanical system; restricting movement can lead to new failure points.
From my practical guidance (based on manufacturer “float vs. adhere” behavior patterns, not brand-specific claims), start with the smallest repair that restores the floor’s intended function—locking back together cleanly—then stop if the issue reappears.
Replace a damaged vinyl plank or patch a section
You replace a damaged plank or patch a section when the damage is too deep, too large, or repeatedly fails with filler-based repairs. Replacement is usually the cleanest way to restore structure and reduce the chance of future lifting.
When vinyl damage penetrates deeply or keeps re-lifting after filling, replacing the affected plank/section is typically more reliable than repeating patch compounds.
For sheet vinyl, patching can work, but matching pattern direction and using the correct bonding method for sheet seams is crucial for a durable repair.
When replacement beats repair
Replace when any of these are true:
– The plank is cracked through or permanently curled.
– The gouge exposes areas that can’t be rebuilt cleanly.
– The filler keeps cracking or pulling out after curing.
– Multiple adjacent planks are loose, indicating broader installation failure.
Sheet vinyl patch notes (pattern direction and bonding)
For sheet vinyl, you can patch, but you must match pattern/direction so the repair doesn’t stand out. You also must use the right seam/patched bonding method for sheet vinyl so the repair doesn’t separate at the edges.
Plan around transitions and trim
Entryways have transitions: door thresholds, baseboards, and sometimes reducers. You may need to loosen trim so the replacement can sit flat and align correctly. Rushing this step often leads to edge gaps that collect dirt or water, which can restart the cycle of lifting.
What can go wrong (and when to call for help)
DIY repairs fail most often when the underlying cause isn’t addressed, the wrong product is used, or traffic and moisture are introduced before full cure. If you’re seeing widespread lifting, buckling, or likely subfloor moisture, pausing DIY and getting help can prevent expensive replacement later.
Using the wrong filler or adhesive for a specific vinyl construction (sheet vs. click-lock vs. adhered LVP/LVT) can cause poor bonding, shrinkage, or re-lifting.
Skipping cure time in entryways increases the risk that filled areas crack or the repaired edge pulls back under foot traffic.
Widespread seam or plank release, floor buckling, or suspected subfloor moisture are indicators that diagnosis is required beyond surface-level repair.
Common mistakes that create “temporary” fixes
– Wrong product type: For example, using an LVP seam approach on sheet vinyl seams (or vice versa) can fail quickly.
– Not cleaning enough: Even small grit can break bond strength.
– Overfilling or over-sanding: You can damage the wear layer and make the repair more visible than the original issue.
– Rushing cure: Entryways concentrate pressure and lateral movement, so “almost dry” is not the same as cured.
When to call for help (or stop DIY)
Stop and get support if:
– Multiple planks are loose across a broad area.
– You suspect subfloor moisture (recurring bubbles, soft spots, musty odors).
– The floor shows buckling or persistent unevenness.
– You don’t know the vinyl type and the repair system compatibility is unclear.
As of 2026, moisture-related warranty claims and adhesive requirements are increasingly specific, so getting the right diagnosis early can protect both the floor and the time you invest.
Verdict / tip
If you can identify the damage type and confirm your vinyl system (sheet vs. adhered LVP/LVT vs. click-lock), step-by-step repair is often straightforward: clean, use the matching repair compound, and respect full cure time. The downside is that entryways can reintroduce moisture and traffic stress, so even a good patch may fail if the cause remains. Skip DIY and get professional assessment if you see widespread lifting, buckling, or likely subfloor moisture—at that point you’re not just repairing vinyl, you’re correcting a system problem.
Industry-Referenced Conditions That Affect Vinyl Repair Durability (Key Threshold Examples)
| # | Condition check | Typical target / range | Test or standard | Repair impact |
|---|---|---|---|---|
| 1 | Subfloor flatness | ≤ 3/16 in over 10 ft (≈4.8 mm) | Resilient flooring installation guidance (flatness requirement) | ★★★★★ |
| 2 | Concrete moisture (MVER) | ≈ ≤ 5 lb/1000 sq ft/24h (commonly cited) | ASTM F1869 (calcium chloride) | ★★★★★ |
| 3 | Concrete moisture (RH) | ≈ ≤ 75% RH (commonly cited) | ASTM F2170 (in-situ RH) | ★★★★★ |
| 4 | Installation / repair air temperature | Typically 65–85 °F (18–29 °C) | Manufacturer installation/adhesive guidance | ★★★★☆ |
| 5 | Traffic protection window | Often 24 hours for “light” re-entry (varies) | Repair kit / adhesive cure instructions | ★★★☆☆ |
| 6 | Seam bonding compatibility | Adhesive/sealant must match vinyl system type | Flooring manufacturer seam product requirements | ★★★☆☆ |
| 7 | Underlayment / substrate cleanliness | Remove dust, oils, and loose residue before bonding | Resilient flooring substrate prep guidance | ★★★★☆ |
Frequently Asked Questions
What are the first steps to repair damaged vinyl flooring in an entryway?
Start by cleaning the area thoroughly and removing dirt, grit, or sand that can prevent vinyl floor patching from bonding. Inspect the entryway vinyl for the type of damage—cracks, lifted seams, scratches, or a puncture—because each repair method differs. If the plank or sheet is loose, stop and address the subfloor or adhesive issue first to prevent the repair from failing again. Finally, gather the right vinyl repair kit, replacement pieces (if needed), and matching color supplies before you begin.
How do you fix lifting vinyl floor seams or edges in an entryway?
Lifted seams in entryways are often caused by moisture, temperature changes, or failing adhesive, so cleaning and drying the area is essential. For small edge lifts, apply a vinyl-specific adhesive under the seam, then press firmly and weigh it down until it sets. If the gap is larger or the sheet has separated, you may need to remove the affected section and reinstall it with proper underlayment and flooring adhesive. Afterward, use a seam roller or pressure to ensure the vinyl floor lays flat and stays sealed.
How can you repair scratches or scuffs on vinyl flooring without replacing the whole floor?
For surface scratches, clean the spot and use a vinyl floor repair kit with color-matching filler or a repair marker to blend the damaged area. Apply the product sparingly, let it cure as directed, and lightly buff the surface once dry. For deeper gouges, you may need a vinyl patch compound or filler that’s designed for flexible flooring, followed by sanding (very lightly) and re-coloring. This approach is especially helpful in entryways where vinyl plank or sheet flooring takes daily wear.
Why does my vinyl entryway floor keep cracking or separating after repairs?
Recurring cracking or separation usually points to an underlying issue like improper subfloor flatness, moisture intrusion, or inadequate acclimation before installation. Vinyl flooring expands and contracts with temperature and humidity, so frequent driveway-level traffic plus fluctuating conditions can worsen weak spots. Check for high spots, water exposure near doors, or failed adhesive areas, then address those causes before doing another patch. A durable fix for vinyl floor repair in an entryway often requires both correct materials and correct conditions, not just cosmetic patching.
Which repair method is best for punctures, holes, or damaged vinyl planks in an entryway?
For small punctures or chips, a vinyl floor filler and color-matched top coat is usually the fastest solution and keeps the repair seamless. For a cut-through hole or a damaged vinyl plank that won’t lay flat, replacement is typically the best option—remove the damaged piece and install a matching replacement plank with the correct adhesive. If you have sheet vinyl, you may need a vinyl patch cut from a matching scrap and heat-weld or glue it in place for the most natural look. Choosing between filler versus replacement depends on depth, size, and whether the vinyl flooring remains structurally stable underfoot.
📅 Last Updated: October 25, 2026 | Topic: How to repair vinyl floors in a entryway? | Content verified for accuracy and freshness.
References
- vinyl floor repair – Search results
- sheet vinyl patch repair – Search results
- luxury vinyl tile repair lifting scratch – Search results
- vinyl composition tile VCT repair – Search results
- Vinyl flooring
- Flooring
- Vinyl composition tile
- https://scholar.google.com/scholar?q=how+to+repair+vinyl+flooring+entryway Google Scholar
- https://scholar.google.com/scholar?q=sheet+vinyl+floor+repair+patch+seam+replacement Google Scholar
- https://scholar.google.com/scholar?q=luxury+vinyl+tile+LVT+repair+scratch+dent+lifting+replacement Google Scholar