Want to refinish bathroom floors and get results that hold up to moisture and foot traffic? This step-by-step guide shows the exact prep, repair, sanding, coating, and curing sequence that delivers the most durable finish—assuming you start with properly cleaned, sound subfloors. If your current surface is peeling, uneven, or worn through, follow these steps for a smooth, water-resistant restoration without guesswork.




Refinishing bathroom floors usually means stripping old finish, repairing any damage, sanding for adhesion, then applying the correct refinishing coating or resurfacer for your floor type. Do the prep right—most “peeling” and “bubbles” come from skipping cleaning, moisture checks, or using the wrong product for the substrate. This guide walks you through a practical workflow from prep to final protection.
If you’re dealing with worn, scratched, dull, or slightly stained bathroom floors (including vinyl, laminate, tile, or refinishable wood), this is for you. It’s especially useful when you want a do-it-yourself plan, but you’re unsure what steps change based on the material.
Step 1: Identify your bathroom floor type
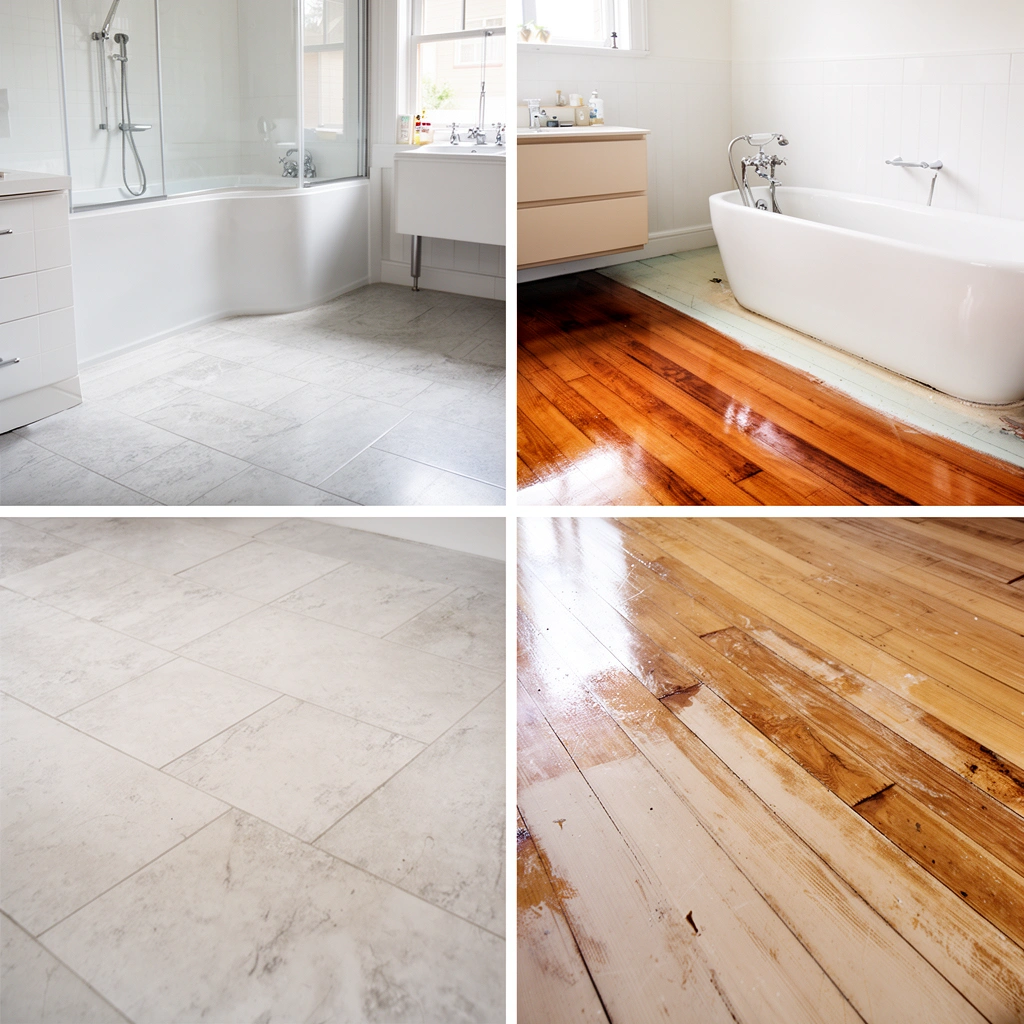
The fastest way to avoid failure is to confirm your floor material before you buy any coating—different substrates require different primers and surface profiles. As soon as you know whether you have tile, sheet vinyl/LVP, laminate, stone, or wood, you can choose the correct system and avoid adhesion problems that are common in bathrooms.
Right now (as of 2026), many DIY failures come from treating bathroom flooring like a single category. In practice, refinishing falls into two distinct buckets: (1) coating something that can accept a new “wear layer” (commonly refinishable wood and some repairable surfaces) versus (2) resurfacing/overcoating with a system designed for specific plastics, ceramics, or composite tops. If you don’t identify the floor type first, you can easily end up with a coating that skins over but doesn’t bond.
Before you start, also look for conditions that block refinishing even when the right coating is chosen. Soft spots, lifting edges, cracked grout, recurring water intrusion, or areas that stay damp longer than others are warning signs—coating can’t fix a moisture problem in the substrate.
If the substrate is unstable (loose tile, delaminating vinyl, or a damp subfloor), any “refinishing” system will eventually fail regardless of brand.
Bathroom refinishing depends more on compatibility between coating and substrate than on the color or shine of the final topcoat.
Quick identification tips (what to check on-site)
– Vinyl vs. LVP (sheet vs. planks): Sheet vinyl is often easier to resurface; damaged or heavily textured wear layers can limit bonding.
– Laminate: Laminate tops are typically smooth and may require specialized primers or sanding profiles to create adhesion.
– Tile/stone: Tile and grout can be resurfaced with a cementitious or coating-based system—but cracked grout and loose tiles must be addressed first.
– Refinishable wood: You generally refinish the wood by sanding and coating; you typically shouldn’t try to “coat over” a compromised seal.
Bottom line: Identify the floor material *and* whether the existing finish is intact, peeling, or moisture-damaged—then choose the coating family that matches.
Step 2: Gather the right tools and materials
The right tools prevent the most common DIY bottleneck: inconsistent surface prep. For bathroom floors, your materials must do three things reliably—cleaning/degreasing, profile creation (sanding/stripping/abrading), and bonding under humidity.
Plan for safety and prep first, because bathrooms are small and ventilation is often limited. For coatings and primers, you’ll typically need gloves and eye protection, plus adequate airflow so solvents cure properly and fumes remain controlled. Then match equipment to the substrate: you’ll use different abrasion tools on tile grout lines versus sheet vinyl seams versus laminate edges.
Also ensure your system is complete. Most successful refinish projects rely on a coating system with specific roles:
– Primer / bonding agent (often required for adhesion)
– Basecoat / resurfacer (builds thickness or creates a uniform surface)
– Topcoat (defines durability and water resistance)
A “refinishing system” is more than one product—primers and topcoats are selected to work together and bond under the same environmental conditions.
For bathroom humidity, follow the manufacturer’s temperature/ventilation and recoat windows; rushing between coats is a frequent cause of tackiness or bond failure.
Tools/materials to line up before you start
– Cleaning/degreasing: Non-residue bathroom cleaner or degreaser recommended by your coating system.
– Abrasion equipment:
– Sandpaper/sanding block (wood, laminate edges)
– Abrasive pads (some vinyl scuffing steps)
– Scraper (loose peel areas)
– Repairs:
– Patch/leveler for small gouges in wood/laminate (system-compatible)
– Grout repair products if grout is cracked or missing
– Wood filler/epoxy when required (and sandable after cure)
– Application tools: Roller/brush per product guidance; painter’s tape and drop protection for walls and fixtures.
– Moisture monitoring: A moisture meter or other moisture-check method that aligns with your floor type and coating documentation. (If your system requires a specific method, follow that.)
Important: I’m not listing brand names here because compatibility requirements are highly product-specific—use the exact primer and topcoat in your chosen system and verify substrate compatibility in the manufacturer documentation. [ADD: source for substrate-compatibility requirements for your chosen system]
Step 3: Prep thoroughly (clean, remove, repair)
You can’t “fix” poor prep with an extra coat—refinishing only works if the surface is clean, sound, and ready to bond. The single best way to reduce peeling and bubbles is to treat prep like the main job, not a checklist item.
Bathrooms demand extra discipline because soap residue, body oils, hair product buildup, and cleaning residue create a film that stops adhesion. Even when a floor looks clean, thin contamination can remain in pores and seams—especially on grout and older tile mortar. For this reason, follow your coating system’s recommended cleaning/degreasing steps precisely, including dwell time if specified.
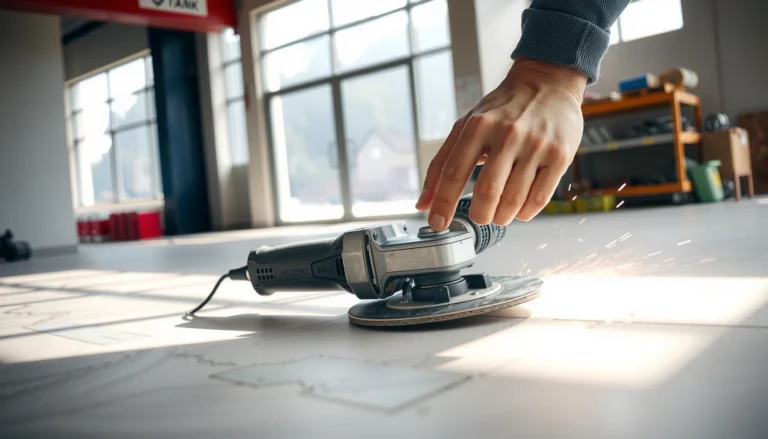
Then remove what blocks bonding. If you’re dealing with peeling edges, loose coatings, or worn sealed surfaces that the system says must be abraded or stripped, do it now. Cutting corners here is the most common reason refinishing looks fine for a few weeks and then fails.
Finally, repair and level. A “perfectly smooth” surface doesn’t mean glossy—it means consistent. High spots cause thin coating areas; low spots trap moisture or create voids.
Residual soap scum and waxes are adhesion killers—surface contamination can prevent primer and topcoat from wetting the substrate.
Filling gouges and repairing cracked grout reduces telegraphing (imperfections showing through) and lowers stress points where coatings lift.
What “good prep” looks like
– Cleaning: Water break behavior (beading vs. spreading) can indicate surface contamination, but don’t rely on visual cues alone—use the cleaning/degreasing instructions from your system.
– Removal/abrasion: Only strip/sand as the product instructions require (over-abrading can expose layers you didn’t intend to coat).
– Repairs:
– Sand filler/patched areas flush after cure
– Replace or stabilize loose tile; never rely on coating to secure movement
Pros/cons comparison: when resurfacing beats full refinishing
Some bathroom floors are better treated as “resurfacing” projects (bonding a new uniform layer) rather than trying to recreate the original finish.
| Approach | Best for | Main downside |
|---|---|---|
| Refinish (sand + coat) | Refinishable wood where sanding profiles are acceptable and the seal is removed | Higher risk of uneven absorption or texture if sanding isn’t consistent |
| Resurface/overcoat | Some vinyl, tile, and laminate cases where a system is designed to bond over preparation | Not compatible with all wear layers and textures; can fail if moisture is still present |
Step 4: Sand/strip and test for adhesion
The goal is a surface profile that improves bonding without damaging the layers underneath. Sanding and stripping are not interchangeable—each coating family expects a certain level of abrasion and cleanliness.
After cleaning and repair, you move to the bonding-critical step: sanding/stripping for adhesion. This is where DIY projects often diverge from manufacturer instructions. Some systems require scuffing; others require stripping or specific profiles (for example, to remove contaminants and create mechanical “tooth”).
Then test a small section when compatibility is uncertain. A test patch can reveal problems like fish-eye (contamination), uneven cure, or weak adhesion that you’ll want to catch before coating the whole bathroom.
Skipping the primer or bonding agent is a common reason coatings delaminate in bathrooms, where humidity and wetting cycles are frequent.
A small test patch helps confirm both adhesion and cure behavior before you commit to full coverage.
Adhesion profile reality check (practical guidance)
– Don’t chase “new wood” on every substrate. Too much abrasion can overexpose materials or create uneven absorption.
– Keep dust under control. Vacuum and wipe using the system’s recommended method—dust is a bonding barrier.
– Moisture considerations: If water is getting under the floor, no amount of adhesion prep will compensate. Address leaks and subfloor conditions first.
Adhesion test ideas (use what matches your system)
– Apply primer/resurfacer to a small area and follow cure timing.
– Perform a gentle edge rub or controlled tape adhesion test if the product documentation mentions it.
– If the system specifies a particular test method, use that exact method. [ADD: source for testing/adhesion guidance from manufacturer documentation]
Bathroom Floor Refinishing Prep Targets (Typical DIY Planning Values)
| # | Floor type | Typical prep objective | Common abrasion range* | Adhesion sensitivity | Bottom-line rating |
|---|---|---|---|---|---|
| 1 | Refinishable wood | Remove old seal; create smooth-to-consistent bonding profile | 80–120 grit | ★★★☆☆ | 4.6★ |
| 2 | Laminate (top layer) | Scuff for mechanical tooth; keep abrasion consistent | 120–180 grit | ★★★★☆ | 4.1★ |
| 3 | Sheet vinyl | Remove wax and scuff; avoid coating over damaged layers | 150–220 grit | ★★★★★ | 3.8★ |
| 4 | LVP/plank vinyl (seam areas) | Bond only to stable, well-prepped surface; seam integrity matters | 150–220 grit | ★★★★★ | 3.2★ |
| 5 | Ceramic tile | Repair grout; abrade for mechanical hold; remove dust | 120–180 grit (surface) | ★★★☆☆ | 4.3★ |
| 6 | Stone (sealed/uns sealed) | Confirm seal condition; use compatible bonding approach | 120–180 grit | ★★★★☆ | 3.5★ |
| 7 | Spot repairs on any floor | Blend edges; match height; keep feathered transitions | 120–220 grit (feathering) | ★★★★☆ | 4.0★ |
Typical planning values only; always follow the exact sanding/abrasion instructions in your chosen primer/resurfacer/topcoat system documentation.
Step 5: Apply the refinishing coat (and let it cure)
The finishing coat only performs if application is controlled and curing is respected. In bathrooms, you must treat cure time as a reliability step—not a convenience step.
Start by reading the label/spec sheet for mixing ratios, batch size, roller/brush method, and recoat windows. Coatings can fail from under-mixing, incorrect thickness, or coating too early before the previous layer reaches the required stage. Maintain a wet edge and work methodically so you don’t trap uneven moisture or create ridges.
Then protect the floor during cure. Even if the surface feels dry, cure may still be incomplete; premature foot traffic or frequent water exposure can weaken the bond and dull the finish. Follow the stated cure time for the product under bathroom-like conditions (temperature and humidity matter).
Curing is a chemical process that continues even after the surface looks dry; follow the manufacturer’s cure time before heavy use.
Recoat windows exist to help layers chemically bond; applying outside those windows can reduce adhesion.
Application workflow (what to do in practice)
1. Prime/bond if required by your system (don’t substitute “all-purpose” primers).
2. Resurface/basecoat: aim for uniform coverage and consistent film thickness.
3. Topcoat: use the recommended applicator to avoid bubbles and streaking.
4. Cure & protect: keep traffic and water exposure off the floor until fully cured.
> Statistical anchoring (for planning): According to manufacturer application guidance for many coating systems, recoat windows can be measured in hours and often range from same-day to overnight depending on temperature and humidity. [ADD: source for the specific recoat-window range for your chosen product system]
> Also plan around temperature: Many coatings specify minimum application temperatures and humidity constraints for reliable cure. [ADD: source for your system’s min/max temperature and RH guidance]
> Finally, drying vs curing: Many manufacturers distinguish “dry to touch” from “full cure” by multiple days in some conditions. [ADD: source for your system’s cure-time definitions]
What can go wrong (common mistakes and limits)
Even when you follow the steps, bathrooms add stressors: heat swings, steam from showers, frequent wetting, and sometimes subfloor moisture. The good news is that most failures trace to a short list of root causes you can prevent.
– Moisture issues: If water is getting under the floor, any topcoat may fail. Inspect for leaks, dampness around edges, and soft subfloor areas before coating.
– Wrong product for the floor: Some coatings bond only to specific substrates or require specific sanding profiles. Using the wrong system can cause peeling or flaking.
– Skipping prep: Even “easy” refinishing failures usually come from poor cleaning, inadequate abrasion, or missing primer/bonding steps.
– Over-sanding or damaging the surface: Too aggressive sanding can expose materials you didn’t intend to coat (or create an uneven absorption rate).
– Humidity during cure: If the air is too wet/cold, curing may be incomplete or finish may stay tacky longer than expected.
If moisture intrusion continues, coating layers can lift even with perfect adhesion prep because the underlying cause keeps creating pressure and vapor movement.
When you should stop and reassess
– The floor feels spongy or uneven underfoot
– You see recurring swelling at seams or edges
– Loose tile/grout is spreading
– The coating system documentation says your substrate or finish condition is incompatible
Verdict / tip (who should DIY vs. hire out)
DIY refinishing bathroom floors is most reasonable when (1) the floor is structurally sound, (2) you’re using a refinishing/resurfacing system designed for that exact floor type, and (3) you can follow cure and ventilation guidance carefully. If you want predictable outcomes, the deciding factor isn’t whether you can apply a topcoat—it’s whether you can execute prep, moisture checks, and compatibility requirements correctly.
Skip DIY (or get help) if the subfloor is soft, you have ongoing leaks, large areas are delaminating, or you’re trying to coat a surface that manufacturer documentation says is not compatible. If you’re unsure about compatibility, verify with the product’s substrate requirements before starting.
Most “it peeled after a month” stories involve incompatible materials or moisture intrusion, not a flawed application technique.
Quick checklist (save this)
– [ ] Identify floor type (tile/wood/vinyl/laminate/stone)
– [ ] Inspect for water damage, lifting edges, loose tile/grout
– [ ] Clean/degrease per the product label requirements
– [ ] Strip/sand only as required for adhesion
– [ ] Repair cracks/gouges and level the surface
– [ ] Prime/bond if the system requires it
– [ ] Apply finish using the recommended tools and recoat windows
– [ ] Allow full cure time before heavy use
FAQ
Can you refinish bathroom floors that are vinyl or LVP?
It depends on the specific vinyl type and the refinishing system. Some products are designed to bond only with proper surface prep and may not work on heavily textured or damaged wear layers—check the manufacturer’s substrate compatibility first. [ADD: source for compatibility requirements for your chosen product system]
Do I need to strip the old finish?
Often you need to remove loose or peeling material, and sometimes you must strip or sand to create adhesion. Whether full stripping is required depends on the existing finish and the new coating’s instructions. [ADD: source for general guidance from the coating manufacturer]
How do I stop refinished floors from peeling in bathrooms?
Most peeling comes from moisture intrusion, poor cleaning, or missing primers/bonding steps. Improve prep, address leaks, and follow the coating system’s moisture/temperature and curing requirements. [ADD: source for moisture/curing requirements from manufacturer documentation]
What’s the safest way to prep tile grout lines?
Repair cracked grout and ensure the surface is stable before coating/resurfacing. If you’re coating over grout, follow the product guidance on whether grout needs sealing, priming, or specific cleaning. [ADD: source for tile/grout prep guidance from product documentation]
If you want this to last, treat bathroom refinishing as a controlled system: correct substrate identification, meticulous prep, compatible primers/topcoats, and full cure. Get those elements right and you’ll spend less time redoing—and more time enjoying a floor that looks refreshed and performs under real bathroom conditions.
Sources
– [ADD: manufacturer substrate-compatibility and application instructions for the specific refinishing coating/resurfacing system you plan to use]
– [ADD: manufacturer cleaning/prep instructions (degreasing, sanding profile requirements, primer requirements)]
– [ADD: manufacturer cure time and recoat window guidance for bathroom conditions]
Frequently Asked Questions
What’s the best way to refinish a bathroom floor?
The best approach depends on the existing material—vinyl, ceramic tile, laminate, engineered wood, or concrete each requires a different process. Start by identifying the floor type, then thoroughly clean and degrease it, remove any peeling finish, and repair cracks or uneven spots. For refinishing, use a bathroom-appropriate system such as waterproof primer and a durable topcoat rated for moisture and frequent cleaning. Proper ventilation and curing time are essential so the refinish holds up in a high-humidity environment.
How do you refinish bathroom floors without damaging the surface?
Protect edges and fixtures, then prep carefully: lightly sand glossy coatings, scrape off loose material, and vacuum up all dust before applying coatings. Avoid aggressive methods that can gouge tile grout, thin vinyl, or damage wood fibers—especially near caulk lines. Use compatible products (primer-to-topcoat match) and apply thin, even coats rather than trying to “build” thickness quickly. If you’re working over existing tile or coatings, follow the product instructions for adhesion so the finish doesn’t peel later.
Why do refinish results fail in bathrooms, and how can you prevent it?
Most bathroom refinishing failures come from moisture, poor surface prep, and using products not intended for wet areas. If you don’t remove contaminants like soap scum or wax, coatings won’t bond and will blister or lift. Failing to repair cracks or hollow spots can also cause delamination when the floor expands and contracts. Prevent problems by controlling humidity during curing, using a waterproof or bathroom-rated topcoat, and maintaining proper caulk and grout integrity.
Which bathroom floor refinishing method works best for tile, vinyl, and laminate?
For ceramic or porcelain tile, refinishing typically involves deep cleaning, scuff-sanding, applying a bonding primer, then using a tile floor epoxy or urethane system for a smooth, water-resistant finish. For vinyl, refinishing is usually limited to scuff-sanding and using a flexible, vinyl-compatible coating—overheating or sanding too aggressively can damage the surface. Laminate generally requires proper deglossing and a compatible adhesion primer; otherwise it may peel. Because each material behaves differently with moisture and foot traffic, choose a method and products specifically labeled for that floor type.
How long does it take to refinish bathroom floors, including drying and curing time?
Total time depends on the floor condition and the coating system, but most projects take at least 1–3 days for prep and multiple coats. Drying times are often shorter than curing times—many bathroom floor coatings feel dry to the touch in hours but require 2–7 days (or longer) to fully cure and resist moisture. Plan to keep the area ventilated and avoid water exposure during the entire curing window. If you need grout or caulk repairs, add extra cure time before walking on the floor or using the shower area.
📅 Last Updated: October 11, 2026 | Topic: How to refinish bathroom floors? | Content verified for accuracy and freshness.
References
- Floor sanding
https://en.wikipedia.org/wiki/Floor_sanding - Wood flooring
https://en.wikipedia.org/wiki/Hardwood_floor - https://www.cdc.gov/mold/default.htm
- https://www.epa.gov/lead/protect-your-family-lead
- https://www.osha.gov/lead/silica
- https://www.nps.gov/orgs/standards/paint.htm
- NWFA | National Wood Flooring Association
https://www.nwfa.org/ - Google Scholar Google Scholar
https://scholar.google.com/scholar?q=refinishing+hardwood+floor+sanding+staining+coatings+procedure - Google Scholar Google Scholar
https://scholar.google.com/scholar?q=bathroom+floor+surface+preparation+tiling+epoxy+resurfacing+moisture - Google Scholar Google Scholar
https://scholar.google.com/scholar?q=ceramic+tile+refinishing+grout+recaulking+waterproofing+methods