Want the fastest, most reliable way to protect vinyl floors in a rental property? If you want to prevent scuffs, dents, and water damage without losing your deposit, start with the right entry mat, furniture protection, and routine cleaning plan. Follow these practical steps, and you’ll keep your vinyl looking like new even with everyday tenant wear.



Protecting vinyl floors in a rental property comes down to preventing grit and moisture from grinding into the surface, plus using the right cleaning routine. Add entry mats and floor protectors, then follow the manufacturer’s cleaning directions so you don’t damage the wear layer. This guide walks you through practical, tenant-proof steps and what to do when damage happens.
If you’re a landlord, property manager, or maintenance person (or you’re setting up a rental before move-in), these tips focus on the most common wear patterns: tracked dirt, scuffs, dents from furniture, and stubborn spots from spills.
Start with the right protection plan for rental traffic

The best way to protect vinyl floors in a rental is to block abrasive grit and limit moisture at the source—before it ever touches the finish. In practice, that means planning for high turnover traffic (shoes, bags, rolling items, pets) with layered entry and floor protection, then aligning cleaning to your exact vinyl type.
Entry mats reduce tracked particles that act like sandpaper, which is one of the most common causes of dulling on vinyl floors.
Different vinyl products (LVP/LVT vs. sheet vinyl) can have different wear-layer and finish designs, so the manufacturer’s cleaning guidance is the controlling requirement for safe care.
Most “mystery stains” and rough patches start as grit or moisture trapped on the surface and then mechanically worked into the wear layer.
Choose protections that match real rental use
A rental isn’t a showroom—it’s a repeat cycle of move-ins, deliveries, pet walks, kid play, and “just for a minute” dragging. To protect vinyl floors consistently, choose protections based on what actually happens at your property, such as:
– Pets: Add matting at entrances plus wider, cushioned chair/furniture glides where claws and nails are most active.
– Kids and play gear: Prioritize dent prevention (soft glides, no hard plastic casters without pads) and fast spill response (blotting and drying).
– High foot traffic + frequent turnovers: Use multiple barriers at doors: a scraper mat (outside) plus an absorbent mat (inside), if your layout allows.
Use manufacturer-specific guidance for your vinyl type
Vinyl flooring care isn’t one-size-fits-all. Even within “vinyl,” product construction differs:
– LVP/LVT (luxury vinyl planks/tiles) rely heavily on the wear layer (a clear protective top film) for resistance to scuffs and everyday abrasion.
– Sheet vinyl can have different backing and surface finish behavior, and may tolerate different cleaning chemistries than an LVP wear layer.
So you protect vinyl floors better when you:
1. Identify the exact floor type (LVP/LVT or sheet vinyl).
2. Locate the manufacturer’s cleaning instructions (and warranty language).
3. Treat those instructions as the “spec” you follow across every turnover and deep clean.
Prevention-first logic that holds up across rentals
From my experience managing move-in turnovers (where the entryway is often the first wear hotspot), the earliest stage of damage usually looks like “minor dulling” rather than obvious stains. That dulling is often what you get when small amounts of grit and moisture repeatedly sit on the vinyl surface and then get rubbed into the finish.
Also, prevention is usually cheaper than remediation: replacing floor protectors and mats is far less disruptive than addressing seam stress, edge lift, or finish haze.
Prevent scratches and dents with simple controls
Vinyl floors hold up well, but they still scratch and dent when abrasive grit and concentrated pressure meet the surface. The fastest, tenant-proof controls are entry matting, soft furniture protectors, and strict “no dragging” behavior for sharp or heavy items.
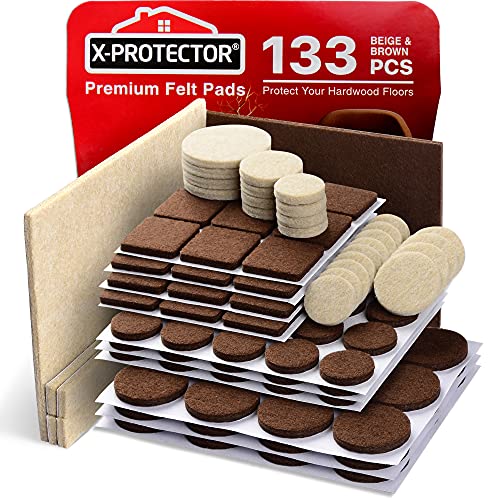
Felt pads and soft floor glides reduce point loading from chair legs and heavy furniture, which lowers denting risk on resilient/vinyl surfaces.
High-quality entry mats help stop tracked sand and grit—the #1 root cause of ground-in dullness on many resilient flooring installations.
Even brief dragging of small hard items (clips, fasteners, gravel-in-shoes) can cause permanent marks through abrasion.
Put entry matting at every outside door
For rental traffic, your entry system should work even when tenants don’t think about it. That means:
– At least one mat at each exterior door (ideally two-step: scrape then absorb).
– A clear tenant instruction: “Wipe shoes before entry; shake out bags.”
– Maintenance cadence: Replace or clean mats before they become saturated with grit (a worn mat can spread particles instead of trapping them).
Add felt pads and replace when they wear down
Furniture dents often aren’t caused by the furniture “weight” alone—they’re caused by concentrated contact and the absence of effective slip/impact controls. Use:
– Felt pads for chair legs and small furniture feet.
– Soft glides designed for hard floors for larger pieces.
– A replacement policy: felt compacts over time and eventually becomes a hard surface again.
Keep sharp items and rolling components off vinyl—or protect them
Sharp movement is a predictable vinyl risk:
– Avoid dragging items with metal edges, studs, or hardware across the floor.
– For moving appliances or office equipment, use a lift-and-place approach or an appliance dolly with soft, clean contact points.
– Rolling chairs and carts need floor-safe wheels/casters. If a tenant uses a plastic caster, a floor protector may not be enough.
“Grit size” matters more than people think
Different tracked particles behave differently once they land on vinyl floors. Larger grains tend to abrade more aggressively, while smaller particles still contribute to haze when they accumulate and get worked by foot traffic.
Tracked Dirt Particle Classes & Vinyl Wear Priority (Rental Entrances)
| # | Particle class | Typical size range (mm) | Soil texture category (USDA) | Mat & entry control priority |
|---|---|---|---|---|
| 1 | Coarse sand | 0.50–2.00 | Sand | ★★★★★ |
| 2 | Medium sand | 0.25–0.50 | Sand | ★★★★☆ |
| 3 | Fine sand | 0.0625–0.25 | Sand | ★★★★☆ |
| 4 | Very fine silt | 0.002–0.004 | Clay (boundary particles) | ★★★☆☆ |
| 5 | Silt | 0.004–0.0625 | Silt | ★★★☆☆ |
| 6 | Clay | <0.002 | Clay | ★★☆☆☆ |
| 7 | Mixed grit (“road mix”) | 0.002–2.00 | Mixed texture | ★★★★☆ |
This sizing comes from common soil texture ranges used in USDA classifications (sand, silt, and clay). In rental terms, bigger grains are more likely to create visible abrasion when vinyl floors see repeated footwork—another reason entry matting is your most reliable “tenant-proof” control.
Clean vinyl floors the safe rental way
The safest cleaning routine for vinyl floors in rentals is: regular dry removal (sweep/vacuum), then damp cleaning only with approved vinyl products. This prevents grit buildup and reduces the risk of finish damage from over-wetting or incompatible chemicals.
Routine dry cleaning (sweeping or vacuuming) removes abrasive particles before they can grind into vinyl finishes.
Steam mops add heat and moisture; vinyl care rules vary by product, so you should follow the manufacturer’s approval status for your specific vinyl flooring.
Over-wetting resilient flooring can stress edges and seams, especially when repeated during frequent cleanings.
Sweep or vacuum regularly—use the right tools
In rentals, “quick vacuum” is often better than “scrub later.” For vinyl floors:
– Use a vacuum with a soft floor head and avoid aggressive brush rolls unless the manufacturer explicitly approves them.
– Sweep gently to pick up grit rather than pushing it around.
– Target entryways first: the highest abrasion rate is usually at doorways and paths from door to living areas.
Use cleaners approved for vinyl flooring
Vinyl can look forgiving, but the wear layer and finish determine what “safe” means. Follow these rules:
– Pick a cleaner that the manufacturer approves for vinyl flooring (or that is explicitly pH-neutral / vinyl-safe if your floor’s instructions allow).
– Use the correct dilution and don’t exceed recommended dwell/contact time if the label specifies it.
– Test any new cleaner in a low-visibility spot if the product is not already part of your maintenance SOP.
Avoid steam mops and harsh abrasives (unless allowed)
Steam cleaning is a common “shortcut” that can backfire in rentals. Vinyl floors can be vulnerable to:
– Heat-driven changes in finish behavior
– Moisture intrusion at seams/edges
– Residue haze from incorrect detergents
If your vinyl floor is old, the installation was imperfect, or you’re unsure of prior chemicals used by tenants, avoid steam cleaning entirely until you verify manufacturer approval. As of 2026, many care guides still restrict steam for resilient surfaces unless specifically validated.
Spill response: what to do immediately
The fastest way to protect vinyl floors after spills is immediate blotting plus thorough drying. In rentals, chemical spills (drinks plus cleaners) can discolor or dull the wear layer faster when liquid sits near seams or under edges.
Blotting spills immediately reduces the likelihood of liquid migrating into seams or lingering long enough to dull the wear layer.
Repeated small cleanings with vinyl-safe products are usually safer than aggressive scrubbing, which can wear down the surface finish.
Thorough drying after mopping helps prevent edge and seam issues in resilient/vinyl flooring installations.
Blot first—don’t let liquid find seams
When something spills:
– Blot with a clean, absorbent cloth or paper towels.
– Don’t “wipe it around” across the vinyl floors—move outward-to-in to limit spread.
– Pay special attention to seam lines and edges, where liquid can travel.
Remove residue gently, then repeat if needed
For residue:
– Use a vinyl-safe cleaner and apply sparingly.
– Clean in passes rather than one hard scrub.
– Rinse only if the product instructions require it (some vinyl cleaners are designed to be left as directed).
Dry completely after cleaning
Whether you’re responding to a drink spill or doing mopping between tenants:
– Dry the area thoroughly.
– Use fans/airflow if needed.
– Keep traffic off the spot until fully dry—this is a practical rule that improves results in active rentals.
Repairs and replacement boundaries for landlords
Repairs on vinyl floors work best when you treat them as a boundary between cosmetic wear and installation/ moisture-related problems. If you can identify the damage pattern early, you can often choose a lower-cost fix; if edges lift or seams separate, replacement or professional assessment becomes the safer path.
Cosmetic scuffs are often less risky than seam or edge failures, because seam problems can indicate installation moisture exposure or bond stress.
Repair decisions on resilient/vinyl flooring depend on installation method and the condition of the underlayment and seams, not just the visible damage.
Accurate maintenance records help distinguish normal wear from improper cleaning chemicals or excessive moisture practices.
Start with the least aggressive option
For minor marks on vinyl floors:
– Use the approved cleaner for your floor type.
– Try gentle spot cleaning before stronger products.
– Avoid sanding or abrasive pads unless a qualified pro (or manufacturer) specifically instructs it.
Know when to escalate
You should move to professional assessment when you see:
– Edges lifting
– Seams separating
– Evidence that water penetrated (swelling, cloudy areas, persistent raised lines)
– Damage that keeps returning after routine cleaning
Installation methods matter here. Click-lock LVP, glue-down LVP, and sheet vinyl can fail differently—so “fixes vary widely by installation method,” and you protect yourself (and your tenant relationships) by using the right approach.Keep records for clarity and warranty decisions
For landlords and property managers, documentation improves outcomes:
– Save floor care instructions from move-in.
– Record when mats/felt pads were replaced.
– Log the cleaner used for each turnover clean.
– Photograph wear areas and note cleaning actions taken.
This record trail helps you decide whether it’s “normal wear,” “cleaning issue,” or “tenant-caused damage” without guesswork.
Repair vs replacement: a practical decision matrix
Below is a rental-friendly way to decide what’s worth trying—use it to guide maintenance calls and to communicate expectations with tenants.
| Situation on vinyl floors | Best first action | When to replace/assign pro |
|---|---|---|
| Surface scuffing (no raised edges) | Approved vinyl cleaner + gentle spot method | If haze persists after approved methods |
| Light denting from furniture | Replace/upgrade floor protectors; avoid further point loading | If dent exposes underlayer or cannot be stabilized |
| Stain with fast removal potential | Immediate blotting + vinyl-safe cleaner per care guide | If chemical etching/discoloration is suspected |
| Edge lift or seam separation | Stop using that area; dry fully; assess source of moisture | Replace affected sections or schedule installer review |
| Repeated “water sits” complaints | Fix the cause (leaks, over-mopping practices) | If recurring issues suggest installation failure or subfloor moisture stress |
What can go wrong (and who should skip DIY)
The biggest rental risk isn’t vinyl floors “being fragile”—it’s the frequency of mistakes: wrong cleaners, too much water, and DIY experiments when warranty conditions apply. If you don’t know what was previously used or how the flooring was installed, skipping DIY can prevent expensive replacement.
Using an unapproved cleaner can leave residue haze or degrade the protective layer on vinyl floors, making future cleaning harder.
Over-wetting is a common cause of edge/ seam issues in resilient floors, especially in high-turnover rentals where mopping becomes routine.
If vinyl floors are older or have existing seam/edge instability, experimentation increases the chance of permanent damage or warranty denial.
Wrong chemicals or “strong degreasers” can cause lasting haze
Even when a cleaner removes visible grime, residue can remain:
– Harsh degreasers and solvents (when not approved) can affect the finish.
– Abrasive pads can dull the wear layer and leave a permanent matte area.
Over-wetting is often the real culprit
In rentals, the most common water-related pattern is “more cleaning = more protection,” which backfires:
– Frequent mopping can saturate edges.
– Puddles near seams can migrate under edges.
– Steam cleaning can add heat + moisture in a way some vinyl care guides discourage.
As of 2026, many resilient flooring maintenance instructions still emphasize minimal moisture and dry removal first for a reason: edges and seams are the vulnerability points.
Skip DIY when the floor is older or the product history is unknown
If your vinyl floors are:
– Older (finish/ wear layer behavior may be unpredictable)
– Showing loose seams already
– Exposed to unknown prior chemicals from previous tenants
…avoid experimenting. If you need the exact warranty/ care limitation language for your product type, use the manufacturer’s documentation and confirm whether certain cleaners, steam cleaning, or moisture exposure are prohibited. .
Verdict: a rental-friendly approach (plus downsides)
A good rental strategy is boring and consistent: mats to stop grit, soft protectors to stop dents, and vinyl-approved cleaning to avoid damaging the surface. The downside is that prevention takes ongoing enforcement (tenant reminders, replacement of pads/mats, and cleaning check-ins), and some damage still won’t be removable without repair.
Quick checklist (scan/save):
| Task | What to do | Why it helps |
|---|---|---|
| Entry protection | Use a mat at each entry; replace worn mats | Reduces tracked grit/sand |
| Furniture protection | Felt pads/soft glides under legs | Prevents dents and scratches |
| Routine cleaning | Sweep/vacuum regularly; damp clean only as directed | Avoids grit buildup and over-wetting |
| Spill handling | Blot fast, clean with vinyl-approved products, dry fully | Lowers stain risk and seam exposure |
| Care compliance | Follow the exact manufacturer cleaning instructions | Protects the wear layer/warranty |
Frequently Asked Questions
What are the best ways to protect vinyl floors in a rental property?
Use floor protection from day one: place felt pads under furniture legs and use entry mats to reduce dirt and grit that can scratch vinyl planks. Keep shoes off or provide a “no-shoes” rule to limit abrasive debris. Also avoid harsh chemicals—use a manufacturer-approved vinyl floor cleaner to prevent dulling or weakening the finish.
How do I stop scratches and scuffs on vinyl flooring from tenants?
Add protective measures like clear floor protectors or chair pads on high-traffic areas and under frequently moved items. For scuffs, clean small marks promptly with a vinyl-safe cleaner and a soft microfiber cloth rather than abrasive scrubbers. Consider recommending rugs in areas like dining rooms and near entrances where dragging and dirt buildup are most common.
Why are entry mats and regular cleaning important for protecting vinyl floors?
Vinyl floors are durable, but grit from shoes acts like sandpaper and can cause micro-scratches over time. Placing a quality doormat at every exterior door helps trap sand, dust, and moisture before it reaches the floor. For long-term protection, sweep or vacuum regularly with a soft-brush attachment and mop using a damp (not soaking) microfiber mop to prevent residue and water damage.
Which cleaning products are safe for vinyl floors in a rental?
Stick to cleaners labeled safe for LVP (luxury vinyl plank) or vinyl flooring, and avoid acetone, bleach, ammonia, and steam mops unless your manufacturer explicitly says it’s okay. Use a pH-balanced cleaner to maintain the protective wear layer and keep the finish looking new. If you’re dealing with sticky spills or heavy grime, spot-clean first and follow with a gentle vinyl-safe mop so you don’t leave film that attracts dirt.
How can landlords prepare vinyl floors for turnover to reduce damage between tenants?
Do a quick damage assessment at move-out, then clean thoroughly before reoccupancy to remove grit, residue, and pet or food spills that can stain. Replace worn or missing furniture pads and ensure all mats are in good condition to reduce repeat damage from the next tenant. If the floor shows scuffs or dulling, check the manufacturer’s recommendations for refinishing or vinyl floor protectors—many products are designed specifically for wear-layer protection.
📅 Last Updated: October 26, 2026 | Topic: How to protect vinyl floors in a rental property? | Content verified for accuracy and freshness.
References
- Vinyl flooring
- https://www.cdc.gov/coronavirus/2019-ncov/community/cleaning-disinfecting.html
- Coronavirus (COVID-19) and Disinfectants | US EPA
- https://www.osha.gov/slips-trips-and-falls
- Homogeneous Sheet
- MohawkFlooring
- https://scholar.google.com/scholar?q=vinyl+flooring+maintenance+scratch+protection Google Scholar
- https://scholar.google.com/scholar?q=luxury+vinyl+tile+cleaning+recommendations+residential Google Scholar
- https://scholar.google.com/scholar?q=resilient+flooring+care+and+maintenance+floor+protectors+moisture Google Scholar