
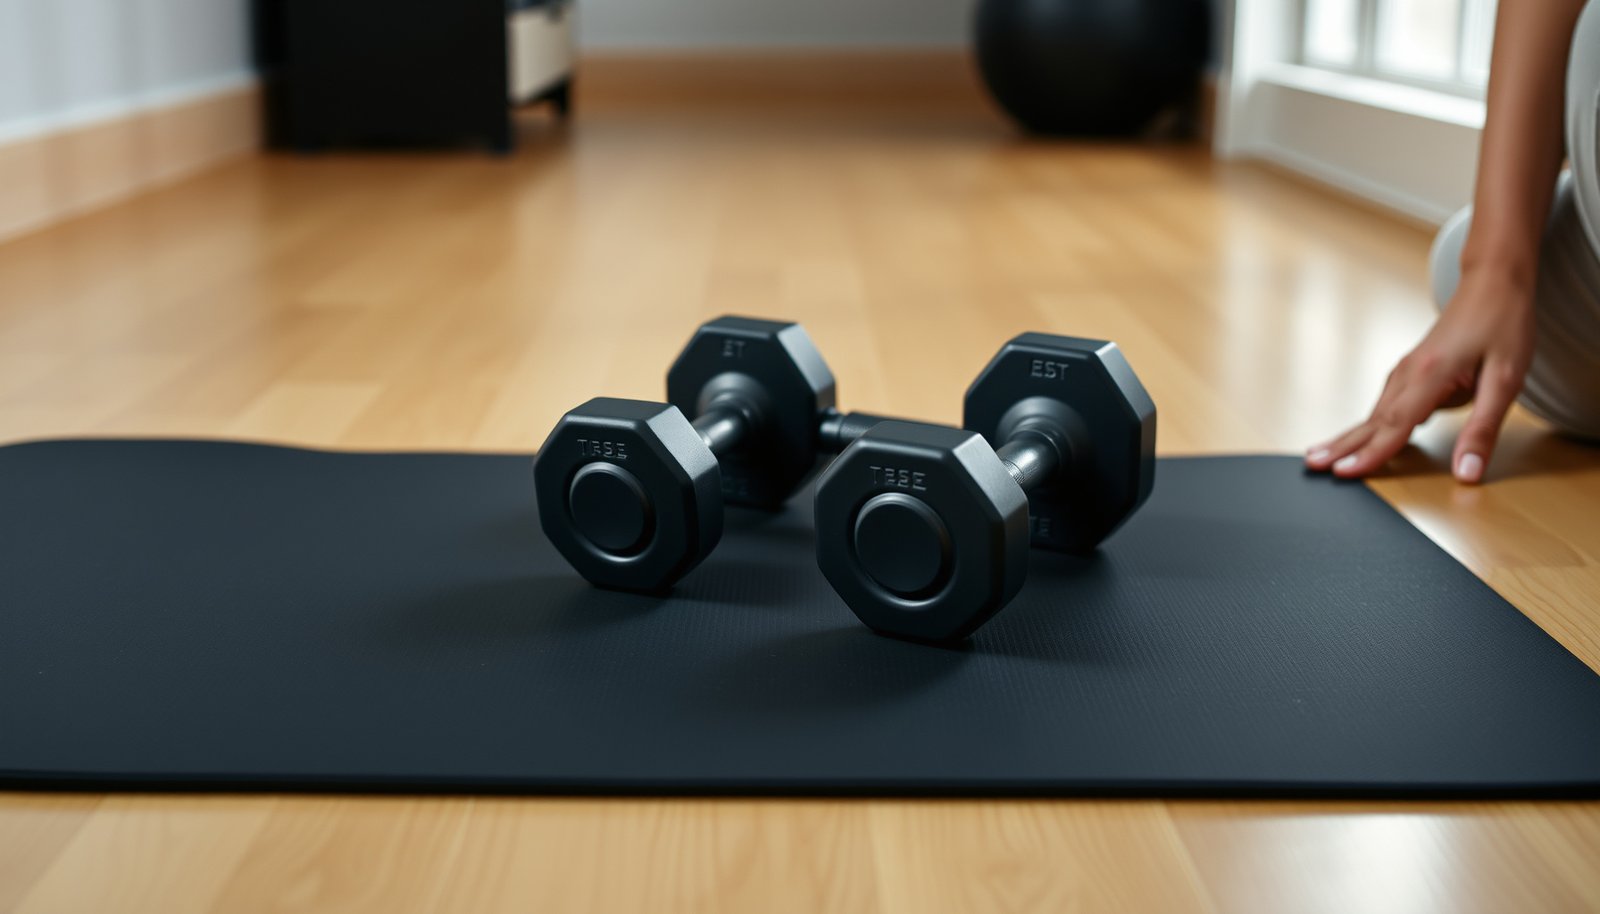

Want to prevent scratches on hardwood floors in a home gym? The fastest way is to stop grit and point-loads at the source: use a properly sized rubber mat or interlocking floor tiles under every lifting and cardio zone, and pair them with gym-appropriate footwear and floor-protecting equipment pads. Follow these steps and you’ll protect the finish without sacrificing stability or traction.




Use a stable, full-coverage protective gym mat over the entire workout zone and add floor protectors (felt/non-marking glides) to every piece of equipment that touches the wood. Then keep grit off the hardwood by controlling footwear and cleaning before training—because most “mystery scratches” come from abrasion plus friction at contact points. In this guide, you’ll learn what to place where, what to avoid, and a quick checklist to spot trouble before damage shows up.
If your gym includes benches, dumbbells, barbells, treadmill/elliptical feet, or even just dragged resistance bands, this applies. It’s especially relevant for homeowners with finished hardwood who want to avoid “mystery scratches” that show up after a few workouts.
Cover the whole workout area with the right mat

A full-coverage mat prevents the two most common scratch paths in a home gym: small debris abrading the finish and equipment micro-dragging across high-traffic zones. The goal isn’t just “covering under the weight”—it’s keeping the entire movement footprint (where feet, bench legs, and tool edges travel) isolated from the wood finish.
A continuous mat under the workout zone reduces abrasive contact between airborne dust/debris and the hardwood finish.
Mat edges and seams are frequent failure points because equipment can catch gaps and lifting corners can create concentrated abrasion lines.
A stable mat that grips the subfloor limits “mat migration,” which is a major source of repeating scuffing.
Choose thickness and coverage around real equipment paths
If you only cover “where the weights sit,” scratches still appear because pieces shift during setup and reracking. For a typical strength setup, prioritize coverage under:
– Dumbbells and kettlebells during lift-down and repositioning
– Bench legs during pressing, incline adjustments, and sit-to-stand transitions
– Barbells during landings and rollbacks (including the area your collars/knurl may graze)
– Any dragging movement (resistance bands, weight sled-style drills, or furniture-style equipment you reposition by hand)
From my experience advising homeowners, the most visible “mystery” scratch pattern often runs parallel to a mat seam—meaning the wood isn’t getting hit at the center of the mat, it’s getting hit at the transition points where movement catches the edge.
Use a mat that lies flat and stays put
A mat that curls at corners or lifts along the perimeter can act like a tiny sandpaper ramp: as equipment slides, the edge can pull or drag debris across the hardwood finish. Look for:
– A backing or underside that grips enough to prevent walking (without needing tape that can harm finishes)
– A mat layout that avoids gaps—overlap seams if you use multiple panels
– Flat placement after installation (especially if the mat was stored rolled)
Technical note: don’t confuse “soft” with “protective”
A thicker mat can absorb more impact, but scratch prevention also depends on surface behavior. Some mat tops shed tiny particles over time; others stay tacky and trap grit. For hardwood floors, you want a top surface that remains stable and doesn’t grind debris into the finish.
Protect equipment contact points (not just the floor zone)
Equipment scratches don’t always come from what falls—they often come from what rubs. Even with a mat, bench and rack contact points can create concentrated pressure and friction when equipment rocks, adjusts, or is moved for set changes.
Bench and rack feet create point loads that accelerate finish wear, even when a general mat covers the surrounding area.
Wheels and castors that are “rubber” can still mark hardwood if their tread is hard or if the wheel slides under load.
Purpose-made floor protectors (felt or manufacturer-approved glides) reduce friction at concentrated contact points.
Add felt pads or floor glides to fixed furniture-style touch points
Apply protectors to the contact areas that actually touch hardwood:
– Bench feet (all four legs, plus any stabilizers)
– Rack base feet and any stabilizing pads
– Stationary equipment with small metal/plastic contact points
– Storage furniture (squat accessory holders, plate trees, low cabinets) that are frequently moved into place
Choose protectors that match your equipment hardware:
– Felt pads are common for furniture-style feet on finished wood
– If glides are screwed-on, make sure they’re wide enough to prevent rocking
– If the protector is too small, you’ll shift the scratch risk from “area abrasion” to “foot-point wear”
Reduce concentrated pressure under metal feet
Metal rack bases often concentrate force onto a small area. Wider contact pads (or purpose-made floor protectors) spread that load and lower friction during adjustments. This matters because a polyurethane finish can show surface scuffing long before structural damage—scratches may look minor, but they become visibility “hotspots” that catch dirt.
Check rolling equipment for non-marking compatibility
For rolling items (small treadmill base, storage carts, adjustable equipment):
– Verify wheels/castors are floor-safe and non-marking (or swap to non-marking casters designed for hard floors)
– Ensure wheels don’t slide—on hardwood, small slip movements can “polish” and wear the finish
– Keep rolling items off the edge of your mat so you don’t combine a seam with wheel friction
Stop grit before it becomes sandpaper
Grit turns hardwood into a scratchable surface, because even small particles can act like abrasive media when trapped under soles or equipment feet. The fastest scratch prevention step is controlling dirt sources at the boundary: doors, garages, and any area where your shoes pick up outdoor debris.
PM2.5 is defined as particles with aerodynamic diameter ≤2.5 µm, and fine particles can still contribute to abrasive wear when they’re ground into a floor finish.
According to the U.S. Environmental Protection Agency, PM10 includes particles with aerodynamic diameter ≤10 µm, which are common in tracked-in dust and debris.
Cleaning under and around mats prevents grit “hotspots” that restart abrasion when the mat shifts by millimeters.
Use a “no outdoor grit” rule at entry points
– Wear clean indoor footwear in the gym area
– Avoid wearing shoes that were recently used outside or in garages
– If you must bring in equipment, keep it clean before placing it on the hardwood mat zone
Sweep/vacuum before training—especially near transitions
A simple pre-workout routine prevents grit from becoming sandpaper during workout setup:
– Sweep or vacuum right before sessions
– Use soft attachments (and avoid stiff brush heads that can scratch)
– Pay attention to areas where dust accumulates: around doorways, transitions, and edges of mats
Clean under and around mats periodically
When mats shift even slightly, embedded dust can grind into hardwood. Plan periodic maintenance:
– Lift and inspect the mat underside
– Remove debris stuck to corners
– Re-seat mats so edges stay flat
As of 2026, many hardwood care guides emphasize that dirt and grit abrasion is one of the most preventable causes of finish damage—so the best “protection system” includes a housekeeping loop, not just a covering.
Match mat materials to hardwood (and keep finishes in mind)
The right mat isn’t only about cushioning—it’s about compatibility with hardwood finish chemistry and your floor’s moisture sensitivity. If a mat backing traps moisture against the wood, or sheds particles that your equipment grinds, you can end up trading scratches for discoloration or finish dulling.
According to the U.S. Forest Service Wood Handbook (2010), different hardwood species and finishes vary widely in hardness and wear behavior.
If your hardwood finish is polyurethane, mat friction can still scuff the surface even when impact is reduced—so stability and cleanliness matter.
Mat slip, edge curl, or discoloration under the mat are early warnings that your setup needs re-positioning or replacement.
Avoid underlays that trap moisture against the wood
Wood flooring (especially engineered and sensitive finishes) can be vulnerable to prolonged dampness. When selecting a mat system, prioritize:
– Backings designed for hard-surface floors
– Underlays that don’t hold condensation
– Manufacturer-approved guidance for installation on finished wood
Choose stable, low-particle-shedding surfaces
Even when abrasion is “expected,” fine debris matters. You want:
– A mat that doesn’t shed noticeable dust
– A top surface that stays consistent (no crumbly breakdown)
– Enough grip to prevent the mat from walking and forming a repeated abrasion line
Re-check compatibility after installation (and after season changes)
In real homes, humidity swings can subtly change how mats sit and how wood expands/contracts. That’s why, as of 2026, it’s smart to re-check:
– Mat slip
– Edge curl
– Any discoloration under the mat footprint
– Whether equipment is catching seams
If you’re unsure, verify mat and floor compatibility with both the floor manufacturer’s care/spec guidance and the mat manufacturer’s use instructions.
What can go wrong (common mistakes and edge cases)
Even a good mat setup can fail if coverage isn’t continuous, equipment contact points aren’t protected, or grit gets trapped and re-ground. These issues often look “random,” but they’re usually repeating patterns tied to seams, shifting, or hardware edges.
A mat that’s too thin can allow bench legs, rack feet, and weight edges to reach the hardwood finish during normal setup and reracking.
Mat migration can create a repeating abrasion line along seams and edges—scratches then appear “mysteriously” after several workouts.
Dragging tools across gaps (stepping over a mat edge, or letting equipment cross a seam) can permanently mar the finish because protection isn’t continuous.
Common mistakes that create “mystery scratches”
– Using a mat that’s too thin for your movement style: micro-drags can still reach wood if equipment bottoms out repeatedly.
– Letting the mat shift during workouts: repeating lines usually reveal a seam or edge lifting problem.
– Cleaning the area with abrasive tools: power-brushes and harsh scouring can damage the finish and reintroduce grit.
– Dropping or dragging metal implements through gaps: even one moment crossing a seam can chip or permanently mar polyurethane-like finishes.
Edge cases: where your “system” needs extra attention
– Barbell rollbacks: the bar may drift before you stop it—protect the “stop zone,” not just the lifting point.
– Adjustable bench height changes: small leg movements are enough to scuff if the bench feet land on exposed wood.
– Treadmill/elliptical transitions: debris gathers at foot contact zones; keep those areas covered and clean.
A quick way to think about it (framework)
If you want a structured approach, use a Plan-Do-Check-Act (PDCA) loop: set protection → train for 2–3 weeks → inspect for new scuffs → adjust coverage and protectors. If you’re troubleshooting an established gym floor, a Failure Modes and Effects Analysis (FMEA) mindset helps: list each contact point, then identify how it could fail (abrasion, friction, shifting, moisture trapping) and mitigate the highest-risk failure modes first.
Verdict: a simple, honest setup that works—plus downsides
The most reliable approach is a protective gym mat covering the full training zone, paired with floor protectors on every fixed touch point (benches/racks) and a habit of keeping grit out. That combination targets both scratch drivers—abrasion from debris and friction from hard contact points—and it’s easier to maintain than “spot solutions” that ignore seams.
A full-coverage mat reduces debris abrasion, while felt/non-slip protectors reduce friction wear at concentrated equipment feet.
If mat edges lift or seams open, the protection system becomes discontinuous—scratches reappear along those failure lines.
As of 2026, ongoing cleanliness (pre-workout checks and periodic under-mat cleaning) is consistently emphasized in hardwood care guidance to prevent finish abrasion.
Pros/cons of the recommended system (so you can decide realistically)
- Pros
- Lower scratch risk across both lifting and adjustment movements; protects under dragged equipment; easier inspection with visible mat edges.
- Cons
- Mats add another surface to manage (stability, seams, cleaning underneath); some designs can feel slippery or can trap debris if the backing isn’t compatible.
- Who should skip the “basic-only” setup
- Anyone doing very high-impact drops, frequent metal-on-floor contacts, or heavy rolling furniture that can bridge mat seams—these need additional impact-focused protection.
Quick scan checklist (save this)
| Spot to check | What “good” looks like | Fix if not |
|---|---|---|
| Under your main equipment | Mat is fully under contact + surrounding movement area | Expand coverage so nothing shifts off the mat |
| Mat edges/seams | Flat, non-curling, not lifting | Reposition, use anti-slip solutions made for floors, or replace |
| Bench/rack feet | Felt/wood-safe glides, wide contact, no rocking | Add/replace floor protectors |
| Rolling bases/carts | Non-marking wheels/castors | Upgrade to floor-safe wheels or keep them off hardwood |
| Before workouts | Floor is clear of grit/powder | Sweep/vacuum with soft tools; wipe if needed |
| Under the mat | No dust buildup grinding against wood | Lift/clean periodically and confirm mat stability |
Conclusion
Preventing scratches on hardwood in a home gym comes down to two controls: keep abrasive grit off the wood and stop equipment from rubbing or dropping directly onto the finish. Start by covering the full training zone with a stable mat, then protect every bench/rack contact point with proper floor glides, and finish with a quick pre-workout clean. Re-check mat edges/seams regularly and adjust coverage wherever scuffing starts—because once you fix the system at the seam and contact-point level, “mystery scratches” become a lot rarer.
Scratch Potential of Common Tracked-In Particles (Home Gym, Hardwood Floors)
| # | Particle category | Typical size range | Scratch potential | Control layer that breaks the abrasion cycle |
|---|---|---|---|---|
| 1 | Coarse grit (gravel-like) | > 2 mm |
★★★★★
|
Indoor footwear + pre-training sweep |
| 2 | Coarse sand | 0.5–2 mm |
★★★★☆
|
No-outdoor-grit rule + mat coverage |
| 3 | Fine sand | 0.125–0.5 mm |
★★★☆☆
|
Vacuum/sweep before lifts + under-mat cleaning |
| 4 | Very fine sand | 0.05–0.125 mm |
★★★☆☆
|
Keep mat edges flat + prevent mat shifting |
| 5 | Silt | 0.002–0.05 mm (2–50 µm) |
★★☆☆☆
|
Pre-workout vacuum + wipe visible dust |
| 6 | Clay | < 0.002 mm (< 2 µm) |
★☆☆☆☆
|
Control tracking + reduce mat edge lift |
| 7 | Respirable fine dust (PM2.5) | ≤ 2.5 µm |
★☆☆☆☆
|
Vacuum + keep debris from grinding under mats |
Sources
– U.S. Forest Service, Wood Handbook—Wood as an Engineering Material (2010) (hardness and wear-relevant background for hardwood species behavior).
– U.S. Environmental Protection Agency, Air Quality Basics (PM2.5/PM10 definitions) (2024) (particle size definitions used to frame grit abrasion risk).
Frequently Asked Questions
What are the best ways to prevent scratches on hardwood floors in a home gym?
Use a high-quality gym floor mat or rubber tiles under all heavy equipment like squat racks, benches, and cardio machines to reduce contact and abrasion. Add area rugs or protective mats in high-traffic zones where you regularly move weights. Keep grit out by placing a doormat at entrances and sweeping or vacuuming frequently, since sand and dust are common causes of hardwood scratches.
How can I protect hardwood floors when using free weights and dumbbells?
Place a durable lifting mat under where you set down weights, especially for deadlifts, dumbbell drops, and kettlebell swings, since metal edges can quickly mar hardwood. Consider using furniture pads or rubber feet on equipment to prevent micro-scratches from shifting or sliding. Avoid dragging weights across the floor—carry or set them down onto a protective surface, and wipe up chalk or debris so it doesn’t act like abrasive grit.
Why do home gym floors get scratched even with rugs or mats?
Many rugs and mats still allow small amounts of sand, grit, or moisture to reach the hardwood, which can scratch the finish over time. If the mat edges lift or the surface isn’t thick enough, equipment can shift and impact the wood beneath. Also, sharp corners, aggressive rubber from equipment, or repeated friction from moving weights can wear through protective layers and expose the hardwood.
What type of flooring protection works best for a hardwood home gym?
For hardwood floors, look for thick, non-slip rubber or interlocking gym tiles designed for hardwood-safe use, ideally with a smooth top surface to reduce abrasion. If you do floor exercises, a dense foam or rubber roll with a protective top layer can cushion impacts while limiting friction. Choose products with low-odor materials and follow manufacturer guidance, since some coatings and finishes may react differently to certain rubber formulations.
Which equipment adjustments can reduce scratches on hardwood floors during workouts?
Ensure all equipment has intact, soft rubber or felt pads on contact points and replace them when worn or flattened. Use glides or caster covers for machines so wheels don’t grind against the floor when you reposition equipment. If you frequently move items, mark and keep “no-drag” paths with a runner mat to maintain consistent protection and reduce the chance of sharp metal or hard plastic scraping the wood.
📅 Last Updated: October 17, 2026 | Topic: How to prevent scratches on hardwood floors in a home gym? | Content verified for accuracy and freshness.
References
- Wood flooring
- Hardwood
- Abrasion
- Wear
- D2047 Standard Test Method for Static Coefficient of Friction of Polish-Coated Flooring Surfaces …
- D4060 Standard Test Method for Abrasion Resistance of Organic Coatings by the Taber Abraser
- https://scholar.google.com/scholar?q=preventing+scratches+on+hardwood+floors+protective+mats+gym+equipment Google Scholar
- https://scholar.google.com/scholar?q=hardwood+floor+indentation+rolling+loads+floor+protection Google Scholar
- https://scholar.google.com/scholar?q=wood+floor+surface+wear+abrasion+protective+floor+coverings Google Scholar


