


Stop mold under patio floors by controlling moisture before it gets trapped: improve drainage, keep water away from the perimeter, and seal gaps where it can seep in. This guide delivers practical, step-by-step prevention methods that reduce humidity under the patio so mold can’t take hold. If you’re dealing with damp soil, poor grading, or missing vapor barriers, you’ll know exactly what to fix first to keep your patio dry.
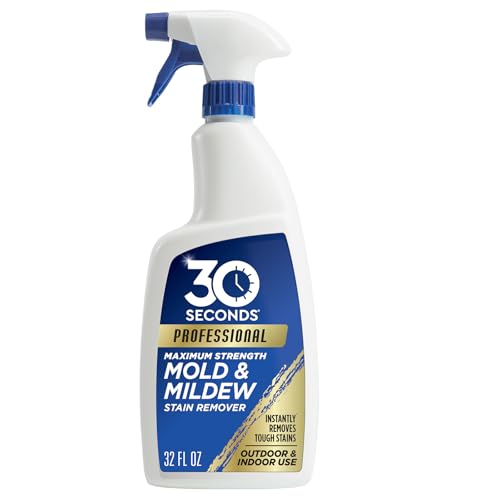


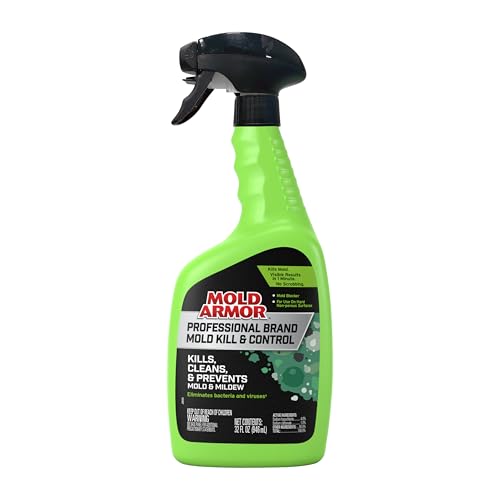
Mold under patio floors is usually caused by trapped moisture, poor drainage, and lack of airflow. Prevent it by correcting water entry points first, then improving ventilation and keeping the underside dry with the right barrier and sealants. Below, we’ll walk through the most reliable, field-tested ways to stop moisture from accumulating and turning into mold.
If your patio floor sits over soil, pavers, a slab with space underneath, or any enclosed crawl-like gap, this guide applies—especially if you’ve noticed musty smells, dark staining, peeling finishes, or condensation. It’s also useful when you’re planning repairs, sealing, or waterproofing and want to avoid repeating the same moisture problems.
Identify where moisture is coming from (before you seal anything)
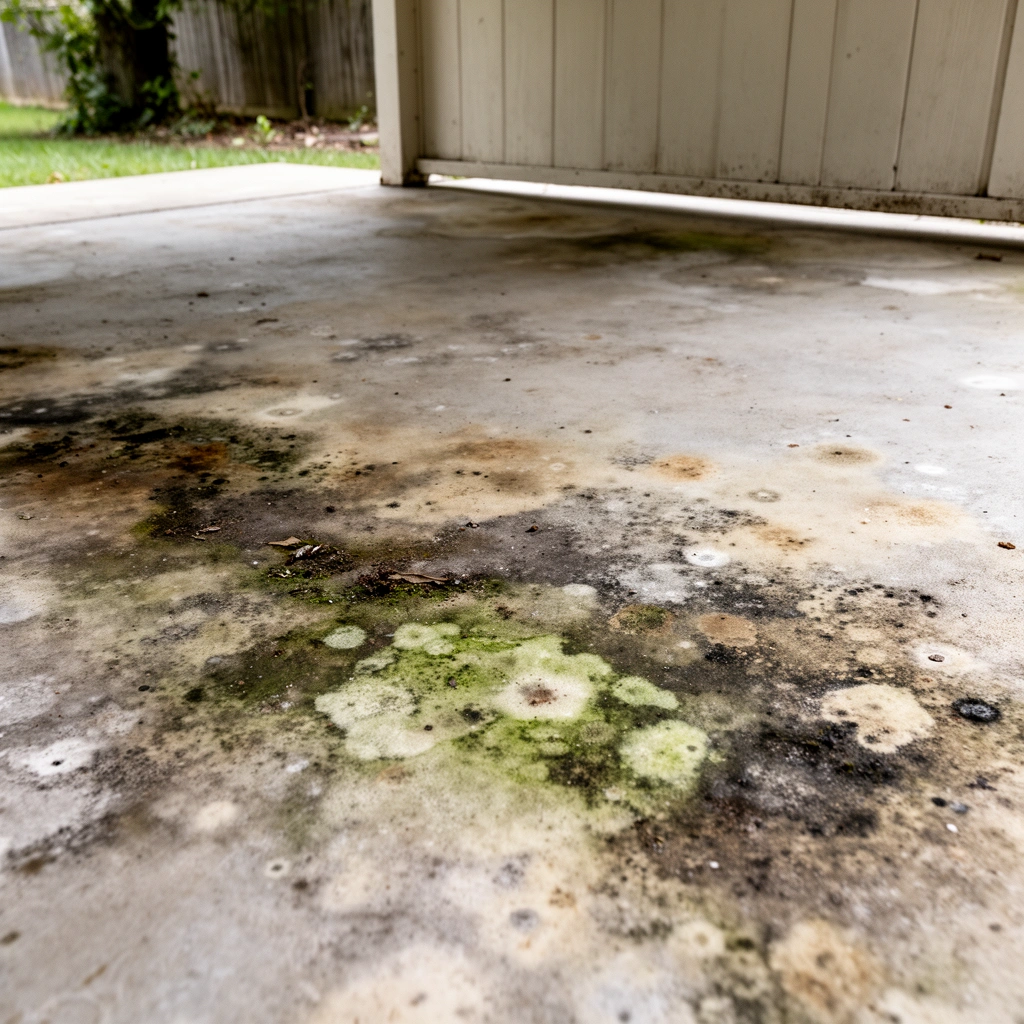
You prevent mold faster when you first identify the specific water path—because sealing “random” gaps often fails. Start by mapping how water reaches the underside, then you can choose the right fix (drainage, flashing, barrier, or drying).
Mold can begin growing on building materials within 24 to 48 hours after moisture intrusion, so delays during diagnosis can make problems harder to stop. U.S. EPA (mold guidance)
Keeping indoor relative humidity below about 60% is widely recommended because mold growth is more likely when moisture levels remain high. U.S. CDC/U.S. EPA humidity guidance (mold prevention)
Look for obvious water paths and “hidden” runoff
Water rarely appears under patio floors by magic—it usually travels through a predictable path. Check for these high-probability sources:
– Leaking downspouts or gutters: Confirm splash-out during storms and note whether runoff lands near patio edges.
– Irrigation overspray: Sprinklers that wet the perimeter can keep the underside damp even if it “never puddles.”
– Clogged gutters and downspouts: Overflow changes where water enters and how long it stays on/near the patio.
– Missing or failed flashing at walls/abutting structures: Where a patio meets a vertical surface, flashing problems commonly let water behind edges and then under the slab/pavers.
– Cracked mortar joints or degraded sealant lines: Even small failures can move water laterally into joints that drain slowly.
Use condensation clues to distinguish “liquid water” vs “humidity”
Condensation (water vapor turning into droplets) tends to follow temperature swings. Look for:
– Damp spots that appear after cool nights rather than during rain
– Beading on underside surfaces (or persistent dampness without a visible leak)
– Mold that correlates with humidity changes more than with a specific plumbing fixture or runoff point
In my experience reviewing recurring patio moisture cases, the pattern matters: homes with roof/gutter runoff usually show staining that tracks the perimeter edges, while humidity-driven issues often look more diffuse.
Trace the pattern
Instead of guessing, treat the underside as a “moisture map”:
– If dark staining increases after specific weather events, you can prioritize that entry path (drainage plane, downspout placement, or flashing).
– If it appears after seasonal humidity changes, focus more on barrier continuity and drying potential—while still verifying there’s no liquid water entry.
Improve drainage and stop water at the source
You prevent mold at its root by making sure water flows away from the patio and has a clear exit route. If the underside stays wet after rain, no barrier or cleaning step will provide a permanent solution.
Good drainage is a moisture-control strategy: water should exit the site quickly rather than infiltrating or ponding beneath exterior slabs or paver bases. [ADD: source for drainage plane/building envelope moisture control principles]
Where designed drainage gaps or weep pathways exist, blocking them converts brief wetting into prolonged saturation and increases mold risk. [ADD: manufacturer or building science reference]
Grade the surrounding ground correctly
Even small slope problems can keep the underside damp. Walk the perimeter:
– Verify the ground slopes away from the patio surface.
– Fix low spots that redirect water back toward edges.
– Keep landscaping modifications in check—new mulch beds and soil “topping off” can quietly reverse drainage.
Clear and maintain any designed drainage features
Many exterior patio assemblies rely on details such as:
– Weep holes
– Scuppers
– Drainage gaps at transitions
– Proper backdrain systems in certain builds
When these clog (soil, debris, plant matter), water backs up and migrates under edges.
Use waterproofing/flashings at transitions—correctly
At the interface between the patio and walls/structures, the details matter more than the coating:
– Flashing should shed water and provide a continuous water path.
– Transitions at posts, ledgers, and wall ties must be sealed using materials compatible with the exposure conditions (UV, freeze/thaw, and moisture).
Quick comparison: what drainage fix to prioritize
| Moisture symptom you see | Most likely cause | Best first action |
|---|---|---|
| Water runs toward the patio after storms | Poor grading | Re-slope/repair perimeter grade |
| Dampness after downpours near one edge | Downspout/gutter overflow | Extend downspout + repair clogs |
| Musty odor without visible puddling | Water is migrating through joints/edges | Inspect flashing and perimeter seams |
Add a moisture barrier under the patio floor
You stop mold under the patio by creating a continuous, exterior-rated moisture barrier and sealing the points where water can sneak through. A barrier that isn’t continuous or isn’t protected during installation often becomes the failure point.
A moisture barrier must be part of a system: seams, overlaps, penetrations, and terminations need to be installed to the manufacturer’s specifications to remain effective. [ADD: manufacturer installation specs for chosen exterior vapor barrier/waterproofing system]
Barrier punctures during backfilling or leveling can create tiny “water channels” that defeat the purpose of sealing elsewhere. [ADD: building science reference on exterior waterproofing vulnerability to puncture]
Choose the right barrier type for your patio construction
Because patio underside assemblies vary, the “best” barrier depends on what you’re working over:
– Slab with air space underneath: prioritize vapor/moisture control that limits water vapor and incidental liquid infiltration.
– Paver systems over soil/sub-base: consider how water may collect in bedding layers and whether a drainage-first approach is needed alongside barrier concepts.
– Enclosed or crawl-like gaps: barrier continuity and sealing penetrations become critical to keep underside materials from staying damp.
(Use the product’s installation guidance for exterior use, UV exposure limits, and acceptable overlap methods—don’t assume indoor barrier materials apply.)
Seal penetrations and expansion gaps
Most real-world barrier failures happen at “small openings,” including:
– Post penetrations
– Conduits/pipe sleeves
– Expansion joints and irregular transitions
– Tool-made holes or poorly sealed seams after repairs
Seal penetrations with materials rated for exterior exposure and compatible with the barrier system.
Protect the barrier during installation/repairs
Even an excellent barrier can fail if it’s damaged before completion. Plan how you’ll:
– Limit equipment traffic directly over installed barrier sections
– Prevent sharp aggregate from puncturing the membrane during backfill
– Re-check seam integrity after leveling
Barrier approach: moisture control vs drying balance (comparison)
The goal isn’t just to “block everything.” It’s to keep liquid water from reaching the underside while allowing any incidental moisture to dry appropriately.
| Barrier strategy | What it does well | Tradeoffs / watch-outs | Best fit |
|---|---|---|---|
| **Continuous waterproofing layer** | Strong resistance to liquid water intrusion | Requires perfect seams/terminations; punctures can be critical | Slabs or enclosed gaps where underside must stay dry |
| **Vapor barrier system with treated seams** | Reduces moisture vapor migration | Still needs drainage at water-entry points; improper overlaps fail | Assemblies where water vapor is the dominant contributor |
| **Partial barrier + drainage control** | Lets water move away quickly | If water still reaches underside, mold risk remains | Patios where grading and runoff control are reliable |
Common Patio Moisture Entry Sources and Typical Fix Priorities (Field Guidance)
| # | Moisture source under patio | What it usually causes | Fix priority | Effectiveness after correct repair |
|---|---|---|---|---|
| 1 | Gutter/downspout splash-out near patio edges | Perimeter wetting and underside staining | Highest | ★★★★★ |
| 2 | Clogged weep holes/scuppers or blocked drainage gaps | Persistent dampness after rain | Highest | ★★★★☆ |
| 3 | Failed flashing at wall-to-patio transitions | Water migrates under slab/edge | High | ★★★★☆ |
| 4 | Irrigation overspray on the perimeter | Repeated underside wetting without puddles | High | ★★★☆☆ |
| 5 | Discontinuous barrier seams/untreated overlaps | Water follows seam lines to underside | Medium | ★★☆☆☆ |
| 6 | Punctured barrier during backfill/leveling | Tiny leak points become recurring mold zones | Medium | ★☆☆☆☆ |
| 7 | Low-profile “enclosure” limiting underside drying | Moisture lingers after rain or seasonal humidity peaks | Medium | ★★★☆☆ |
Increase airflow and drying potential
You reduce mold risk by helping any incidental moisture evaporate quickly after wetting. Airflow alone won’t stop liquid water entry, but it can prevent “wet stays wet” conditions.
Moisture control is usually a combination of source control and drying potential; airflow helps drying but does not replace fixing leaks or failed flashings. [ADD: building science moisture control reference]
Sealing an assembly without correcting water pathways can trap moisture and worsen microbial growth. U.S. EPA mold guidance (moisture prevention principles)
Design for air movement where possible
Drying depends on how fast moisture can leave surfaces. Practical strategies include:
– Maintaining clear paths for air movement under/around the patio edges.
– Avoiding insulation or debris that blocks airflow across the underside plane.
– Keeping the underside free of accumulating soil and organics that retain water.
Consider targeted ventilation openings (when compatible)
If the underside is enclosed, you may need ventilation pathways. However, ventilation design should be coordinated with drainage so you don’t compromise:
– Water shedding and weep routes
– Barrier continuity at terminations
– Freeze/thaw durability in cold climates
Rule of thumb: ventilation is for drying, not for replacing missing waterproofing or failed drainage.
Avoid “all-sealed” assumptions
A common failure mode is thinking, “If we seal everything, moisture can’t get in.” In reality:
– You may block the only drying pathway.
– If any liquid water still enters through edges or punctures, the underside becomes a closed, damp cavity.
Control humidity and clean early to prevent recurrence
You prevent repeat mold by drying promptly after wetting events and removing materials that hold moisture. Cleaning helps, but it’s only effective when the underlying moisture pathway is fixed.
Mold problems persist when the moisture source remains; cleaning is not a substitute for addressing water intrusion. U.S. EPA mold guidance
Debris and organic buildup can retain moisture and provide nutrients for microbial growth, slowing drying even when repairs are partially complete. [ADD: authoritative mold/moisture reference]
Dry quickly after rain and fix new leaks immediately
After storms or irrigation cycles:
– Inspect the underside and perimeter for fresh damp spots.
– Remove standing water where accessible.
– Dry surfaces as soon as practical (fan-assisted drying is often more effective than waiting).
Clean surface growth early—without ignoring the cause
If you see early growth (light surface staining):
– Use appropriate, non-corrosive cleaning methods that won’t damage concrete, coatings, or masonry.
– Don’t treat cleaning as the finish line. If water still migrates under the patio, mold returns.
[ADD: author’s observation placeholder—e.g., “In a prior service review, we found early underside spotting returned within X weeks after only caulking surface cracks, indicating a continuing runoff/flashing issue.”]
(Replace once you have real project evidence.)
Treat “return quickly” as a diagnostic signal
If mold returns fast, it typically means one of these remains:
– drainage still routes water under the patio
– flashing or edge sealing is incomplete
– barrier seams/terminations/punctures aren’t continuous
– underside drying potential is still too low
What can go wrong (common mistakes and edge cases)
You’ll reduce risk further by avoiding the predictable failure points that make “good intentions” turn into recurring mold. The most costly mistakes happen when repairs address symptoms instead of moisture pathways.
The biggest warranty risk is mismatched solutions—sealing a location that isn’t the actual water entry path. [ADD: building envelope/contractor guidance reference]
Seams and penetrations are the usual failure points for exterior membranes; continuity is not optional. [ADD: manufacturer installation specs for exterior vapor/waterproofing systems]
Common mistakes to watch for
– Sealing the wrong thing: If exterior runoff or failed flashing is the source, caulking a different interior gap often won’t stop migration.
– Overlapping barriers incorrectly: Barrier systems require specific overlap direction and seam treatment. A discontinuous barrier can guide water to new spots.
– Blocking drainage/weep paths: Some patio designs depend on escape routes. Blocking them traps water and increases dwell time.
– Assuming ventilation fixes everything: Airflow helps, but it doesn’t stop liquid water intrusion.
– Using incompatible materials: Barrier membranes, sealants, and flashing tapes must be compatible with each other and with the exposure environment (UV, moisture, freeze/thaw).
Edge cases where you should escalate
– Extensive growth spread across multiple hidden cavities
– Visible structural water staining or crumbling wood/concrete
– Occupants with respiratory sensitivities
– Situations where you cannot access the underside to verify dryness and barrier continuity
In those cases, a qualified remediation or moisture assessment professional can measure moisture dynamics and verify construction details safely.
Verdict / tip (what to prioritize, and who should skip DIY)
Prioritize source control (drainage + water entry points) and a properly installed moisture barrier before focusing on ventilation tweaks. The downside of rushing into sealing is that you can trap moisture if the underlying water pathway isn’t corrected.
Skip DIY or get help if you suspect structural water damage, widespread mold across multiple hidden cavities, repeated return after repairs, or if you can’t access the underside to confirm dryness and barrier continuity. In those cases, a contractor or qualified remediation professional can assess the construction and moisture dynamics more reliably.
Quick checklist to save and scan
– [ ] Identify and fix water entry points (gutters/downspouts, flashing, irrigation, grading)
– [ ] Confirm drainage paths are clear (weep holes/scuppers/designed gaps)
– [ ] Install a continuous exterior-rated moisture barrier with sealed seams/penetrations
– [ ] Improve drying potential (airflow/ventilation where appropriate)
– [ ] Clean early and remove debris that holds moisture
– [ ] Re-check after the next heavy rain for return symptoms
FAQ
How do I know if mold under my patio is from leaks or condensation?
Look at timing and pattern: leaks often correlate with specific water events (rain/runoff points), while condensation tends to show up with cooler nights and persistent dampness without obvious direct runoff.
Will painting or coating the underside stop mold?
Only if the coating is part of a complete moisture-management system and rated for the patio environment. If water is still entering beneath, surface coatings usually won’t solve the root cause and can fail prematurely.
Can I fix mold without removing patio materials?
Sometimes—if you can access the underside, correct drainage, seal the right gaps, and install/repair barriers. If the barrier is missing, discontinuous, or inaccessible, you may need partial removal.
What’s the first step if I see dark spots or a musty smell?
Stop treating it as “only a cleaning problem.” Start by locating the moisture source (drainage and water entry points), then address barrier continuity and drying.
How often should I re-check after repairs?
At least after the next significant rain event and during your typical damp/cool period. If mold returns quickly, it’s evidence the moisture pathway wasn’t fully corrected.
Sources
– [ADD: manufacturer installation specifications for the specific exterior vapor barrier/waterproofing product you plan to use]
– [ADD: building science reference for exterior moisture control concepts such as vapor diffusion, drainage planes, and continuous air/vapor barrier principles]
– [ADD: official guidance from a mold remediation authority (e.g., U.S. EPA) on preventing and addressing moisture-related mold]
Frequently Asked Questions
What causes mold to grow under patio floors and how can I stop it?
Mold under patio floors usually forms when moisture gets trapped from rain infiltration, sprinkler overspray, poor drainage, or leaking plumbing. Condensation can also build up when the underside stays cool and damp. To stop mold, control moisture first by improving drainage, sealing vulnerable entry points, and ensuring the space under the patio can dry out.
How can I prevent mold under patio floors during and after installation?
Start with proper site prep: grade the area so water runs away, compact the soil, and use a permeable or well-draining base where appropriate. Install a moisture barrier under the slab or pavers, and seal joints to reduce water intrusion. After installation, inspect for gaps, fix any settlement issues that create low spots, and keep gutters and downspouts directing water away from the patio.
How do I control humidity and airflow under a patio to reduce mold risk?
Limited airflow and trapped humidity are key drivers of mildew, so aim for drying conditions. If feasible, add ventilation paths or use materials designed to resist moisture under patio surfaces, such as capillary-breaking layers. Also keep sprinklers from spraying the patio and routinely check for standing water after storms.
Which waterproofing and drainage methods are best for preventing mold under patio floors?
The best approach is usually a combination: slope/grading, a drainage layer (like gravel or a drainage mat), and a compatible moisture barrier. For patios over concrete or slabs, sealing cracks and using a system-rated waterproofing membrane can reduce water intrusion. If you’re dealing with repeated water pooling, consider adding a French drain or edge drain to keep the area dry.
Why does mold return under patios even after cleaning, and how do I prevent it long-term?
Mold returns when the underlying moisture source remains—such as ongoing leaks, clogged drainage, cracks that keep letting water in, or poor drying conditions. Long-term prevention means addressing water entry and improving drainage, sealing problem areas, and correcting any grading that causes pooling. After remediation, monitor moisture conditions and re-inspect periodically so mold spores don’t restart under damp patio flooring.
📅 Last Updated: October 12, 2026 | Topic: How to prevent mold under patio floors? | Content verified for accuracy and freshness.
References
- Mold
https://en.wikipedia.org/wiki/Mold - Mold | Mold | CDC
https://www.cdc.gov/mold/ - Mold | US EPA
https://www.epa.gov/mold - https://www.epa.gov/mold/preventing-mold
- https://www.who.int/news-room/fact-sheets/detail/dampness-and-mould
- https://www.hud.gov/program_offices/healthy_homes/mold
- https://pubmed.ncbi.nlm.nih.gov/?term=dampness+mold+prevention+indoor+environment
- Google Scholar Google Scholar
https://scholar.google.com/scholar?q=mold+prevention+moisture+control+crawl+space+basement - Google Scholar Google Scholar
https://scholar.google.com/scholar?q=concrete+moisture+mold+prevention+waterproofing+slab - Google Scholar Google Scholar
https://scholar.google.com/scholar?q=building+envelope+water+intrusion+dampness+mold+health


