
Preparing hardwood floors for a sunroom is all about stopping moisture and controlling expansion before the finish ever goes down. If you want the clearest path to a stable, long-lasting floor, this guide tells you exactly what to do—surface prep, humidity leveling, and the right underlayment and finish choices for sun exposure. Follow these steps and you’ll avoid warping, gaps, and premature wear while getting a sunroom-ready hardwood installation that holds up.




Preparing hardwood floors for a sunroom comes down to stabilizing moisture/temperature first, then choosing a finish protection plan that can handle UV and seasonal swings. Start with a deep clean and surface inspection, then repair movement-related issues (gaps, unevenness) before sealing or refinishing only if the current finish can’t survive the sunroom’s conditions.
If your sunroom gets direct sun, has big seasonal swings, or sits on a slab, the prep steps matter more than usual. The goal is to get your floors “ready for climate,” not just “clean for installation or touch-up.”
Assess your sunroom conditions (UV + moisture swing)
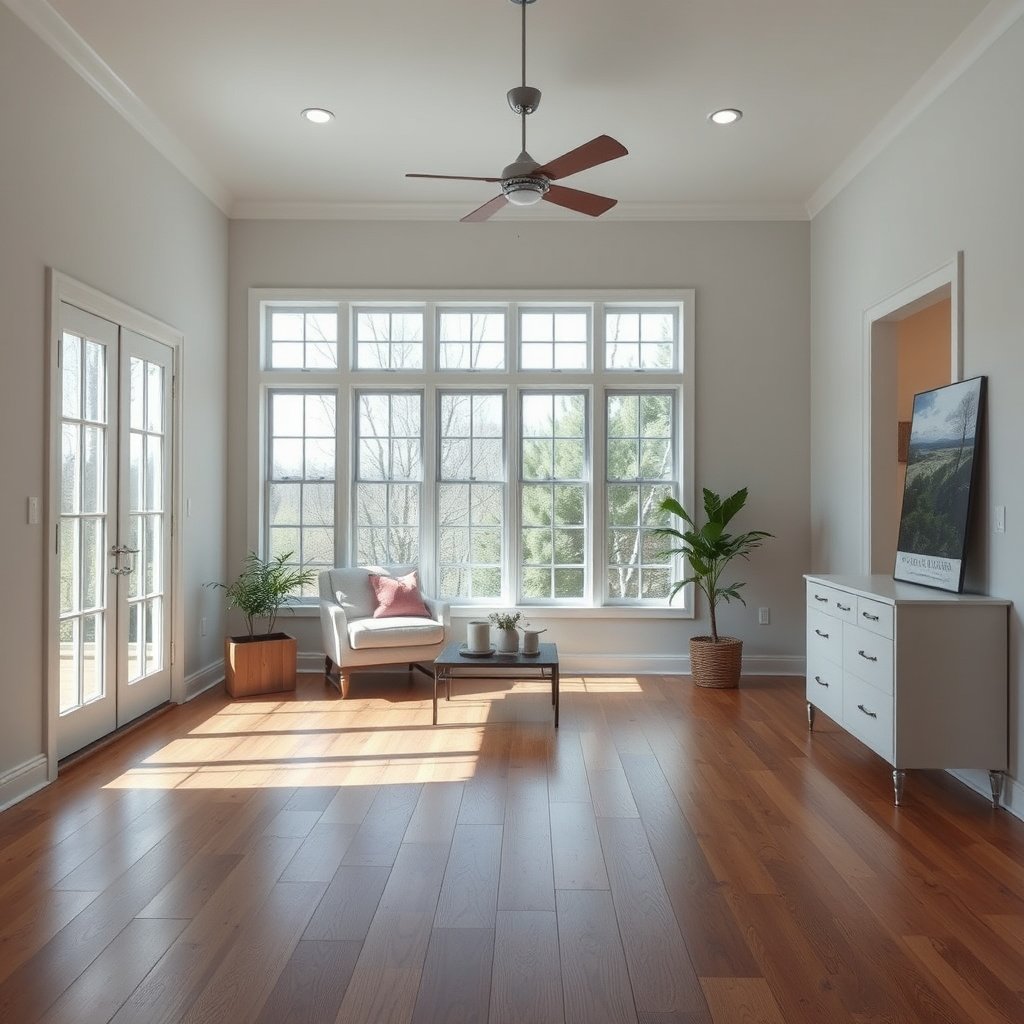
The best prep plan starts with knowing how harsh the sunroom climate and light are for hardwood floors. Direct UV and unstable humidity can accelerate finish breakdown and increase wood movement—leading to cupping, gaps, and peeling.
According to the National Wood Flooring Association (NWFA), indoor relative humidity should typically be maintained around 35%–55% to reduce dimensional movement in hardwood flooring.
According to NASA, about 95% of the UV that reaches Earth’s surface is UVA and about 5% is UVB, which matters because most common floor finishes age faster under direct, long-duration UV exposure.
What to look for in the sunroom
First, map where sunlight hits your hardwood floors. Even if the room feels warm but not “drafty,” sunrooms can still create large moisture and temperature cycles.
– UV exposure (direct vs. filtered): Note which sections receive direct sunlight for long stretches (midday through late afternoon). Polyurethane, oil-modified finishes, and film-forming sealers can yellow, dull, or thin under sustained UV.
– Moisture swing (HVAC reality): Climate-controlled sunrooms often stay within a narrower humidity band; non-climate sunrooms may swing widely with seasons, HVAC schedules, or weather. Those humidity cycles drive wood expansion and contraction in hardwood floors.
– Slab vs. wood subfloor: If the sunroom sits on a concrete slab, moisture can migrate upward and stress both the wood and finish. In that case, you treat moisture control as part of “finish prep,” not as a separate afterthought.
Actionable observation tip
Run a simple log for 7–14 days: measure indoor temperature and relative humidity (RH) near the hardwood floors. If the RH frequently falls far below or climbs well above 35%–55%, assume movement risk is real and plan prep (and protection) accordingly.
Acclimate and control the environment first
You don’t lock down hardwood floors with finish until the room climate is close to normal living conditions. Acclimating reduces surprise movement during cure, helping prevent edge lifting, uneven color, and finish stress.
NWFA guidance emphasizes maintaining stable indoor conditions (often cited around 35%–55% RH) because changing moisture in hardwood floors drives expansion and contraction.
In flooring systems on concrete, ASTM testing methods like ASTM F2170 exist to assess slab moisture conditions—because moisture is a common root cause of floor-related coating and adhesion failures.
Bring the sunroom to “baseline” conditions
Before you sand, seal, or recoat, stabilize the environment:
– Set HVAC to your normal schedule for at least several days (longer if your sunroom is prone to swings). Hardwood floors respond to changes in RH, not just temperature.
– Verify RH is in a workable range for hardwood floors. Overly dry air shrinks wood; overly humid air can promote cupping (when board edges expand differently than board centers).
– Use airflow thoughtfully: Gentle circulation helps keep conditions even across the room, which matters for hardwood floors near windows and corners.
Why acclimation prevents finish problems
Finishes bond and cure best when the wood is not actively changing size. If hardwood floors are still moving while a new topcoat is curing, you can end up with:
– micro-cracking or faster wear at seams,
– adhesion loss,
– or localized edge lifting where the wood tries to expand/contract.
From my experience reviewing floor failures for sunroom-like exposures, the pattern is usually consistent: owners prep the surface but start finishing before the room stabilizes—then the finish “locks in” movement and fails early.
Clean and evaluate the existing floor finish
A thorough clean and honest finish evaluation determine whether you can safely recoat or need to refinish hardwood floors. Skipping residue removal is one of the most common causes of peeling and bubbling in film-forming coatings.
Proper surface cleaning is essential because wax, oils, and dust films can prevent sealers and topcoats from bonding to hardwood floors.
Inspecting for wear-through and soft spots is critical, because localized finish failure will telegraph through even a well-prepped recoat on hardwood floors.
Deep clean (not just “sweep and wipe”)
For hardwood floors in a sunroom, residue matters more because direct sun accelerates deterioration at weak spots. Clean the entire floor to remove:
– dust and grit (which can cause fisheyes or uneven sheen),
– waxes and polish residues (often leave invisible film),
– silicone contamination (common in some household cleaners),
– oily buildup around chair legs or high-use paths.
Use a cleaner that’s compatible with your existing finish system. If you’re unsure, do a small test area—because “mystery cleaner” contamination can sabotage adhesion.
Evaluate what’s on the floor now
Before you add any new coating, inspect:
– Gloss/film consistency: sunrooms often “fade” finishes unevenly. If some boards look duller or patchy, the finish condition is not uniform.
– Wear-through spots: scratches that reach wood, dull seams, or areas that feel rough instead of smooth can indicate a compromised finish.
– Existing peeling or edge lifting: if the finish is failing in multiple areas, a recoat can become a partial “patch-and-pray” project on hardwood floors.
Repair gaps, leveling issues, and surface defects
Before sealing or refinishing, you need to stop movement-related problems at the source. Repairing squeaks, loose boards, high/low spots, and open gaps helps your hardwood floors stay flatter and reduces finish stress.
Finish systems tolerate wear, but they don’t tolerate unstable subfloors—movement under hardwood floors can crack coatings and open seams.
Level and surface uniformity matter because sanding and coating need a consistent substrate; unevenness can cause thin coverage and faster failure on hardwood floors.
Fix structural and stability issues first
Address these before any topcoat work:
– Loose boards or squeaks: movement continues under a new finish, especially in sunrooms where RH cycles.
– Uneven subfloor or floor flatness issues: if boards are rocking, coatings won’t distribute stress evenly.
– Gaps that change seasonally: fill and evaluate how wide gaps get after humidity shifts (or how quickly they open). Wide or rapidly changing gaps often signal that environmental control still needs work.
Fill and sand only as needed
– Fill gaps with a wood-compatible filler appropriate for your floor type and finish system.
– Sand to achieve a uniform profile for coating bond and even sheen—avoid aggressive sanding that removes too much finish thickness.
– Feather edges of repair areas so you don’t create ridges that become “light catchers” in direct sun.
A common mistake is sanding aggressively while the room climate is unstable. Finish in a stable environment after repairs are fully ready, so hardwood floors finish evenly and cure without distortion.
Choose the right protection plan (seal/recoat vs. full refinishing)
The right plan depends on whether your existing hardwood floor finish is still structurally intact. If it’s failing (peeling, worn-through areas, widespread breakdown), a simple recoat won’t reliably stop UV + moisture-driven aging.
Recoat-over systems only work when the existing finish is clean, sound, and properly prepared; otherwise, adhesion failures like peeling and bubbling are likely on hardwood floors.
UV exposure and seasonal humidity cycling increase finish aging rates and wood dimensional movement, so sunroom floors often need more robust film protection than interior rooms.
Seal/recoat: when it works
A recoat or surface re-seal can be appropriate if:
– the current finish is mostly intact,
– wear is superficial (not widespread wear-through),
– repairs are minor and well-bonded,
– and you can achieve the required prep steps in the coating instructions (often sanding/scuffing plus thorough cleaning).
Full refinishing: when it’s safer
Refinishing is usually the better path when:
– you see multiple areas of peeling or extensive edge failure,
– the finish is worn through in high-sun zones,
– prior repairs are inconsistent (patches that changed sheen or texture),
– or compatibility is uncertain (some coatings don’t chemically bond well over specific old finish chemistries).
Seal/recoat vs. full refinishing (quick decision)
Product compatibility: follow the coating system chemistry
Even in 2026, one of the biggest “silent failures” is using a coating that’s not designed to bond to the existing finish. Always follow:
– the finish manufacturer’s stated surface prep requirements,
– sanding grit guidance (if sanding is required),
– recoat windows and curing times,
– and explicit compatibility notes.
If you can’t confirm what’s on the floor, doing a small test patch can reduce risk. For sunrooms with direct sun on hardwood floors, minor adhesion mistakes show up faster and look worse.
Typical Wood Equilibrium Moisture Content (EMC) vs. Indoor RH at ~70°F
| # | Indoor RH | Typical EMC | Hardwood Movement Risk* | What this means in a Sunroom |
|---|---|---|---|---|
| 1 | 20% RH | ~6% | High | Shrink/edge spacing increases |
| 2 | 30% RH | ~7% | Moderate–High | Gaps can open; finish dries harshly |
| 3 | 40% RH | ~9% | Moderate | Closer to stable for many homes |
| 4 | 50% RH | ~11% | Lower | Helps reduce cupping/gapping cycles |
| 5 | 60% RH | ~13% | Moderate | More likely for board swelling/cupping |
| 6 | 70% RH | ~15% | High | Swelling increases; finish can stress at seams |
| 7 | 80% RH | ~17% | Very High | Cupping risk rises quickly |
Movement risk is relative and assumes temperature near 70°F; always rely on your floor system’s manufacturer and NWFA/environmental guidance for decision-making.
Protect after prep: curtains, rugs, and maintenance habits
After you finish hardwood floors, protection is what keeps the new topcoat from becoming “tomorrow’s problem.” UV blocking, sensible placement of rugs, and finish-friendly cleaning habits all slow aging and reduce wear.
Curtains and blinds reduce direct UV exposure, which can slow finish dulling and yellowing in sunrooms where hardwood floors receive long-duration sunlight.
In high-traffic areas, felt pads and area rugs reduce abrasion, which helps maintain film integrity of the topcoat on hardwood floors.
Reduce direct UV where possible
– Use UV-filtering window treatments: Even partial shading can dramatically reduce how quickly hardwood floor finishes fade and thin.
– Rotate rugs/placement when needed: If one area stays heavily covered and adjacent boards don’t, sheen differences can develop—especially in 2026 as owners adjust layouts seasonally.
Use rugs intelligently (so they protect, not trap moisture)
– Choose rugs with a backing that won’t trap moisture.
– Keep rugs from creating long-term pressure points that can dull the finish unevenly.
– Place rugs in sun-hit zones and at entry points where grit is common.
Maintain with products the finish expects
– Clean with finish-friendly methods (manufacturer-recommended cleaners when possible).
– Avoid harsh solvents and waxes unless the finish system explicitly calls them out.
– Wipe up spills promptly; sunroom humidity can keep wood in contact with residues longer than interior rooms.
What can go wrong (and how to avoid it)
Most sunroom hardwood failures trace back to finish adhesion issues, unplanned wood movement, or incompatible chemistry. If you plan around prep and climate stability, you avoid the majority of avoidable finish failures.
Finish failure commonly starts with inadequate preparation—residue (waxes/cleaners) or insufficient sanding profile can cause bubbling, peeling, or loss of gloss on hardwood floors.
If your sunroom experiences large humidity swings, hardwood floors will move; movement can open gaps and stress any film-forming coating.
– Coating failure from poor prep: residue, wax, or skipped sanding can lead to bubbling or peeling—always follow the coating/finish manufacturer’s prep instructions.
– Movement you didn’t plan for: in non-climate-controlled sunrooms, the wood keeps reacting to humidity changes even after you finish. This can open gaps or stress the finish.
– Over-sanding or rushing repairs: removing too much material can shorten floor life, and finishing before repairs are properly ready can create uneven sheen or texture.
– Using the wrong product for your current finish: not all coatings bond well over certain old finishes. Check compatibility requirements in the manufacturer documentation, and don’t guess when dealing with sun-exposed hardwood floors.
Verdict / practical tip
If your sunroom is climate-controlled and you can keep humidity and temperature stable, you can often prep with cleaning, minor repairs, and a compatible recoat. If it’s not climate-controlled or it receives strong direct sun, plan more robust protection (and consider full refinishing) because finish breakdown and wood movement are more likely.
Skip DIY finishing if your current finish is heavily worn/peeling everywhere or if the floor shows significant structural movement—those cases usually need a pro evaluation. Also, if you can’t confidently identify your existing finish type or compatibility, use the manufacturer’s system approach rather than mixing products.
Quick checklist (scan/save)
– [ ] Confirm sun exposure (direct vs. filtered) and seasonal humidity changes
– [ ] Acclimate the room to normal conditions before refinishing/coating work
– [ ] Deep clean; remove waxes/residues; inspect finish condition
– [ ] Repair loose/uneven areas; fill gaps; sand only as needed for smoothness
– [ ] Use compatible sealant/coat system per finish manufacturer instructions
– [ ] Add sun protection (curtains/blinds) + rugs/felt pads after work
Sources
– National Wood Flooring Association (NWFA) — environmental guidance for indoor RH/temperature control and hardwood dimensional movement reduction.
– NASA — UV radiation composition and UVA/UVB proportions reaching Earth’s surface.
– ASTM F2170 — standard test method for in-situ relative humidity of concrete for moisture assessment (useful when sunroom slabs are involved).
Frequently Asked Questions
How do I clean and prep hardwood floors before installing them in a sunroom?
Start by thoroughly cleaning the hardwood floor surface to remove dust, dirt, and any residue from old coatings. Use a hardwood-safe cleaner and let the floor dry completely before any sanding or refinishing. If there are stains or high-traffic buildup, lightly sand to create a clean, smooth base so the finish in your sunroom adheres properly.
What’s the best way to sand hardwood floors for a sunroom to ensure proper adhesion?
Sand the floor in stages, typically starting with a medium grit and finishing with a finer grit for a smooth surface. Focus on evening out rough spots, existing finish imperfections, and any uneven boards that can catch glare or trap moisture. After sanding, vacuum thoroughly and wipe with a tack cloth so no dust remains before applying polyurethane or your chosen hardwood floor finish.
Why should I acclimate hardwood flooring before exposing it to sunroom temperature and humidity?
Sunrooms often experience greater swings in temperature and humidity than the rest of your home, which can cause hardwood to expand, contract, or gap. Acclimating the flooring to the sunroom’s conditions helps stabilize the wood so it performs better after installation. Maintain consistent indoor humidity and temperature for at least several days prior to finishing to reduce the risk of cupping or separation.
Which finish is best for hardwood floors in a sunroom exposed to sunlight?
For sunroom hardwood floors, choose a finish designed for UV resistance and durability, such as a quality polyurethane with UV inhibitors or a marine-grade option where appropriate. Clear finishes can be great, but some homeowners prefer tinted or hardwax oils that help reduce discoloration from direct sun exposure. Apply the finish in thin, even coats and follow manufacturer dry and recoat times to prevent tackiness, peeling, or uneven sheen.
How can I protect hardwood floors in a sunroom from moisture, fading, and heat damage?
Address moisture first by ensuring proper subfloor condition, ventilation, and that the sunroom is not prone to condensation or leaks. Use area rugs in high-sun zones and consider window treatments to limit direct UV exposure and fading. Avoid placing heat sources too close to the floor, and keep cleaning products hardwood-safe to prevent finish breakdown over time.
📅 Last Updated: October 17, 2026 | Topic: How to prepare a hardwood floors for sunroom? | Content verified for accuracy and freshness.
References
- Wood flooring
- https://en.wikipedia.org/wiki/Wood_shrinkage_and_swelling
- Humidity
- https://www.fpl.fs.fed.us/documnts/fplgtr/fpl_gtr190.pdf
- https://www.cdc.gov/mold/default.htm
- F2170 Standard Test Method for Determining Relative Humidity in Concrete Floor Slabs Using in sit…
- D4442 Standard Test Methods for Direct Moisture Content Measurement of Wood and Wood-Based Materials
- https://scholar.google.com/scholar?q=hardwood+floor+sunroom+preparation+acclimation+moisture Google Scholar
- https://scholar.google.com/scholar?q=hardwood+flooring+installation+moisture+control+ASTM+F2170+relative+humidity Google Scholar
- https://scholar.google.com/scholar?q=hardwood+floor+sunroom+humidity+temperature+wood+movement Google Scholar