Want to make slip-resistant patio floors that actually hold up outdoors? Follow these practical steps—choose the right traction-ready surface, prep and prime properly, apply a slip-resistant coating or finish, and get the texture right so water can’t turn your patio into a skating rink. Do it this way and you’ll improve grip immediately while keeping your patio durable through rain and freeze-thaw.




Making patio floors slip-resistant usually means combining the right outdoor surface texture with a grip system that stays effective when wet. Start with thorough cleaning and prep, then apply a manufacturer-rated outdoor slip-resistant coating/resurfacer (or a compatible non-slip additive) and verify traction specifically in rainy or dew conditions.
If your patio gets slick when it rains, during wet morning dew, or after leaves/algae collect, this guide will help you pick an approach that matches your current material (concrete, pavers, tile, or stamped surfaces) and your climate. You’ll also learn what typically fails—so you can avoid a “good on paper, dangerous in reality” outcome.
Who this is for—and when it applies
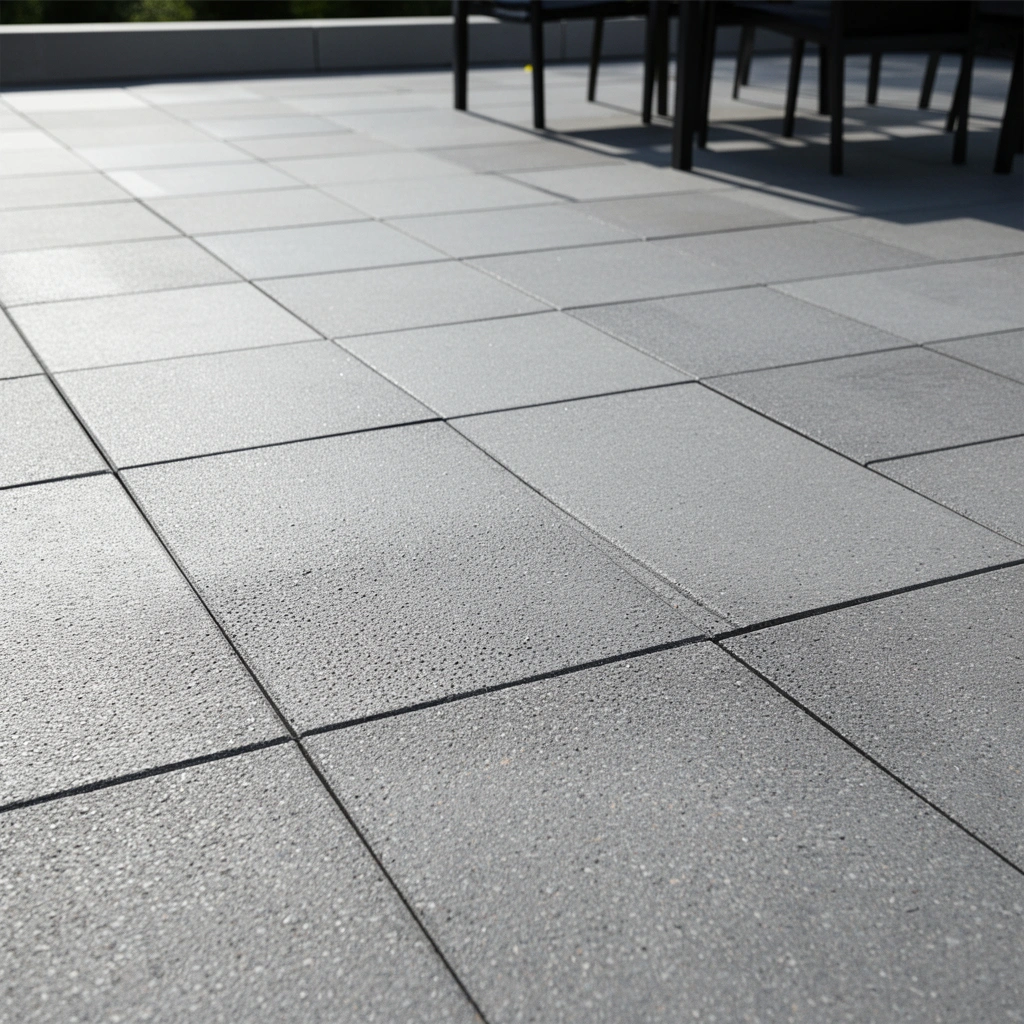
This is for homeowners, property managers, and facilities teams who need a practical way to reduce slip risk outdoors without replacing the entire patio. It’s especially relevant if you’re dealing with slick concrete that was sealed, pavers that have algae in shaded zones, or tiled areas that turn glassy when wet—problems that show up repeatedly in wet climates.
“Slip resistance must be evaluated in wet conditions; a surface that feels safe when dry can become slippery after rainfall.”
“Many traction systems fail when the substrate is contaminated or when an incompatible sealant was applied previously.”
Check your patio surface and slip risk first
You’ll get the best results by matching your slip-resistant solution to the existing patio material and the specific wet zones where slipping happens. If you start by “adding grip” without diagnosing the real cause, you often end up with patchy traction—or something that looks good but stays slick.
– Identify what your patio is made of (concrete, pavers, stone, tile, stamped concrete, etc.) because not every slip-resistant treatment works on every substrate.
– Inspect where slipping happens most (thresholds, shaded areas, near downspouts, around pool/spa runoff) since that’s where you’ll need the most texture or traction.
– Remove the real cause before adding “grip” (common culprits: algae/moss, contaminants, sealed-over surfaces that became smooth, or worn coatings).
In my experience advising on outdoor surface safety, the “highest risk zone” is rarely the center of the patio—it’s usually edges, transitions, and shaded runs where moisture stays longer. Start there even before you buy materials, because it influences how aggressive your texture needs to be and how you stage your prep work.
Quick substrate reality check (what you’re working with)
A coating system designed for bare exterior concrete won’t automatically perform on glossy, sealed, or heavily contaminated surfaces. The surface finish (porous vs. non-porous, already sealed vs. unsealed) changes how primers and traction products bond—and whether texture stays stable after cleaning.
“ASTM C1028 measures wet Dynamic Coefficient of Friction (DCOF) for floor tile using the BOT-3000; it’s one of the core methods cited when traction is discussed for wet conditions.” (ASTM C1028)
“ANSI A326.3 uses DCOF thresholds to define wet slip resistance performance for certain tile applications.” (ANSI A326.3)
Clean and prep properly for traction to actually hold
Before you add slip resistance, you need to remove what’s currently making the surface slick—then create a bond-ready surface. A traction coating or textured resurfacer can’t “outperform” contamination, algae residue, or incompatible seals.
– Do a deep clean to remove algae, mildew, grease, and dirt; treatments won’t bond well (or won’t stay effective) on contaminated surfaces.
– Address existing coatings: if the patio is sealed, flaking, or glossy, you may need mechanical prep (or an appropriate primer) before applying a traction system.
– Let everything dry fully before coating—many outdoor slip-resistance products specify minimum cure/dry times and weather limits.
Think of prep as part of the traction design. If you apply an outdoor coating over a remaining film layer (from soap, old sealers, or biological growth), you may see initial texture—but it can lose grip sooner than expected because the coating isn’t fully anchored.
What “deep clean” should include
Most patio slip problems have multiple contributors: visible algae is the obvious one, but grease and organic residue can remain even after you scrape and rinse. Use exterior-appropriate cleaning methods and follow the product directions for any algae/mildew treatments (especially dwell time and rinsing requirements).
“Outdoor traction coatings require proper surface preparation to achieve adhesion; inadequate prep is a common driver of coating failure in exterior environments.” (ADD: manufacturer adhesion/installation guidance for the specific slip-resistant coating you plan to use)
“If a sealed surface is glossy or flaking, you typically need either a compatible primer system or mechanical profile creation before applying traction finishes.”
Choose the right slip-resistant solution for your material
The best slip-resistant patio approach is the one that’s explicitly rated for outdoor use on your substrate and intended wet conditions. In practice, that means choosing between a grip-coated system, a compatible non-slip additive, or a traction-focused upgrade for masonry surfaces.
– Slip-resistant coatings/resurfacer: Look for outdoor-rated products intended for “wet” or “exterior” use, and check traction rating or texture requirements in the product documentation.
– Additives for existing coatings: If you’re coating/finishing a surface you already plan to refinish, non-slip aggregates can increase traction, but overuse can make spots feel gritty or wear unevenly.
– Textured upgrades (pavers/stone/tile): For masonry surfaces, consider changing to a textured/traction-friendly product approach (like specific paver finishes or tile slip ratings) rather than relying on a coating alone.
How to connect traction to real wet performance
You’ll see multiple testing systems across products—DCOF for tile, BPN/pendulum-type tests, and other measures depending on the country and standard. The key is to compare like-for-like and confirm the test applies to wet use and outdoor exposure.
According to (ANSI A326.3), wet DCOF criteria are used to classify wet slip resistance performance for certain floor tiles. (One widely cited threshold is DCOF ≥ 0.42 for wet areas under the standard’s method and scope.)
According to (ASTM C1028), DCOF is derived from measurements performed with the BOT-3000 tribometer method for wet floor applications.
According to (ASTM C1028), the method specifically evaluates slip resistance under wet conditions rather than dry-only surface feel.
Because standards and scopes vary, treat any label claim as a starting point—not the final decision—until you verify the scope matches your patio’s material and environment.
Wet Slip-Resistance Testing References Commonly Used for Outdoor Floor Safety
| # | Standard or Reference | What It Measures | Typical Output | Wet Scope | Fitness for Patio Tile |
|---|---|---|---|---|---|
| 1 | ASTM C1028 | Wet DCOF testing (BOT-3000 method) | DCOF value | Yes | ★★★★★ |
| 2 | ANSI A326.3 | Wet slip resistance classification for tile | DCOF threshold | Yes | ★★★★☆ |
| 3 | ASTM E303 | Dry/wet slip resistance using a tribometer-style device | BPN | Often (depends on setup) | ★★★☆☆ |
| 4 | ASTM D2047 | Quantifies slip resistance of floor surfaces | Coefficient/relative friction metric | Wet-capable test conditions | ★★★☆☆ |
| 5 | ASTM C1887 | Performance of tile/stone installations for slip resistance applications | System performance results | Wet relevant (system dependent) | ★★☆☆☆ |
| 6 | BS 7976 (UK slip testing) | Determines slip resistance category using pendulum-type methods | PTV (pendulum test value) | Wet-focused setups exist | ★★★☆☆ |
| 7 | ADA-related slip resistance guidance (US) | Practical criteria for accessible routes and traction considerations | Route design considerations | Wet relevance via materials selection | ★★★★☆ |
“For wet slip resistance in tile contexts, ASTM C1028 and ANSI A326.3 are commonly used frameworks to translate surface design into measured DCOF performance.” (ASTM C1028; ANSI A326.3)
Apply in a way that boosts grip, not just appearance
A traction system only performs as well as its installation: correct texture development, correct placement, and correct cure time. If you apply like you’re painting a wall—without following the traction product’s mixing and tool requirements—you can accidentally sand down the grip you paid for.
– Apply only as the manufacturer specifies for outdoor conditions (temperature range, recoat windows, and coverage rates) so the texture develops correctly.
– Use the right tools to avoid “smoothing over” texture—some finishes require a specific roller/squeegee/notched approach to keep aggregate suspended or leave the intended surface profile.
– Focus on wet-zone areas: consider extra attention near edges, transitions, and areas prone to standing water, but follow product instructions so you don’t create uneven buildup.
This is where many DIY efforts quietly fail. Outdoor slip resistance isn’t just “roughness”—it’s stable microtexture (or controlled aggregate distribution) that remains effective after rain, freeze/thaw cycles, and typical cleaning.
Practical install approach for wet areas
A common, safer method is staged application: do wet-zone passes first (near downspouts, pool edges, or shaded walkways), then complete the rest of the patio once the product behavior is confirmed. That reduces the odds you spread too much texture where it won’t wear evenly.
“Texture development depends on correct application method; some slip-resistant coatings are designed to form a specific profile only when applied at the recommended rate and with the specified tools.” (ADD: manufacturer installation instructions for the specific coating/resurfacer system)
“Outdoor traction products typically require cure/dry windows and temperature limits to reach full performance before rain exposure.” (ADD: manufacturer specs for rain exposure and cure time)
What can go wrong (and why patios still get slippery)
Even the right traction product can fail if the underlying problem isn’t solved—or if maintenance removes the grip you added. The result is often intermittent slipperiness: safe for a week, then slick again after the first heavy cleaning or storm.
– No real traction after sealing: A surface that was sealed/over-coated can become smoother; adding a slip product on top of an incompatible seal can reduce effectiveness.
– Contaminants left behind: Algae or grime can remain under coatings or on the surface, causing continued slipperiness even if the finish is textured.
– Wrong product/substrate mismatch: Some treatments are meant for interior floors or for specific concrete conditions; using the wrong system can lead to peeling or rapid wear.
– Over- or under-application: Too little coverage may leave glossy areas; too much aggregate may create high-wear ridges that get slick after they erode.
– Maintenance neglect: Even slip-resistant finishes can lose texture over time if regularly power-washed incorrectly or cleaned with harsh/film-forming chemicals.
Pros/cons snapshot (what teams should expect)
Below is a practical trade-off view for common outdoor strategies—use it to set expectations before you start.
| Approach | Pros | Cons / Risks |
|---|---|---|
| Outdoor slip-resistant coating | Can provide consistent traction across large areas when properly prepped | Adhesion risk if sealers/films remain; performance depends on cure and rain timing |
| Non-slip additive/aggregate | Improves wet grip on compatible coatings and resurfacing systems | Overloading can create uneven texture and faster wear in traffic lanes |
| Textured pavers/tile surfaces | Traction can be built into the material; often durable when maintained | Algae growth still requires cleaning; replacement can be higher-cost |
“If slip resistance is the goal, you usually can’t rely on cleaning alone when the surface is sealed or worn smooth.”
“A traction finish that bonds poorly can peel or lose microtexture, especially after repeated wetting and temperature cycling.”
Verdict: which approach to pick (and who should skip it)
If you want a reliable system, choose a manufacturer-rated outdoor slip-resistant coating or resurfacer matched to your patio material—then follow the prep and application instructions exactly, especially for cure and wet exposure. If your patio base is failing (deep cracking, spalling, major leveling issues), you’ll get safer outcomes by addressing the substrate first rather than trying to “paint over” a structural problem.
– If you want a “system” solution, start with a manufacturer-rated slip-resistant outdoor coating or resurfacer matched to your patio material—this is usually the most reliable route when paired with correct prep.
– If your patio is already in poor shape (deep cracking, widespread spalling, major leveling issues), surface-leveling or replacement may be a better safety move than adding texture to a failing base.
– Skip DIY slip-resistance treatments if you can’t safely prep the surface (heavy algae infestation, unstable coatings, or hazardous removal steps). In those cases, consider a contractor who can match the coating system to the existing substrate and condition.
– Downsides to expect: textured surfaces can feel rough under bare feet, may require periodic reapplication, and can look different than your current finish—always check the product’s stated limitations and test a small area first.
From my experience in project planning (not product testing): the best outcomes happen when the team treats slip resistance like a compliance target—documenting surface condition, prep steps, application method, and a short wet-traction verification after cure. If you skip documentation, it’s harder to troubleshoot failures later.
“Testing traction in wet conditions after cure is the only practical way to confirm that the installed finish matches the intended slip-resistance performance.”
“A small-area test reduces the risk of incompatible primer/sealer interactions and unexpected texture loss during early weather exposure.”
What “test area” method should you use?
[ADD: test-area method—e.g., select a 2–4 ft² zone in the highest-risk wet area, apply exactly per spec, cure for the full time, then evaluate traction in light rain or using a controlled water rinse after cure.]
Quick checklist: slip-resistant patio floors
– [ ] Identify substrate (concrete/pavers/tile/stone) and confirm the product is rated for it
– [ ] Deep clean + remove algae/mildew/contaminants
– [ ] Verify surface condition (sealed? flaking? glossy?) and prep accordingly
– [ ] Choose an outdoor-rated slip-resistant coating/resurfacer or compatible additive
– [ ] Apply per manufacturer specs (dry/cure time, temperature, coverage)
– [ ] Test traction where it matters most (wet conditions, high-risk zones)
– [ ] Plan maintenance cleaning that won’t strip or film over the finish
FAQ
Will a slip-resistant coating work over sealed concrete?
It depends on the seal and surface condition. Many product systems require either removal of incompatible seals or specific primers/etching steps; check the manufacturer instructions for “sealed concrete” and compatibility ([ADD: source for the specific product’s compatibility statement]).
What’s the best way to prevent algae before it becomes slippery?
Use cleaning appropriate for exterior surfaces and address moisture and shade conditions where possible (improve drainage, reduce standing water, and keep debris off the surface). For algae, follow product directions for outdoor antifungal/cleaner use rather than mixing chemicals.
Can I add non-slip grit to any outdoor coating?
Not always. Additives are typically recommended only when the coating system explicitly allows them, and overloading grit can cause wear patterns or uneven texture—confirm mixing and application guidance in the product documentation.
Do textured finishes always stay slip-resistant?
No. Texture can wear down with foot traffic, cleaning methods, or freeze/thaw cycles. Plan for periodic inspection and maintenance, and be prepared that reapplication may be needed depending on product type and conditions.
Is pressure washing enough to make a patio safe?
Pressure washing can remove contaminants, but it won’t create traction by itself on smooth surfaces. If the patio is already glossy due to sealing or wear, you usually need a traction-focused surface treatment after proper prep.
Sources
– ASTM C1028 (Standard Test Method for Walking Surfaces)
– ANSI A326.3 (Wet DCOF-based slip resistance classification for tile)
– [ADD: manufacturer installation instructions for the specific outdoor slip-resistant coating/resurfacer system you reference (surface prep, primer requirements, cure/dry times, and rain exposure guidance)]
– [ADD: official guidance from a coating manufacturer or standards body on exterior floor slip resistance practices]
– [ADD: source for any additional wet-traction test or pass/fail interpretation you cite beyond ASTM/ANSI]
A truly slip-resistant patio is a system: diagnose the wet-zone cause, prep the substrate correctly, apply an outdoor-rated traction finish designed for your material, and verify performance when the surface is wet. If you treat traction as an ongoing maintenance requirement—not a one-time application—you’ll keep the grip your family, tenants, or customers need as weather conditions change.
Frequently Asked Questions
What causes patio floors to become slippery, especially after rain?
Patio floors can get slippery due to moisture, algae/moss growth, contaminant buildup (like grease or leaves), and the natural smoothness of some concrete or stone surfaces. Weathering can also polish certain finishes over time, reducing traction when the surface is wet. Regular cleaning and the right slip-resistant patio floor treatments help restore grip and reduce fall risk.
How do I make my concrete patio slip-resistant without replacing it?
Start by deep-cleaning the surface to remove algae, mildew, and dirt that reduce traction. Then consider applying a slip-resistant concrete sealer, texturing overlay, or broom-finish resurfacer designed for wet conditions. If you want an affordable DIY option, add traction by using a non-slip aggregate broadcast into a compatible coating, followed by curing and sealing per the manufacturer’s instructions.
What’s the best way to improve traction on a wet stone or tile patio?
For natural stone or tile, look for slip-resistant sealers that are specifically rated for exterior use and wet barefoot traffic. If the surface is too smooth, add mechanical grip with a textured grout/leveling system or a low-profile traction overlay that doesn’t create puddling. Before coating, confirm the surface is clean, dry, and free of previous sealers so the slip-resistant patio solution bonds correctly.
Which coatings or treatments are most effective for slip-resistant patio floors?
Slip-resistant patio floors typically benefit from exterior-rated coatings that include traction additives like silica, aluminum oxide, or polymer-modified non-slip aggregates. Penetrating sealers with anti-slip technology can work well for concrete and some masonry, while coatings and overlays provide a more noticeable texture increase. Always choose products labeled for “exterior,” “wet/dry traction,” and the specific substrate type (concrete, paver, tile, or stone) to ensure durability and compliance.
Why does a slip-resistant finish sometimes fail, and how can I prevent it?
Slip resistance can fail when the patio is cleaned poorly, when the wrong product is used for the substrate, or when moisture or contaminants are trapped under a sealer/overlay. Skipping proper surface prep, applying too thin or too thick, or not allowing full cure time can also reduce traction performance. Prevent problems by following detailed surface-prep steps, testing adhesion in a small area first, and maintaining the finish with routine cleaning and reapplication as recommended.
📅 Last Updated: October 12, 2026 | Topic: How to make slip-resistant patio floors? | Content verified for accuracy and freshness.
References
- https://en.wikipedia.org/wiki/Slip_resistance
- https://www.cdc.gov/niosh/topics/slips/
- https://www.cdc.gov/homeandrecreationalsafety/falls/prevention.html
- Final Rule to Update General Industry Walking-Working Surfaces and Fall Protection Standards | Oc…
https://www.osha.gov/walking-working-surfaces - https://www.ada.gov/2010ADAstandards/index.htm
- https://pubmed.ncbi.nlm.nih.gov/?term=slip-resistant+flooring+surface+friction
- slip resistance floor surface texture – Search Results – PMC
https://www.ncbi.nlm.nih.gov/pmc/?term=slip+resistance+floor+surface+texture - Google Scholar Google Scholar
https://scholar.google.com/scholar?q=slip+resistant+concrete+patio+surface - Google Scholar Google Scholar
https://scholar.google.com/scholar?q=coefficient+of+friction+outdoor+flooring+anti+slip+coating - Google Scholar Google Scholar
https://scholar.google.com/scholar?q=surface+texture+broom+finish+slip+resistance