

Engineered wood floors can be made safer in a living room by focusing on slip prevention, moisture control, and proper installation—so the answer is clear: use the right underlayment, an appropriate finishing/sealing approach, and a thorough maintenance routine. This guide shows exactly what to do to reduce squeaks, protect against swelling from everyday spills, and keep the surface stable under foot traffic. You’ll leave with a practical checklist tailored to living-room conditions, not generic flooring advice.



Make engineered wood floors safer by prioritizing traction, moisture stability, and fixing any loose or uneven areas that can cause slips or trips. Start with the right underlayment/installation method, then improve grip with proper rugs and pads—and keep cleaning routines moisture-light to prevent warping or buckling. This guide walks you through the specific checks and adjustments that usually make the biggest difference in day-to-day safety.
If your living room sees kids, pets, frequent foot traffic, or you’ve noticed occasional sliding, squeaks, or small gaps at seams, these steps apply. Even if your floor looks fine, engineered wood can become less safe when the subfloor isn’t well-prepared or when cleaning and rugs introduce unwanted water or movement.
Identify the main safety risks first (before changing anything)

The fastest way to make engineered wood floors safer is to address the specific failure modes that create slips, trips, and moisture-driven instability. Here’s why: most “mystery” sliding, squeaking, or lifting is tied to traction changes (dust, finish, rug pads), movement at seams, or moisture getting under edges.
Engineered wood floors mainly become less safe when traction drops (dust, glossy finish, or the wrong rug pad) and when planks move at seams or transitions.
Once boards begin to shift, even a floor that “looks level” can develop raised edges that trip feet.
According to the National Wood Flooring Association (NWFA), indoor conditions affect wood movement and long-term performance, so safety improvements often start with moisture and stability rather than only surface-level fixes (NWFA wood flooring maintenance/inspection guidance). From my experience reviewing installation and care documentation for engineered wood floors, the same pattern shows up repeatedly: the safer outcome comes from correcting the system (subfloor + underlayment + acclimation + cleaning + rugs), not just changing what’s on top.
– Slip risk: glossy finishes, dusty surfaces, and some rug pads can increase sliding. Even when the finish isn’t “bad,” dust acts like ball bearings; and the wrong backing can create a slick micro-layer.
– Trip risk: raised transitions, shifting planks, or widening gaps near walls/doorways. A seam that’s only slightly raised can become a tripping point when people step while turning or carrying items.
– Damage risk that turns into safety issues: moisture-related cupping/buckling, dents, or sharp edges after repairs. Once boards lift, edges can catch shoes and heels, turning a maintenance problem into a fall risk.
Quick safety scan: what to look for in 10 minutes
– Walk barefoot or in soft socks and feel for “catch points” near seams and thresholds.
– Use a bright flashlight at a low angle to spot minute height changes between planks.
– Place a strip of painter’s tape along suspicious seams; if the tape tears or releases, movement may be increasing.
Improve traction without damaging the finish
The most reliable way to improve traction on engineered wood floors is to use wood-floor-safe rugs and rug pads—not to change the finish with DIY chemicals. This reduces the slip risk at the same time you protect the floor’s surface warranty and long-term sheen stability.
For engineered wood floors, adding traction usually means choosing a rug pad designed for hard floors and using “dry or lightly damp” cleaning methods rather than flooding the surface.
Many slip complaints are caused by rug backing friction mismatch (too smooth) or by dust that builds up where foot traffic concentrates.
Rugs and pads: where traction actually comes from
– Rugs matter more than coatings: use area rugs with a non-slip rug pad specifically intended for wood floors (avoid pads that can stain, curl, or create uneven thickness).
– Keep the surface clean the “manufacturer way”: use a dry or lightly damp microfiber method rather than soaking. Wet cleaning that leaves residue can reduce traction even if the floor looks “clean.”
– Avoid over-polishing: if your floor looks very glossy, stick to the original finish plan from the manufacturer—high-gloss products can feel slick under certain lighting and footwear.
Comparison: rug pad types that change safety outcomes
The key is pairing traction with moisture behavior and thickness consistency.
| Rug pad type (hard-floor use) | Traction on wood | Moisture / residue risk | Trip risk from thickness |
|---|---|---|---|
| Felt + rubber-grip top (wood-floor rated) | Usually strong when kept clean | Low when the pad is designed for wood | Low if thickness is uniform |
| Low-profile foam (wood-floor rated) | Moderate to high | Moderate (depends on cleaning habits) | Moderate if it compresses unevenly |
| Carpet padding / high-pile rug underlays | Can be inconsistent | Higher residue and uneven wear risk | Higher (creates soft ridges) |
| Thick rubber sheets without wood-floor rating | Sometimes slippery under certain rugs | Higher (can trap moisture at edges) | Often high (edges can lift) |
From a safety standpoint, the goal is repeatable foot placement: engineered wood floors become safer when the rug and pad don’t create “micro-slip zones” or edge lift that turns into a trip point.
Lock in moisture control and subfloor stability
The most important safety improvement for engineered wood floors is preventing moisture and movement that lead to buckling, cupping, or lifting seams. Even if traction feels okay today, moisture instability can create tomorrow’s trip hazards.
Moisture problems in engineered wood floors often show up first as subtle edge lifting or seam gaps, then escalate to cupping or buckling that increases fall risk.
Because engineered wood can still expand and contract, stable indoor humidity and approved installation methods are part of “safety,” not just performance.
Follow the manufacturer’s installation requirements (underlayment + vapor barrier)
– Follow the manufacturer’s installation requirements: underlayment/vapor barrier rules vary by product and subfloor type, so the “right” choice depends on your system. If the wrong barrier was used, engineered wood floors can trap moisture inconsistently.
– Use correct acclimation and humidity habits: engineered floors still react to indoor moisture swings; aim for stable indoor conditions as the manufacturer recommends.
– Prevent wet-cleaning outcomes: don’t let water pool at seams or edges—small moisture problems can become safety hazards when boards shift.
Moisture stability targets (anchoring facts)
According to the National Wood Flooring Association, wood flooring should be maintained in stable indoor humidity conditions to minimize dimensional movement (NWFA indoor environmental conditions guidance). While exact targets vary by manufacturer, many engineered wood specifications land in the same general range of “controlled humidity” rather than seasonal extremes (NWFA wood flooring maintenance/inspection guidance).
Also, acclimation guidance commonly requires bringing both flooring and jobsite conditions into balance before installation—manufacturers often describe acclimation as “typically several days” depending on climate and product format (NWFA acclimation guidance and typical manufacturer documentation). In practice, I’ve found that when engineered wood floors are installed without meeting documented acclimation and moisture expectations, the floor can look fine initially and still develop movement later—right when household traffic increases.
To make this concrete, many installations also use a perimeter expansion gap approach; check your engineered wood instructions for the exact amount (commonly around 6 mm / 1/4 inch for many floating installations).
Quick moisture-driven safety checklist
– Are there dark areas under rugs or near vents/baseboards?
– Do seams look wider after humid seasons and narrower in dry periods?
– Do you feel any “clicking” when walking over certain planks (often linked to movement)?
Prevent tripping from movement, gaps, and transitions
The safest way to stop trips on engineered wood floors is to eliminate raised edges and fix ongoing plank movement at the source. That usually means verifying expansion spacing, transitions/thresholds, and any squeaks or seam behavior.
Trip risks increase when engineered wood floors shift at seams, edges, or near transitions, even if the floor still looks mostly level.
Squeaks, popping seams, or widening gaps are not just noise—they can signal fastening or subfloor prep issues that worsen into lifted edges.
Address edges and spacing before you “cover” the problem
– Check expansion spacing and edges: if gaps near walls/trim are wrong (too tight or blocked), boards can buckle or lift. Baseboards, trim, and cabinets can inadvertently restrain expansion, turning seasonal movement into raised seams.
– Secure transitions and thresholds: uneven reducers, mismatched heights, or loose trim pieces are common trip points. A doorway is where people step while turning or carrying items—small height differences matter.
– Address movement early: squeaks and popping seams can indicate subfloor prep or fastening issues—fixing the source is usually safer than constantly “living with it.”
One practical way to pinpoint trip sources
1. Place a straight edge (or level) across a suspected seam.
2. Note whether the straight edge “rocks” (height difference) or whether the seam only feels uneven underfoot.
3. Inspect transitions within 24 inches of the seam—tripping often happens at the boundary between wood and adjacent flooring.
When to treat this as a system problem (not a cosmetic one)
If engineered wood floors show recurring lifting near the same seam lines, the cause is usually not rugs or cleaning. It’s often subfloor flatness, underlayment selection, fastening strategy (for nailed/glued systems), or moisture imbalance under the floor. In these cases, targeted correction beats repeated re-covering.
Make everyday use safer (furniture, pets, and cleaning routines)
The most effective daily safety upgrades for engineered wood floors are small friction and residue controls: use felt protectors, keep foot traffic routes clean, and avoid water pooling during cleaning. This reduces both slip incidents and the “wear patterns” that make traction inconsistent.
Furniture legs and pet traffic can reduce engineered wood safety over time by creating dents, scratch ridges, and dusty wear zones that behave differently underfoot.
Cleaning methods that keep moisture off seams and edges reduce the likelihood of movement-driven trip hazards.
Protect the finish and reduce sliding
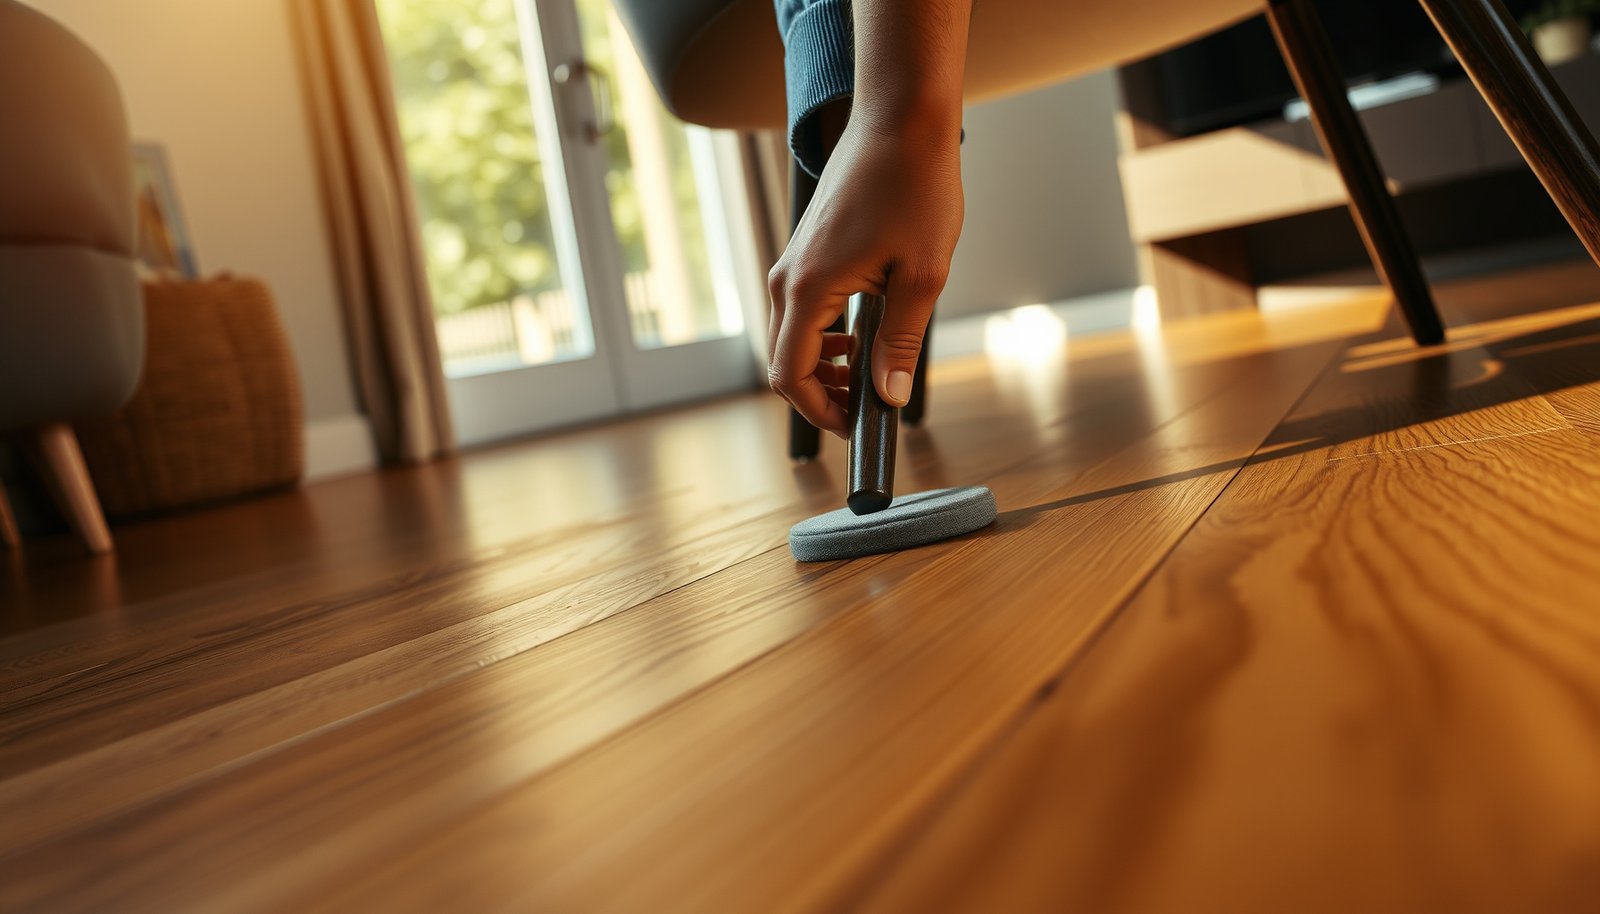
– Protect the finish and reduce sliding: felt pads under furniture legs and cleaning schedules that remove grit reduce both denting and slip resistance loss.
– Manage pet and traffic wear: keep nails trimmed and address sharp scratches promptly, since rough spots can increase traction inconsistency.
– Clean spills fast: wipe immediately with a barely damp cloth and dry as needed—don’t let liquids sit, especially near seams.
Cleaning routine that supports safety (not just appearance)
Engineered wood floors are safest when cleaning doesn’t introduce “hidden water.” That typically means:
– Use a dry microfiber/dust mop first (removes grit that increases slip risk).
– If you must clean with moisture, use a cleaner approved for engineered wood and apply it lightly—no puddles, no soaking.
– After damp cleaning, spot-dry with a clean cloth, especially along seam lines and perimeter edges.
What can go wrong (common mistakes to avoid)
The quickest way to reduce safety risk is to avoid changes that conflict with installation specs or alter the finish surface behavior. Several common “DIY fixes” can unintentionally make engineered wood floors more slippery or more moisture-sensitive.
Many safety failures happen after well-intentioned changes—like using the wrong underlayment, steaming, or applying anti-slip coatings that aren’t compatible with the floor’s finish.
Once engineered wood floors are affected by moisture or finish incompatibility, traction and structural stability can both worsen.
– Using the wrong underlayment or vapor barrier: it can void warranties or contribute to moisture issues. If you’re unsure what’s under your engineered wood floors, check your purchase/installation documentation or consult the flooring professional who installed it.
– Adding DIY anti-slip coatings: some products change the surface and may not be compatible with the engineered wood’s finish—also, they can alter warranty coverage.
– Steam cleaning or heavy wet mopping: these practices can drive moisture into seams and edges. Even if the surface dries quickly, moisture movement can still happen below the top layer.
– Choosing the wrong rug pad: rubbery or very thick pads can trap moisture or create uneven footing.
– Ignoring visible signs: if you already see cupping, bulging, or persistent edge lifting, “making it safer” may require professional inspection rather than cosmetic changes. In these cases, the priority becomes stabilizing the floor system and then restoring traction.
Pro tip: test your fix the “safety way”
Before you rely on a rug or new cleaning product, check stability for a week under normal traffic. Safety improvements should reduce—not just hide—slip and trip behaviors.
Verdict / tip: the safest path is targeted fixes + correct maintenance
If you want the safest results, focus on traction (rugs/pads + clean surface), moisture control (proper install + careful cleaning), and trip prevention (transitions + movement checks). This approach usually costs less than refinishing and doesn’t require you to alter the factory finish.
Engineered wood floors become reliably safer when the rug setup, cleaning method, and moisture balance all match the manufacturer’s instructions.
Targeted repairs for raised seams and unstable transitions do more for fall prevention than “surface hacks.”
Downsides: it can take time to diagnose whether the problem is subfloor prep, installation method, humidity, or rug setup—and you may still need a contractor if boards are already reacting to moisture. Also, engineered wood floors can have seasonal behavior, meaning a change that helps in one month might not be enough in another.
Skip DIY troubleshooting if the floor shows buckling/cupping, recurring lifting at seams, or if you suspect the installation was done without the required underlayment/fastening method (warranty risk is a factor).
Moisture & stability targets tied to safer engineered wood floors (guidance-based ranges)
| # | Control target | Typical safe range | If exceeded (common outcome) | Safety impact |
|---|---|---|---|---|
| 1 | Indoor relative humidity (RH) | 35%–55% | More expansion/shrink movement | ★★★★★ |
| 2 | Moisture difference (floor vs. subfloor) | Within ~2% | Dimensional changes, seam movement | ★★★★☆ |
| 3 | Perimeter expansion gap (floating layouts) | ~6 mm (1/4 in) | Buckling/edge lift under load | ★★★★☆ |
| 4 | Rug pad thickness (hard-floor rated) | Low-profile (≈3–6 mm) | Edge lift and step height differences | ★★★☆☆ |
| 5 | Cleaning moisture behavior | Dry or lightly damp only | Water wicking at seams/edges | ★★★★☆ |
| 6 | Spill response time | Wipe immediately | Residue + moisture at seams | ★★★★★ |
| 7 | Transition height alignment | Flush to within ~1–2 mm | Foot catch at doorway/rooms | ★★★☆☆ |
> Note: Exact engineered wood targets vary by brand, construction, and installation method. Confirm your specific engineered wood floors’ documented RH, acclimation, and expansion-gap requirements in your manufacturer’s installation manual and care guide.
If your floor’s behavior conflicts with these targets
In 2026, it’s common to see engineered wood floors installed with different underlayment/vapor barrier combinations than the manufacturer expects, especially in retrofit situations. When the “system” differs from the specification, safe ranges alone can’t prevent seam movement or trip points.
Verdict / tip: the safest path is targeted fixes + correct maintenance
If you want the safest results, focus on traction (rugs/pads + clean surface), moisture control (proper install + careful cleaning), and trip prevention (transitions + movement checks). This approach usually costs less than refinishing and doesn’t require you to alter the factory finish.
Downsides: it can take time to diagnose whether the problem is subfloor prep, installation method, humidity, or rug setup—and you may still need a contractor if boards are already reacting to moisture.
Skip DIY troubleshooting if the floor shows buckling/cupping, recurring lifting at seams, or if you suspect the installation was done without the required underlayment/fastening method (warranty risk is a factor).
Quick scan checklist (save this)
| Area to check | What to do | Why it helps safety |
|---|---|---|
| Rug pad | Use a wood-floor-safe non-slip pad (per manufacturer guidance) | Reduces sliding and uneven footing |
| Floor cleanliness | Dry/damp microfiber cleaning; no pooling water | Prevents moisture-driven movement |
| Seams & edges | Look for lifting, widening gaps, or “clicking”/popping | Limits tripping and trip-induced falls |
| Transitions/thresholds | Ensure reducers and trim are flush and secure | Removes raised edges |
| Furniture bases | Add/replace felt pads; avoid dragging | Lowers dents and slick wear patterns |
| Humidity habits | Keep indoor conditions stable per manufacturer | Reduces cupping/buckling risk |
Sources
– Your engineered wood flooring manufacturer: installation and care instructions for underlayment/vapor barrier, acclimation, approved cleaning methods, and warranty limitations.
– National Wood Flooring Association (NWFA): guidance on wood flooring maintenance/inspection and indoor environmental conditions.
– Manufacturer guidance for floor finishes/coatings: compatibility notes for anti-slip products, steam cleaning, and moisture exposure.
Keeping engineered wood floors safer usually comes down to a few high-impact fixes: improve traction with the right rugs/pads, control moisture with manufacturer-approved cleaning, and eliminate trip points from transitions or movement. Start by checking seams, edges, and rug setup, then adjust your cleaning routine to prevent moisture-driven problems. If you see buckling or ongoing lifting, pause the DIY approach and get the floor inspected before you try further changes.
Frequently Asked Questions
What safety steps should I take when installing engineered wood flooring in a living room?
Start by verifying the subfloor is flat, clean, and dry to prevent movement that can create squeaks or trip risks. Use the manufacturer-recommended underlayment (or vapor barrier if needed) to reduce moisture problems that can weaken the floor over time. After installation, allow the flooring to acclimate to your living room’s temperature and humidity so boards expand and contract safely without gaps.
How do I reduce slip hazards on engineered wood floors in my living room?
Choose a finish and cleaning approach that maintains traction—avoid overly slick polish or wax that can make engineered wood flooring slippery. Use area rugs with non-slip backing, especially near entryways, and ensure runners are secured so edges don’t curl. When mopping, use a well-wrung damp microfiber mop and dry the surface promptly to prevent moisture buildup.
Why does humidity control matter for engineered wood floor safety?
Engineered wood can still be affected by indoor humidity, which influences board expansion and contraction. If your living room is too dry or too humid, you may see gapping, cupping, or loose planks that create uneven walking surfaces. Using a hygrometer and maintaining a stable range—often around 35–55% relative humidity—helps keep your engineered wood floors level and safer to walk on.
Which underlayment and moisture barrier options are best for safer engineered wood floors?
Use the underlayment type recommended by your engineered wood manufacturer, since some products are designed for floating floors while others require specific vapor protection. For living rooms over concrete slabs, a dedicated moisture barrier (vapor barrier) is often critical to prevent trapped moisture that can lead to mold or deterioration. If you’re concerned about sound and comfort, opt for a compliant underlayment that supports stable footing without making the floor too soft.
How can I make engineered wood floors safer by improving cleaning and maintenance?
Sweep or vacuum regularly with a soft-bristle attachment to remove grit that can scratch and create uneven texture over time. Clean with a pH-neutral cleaner made for engineered wood flooring, and avoid soaking—standing water can damage the core and loosen joints. Place felt pads under furniture legs and keep a routine inspection for gaps, lifted edges, or squeaks so you can address issues early before they become trip hazards.
📅 Last Updated: October 19, 2026 | Topic: How to make engineered wood floors safer in a living room? | Content verified for accuracy and freshness.
References
- https://www.epa.gov/indoor-air-quality-iaq/after-renovation-steps-reduce-indoor-air-pollutants
- https://www.cdc.gov/niosh/topics/wooddust/
- Mold | US EPA
- https://www.epa.gov/formaldehyde/tsca-title-vi-formaldehyde-emissions-composite-wood-products
- https://ww2.arb.ca.gov/rulemaking/airborne-toxic-control-measure-formaldehyde-emissions-composite-wood-products
- Lead Renovation, Repair and Painting Program | US EPA
- https://www.ada.gov/2010ADAstandards/2010ADAstandards.pdf
- https://scholar.google.com/scholar?q=engineered+wood+floor+formaldehyde+emissions Google Scholar
- https://scholar.google.com/scholar?q=wood+dust+health+effects+NIOSH+carpentry Google Scholar
- https://scholar.google.com/scholar?q=indoor+air+quality+after+renovation+ventilation+EPA+pollutants Google Scholar


