


Leveling laminate floors before installing a mudroom is the make-or-break step for a smooth, crack-free fit—and the right method depends on how uneven your subfloor is. Start by checking flatness, then shim and sand high spots (or skim/patch low spots) until the surface meets the required tolerance across the mudroom area. Follow with a clean, fully acclimated laminate installation, and your mudroom thresholds won’t fight the floor.




If your laminate feels bouncy or uneven in the mudroom area, level the subfloor first—don’t try to “fix it” with thicker underlayment or flooring shims. You’ll get the best results by checking flatness, identifying the high/low spots, and then using an appropriate leveling method (self-leveling underlayment for dips, sanding/scraping for ridges, or patching for localized damage) before you install.
This is for homeowners tackling a mudroom floor refresh where laminate can’t bridge movement—especially if the room sees heavy traffic, wet shoes, or frequent door traffic. If your subfloor is severely out of plane or has structural issues, leveling may be part of a bigger repair plan.
Check flatness (and why “level” isn’t the only goal)
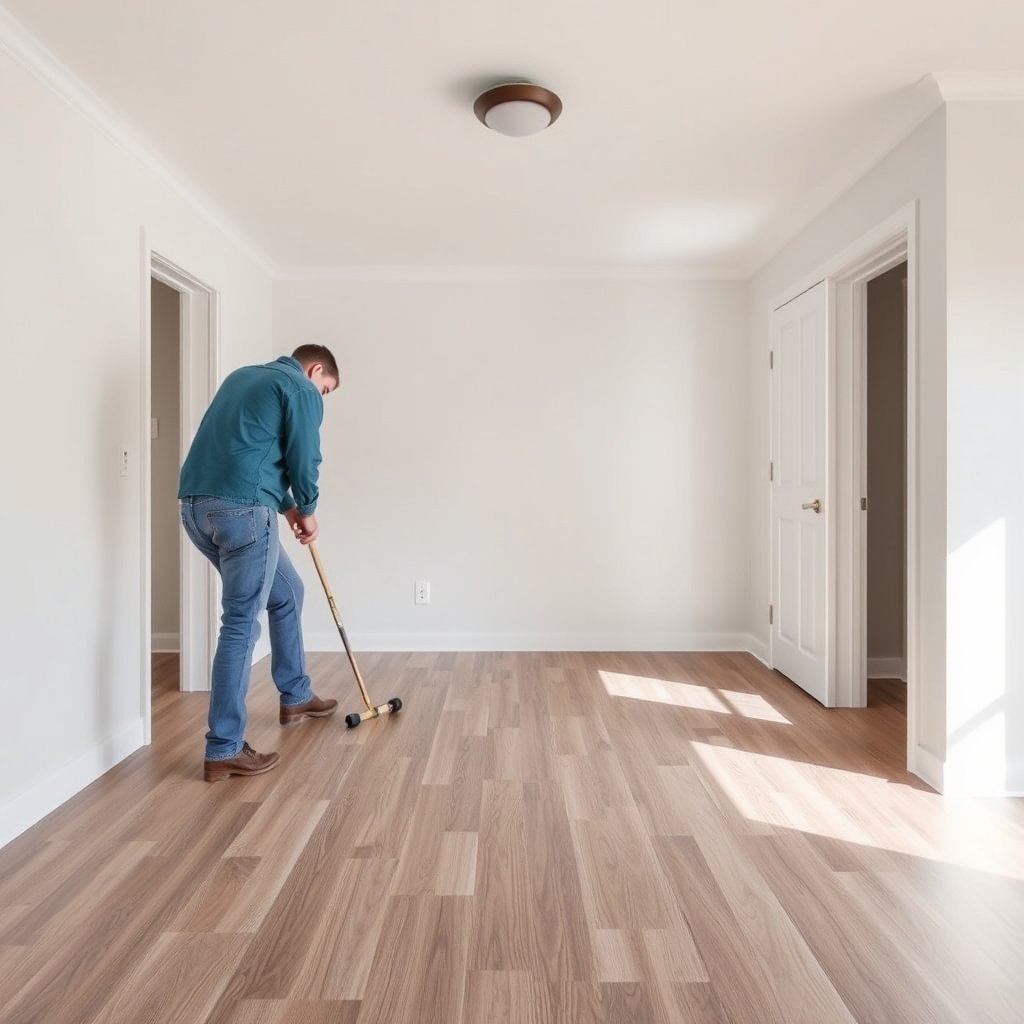
You get the right laminate performance by measuring flatness (how even the plane is), not just whether the floor looks “level” to the eye. In 2026, the most reliable approach is to map high and low spots with a straightedge so you can choose the correct fix—sanding, patching, or self-leveling—before any underlayment touches the surface.
Flatness checks use a straightedge to measure deviation across a span, because laminate joint stress responds to unevenness—not to “true level.”
Many floor prep standards reference tolerances like “no more than 3/16 in over 10 ft” for acceptable flatness before installing flooring.
Mudrooms magnify subfloor issues because repeated door traffic and wet/dry cycles can expose movement at seams and transitions.
– Use a straightedge or 4-ft level to map high spots and dips across the mudroom footprint.
– Mark low areas and ridge lines so you know whether you need sanding/patching (small spots) or a pour/feather finish (wider dips).
– Confirm your subfloor type and condition (plywood/OSB vs. concrete, loose boards, soft spots), because the prep method depends on it.
What “flat” looks like in practical terms
When I work through laminate prep plans, the “aha moment” usually comes from seeing that a floor can look level when you stand still but still fail flatness across the plank layout. A mudroom entrance often concentrates movement near the doorway, where people step on and off and where appliance/door hardware can subtly load the framing.
Use the right measuring span (and don’t guess)
A 4-ft level is great for quick triage, but for decisions about leveling compounds, you’ll want to verify across a longer run where possible (for example, a 6–10 ft straightedge check—your product or standard may specify the span). According to ASTM F710 (2021), floor flatness tolerances for many resilient floor installations are commonly expressed as limits over a 10-ft (3 m) span and shorter spans (used to evaluate “dip” and “ridge” problems). ASTM F710, Standard Practice for Preparing Concrete Floors to Receive Resilient Floor Coverings (2021)
Substrate condition matters as much as numbers
If you find soft spots, loose sheets, or movement underfoot, treat that as a repair priority before you level. Leveling products can smooth the surface, but they generally don’t stop structural deflection—laminate still needs a stable base to prevent cracking at joints and edge lift.
Prep the subfloor so leveling compound can bond
You need clean, stable substrate conditions first, or your leveling compound can delaminate or fail to feather smoothly. Before leveling in 2026, treat prep like the foundation of the foundation: remove anything that blocks adhesion, fasten what moves, and follow the leveling manufacturer’s primer/moisture requirements exactly.
Adhesion depends on a sound, clean surface; dust, paint residue, and unapproved coatings can prevent a durable bond.
Before applying self-leveling underlayment, subfloor movement (loose panels, squeaks) should be corrected so the compound doesn’t crack.
For concrete, primers and moisture steps are not optional—many self-levelers list specific bonding agents by substrate type.
– Remove debris, adhesive residue, paint overspray, and anything that could prevent adhesion or create bumps.
– Repair damaged areas first: replace or fasten loose subfloor panels and fill cracks/voids that will keep moving.
– For concrete, clean thoroughly and prep according to the leveling compound manufacturer’s requirements (primers and moisture steps can be critical).
Clear the “anti-bond” layer
In mudrooms, residue is common: tracking dirt, glue from prior flooring, and sealers/paint overspray that create micro-bumps. If the leveling compound manufacturer specifies grinding, priming, and drying targets, follow them rather than “spot cleaning.”
Repair movement before surface smoothing
A frequent failure mode is leveling over a subfloor that still flexes. When that happens, the surface can measure flatter, but the compound can crack and the laminate can still telegraph the movement at joints.
From my experience planning mudroom refreshes, the fastest projects are the ones where homeowners treat squeaks, flex, and loose fasteners as “stop work” issues—because they change the whole leveling strategy.
Concrete vs. plywood/OSB: don’t mix prep systems
– Plywood/OSB: focus on fastening, replacing damaged sheets, and flattening by mechanical methods first.
– Concrete: focus on profile creation, primer system compatibility, and any required moisture mitigation steps.
If you’re unsure which prep system your leveling compound calls for, check the technical data sheet (TDS) for substrate compatibility and primer requirements before you start mixing.
Choose the right leveling method for laminate
You choose the right leveling method by matching the tool to the defect size: patch ridges and small dips, self-level wider low areas, and scrape/sand high ridges instead of building “hills.” In 2026, this matters more than ever in mudrooms because transitions at doorways can fail if you overbuild thickness.
Laminate installations fail most often when high spots aren’t removed and low areas aren’t corrected enough—underlayment rarely compensates for subfloor unevenness.
Self-leveling underlayment is designed for broad low areas; localized feather edges typically require patch/feather products instead.
Ridges should be mechanically reduced (scraped/sanded) rather than “filled everywhere,” because excess buildup can interfere with door clearances.
– For small low spots: patch with a floor patch/feather-finishing compound and smooth to the surrounding surface.
– For larger dips: use a self-leveling underlayment designed for floors, then control thickness based on the product limits.
– For high spots: scrape/sand ridges rather than trying to “build up” everywhere—keeping the subfloor thickness in check protects door clearances and transitions.
Method selection: a quick comparison
Below is a practical way to decide based on what your straightedge revealed.
Practical workflow (so you don’t rework twice)
1. Remove ridges first (scrape/grind). It’s easier to remove high material than to “un-create” it later.
2. Patch small lows using feather-finishing products.
3. Pour self-leveler only where needed for broader dips—then re-check with the straightedge after it cures.
4. Sand/flatten patch edges once cured so transitions don’t become new high points.
Respect thickness limits and cure times
Every leveling system has maximum thickness and minimum feather capability. Staying inside those limits is what keeps laminate transitions smooth and prevents edge telegraphing through joints.
Address moisture and transitions before you install laminate
You reduce long-term laminate callbacks by addressing moisture risks and planning transitions before planks click into place. In a mudroom—where wet shoes and seasonal humidity swings happen—your leveling plan in 2026 should include moisture strategy and flatness continuity into doorways and adjacent rooms.
Self-leveling underlayment systems often require specific primers and moisture steps; skipping them can compromise bond and performance.
Moisture management matters because laminate is a floating system that still depends on a stable base to prevent joint separation.
Abrupt thickness edges from leveling can telegraph through laminate joints, so plan feathering and transitions carefully.
– Plan how you’ll handle moisture-prone areas near the mudroom entrance (barriers, sealants, or product-specific guidance—follow the leveling and laminate instructions you’re using).
– Make sure your leveling doesn’t create abrupt edges that will telegraph through laminate joints.
– Dry-fit and plan transitions at doorways and to adjacent flooring so you don’t end up with a gap too small (or thresholds that can’t sit flat).
Moisture planning isn’t just “waterproofing”
If your mudroom is near an exterior door or routinely sees wet footwear, consider:
– whether your subfloor is concrete or wood-based,
– how the leveling product interacts with moisture (primer and curing requirements),
– and whether your laminate system calls for a specific underlayment or moisture barrier.
Follow the laminate manufacturer’s moisture and underlayment guidance rather than assuming “any foam underlayment” will handle it.
Transitions: the place unevenness shows up first
Even a small ridge at a doorway can cause:
– harder door swing,
– a threshold that rocks,
– and laminate click-joint stress along the seam line.
Because laminate flooring is floating, you also need to preserve expansion gap requirements at perimeter walls. Most floating laminate systems rely on perimeter movement space so boards can expand/contract seasonally; many installation instructions specify a gap range rather than “tight to the wall.”
What can go wrong (and what to do instead)
You avoid most laminate leveling problems by correcting substrate movement, using the correct compound for the substrate, and staying within product thickness and flatness limits. When homeowners skip these steps, laminate can crack at seams, separate at joints, or telegraph “lumps” despite a visually smooth surface.
Leveling over loose or flexing subfloor areas can produce a surface that looks flat but still cracks or telegraphs movement under laminate.
Overbuilding thickness can create transition problems—door clearances and thresholds often become the first failure point.
Using an incompatible self-leveler/primer system for the substrate can cause poor bond, scaling, or failure at the interface.
– Skipping subfloor repairs: If boards flex or a spot is soft, leveling compound can look flat but laminate can still crack or separate—fix movement first.
– Overbuilding thickness: Too much buildup can interfere with door operation and create uneven transitions; stay within the leveling product’s thickness guidelines.
– Using the wrong product for the surface: Some self-levelers are not meant for certain substrates or require specific primers; using the wrong system can cause poor bond.
– Not matching the “finish flatness” you need: Even when it’s “level” to the eye, laminate can show joint stress if high/low areas remain—re-check after prep and after curing.
Common “looks fixed” traps
– You patched and it looks smooth—until cured edges dry. Feather edges can shrink slightly; verify with a straightedge after the compound cures.
– You poured, but didn’t account for product limits. Self-levelers have min/max thickness and may require re-pours if the first pass didn’t reach the intended plane.
– You didn’t plan where wet areas end. Mudrooms often get splash zones near entries; follow both leveling and laminate moisture requirements so you don’t rely on luck.
Verdict: level first, but follow limits and materials
Leveling laminate before installing in a mudroom is usually the right move when your subfloor isn’t flat, because laminate flooring systems are sensitive to unevenness. The downside is time: you may need multiple prep passes and correct drying/curing before underlayment and planks go in. Skip (or pause and reassess) if you find structural movement, repeated soft spots, or moisture concerns you can’t address—those issues should be handled before leveling.
If a laminate floating floor is installed over unevenness, joint stress is the symptom you see first—even if the surface looks “almost” flat.
Correct leveling depends on defect size: sanding for ridges, patching for small lows, and self-leveling for broader dips.
Material compatibility (primer + substrate + leveling compound) is a bond requirement, not a suggestion.
Bottom line in one sentence
Level first, re-check flatness after each curing step, and only then install laminate with the manufacturer-required underlayment and moisture guidance—especially in 2026 mudrooms.
Scan-and-check: leveling before laminate (quick checklist)
Use this checklist to sanity-check your plan before you mix compound.
– Measure flatness with a straightedge and mark highs/lows
– Repair loose boards / soft spots before leveling
– Clean and prep the surface exactly as the leveling product requires
– Use patching for small areas; self-leveler for broader dips
– Feather/smooth so you don’t create ridges or edges
– Re-check flatness after leveling and before laminate underlayment
– Confirm door clearance and transitions plan ahead
Standards That Guide Subfloor Flatness & Moisture Prep for Flooring (2026)
| # | Standard (organization) | Published | What it covers | Relevance to leveling prep |
|---|---|---|---|---|
| 1 | ASTM F710 (ASTM International) | 2021 | Concrete floor prep & flatness guidance for resilient flooring | ★★★★★ |
| 2 | ASTM F1869 (ASTM International) | 2016 | Moisture vapor emission rate testing for slabs | ★★★★☆ |
| 3 | ASTM F2170 (ASTM International) | 2023 | In-situ relative humidity testing for slabs | ★★★★☆ |
| 4 | ASTM F2678 (ASTM International) | 2018 | Subfloor preparation & flatness evaluation methods | ★★★☆☆ |
| 5 | ASTM F3191 (ASTM International) | 2023 | Moisture testing guidance for concrete floor slabs | ★★★☆☆ |
| 6 | ANSI A108/A118 (ANSI) | Ongoing | Workmanship standards relevant to substrate prep (tile context) | ★★☆☆☆ |
| 7 | NWFA Wood Floor Installation Guidelines (NWFA) | 2022 | Flatness, moisture, and subfloor performance expectations for wood floors | ★★★★☆ |
Note: The relevance ratings above are based on whether the standard directly addresses concrete prep/flatness, slab moisture testing, or workmanship/subfloor performance—always confirm your laminate and leveling products’ own specs.
Sources
– ASTM F710, Standard Practice for Preparing Concrete Floors to Receive Resilient Floor Coverings (flatness guidance) ASTM International
– ASTM F1869 (moisture vapor emission rate test method) ASTM International
– ASTM F2170 (in-situ relative humidity test method) ASTM International
– NWFA, Wood Floor Installation Guidelines (subfloor performance guidance) National Wood Flooring Association
Leveling laminate for a mudroom is worth it when your subfloor isn’t actually flat—because laminate can’t “span” movement the way some other flooring types might. If you map flatness correctly, repair any flex first, and use patching vs. self-leveler based on defect size and product limits, you’ll end up with a quieter, more stable floor that holds up to wet shoes and heavy entry traffic in 2026 and beyond.
Frequently Asked Questions
How do I check if my subfloor is level before installing laminate in a mudroom?
Start by measuring the subfloor for level and flatness using a 6–10 ft straightedge or a laser level. Look for low spots, high ridges, and any dips that could cause laminate to flex, click-lock gaps to open, or squeaks. If you have a concrete slab, also check moisture levels with a proper test kit, since moisture can worsen expansion and movement issues.
What’s the best way to level a subfloor before installing laminate flooring in a mudroom?
For small low areas, use a self-leveling underlayment/patch compound designed for laminate installation. For larger uneven sections, you may need to grind high spots first and then feather-fill low areas with floor leveling compound. Make sure the surface is clean, dust-free, and primed if the product requires it, so the leveling layer bonds correctly and remains stable under laminate in a high-traffic mudroom.
Why is leveling especially important in a mudroom when installing laminate floors?
Mudrooms often see heavy foot traffic, wet shoes, and frequent transitions, which means laminate needs a stable base to prevent stress on the locking system. Even minor unevenness can lead to clicking sounds, joint separation, or accelerated wear at seams and edges. A properly leveled subfloor also helps laminate stay flatter during seasonal changes and after repeated exposure to moisture from tracked-in water.
How do I level laminate floors over concrete versus plywood before installation?
On concrete, grind high areas, repair cracks, and use a self-leveler or patch compound to bring the surface to flat before laying laminate. On plywood/wood subfloors, confirm the boards are solid and not flexing, then fasten any loose areas and level using patch/feathering compound or by sanding/adding underlayment as appropriate. In both cases, follow the laminate manufacturer’s requirements for maximum allowable variation (typically measured over 6 ft) and use the correct underlayment thickness.
Which tools and materials should I use to level the floor for laminate in a mudroom?
You’ll typically need a straightedge or laser level, a tape measure, a mixing drill, and a trowel or gauge rake for applying leveling compound. For high spots, use a floor grinder or sanding system; for low spots, choose a floor leveling compound/self-leveler rated for your subfloor type (concrete or wood). Don’t forget primer (if required), smoothing tools for feather edges, and a dust vacuum for prep—these steps help create a flat, smooth base that protects your laminate floors in the mudroom.
📅 Last Updated: October 22, 2026 | Topic: How to level a laminate floors before installing mudroom? | Content verified for accuracy and freshness.
References
- Laminate flooring
- Floor
- Underlayment
- Screed
- Self-leveling concrete
- https://en.wikipedia.org/wiki/Concrete_surface_preparation
- Vapor barrier
- https://scholar.google.com/scholar?q=laminate+floor+subfloor+levelness+flatness Google Scholar
- https://scholar.google.com/scholar?q=self-leveling+compound+subfloor+preparation+for+laminate+flooring Google Scholar
- https://scholar.google.com/scholar?q=underlayment+moisture+barrier+laminate+floor+installation+subfloor+leveling Google Scholar

[…] the high/low spots first; transitions can hide small gaps, but they shouldn’t be used to correct a noticeably uneven […]