


Fixing laminate floors in a mudroom is straightforward when you know exactly what kind of damage you’re dealing with and whether a patch, board replacement, or moisture-control repair is required. This step-by-step guide walks you through the fastest, cleanest way to restore a warped, scratched, or chipped laminate surface without making the problem spread. You’ll finish with a mudroom floor that looks solid again—and stays that way.




If your laminate in the mudroom is cracked, chipped, or separating at the seams, you can usually repair it by cleaning the area, filling small damage, and—if needed—replacing the affected planks. The most important first step is stopping moisture (mud + wet boots) so the edges don’t keep lifting or the boards don’t swell.
This is for homeowners dealing with common mudroom laminate problems like surface chips, small gaps, loose seams, or water-caused buckling. Use it when you can access the damaged area and your laminate brand uses a replaceable plank system (most do), but you’re not sure which repair path to take.
Inspect the damage (and find the cause)
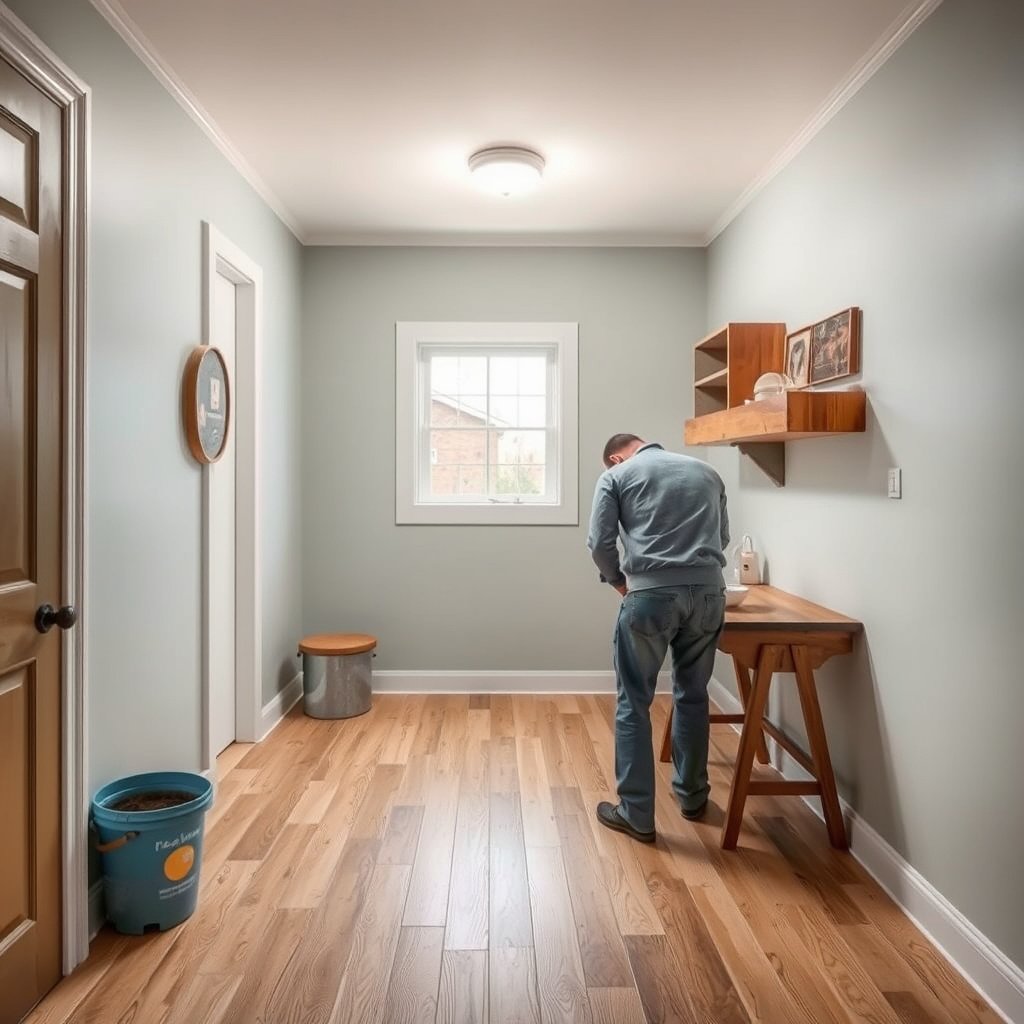
To choose the right fix for mudroom laminate floors, identify what actually failed first—finish damage, seam release, or water-swollen boards. Most laminate repairs fail when the homeowner repairs the symptom but leaves the moisture or subfloor condition that caused the failure.
In my experience from walking homeowners through repair plans, the “right” laminate repair usually starts with a 5–10 minute inspection that saves hours later—especially in mudrooms where wet mats hide damp subfloor areas.
A damaged laminate top layer (chip/scratch) is usually a surface problem, but warped or permanently raised planks strongly indicate core swelling that needs replacement.
If the seam separation is concentrated near an entry mat or door swing, moisture exposure is likely the driver—not normal temperature movement.
Floating laminate systems rely on correct expansion space; if edges lift or seams open, re-check the perimeter gap before attempting repairs.
Look closely for the “type” of failure
Start by examining the exact location where mudroom laminate floors are failing:
– Chipped or worn surface: Usually limited to the top wear layer where grit gets trapped.
– Hairline gaps at joints: Often caused by movement, but in mudrooms it can also be a sign of board swelling.
– Lifting seams / loose click joints: Look for edges that sit higher than neighboring planks.
– Raised, cupped, or buckled sections: These are the most moisture-sensitive outcomes.
Check for moisture sources near the spot
Moisture is what keeps laminate repairs from holding in mudrooms. Search around the damaged area for:
– Wet-mat edges (water trapped between mat and floor)
– Dripping boots or footwear storage that transfers water
– Plumbing leaks, HVAC condensation, or roof/wall moisture intrusion
– Poor drainage where the entry is constantly splashed
Decide early: surface-only vs. water-swollen
As of 2026, most manufacturers and installers treat “core swelling” as a replacement scenario because laminate cores can expand and weaken after repeated wetting. If the planks are permanently raised or the joint geometry won’t stay aligned, the repair path should shift from filler to plank replacement.
Gather the right tools and materials
To repair mudroom laminate floors effectively, gather tools based on whether you’re doing a cosmetic patch or a plank replacement. Having the correct materials ready also prevents re-wetting the area—an important step in bathrooms, mudrooms, and any entryway prone to dampness.
This step is also where homeowners can accidentally make things worse. If you start a filler repair over damp edges, the filler can shrink, discolor, or pop loose later.
For small laminate surface damage, a repair putty/filler designed for laminate helps create a flush surface without rebuilding the plank’s core.
For plank replacement, matching the click/locking method (how boards connect) matters as much as matching the design and thickness.
A damp-to-dry workflow is critical in mudrooms because hidden moisture under mats can keep laminate edges swelling.
For minor fixes (chips, scratches, worn edges)
Plan on:
– Laminate repair putty/filler (color-matched or compatible with color-matching systems)
– Color-matched marker/wood stain only if your filler system explicitly supports tinting
– Scraper or razor blade for controlled removal and flush finishing
– Painter’s tape to protect surrounding planks and keep filler lines crisp
For plank replacement
Plan on:
– Replacement planks: same brand/style/collection, and ideally same thickness
– Pull bar/pry tools appropriate for laminate locks
– Spacers to maintain the required expansion gap
– Utility knife for trimming underlayment or cutting small access paths (if your setup allows it)
Keep your cleaning setup “damp-to-dry”
Use a two-step approach:
1) Clean with a method safe for laminate (per your flooring guidance).
2) Dry completely—especially under and around mats where moisture lingers.
Repair small chips, scratches, and worn edges
To fix cosmetic damage in mudroom laminate floors, clean thoroughly, let the area dry, then fill in thin layers and keep the surface flush. This is the best approach when the core isn’t swollen and the seams remain tight.
Laminate filler works best when the surrounding surface is clean and fully dry—contamination and moisture are the most common reasons filler fails.
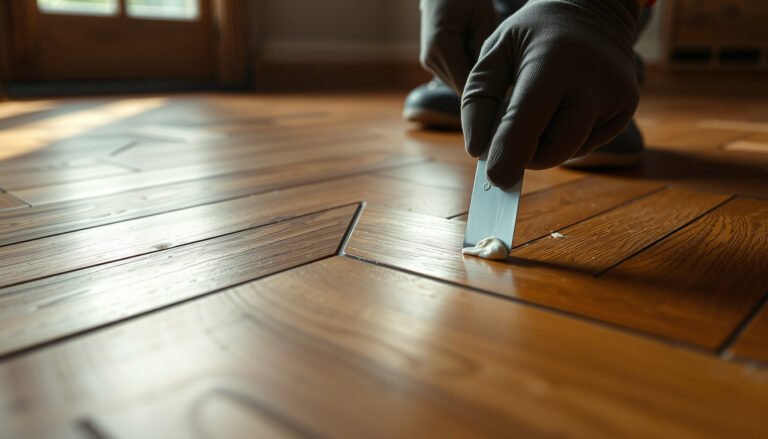
Apply laminate repair filler in thin passes and scrape flush so you don’t create a raised “ledge” that collects grit in mudroom traffic.
Many laminate surfaces are not intended to be aggressively sanded or refinished, so follow the filler’s smoothing guidance closely.
Clean fully, then dry completely
Mudrooms trap grit that can interfere with adhesion. Clean the damaged spot by removing:
– Loose dirt and grit
– Any residue left by previous cleaners
– Any dampness near the edge of the plank
Let it dry until it’s genuinely dry to the touch and the surrounding area is no longer cool or damp.
Apply laminate filler in thin passes
– Tape off nearby planks if you need straight edges.
– Press filler into the chip or scratch.
– Scrape with a razor/scraper so it’s flush with the surrounding surface.
Thin passes reduce shrinkage risk and help the repair cure more evenly.
Smooth and cure per the product instructions
Once cured:
– Lightly smooth only as the filler instructions allow.
– Avoid heavy sanding that could damage the laminate wear layer.
If your laminate maker states sanding is not recommended, treat smoothing as “scrape-and-reveal,” not “sand-and-finish.”
Replace damaged or separated laminate planks
To restore mudroom laminate floors when seams lift or planks are damaged, replace the affected boards using the correct locking/unlocking method. Replacement is the durable fix when the core is compromised or when joint geometry can’t stay aligned.
In floating laminate systems, the correct locking/unlocking method (lift-and-remove vs. slide-out) is determined by the manufacturer’s click design.
Maintaining the expansion gap around walls and doorways is necessary to prevent “tenting” or repeated seam openings as temperatures change.
Dry subfloor conditions determine whether new planks stay flat; reinstalling over lingering moisture increases the chance of repeat buckling.
Remove transitions and trim as needed
To access the damaged plank(s):
– Remove shoe/base transitions in the area
– Remove base trim if needed for access (depends on your layout)
– Remove the planks that must come out to reach the damaged section
Use the locking system correctly
Laminate boards vary:
– Some boards lift out once the joint is released.
– Others require sliding to disengage tongue-and-groove click components.
Follow your plank’s method from the manufacturer instructions to avoid breaking tabs and causing permanent damage to neighboring planks.
Install replacement planks with correct expansion gaps
When reinstalling:
– Maintain the correct perimeter expansion gap using spacers.
– Re-check seam alignment before the boards are fully seated.
– Ensure the floating section remains free to move—don’t force it tight against walls.
Mudroom reality check: match what you can’t see
In mudrooms, the visual mismatch is often less damaging than the performance mismatch. If you can’t perfectly match the plank color, you still want:
– Same thickness class
– Same lock design
– Same wear layer pattern scale (as close as possible)
Fix swelling or buckling from water (repair vs. replace)
To deal with water-related swelling in mudroom laminate floors, the deciding factor is whether the board returns to flat after drying. If the planks are permanently raised, cupped, or keep separating at the seams, replacement is usually the reliable path.
As of 2026, most laminate warranties treat water-swollen cores as beyond “repair,” because the core can lose dimensional stability after repeated wetting cycles.
If laminate planks are permanently cupped or seams continue opening after drying, the core has likely been affected and plank replacement is the dependable option.
Floating floors still need to sit on a dry subfloor; otherwise new boards can fail again from trapped moisture.
Moisture testing methods for subfloors (e.g., ASTM standards) report results in standardized units, which helps installers compare readings consistently.
Dry the subfloor before reinstalling anything
Before you reinstall replacement planks:
– Verify the subfloor has dried (not just the surface).
– If your mudroom has repeating wetting, address the cause first (mat placement, drainage, or leak repair).
Repair vs. replace: a practical decision framework
Below is the simplest “decision lens” we use in real-world laminate troubleshooting—because the core question is whether the board is now dimensionally stable.
- Choose repair (filler / surface patch) when:
- Damage is limited to chips/scratches; seams remain tight; boards stay flat after drying; and the moisture source has been corrected.
- Choose replacement when:
- Planks are permanently raised/cupped, seam geometry won’t stay locked, or you see evidence of water intrusion at plank edges.
Decide how far the water spread
If the affected area is small and you can remove outward from the damaged boards, replacement can be localized. If the water spread widely (often under mats or near entry traffic zones), replacement may be more practical than patching because the surrounding boards may still be compromised.
Moisture testing basics (so you don’t guess)
If you’re uncertain whether moisture is still present, the method matters:
– According to ASTM F1869, moisture vapor emission rate is expressed in lb/1000 sq. ft./24 hours (ASTM F1869).
– According to ASTM F2170, in-situ relative humidity is measured using RH probes and reported as %RH (ASTM F2170).
– According to NWFA guidance for floating floors, perimeter expansion gaps are typically 1/4 in. (about 6 mm) to allow movement without tenting (NWFA installation guidance for laminate/floating floors).
Laminate Floor Damage Patterns vs. Most Reliable Fix (Mudrooms, 2026)
| # | What You See | Most Likely Cause | Repair Path | Key Rule | Durability Rating |
|---|---|---|---|---|---|
| 1 | Small chips along plank edges | Foot traffic + grit | Laminate filler patch | Fill only after full dry | ★★★★☆ |
| 2 | Surface scratches (no seam gap) | Sand dragged by boots | Color-matched filler + scrape flush | Avoid sanding unless allowed | ★★★★☆ |
| 3 | Hairline seams near mat edge | Localized moisture + core swelling | Replace affected planks | Reinstall with expansion gap | ★★★★☆ |
| 4 | Seams lifting (step/edge effect) | Lock joint fatigue or swelling | Replace and re-seat locks | Use correct lock method | ★★★☆☆ |
| 5 | Buckling/cupping after wet boots | Core swelling from repeated exposure | Remove outward + replace planks | Dry subfloor before reinstall | ★★★★☆ |
| 6 | Visible gaps after temperature swings | Expansion gap blocked or too tight | Reset spacing (often partial lift) | Confirm perimeter spacing | ★★★☆☆ |
| 7 | Filler applied over damp seams | Moisture trapped under surface | Stopgap that reopens | Dry first, then patch | ★☆☆☆☆ |
What can go wrong (common mudroom mistakes)
To keep your laminate repair from failing, avoid the mistakes that keep moisture cycling and prevent correct movement. In mudrooms, the most damaging “repairs” are the ones that look fixed but leave the subfloor or expansion gap conditions unchanged.
Filling over dirt or moisture is a top failure mode because laminate filler adhesion depends on a clean, fully dry surface.
Replacing planks without correcting the moisture entry point can lead to repeat buckling within the next wet season.
Ignoring expansion gaps can force a laminate floor to tent or separate during normal seasonal temperature changes.
Common errors that undermine good repairs
– Filling over dirt or moisture: filler may discolor, shrink, or pop out later.
– Replacing planks but leaving the moisture source: the new boards can buckle again.
– Ignoring expansion gaps: too-tight installation can cause cumulative movement problems.
– Using the wrong filler: standard wood putty often doesn’t behave well under foot traffic or may not blend.
– Over-sanding or refinishing: many laminate surfaces aren’t designed to be sanded and re-coated.
Limits of this approach
This step-by-step guidance works best when:
– You can access the damaged section
– The subfloor isn’t structurally compromised
– The moisture problem is localized and correctable
Verdict / tip + quick checklist
If the damage is small (chips/scratches), a laminate filler repair is often the fastest option. If seams are lifting, boards are permanently warped, or water damage is involved, plank replacement is usually the durable fix—though it costs more and takes more time.
Repair is best for surface-only damage; replacement is best when the core has been affected and boards stay raised or seams keep opening.
Stopping the mud-and-moisture trigger is the difference between a one-time fix and repeat laminate failure in a mudroom.
Downsides to know (so you can plan realistically)
– Matching is hard: replacement requires getting the same plank design (or blending from extra stock/remaining boxes).
– Moisture can be bigger than it looks: you may discover subfloor dampness extending beyond the visible damaged boards.
– Hidden problems mean wider work: soft/spongy subfloor or an ongoing leak can turn “one-plank” repairs into larger projects.
Skip DIY if…
Don’t DIY if you suspect a hidden leak, the subfloor is soft/spongy, or the water damage likely extends beyond a localized area.
Scan/Save Checklist
– [ ] Stop moisture source (fix leaks, adjust mat placement, check drainage)
– [ ] Confirm what’s wrong: chip vs. lifted seam vs. buckling
– [ ] Dry everything completely before any patching or reinstall
– [ ] Match color/style; use laminate-appropriate filler for small damage
– [ ] For replacement: remove needed planks, maintain expansion gaps
– [ ] Test seam tightness and alignment before reinstalling trim
Sources
– ASTM F1869 (Standard Test Method for Measuring Moisture Vapor Emission Rate of Concrete Subfloor Using Anhydrous Calcium Chloride)
– ASTM F2170 (Standard Test Method for Determining Relative Humidity in Concrete Floor Slabs Using In Situ Probes)
– NWFA installation guidance for floating floors / laminate expansion spacing (for recommended perimeter expansion gap practices)
A solid mudroom laminate repair comes down to one controlling variable: moisture control. Diagnose whether you’re dealing with surface-only chips or core-affected swelling, then either patch with laminate-approved filler (after everything dries) or replace affected planks using the correct lock method and expansion gap. When the moisture trigger is addressed, your repaired floor should stay tight, flat, and usable for the next rainy season.
Frequently Asked Questions
How do I repair laminate floor water damage in a mudroom?
Start by identifying how far the moisture penetrated—if the boards are swollen or the seams have opened, you may need to replace affected planks rather than just surface-fix them. Remove baseboards or trim carefully, lift the damaged laminate section, and dry the subfloor thoroughly with fans and dehumidifiers for at least 24–48 hours. Replace with matching laminate (or the closest style/thickness), and use the manufacturer’s recommended underlayment and expansion gaps to prevent future warping.
What’s the best way to fix scratched or scuffed laminate floors in a high-traffic entryway?
For minor scratches, use a laminate floor repair kit with color-matched filler or markers, then gently buff the area to blend it with the surrounding finish. For deeper scuffs, clean first, apply filler sparingly, and let it cure fully before wiping away excess. Avoid soaking the repair—mudrooms are often exposed to wet boots and salt, so use a damp microfiber cloth and a laminate-safe cleaner afterward.
How can I repair loose or separated seams in laminate flooring?
Loose seams usually come from lack of expansion space, repeated moisture exposure, or damaged click-lock joints, so begin by checking for gapping along the seam. If the subfloor is flat and dry, you may be able to re-lock planks by carefully lifting and re-seating them, then securing the area with a spacer to maintain the proper expansion gap. If the joints are broken or the planks have swollen, remove and replace the affected boards to restore a stable laminate surface in your mudroom.
Which cleaner should I use to prevent laminate floor damage from mud, salt, and wet boots?
Use a laminate-specific cleaner or a mild pH-neutral cleaner, and avoid harsh degreasers, waxes, or steam mops that can break down the finish. For daily mudroom maintenance, sweep or vacuum grit frequently and wipe spills promptly with a damp microfiber mop. If you live in a snowy area, rinse or wipe salt residue off shoes before it reaches the floor, since salt can dull and damage laminate over time.
How do I replace a damaged laminate plank section in a mudroom without ruining surrounding boards?
Begin by tracing the damaged area, then remove trim or baseboards as needed so you can access the planks while keeping nearby pieces intact. Carefully disconnect planks using the manufacturer’s method—many click-lock laminates require lifting at an angle to avoid cracking—then pull out the damaged plank(s). Install replacement laminate with proper expansion gaps, reinstall trim, and protect the area from heavy traffic for at least 24 hours to ensure the repair settles correctly.
📅 Last Updated: October 22, 2026 | Topic: How to repair laminate floors in a mudroom? | Content verified for accuracy and freshness.
References
- Laminate flooring
- Mold | US EPA
- https://www.epa.gov/mold/mold-cleanup-guidance
- https://www.epa.gov/mold/preventing-mold-growth
- https://www.cdc.gov/mold/cleanup/index.html
- Floods | Ready.gov
- https://www.hud.gov/program_offices/healthy_homes/mold
- https://scholar.google.com/scholar?q=how+to+repair+laminate+flooring+water+damage Google Scholar
- https://scholar.google.com/scholar?q=replace+damaged+laminate+floor+planks+click+lock+repair Google Scholar
- https://scholar.google.com/scholar?q=laminate+flooring+mudroom+maintenance+scratch+repair Google Scholar

[…] laminate in a mudroom is less about making the floor “submersion-proof” and more about stopping moisture from reaching the seams and edges—especially through the underlayment and at door thresholds. If […]