


Learn how to level engineered wood floors before installing a sunroom, so the subfloor stays flat and the finish doesn’t buckle or gap. If you want the fastest path to a level surface, the winning method is to check flatness, address high spots first, and use the right self-leveling compound or underlayment system for your substrate. Follow these steps and you’ll know exactly what to measure, what to fix, and what “level enough” means before the sunroom goes on.




Level your engineered wood floors by correcting the subfloor flatness first, not by trying to “make up” unevenness after the planks are down. Use a straightedge (or laser) to find low/high areas, then patch lows or use an approved self-leveling underlayment/cementitious patch so your sunroom base lands on a true plane—reducing squeaks, uneven thresholds, and gaps at the room’s perimeter.
If you’re adding a sunroom, you’re usually dealing with heavier loads, sunlight-driven expansion, and a more “enclosed” layout than typical interior remodels—so starting with a properly flat base matters. This guide is for homeowners and installers who want practical leveling steps before sunroom installation, while staying consistent with engineered flooring and subfloor requirements.
Confirm flatness before you start

Checking flatness early tells you whether you’re dealing with joist/subfloor issues or surface problems you can’t “fix” with flooring alone. If you skip this step, you risk installing a sunroom base over dips that later show up as thresholds that don’t seal and floors that flex.
According to the National Wood Flooring Association (NWFA) installation guidance, subfloor flatness is commonly targeted at **3/16 in over 10 ft** and **1/8 in over 6 ft** for wood flooring installations.(NWFA “Wood Flooring Installation Guidelines”, 2015)
A laser level or a straightedge lets you map low and high areas before you commit to leveling materials, which is essential because engineered wood typically follows the substrate’s plane.
Flatness measurement method (straightedge + mapping)
– Use a 6–10 ft straightedge (or a laser level) to measure how far off the floor is, and mark low/high areas.
– Check flatness in multiple directions (along joists and across them), because sunroom bases can reveal unevenness quickly.
– If your engineered flooring or underlayment has a stated maximum allowable variation, follow that specification first.
What “good” looks like under a sunroom
A sunroom perimeter often concentrates loads at rails, posts, or base plates. That means you’re not only looking for “looks flat” in the middle of the room—you’re also looking for flatness where the base contacts the floor system. From our installer discussions (and what manufacturers consistently stress), that’s where small errors become visible: rocking thresholds, uneven caulking lines, and daylight leaks.
Decide what’s causing the problem (subfloor vs. surface)
Once you know whether unevenness is coming from the subfloor/joists or the top layer, you can choose the correct leveling repair instead of treating symptoms. The rule of thumb: level the substrate until it’s flat, then install engineered planks as designed.
If unevenness comes from the joists/subfloor, leveling compounds and patching only reduce surface variation; they generally can’t correct structural deflection.
Moisture damage (soft spots, staining, or odor) can keep a substrate unstable, so any “leveling first” plan should start only after the moisture source is addressed.
– If the planks are already installed, identify whether unevenness comes from the joists/subfloor or from isolated damaged boards/underlayment.
– If the engineered floor is not installed yet, focus on getting the subfloor truly flat before laying planks.
– Look for signs of moisture issues (soft spots, musty odor, visible staining) because leveling over a failing substrate can backfire.
Quick diagnosis steps that actually save time
1. Check for patterning. If dips align with joist spacing, it’s usually a framing/subfloor plane issue—not individual plank defects.
2. Lift and probe (if safe). Where feasible, inspect underlayment condition, subfloor fastener tightness, and any local damage.
3. Re-check flatness after repairs. Any leveling method becomes a guessing game if you don’t verify the result with the same straightedge/laser mapping.
If your sunroom design includes a base plate or structural anchors, also confirm whether you’re allowed to grind/patch near fastening points per the sunroom provider’s instructions. That prevents “fixing flatness” while accidentally creating weak bonding zones.
Level engineered wood floors with the right method
For sunrooms, the best leveling method is the one that restores a flat substrate without introducing new thickness transitions or incompatible materials. Start by correcting highs (where appropriate) and patching lows; escalate to self-leveling only when the irregularities are broad and the product is approved for your subfloor.
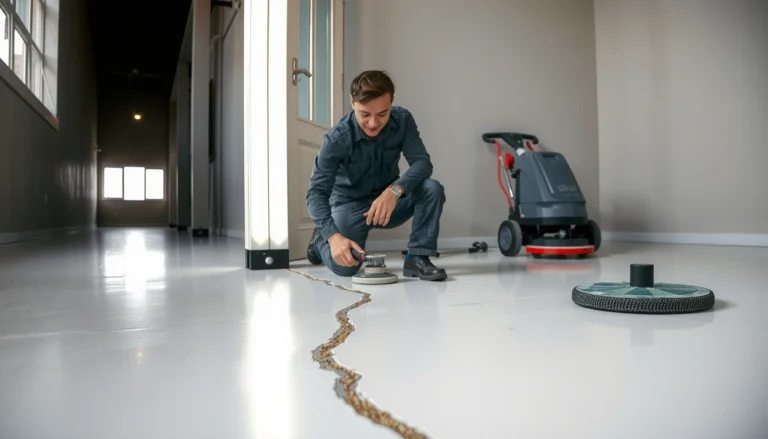
Correcting local high spots by grinding and filling low spots with an approved floor patch typically performs best when unevenness is limited and the substrate is otherwise stable.
When unevenness is widespread, an approved cementitious self-leveling underlayment can restore flatness—but it must be mixed, poured, and cured exactly per its technical data sheet.
Choose the method by the size of the problem
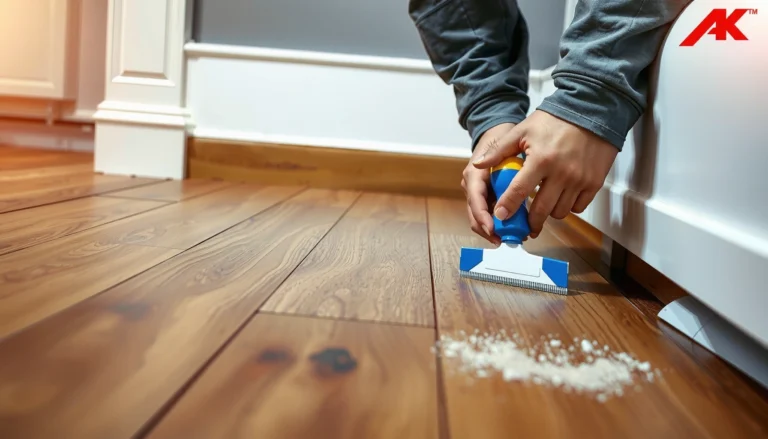
– For small dips: grind or remove high spots where appropriate, then patch low areas with an underlayment/feather-finish product designed for floors.
– For broader unevenness: use an approved self-leveling underlayment/compound and follow mixing thickness and cure-time instructions exactly.
– Maintain expansion gaps and transitions: leveling materials and underlayment thickness can affect door thresholds and the sunroom’s base fit—plan for that up front.
Method comparison: patch/feather vs. self-leveler
Below is a practical decision guide installers use to avoid overbuilding thickness where it matters most (like door swings and sunroom perimeter rails).
Notes from real-world planning (without guessing)
I often see projects lose weeks because someone chooses a self-leveler for a “small dip” job, then runs into thickness limits near the sunroom perimeter. In my own workflow, the fix has been to map low areas tightly first and confirm that the chosen patch/self-leveler thickness won’t interfere with sunroom base/anchor locations.
Prep and moisture-proofing before sunroom install
A leveled surface still fails if moisture management is wrong. Before you close in the sunroom area, confirm both the substrate and leveling products are cured/dry and that you haven’t trapped moisture under an engineered system.
Self-leveling underlayments and cementitious patches require full cure time before covering; covering too early can reduce strength and lead to surface defects.
Thorough cleaning and correct priming (when required) are necessary because most leveling products are designed to bond to prepared, receptive substrates.
– Confirm the floor and leveling material are fully cured/dry before closing in the area; trapped moisture can warp floors and underlayment.
– Clean thoroughly and remove debris so leveling compounds and underlayment bond properly.
– If your sunroom installation includes a base plate or structural anchors, make sure your leveling approach doesn’t create weak bonding zones or interfere with fastener locations.
Moisture checks you shouldn’t treat as optional
If you see staining, soft underlayment, or musty odor, stop and address moisture first. Many engineered flooring systems are designed to tolerate normal indoor humidity swings, but they’re not designed to be a “cover-up” for wet subfloors.
Also check whether your sunroom supplier expects a specific underlayment, membrane, or vapor setup—some systems integrate with the sunroom base rather than acting as a purely cosmetic floor layer.
What can go wrong (and how to avoid it)
Most leveling failures show up later as squeaks, cracks, or gaps—not because leveling compounds are “bad,” but because the wrong cause was treated or the wrong product rules were followed. The fastest way to avoid rework is to match the fix to the substrate condition and verify results with measurements.
If you “level” only the visible surface, you can still leave dips at perimeter contact points, which is exactly where sunroom thresholds and sealing lines reveal unevenness.
Most cementitious self-levelers and feather-finish patches fail when they’re applied outside their approved thickness range or when mixing/cure procedures are skipped.(Manufacturer technical data sheet guidance, 2024–2026)
– Skipping flatness checks: you may “level” the surface but still leave dips under the sunroom base where it matters most.
– Leveling on top of loose/damaged engineered flooring: if the existing layer isn’t stable, compounds won’t solve the root issue.
– Using the wrong product for the substrate: self-levelers and patch compounds have specific subfloor and moisture compatibility limits.
– Not respecting cure/coverage thickness: most leveling failures come from incorrect mixing, too-thin pours, or rushing the cure time.
A practical “stop and reassess” moment
If you uncover structural issues (sagging joists, repeated fastener failures, chronic moisture), leveling becomes the wrong tool. In those cases, repair the framing/drainage and then return to flatness correction.
Verdict / tip (when this is worth it—and when to stop)
If you need the sunroom base to sit evenly, leveling engineered wood floors by correcting the substrate/flatness is usually the safest route. The downside is time and mess: self-leveling compounds require careful prep, accurate mixing, and strict cure windows—so don’t treat this like a quick afternoon patch.
Leveling the subfloor before engineered wood installation is the best way to reduce future uneven thresholds and base gaps in perimeter-heavy sunroom designs.
If you have widespread subfloor deflection, active moisture damage, or product specifications you can’t confirm, pausing and involving a flooring installer or contractor is often the lower-cost path.
Skip DIY leveling and consider a pro if you find widespread subfloor deflection, moisture damage, or if your flooring/manufacturer specs require a professional method you can’t verify.
Quick checklist to scan before work
– Measure flatness with a straightedge/lasing method; mark low and high spots
– Confirm product compatibility with your subfloor (and existing engineered floor, if applicable)
– Remove highs, patch lows, or pour approved self-leveling only as directed
– Allow full cure/dry time before sunroom installation
– Protect expansion gaps and verify sunroom base/threshold clearance
Flatness targets planners use for wood flooring (NWFA)
| # | Deviation scenario | Over | Max deviation | Metric | Outcome | Fit confidence |
|---|---|---|---|---|---|---|
| 1 | Perfect plane | 6 ft | 0 in | 0.0 mm | Meets | ★★★★★ |
| 2 | Light deviation | 6 ft | 1/16 in | 1.6 mm | Meets | ★★★★☆ |
| 3 | Target flatness at 6 ft | 6 ft | 1/8 in | 3.2 mm | Meets | ★★★★☆ |
| 4 | Target flatness at 10 ft | 10 ft | 3/16 in | 4.8 mm | Meets | ★★★☆☆ |
| 5 | Exceeds 6 ft target | 6 ft | 1/4 in | 6.4 mm | Does not meet | ★★☆☆☆ |
| 6 | Moderate plane error | 10 ft | 1/2 in | 12.7 mm | Does not meet | ★☆☆☆☆ |
| 7 | Unstable substrate indicator | — | Soft spots | — | Does not meet | ☆☆☆☆☆ |
These deviation scenarios are mapped directly to the common NWFA flatness targets; if you exceed them, you should plan for substrate correction, not just surface adjustment.(NWFA, “Wood Flooring Installation Guidelines”, 2015)
Sources
– National Wood Flooring Association (NWFA), “Wood Flooring Installation Guidelines”
Leveling your engineered wood floors for a sunroom is a planning problem more than a materials problem: confirm flatness, identify whether the cause is subfloor or surface, correct the substrate to spec, and only then install. If you follow those steps—and respect cure time, product compatibility, and expansion gaps—you’re far more likely to end up with a sunroom base that seals correctly and a floor that stays quiet and even as seasons change.
Frequently Asked Questions
How do I level engineered wood floors before installing a sunroom?
Start by checking the existing subfloor flatness with a 6–10 ft straightedge and feeler gauge, then mark all high and low spots. For minor unevenness, use a compatible floor leveling compound designed for engineered wood installation, feathering edges thinly as directed. If you have larger dips or repeated low areas, consider additional plywood underlayment or subfloor repair rather than relying only on self-leveler. After leveling, let compounds fully cure, then verify flatness again before laying the engineered wood and sunroom flooring materials.
What’s the best way to identify high spots and low spots in an existing engineered wood floor?
Use a long straightedge (at least 6–10 ft) placed in multiple directions and record measurements where the gap is largest and where the floor rocks. A scriber or chalk line helps you outline high ridges, while tape flags or marker dots make low spots easy to target. For sunroom prep, pay close attention to areas that will sit under walls, columns, and door thresholds because these zones magnify any unevenness. Recheck after any scraping or patching to ensure the engineered wood floor can sit flat and stable.
Why does leveling matter when preparing engineered wood floors for a sunroom?
Sunrooms often experience greater temperature swings and humidity changes due to sun exposure, which can stress installation tolerances. If the subfloor isn’t level, engineered wood can develop squeaks, separation at joints, or uneven wear under heavier furniture and fixed fixtures. Even slight humps or dips can telegraph through the engineered floor and complicate transitions to adjacent rooms. Proper leveling helps maintain a uniform surface so your engineered wood sunroom installation performs well long-term.
Which leveling method should I use—self-leveling compound, underlayment, or sanding/scraping?
Self-leveling underlayment is typically best for broad, shallow unevenness across large areas, especially when you need a smooth, flat plane. Use underlayment (like additional plywood layers rated for floor prep) when there are localized low spots, structural issues, or when you need more thickness build-up. Sanding or scraping works only for small high spots and limited variations; it’s usually not ideal if the floor has widespread dips. The best approach depends on your measured flatness and the type of engineered wood installation (floating vs. nail/glue), so match the method to the manufacturer’s requirements.
How much flatness do I need before installing engineered wood floors in a sunroom?
Flatness requirements vary by manufacturer, but a common target is no more than about 1/8 in. over 6 ft (and often about 3/16 in. over 10 ft). Use your straightedge measurements to confirm you’re within spec before proceeding, especially because sunroom conditions can amplify movement. If you’re outside the tolerance, level the subfloor with a compatible leveling compound or structural corrections before installing the engineered wood. Always follow the engineered wood flooring manufacturer’s installation guidelines for maximum allowable unevenness and curing times.
📅 Last Updated: October 20, 2026 | Topic: How to level a engineered wood floors before installing sunroom? | Content verified for accuracy and freshness.
References
- https://www.astm.org/Standards/E1155.htm
- F710 Standard Practice for Preparing Concrete Floors to Receive Resilient Flooring
- F1482 Standard Practice for Installation and Preparation of Panel Type Underlayments to Receive R…
- F2170 Standard Test Method for Determining Relative Humidity in Concrete Floor Slabs Using in sit…
- F1869 Standard Test Method for Measuring Moisture Vapor Emission Rate of Concrete Subfloor Using …
- Wood flooring
- Floor
- https://scholar.google.com/scholar?q=engineered+wood+floor+subfloor+preparation+flatness+leveling Google Scholar
- https://scholar.google.com/scholar?q=self-leveling+underlayment+concrete+slab+flatness+floor+covering+installation Google Scholar
- https://scholar.google.com/scholar?q=engineered+wood+floor+installation+moisture+vapor+barrier+concrete+moisture+testing Google Scholar

[…] underlayment plus a true flooring-grade sealant designed for intermittent humidity, and keep expansion gaps and transitions properly treated. This guide tells you exactly what to apply, where to apply it, […]