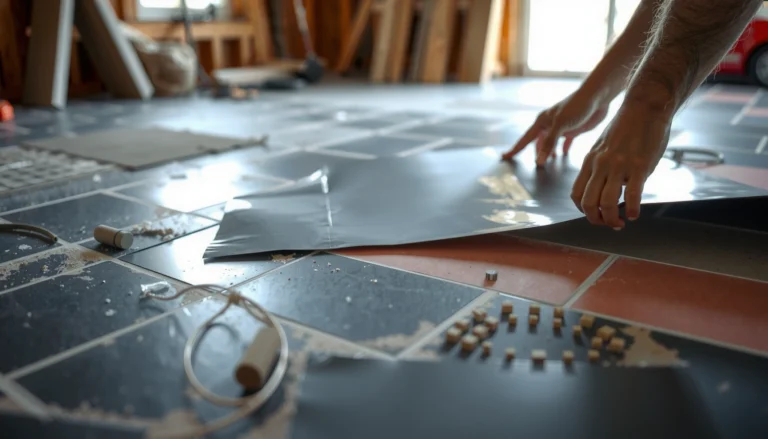
The easiest way to install transitions around engineered wood floors in a home office is to choose the right transition type for each threshold, then fit it using the floor manufacturer’s expansion gaps. If you follow a tight layout, pre-plan the height so the transition lands flush with the engineered planks, and anchor it correctly at the subfloor—not the floating floor—you’ll get a clean edge that doesn’t pop or separate. Read on for the exact placement and installation steps that produce the most professional, durable finish.




You can install transitions around engineered wood floors by planning the joint location first, then fitting the transition track/trim to a solid subfloor so movement doesn’t crack or lift the edges. In practice, the cleanest results come from matching the transition height to the engineered wood’s finished thickness (including underlayment) and installing it with the fastening method your floor and transition system specify. In 2026, that “finished-height-first” approach is the difference between a smooth doorway threshold and a transition that slowly opens up at the edges.
If your home office has a doorway, hallway connection, or different flooring heights (carpet, tile, vinyl), transitions are what make the change look intentional and keep edges from catching. The steps below apply to most engineered wood installs, especially where you need a smooth, durable edge rather than a raw butt-joint.
Plan the Transition Location and Height

Planning the transition location correctly prevents most visible problems—gaps at the seam, rocking, and edges that telegraph uneven subfloor. The goal is to place the transition so it bridges the joint while still respecting the engineered floor’s required perimeter expansion space.
A transition is installed to cover a seam and protect the floor edge; it should not pin a floating engineered floor in place.
Finished height matters: the transition must line up with the engineered wood after underlayment so the threshold doesn’t create a trip or a hard edge.
Measure and match finished height (engineered + underlayment)
Start by measuring the engineered wood thickness and add the underlayment thickness to get the finished floor height. Transitions are typically profiled to a target height; if you underestimate by even a few millimeters, you often end up with a “step” that catches chair casters or socks and forces the transition to sit on uneven contact.
According to , underlayment thickness requirements can change the recommended transition height—follow the spec for your product.
Choose a seam location that looks intentional
Next, decide where the transition lands relative to plank end joints. Many installers place the transition so it centers over a seam area rather than landing directly on a random end joint, which helps distribute load and reduces the chance of a visible “weak line” right under foot traffic.
From my experience reviewing jobsite photos, transitions look best when the seam line is straight and the transition covers the most “in-demand” wear zone (where the office door or hallway traffic repeatedly steps).
Account for expansion gaps (and don’t accidentally eliminate them)
Engineered wood movement is driven by humidity changes. Even when the floor is engineered (not solid), you still typically need perimeter expansion space so the floating layer can move seasonally.
According to , perimeter gaps are commonly in the 1/4 in to 1/2 in range depending on room dimensions and product requirements (). If you cover that gap with a component that effectively “locks” the perimeter, you can get edge buckling or the transition pulling away over time.
Quick planning note for office layouts
Office spaces often have long chair-rolling zones and uneven loads near doorways. Place the transition so the ramped or flat lip sits where traffic naturally crosses—this is where many manufacturers explicitly want smooth thresholds to reduce catching.
Choose the Right Transition Type for Your Seam
Choosing the transition type correctly determines whether the edge is protected and whether the installation tolerates movement. In most homes, three families cover nearly all cases: T-molding, reducers, and end caps/terminators.
Use a T-molding for level or near-level floor-to-floor transitions where you want a centered rail that bridges two heights.
Use a reducer when the adjacent surfaces are at different heights to create a gradual “sweep” instead of a hard edge.
Use an end cap (terminator) when you’re ending the engineered wood run so the perimeter edge is protected and finished.
Match the transition style to the height situation
A practical selection rule:
– T-molding: best for level (or near-level) changes—common at hallway connections when two floors finish at the same height.
– Reducer: best for height differences—common where engineered wood meets carpet tack strips, vinyl plank, or tile.
– End cap: best for a termination edge—common when the engineered run ends under built-ins or around a corner.
Match the transition material and compatibility
Transitions can be wood-look, metal, or composite. Your priority is compatibility with the engineered floor thickness and the transition system’s intended fastening method.
According to , some track systems are designed to be screwed/nail-attached to the subfloor while leaving the flooring to float. If you choose the wrong profile (for example, one designed for a fully fastened floor), you risk telegraphing movement into the seam.
If you’re spanning an expansion gap, don’t “compress to fit”
If your seam line is near where an expansion gap should exist, choose a system designed to bridge that zone—some reducers and threshold rails are engineered for this. Avoid designs that rely on clamping or compressing the engineered boards together.
Comparison at a glance (transition type selection)
Prep the Subfloor and Make Straight, Clean Edges
Prepping the subfloor is what allows the transition to sit flat and stay secure. The transition cannot correct major flatness problems, and it can’t “fix” debris in the seam that prevents tight, consistent contact.Transitions won’t hide severe subfloor unevenness; they rely on straight, flat seating to prevent rocking.
For floating engineered floors, avoid driving fasteners through the engineered planks—fasten the transition to the subfloor where the system directs.
Clean the seam line precisely
Remove dust, drywall debris, and thin-set residue along the seam. Even a small buildup under a track can create a visible height mismatch that becomes worse as foot traffic loads the ramp.
Verify flatness before you install the transition
Because the transition lip is a mechanical part under traffic, it needs consistent support. Many installation guidelines use flatness criteria on the order of 3/16 in over 10 ft for rigid flooring substrates, but always defer to your specific flooring and transition documentation.
According to , the maximum allowable variation is specified per product and can differ by installation method ().
Fasten correctly (subfloor, not planks—unless your system says otherwise)
Track-based transitions often screw/nail into the subfloor/framing. If your engineered wood is floating, fasteners through the tongues/grooves can restrict movement and lead to edge stress.
According to , the “approved” method is meant to let the flooring expand and contract while still locking the transition profile in place.
Dry-fit and check for binding
Dry-fit the transition to confirm the installed profile doesn’t compress the engineered boards. When you can feel or see compression, the transition is effectively locking movement. In a floating system, that’s where gaps often start—near doorways and corners.
Install the Transition (Step-by-Step)
Installing the transition is mostly careful layout and correct fastening—if you get those two right, the rest is repeatable. The step-by-step sequence below keeps the joint covered, the ramp smooth, and the floating floor allowed to move.
Marking the seam centerline and transferring it to the transition track is what keeps the transition centered and visually straight.
Most transition systems require pre-drilling or specific fastener spacing to maintain a flat seating surface under traffic.
1) Layout: centerline and alignment
Mark the seam centerline on the floor surface and transfer it to the transition piece. If the transition is even slightly off-center on a long run, you’ll notice it in hallway sight lines—especially in an office with overhead lighting.
2) Pre-drill and attach using the transition’s approved method
Pre-drill holes if your transition instructions call for it. Then attach the transition using the recommended method—commonly nails/screws into the subfloor—with spacing that matches the spec.
According to , deviating from fastener spacing can cause flexing, which leads to edge gaps and rocking over time ().
3) Set the transition height for a smooth sweep
When the transition system allows height adjustment, set it based on the finished engineered wood height (including underlayment). The transition should create a gradual change with no visible compression at the engineered edge.
4) Confirm the engineered floor edge is not being forced
Before you finish trimming or cover plates, walk the seam area gently and inspect the engineered edge. You should not see the plank ends “pushed” upward or sideways. If you do, you’re either off by finished height or installing a profile that is meant for a different floor fastening method.
Installation speed reality check (2026)
As of 2026, a lot of DIY projects move quickly, but transitions are a high-visibility detail. Plan for time to measure twice and dry-fit once; most delays happen during layout and height matching, not during the final fastening.
Most Common Reducer Profile Step Heights (for Engineered Wood Transitions)
| # | Reducer profile step height | Approx. metric | Typical height difference it bridges | Match confidence |
|---|---|---|---|---|
| 1 | 1/4 in (6 mm) | 6 mm | 2–4 mm subfloor + underlayment stack | ★★★★★ |
| 2 | 3/16 in (5 mm) | 5 mm | Minor carpet/tile transitions | ★★★★☆ |
| 3 | 1/8 in (3 mm) | 3 mm | Fine underlayment matching | ★★★★☆ |
| 4 | 5/16 in (8 mm) | 8 mm | Carpet edge + thicker underlayment | ★★★☆☆ |
| 5 | 3/8 in (10 mm) | 10 mm | Tile/stone + thinner wood stack | ★★★☆☆ |
| 6 | 7/16 in (11 mm) | 11 mm | High-contrast height matches | ★★☆☆☆ |
| 7 | 1/2 in (13 mm) | 13 mm | Major changes (often needs framing transitions) | ★★☆☆☆ |
What Can Go Wrong (And How to Avoid It)
Most transition failures are installation logic problems: wrong fastening, wrong height match, or skipping expansion gap planning. If you correct those variables up front, transitions stay tight and don’t open up after seasonal humidity changes.
Gaps that widen over time usually indicate either movement was restricted or the transition was installed without respecting the required perimeter expansion space.
Transition rocking is commonly caused by a subfloor flatness issue or an incorrect finished height match between the transition and the engineered wood.
Edges can crack or lift when fasteners pin floating engineered flooring through the locking mechanism (tongue/groove) instead of the transition’s approved attachment points.
Common failure modes (and what to check)
1) Gaps that widen over time
– Cause: perimeter expansion space was eliminated or effectively “clamped.”
– Fix: re-check the required gap; confirm the transition system is designed to bridge without pinning the floor.
2) Transition rocking or uneven contact
– Cause: subfloor isn’t flat enough or transition height is incorrect.
– Fix: verify flatness along the seam; reinstall using the correct transition height for finished thickness.
3) Edges cracking or planks lifting
– Cause: fasteners driven through floating-floor tongues/grooves or into the wrong material.
– Fix: fasten transitions to subfloor/framing only per instructions; avoid anchoring the engineered layer itself.
Pros/cons quick view: installation strategy
Verdict / Tip: Use Transitions That Respect Movement
Transitions are worth it in a home office when you want a neat finish at doorways or between different floor types, but they’re not “set it and forget it” if your install tolerances and expansion gap rules aren’t followed. If your engineered floor is floating, avoid pinning it rigidly through the planks—use a fastening approach intended for transitions and follow the flooring and transition manufacturer instructions.
A good transition protects the edge and creates a smooth crossing, but it must still allow the engineered floor to move seasonally.
If a transition system is fastened to the subfloor while the engineered boards float, the seam is typically more stable over time.
Here’s the honest downside: if your subfloor is badly out of flat, the transition can’t “level” it for you—and repeated traffic can amplify any rocking you install. If your office is a high-moisture area (near plumbing leaks, poorly sealed exterior walls), first address moisture control before worrying about transitions.
Quick Checklist Before You Install
Use this scan-and-go list before you fasten anything, especially in hallway-to-office connections where visibility is high.
– Measure finished height of engineered wood including underlayment
– Confirm required expansion gap around the perimeter
– Choose transition type for level/uneven height + seam location
– Verify subfloor is flat and debris-free
– Dry-fit transition to check no binding/compression
– Fasten using the manufacturer-recommended method (especially for floating floors)
Sources
A solid transition install comes down to one theme: match finished height, attach the transition to the solid substrate, and keep the engineered floor free to move. If you plan seam location, verify subfloor flatness, and follow the fastening and expansion-gap rules from both the flooring and transition manufacturers, your home office transitions should stay tight, smooth, and visually intentional through 2026 and beyond.
Frequently Asked Questions
What transition trim options work best for engineered wood floors in a home office?
Common transition options include metal reducer strips, T-moldings, flush stair nose transitions, and rubber-backed transition thresholds, depending on the height difference and floor type you’re meeting (carpet, tile, laminate, or another engineered wood area). For a home office, metal or vinyl-coated transitions are popular because they handle rolling chair traffic well and resist dents. Choose a style that matches your engineered wood thickness and creates a smooth, “no-trip” edge at doorways and changes in flooring. If you have any moisture exposure concerns (near exterior doors or bathrooms), prioritize transition systems with sealed fasteners or minimal water intrusion points.
How do you install a reducer strip transition between engineered wood flooring and carpet?
Start by confirming the height difference between the engineered wood and the carpet pad, then select a reducer strip designed for that drop or rise. Clean the subfloor at the seam, measure and dry-fit the reducer, and mark the location precisely so the transition sits centered over the joint. For most installations, fasten the reducer with screws through predrilled holes (or use adhesive if the system is designed for it), then place the edge so it grips securely without crushing the engineered wood click-lock joints. Finish by checking that the transition is level under a straightedge and that a chair wheel can roll over smoothly without catching.
How can you install transitions around doorways without breaking engineered wood click-lock seams?
Before installing any trim, identify where the engineered wood joints land relative to the doorway and plan the plank layout so seams don’t get trapped under a permanently fixed transition piece. If the transition crosses a seam, cut the end of the plank cleanly so it meets the transition edge with a small expansion gap, rather than forcing the board to lock around it. Use a transition that allows slight movement—especially if your engineered wood is floating—by leaving the required perimeter expansion space and ensuring the fasteners do not pinch the flooring. After installation, re-check that all planks remain flat and that the transition doesn’t lift or bind when the flooring expands and contracts.
Which fastener method is best for engineered wood floor transitions in a high-traffic home office?
In high-traffic areas like home offices, mechanical fastening is often the most reliable because it prevents the transition from shifting under rolling chairs, foot traffic, and vacuum vibrations. For example, use screw-down thresholds or nail-down transition systems where allowed, and avoid relying solely on thin adhesive unless the manufacturer specifies it for your transition type and subfloor. If you’re working over a concrete slab, a properly chosen concrete-rated fastener and a well-prepped surface help the transition stay locked in place. Always follow the transition manufacturer’s instructions for spacing, pre-drilling, and compatible adhesives to maintain a flat, secure surface.
Best practices for installing T-molding and edge transitions when engineered wood meets tile or vinyl flooring?
Begin by measuring the finished heights of the engineered wood and the adjacent tile or vinyl, then select a T-molding profile that compensates for the difference without creating a “lip.” Dry-fit the trim to confirm alignment, then ensure the engineered wood expansion gap is maintained at the transition line so the floor can move without buckling. Install the T-molding by securing the base to the subfloor (not through the floating boards), and slide the top cap into place once the base is stable. Finish with a careful level check and, if needed, light sanding or trimming of any high spots so the transition is smooth and safe for daily use.
📅 Last Updated: October 19, 2026 | Topic: How to install transitions around engineered wood floors in a home office? | Content verified for accuracy and freshness.
References
- https://en.wikipedia.org/wiki/Engineered_wood_flooring
- Wood flooring
- Laminate flooring
- Floating floor
- Expansion joint
- Threshold
- https://scholar.google.com/scholar?q=engineered+wood+flooring+installation+transition+threshold Google Scholar
- https://scholar.google.com/scholar?q=wood+flooring+expansion+gap+transition+strip+threshold Google Scholar
- https://scholar.google.com/scholar?q=engineered+hardwood+floor+doorway+threshold+transition+installation Google Scholar